Hello, Irresistible Floral Birthday Card

Hello, Irresistible Floral Birthday Card

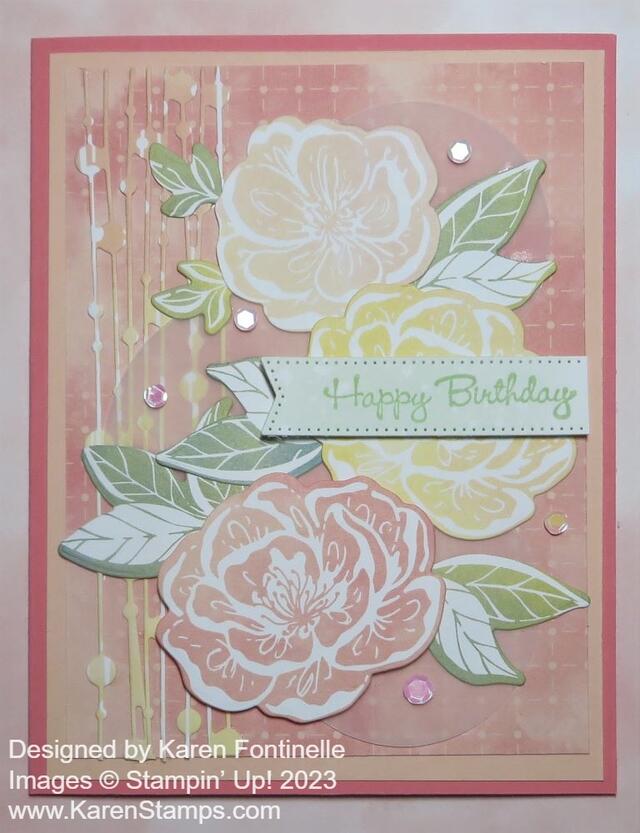
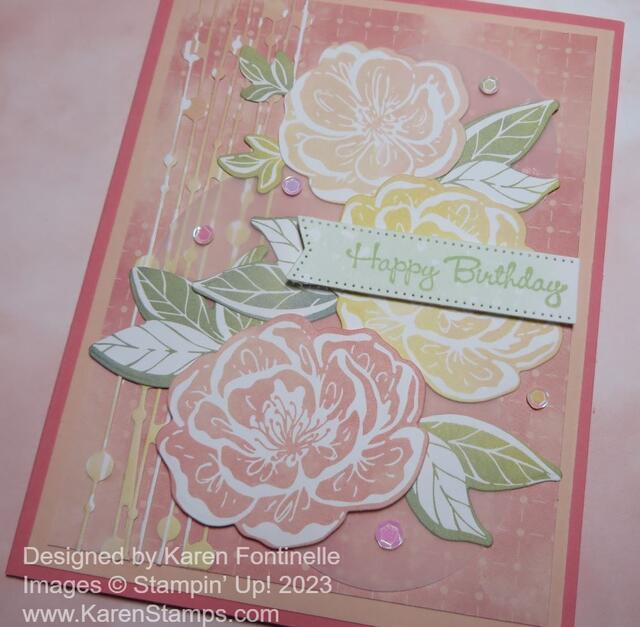
I seem to be quite taken with this paper lately, even though it’s not one of the brand-new products, but there is something about it! I made this Hello, Irresistible Floral Birthday Card mostly with die-cutting the elements on the card.

This is the Hello, Irresistible 6″ x 6″ Designer Series Paper, available as an Online Exclusive in the Stampin’ Up! Online Store. This means you won’t find the paper in the catalog, but it can be purchased online for as long as it is available. If you like this paper, you can purchase it at a 15% discount during the month of June on the Designer Series Paper Sale! The patterns are all so soft and pretty!

In making this card, I chose a card base of Flirty Flamingo, but I also added a layer of Petal Pink. I couldn’t decide which color to use so I used both! Next, there is a layer of designer paper. There are so many pretty patterns to choose from. I liked this color-washed linear design to be the background for the flowers.

What really inspired this card was the die-cut vertical piece on the left side of the card. I already had it in my pile of scraps that I didn’t use one other time, so I carefully adhered it to the card on those dots. You might not notice, but I decided to punch out some Vellum Cardstock circles, one with the 2 3/8″ Circle Punch and two with the 2″ Circle Punch. I put the largest circle near the bottom of the card and the other two above.

You can stamp flowers and leaves if you like from the Irresistible Blooms Stamp Set or you can die cut them right out of the designer paper! There are large and small outline flower dies plus a couple of different leaf dies. It is so fun when you can cut out the designs from the paper. Then I just played around with the flowers and leaves until I was happy with the placement and glued them down. The bottom flower is popped up on Stampin’ Dimensionals.

The greeting is stamped on a piece of designer paper in a Soft Sea Foam color in Soft Sea Foam ink. The greeting is in the Go-To Greetings Stamp Set. I used a narrow banner die in the Stylish Shapes Dies to make a thin banner for the sentiment without covering up too much of the flowers.

For a finishing touch, I adhered several of the Petal Pink sequins randomly on the card in the Pastel Adhesive-Backed Sequins. I really like these sequins, three different colors, and different sizes.

Here is another card I made using the Hello, Irresistible Paper.

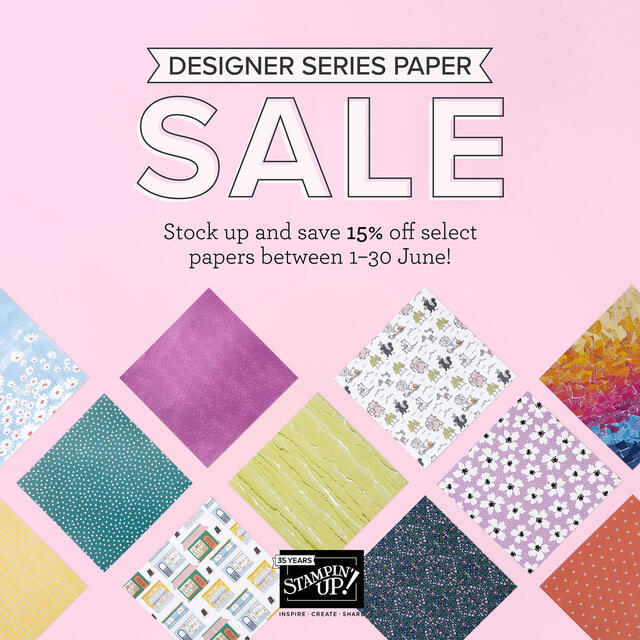
Take advantage of the Stampin’ Up! Designer Series Paper Sale while you can!

Hello, Irresistible Floral Birthday Card Closeup

New Boho Beach Kit in the Kit Collection!

Kit Collection Boho Beach Kit Info

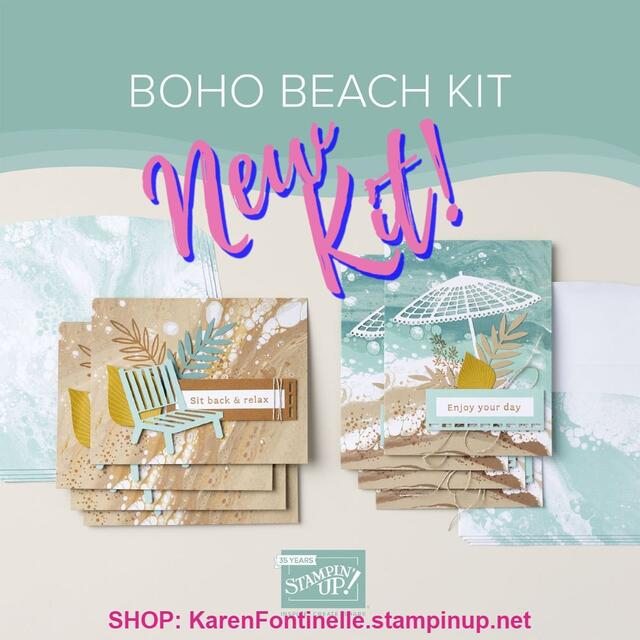
If you love the beach or are going to the beach this summer, you might love this new kit in the Stampin’ Up! Kit Collection! It’s called the Boho Beach Kit, and as you can see, it evokes images of the beach, the water, vacation, and relaxation……what more could you need?!

Did you notice the very interesting background on the cards? It’s an acrylic-poured paint art style that was used for a marbled color effect. My niece showed me some artwork she was doing with this method a few years ago and it looked so fun I wished I could have zapped myself right over there to play, too! You don’t have to make the background yourself, though, the cards are already printed with this design! Easy peasy!

DETAILS
This month’s kit includes:

  • Enough supplies to create 8 cards—4 each of 2 designs
  • 8 coordinating envelopes
  • Boho Beach photopolymer stamp set
  • One Pecan Pie Ink Spot
  • Printed card bases, printed die cuts, adhesive, embellishments, and a clear block
  • Finished card size: 5-1/2″ x 4-1/4″ (14 x 10.8 cm)
  • Coordinating colors: Crumb Cake, Lost Lagoon, Pecan Pie, Pool Party, Wild Wheat

Play with the new In Color, Wild Wheat, and try out one of the new Core Colors, Pecan Pie, plus a returning one, Lost Lagoon!

These kits are not the same as Paper Pumpkin Kits. Very similar in that they are kits, but Paper Pumpkin is a monthly subscription kit and you may or may not be able to purchase one later after it is mailed out. The Stampin’ Up! Kit Collection, however, is in the Stampin’ Up! Online Store and as long as they aren’t sold out, you can purchase them anytime. You can choose between Card Kits and Craft Kits.

Kit Collection Boho Beach Kit photos

Watch Sara Douglass show the kit and how she makes her cards!

This Boho Beach Kit goes LIVE today so you can purchase it right away in the

Stampin’ Up! Online Store under Kit Collection.

SHOP HERE!

Hello, Irresistible Hello Card

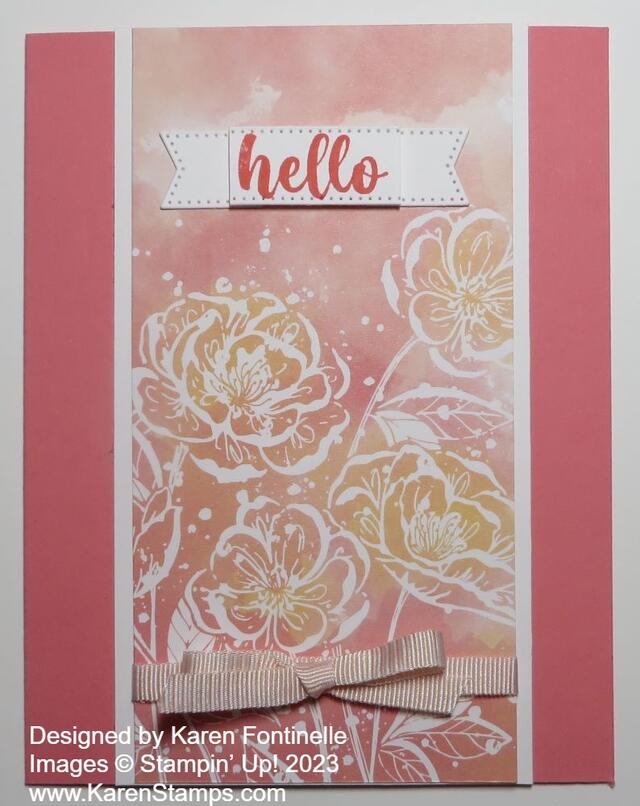
Sometimes all you have to do is spy one of your scraps to get a card idea! That’s how this Hello, Irresistible Hello Card came about. I spotted a diecut scrap and was going to use the other side of this piece of designer paper, but when I turned the paper over, I decided to use this floral side instead! So you never know what you might come up with!

I used the Hello, Irresistible 6″ x 6″ Designer Series Paper on the front of this card. You might miss this paper because it is not in the new Annual Catalog. It is one of the Online Exclusives in the Online Store. The important thing is it is one of the select papers on the Stampin’ Up! Designer Paper Sale going on right now during the entire month of June! The whole package of 48 sheets of paper is very pretty. It has digitally hand drawn botanical and floral images plus color washes.

The card base is Flirty Flamingo. I decided to make the designer paper the full length of the card and center it so it is cut at 5 1/2″ x 2 3/4″. I thought it would be pretty to put a layer of Basic White cardstock behind it to accent the white images of the flowers, but I made it narrow. It is cut at 5 1/2″ x 3″.

Before adhering anything, I wrapped a piece of the pink ribbon in the Ribbon Duo Combo Pack around the bottom of the designer paper. I put it pretty low so as not to cover up the flowers. I tied a little bow separately and adhered it to the ribbon with a Mini Glue Dot. Then I assembled the card.

The greeting is stamped in Flirty Flamingo ink on Basic White from the Irresistible Blooms Stamp Set and diecut with a banner die in the Stylish Shapes Dies. Since I didn’t want the banner as long as it was, I tried an idea I saw recently. I cut off the ends of the banner and put Stampin’ Dimensionals on the back of the greeting. Don’t put them all the way to the ends so you have space. After adhering the greeting, I put Multipurpose Liquid Glue on the backs of the two end pieces I had cut off and adhered them flat on the card but slid underneath the popped-up greeting a little bit. That shortens the whole thing and just gives a little different look to your card!

Sometimes I don’t think about adding some sparkly jewels to my card until after I take the photo, but you certainly could add some Iridescent Rhinestone Basic Jewels to this card! That would be very pretty!

Don’t forget the Designer Paper Sale this month! Save 15% on select papers, and this is one of them!

SHOP STAMPIN’ UP! ONLINE HERE!

Fresh As a Daisy Recycled Gift Bag

Fresh As a Daisy Recycled Gift Bag

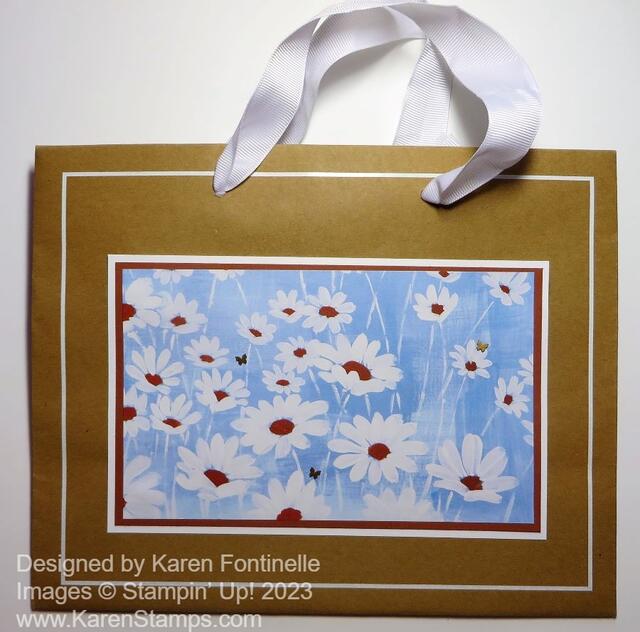
This is one of my favorite things to do with my stamping skills, making this Fresh As a Daisy Recycled Gift Bag! Actually, there isn’t even any stamping on this project and it probably only took me ten minutes are the most to make it. This is one of those quality shopping bags that I got at one of my favorite gift shops. Of course, on the front and the back it has the name of the store printed on the bag. But I love to take a shopping bag like this one I got from a store, and then decorate it and use it later as a gift bag. You can decorate it for any occasion. If every time you got one of these handled gift bags from a store, or even purchase a pack of them at the big craft stores, you stopped and decorated the front, covering up the printing, you will have a nice selection of gift bags that you personalized for a certain occasion or a certain person. It’s always handy to have gift bags in your stash for when you need one!

For this bag, I thought I would like to use the Fresh As a Daisy Designer Series Paper. I thought I would use the pattern with the green background and white daisies, but when I came upon this pattern, I chose it! For this bag, to cover up the store name, I cut it at 4 1/4″ x 7″. Of course, your measurements have to be appropriate for your bag.

I layered the daisy designer paper on a piece of Copper Clay Cardstock (one of the new In Colors). Because the handle was made with white ribbon and because of the white border around the edge of the bag, I decided to layer the designer paper and Copper Clay cardstock on a piece of Basic White Cardstock to help it all stand out on the kraft-colored bag.

For just a little embellishment, I added three of the Brushed Brass Butterflies flying around the daisies.

You could use any of the daisy patterns in the Fresh As A Daisy Designer Series Paper on a bag like this! Remember, Stampin’ Up! is having a sale on select Designer Series Papers during the month of June, so if you don’t have this summer Fresh As a Daisy Paper, or if you need more, be sure to order while you can get 15% off!

SHOP STAMPIN’ UP! ONLINE HERE!

Bright & Beautiful Just For You Card

Bright & Beautiful Just For You Card

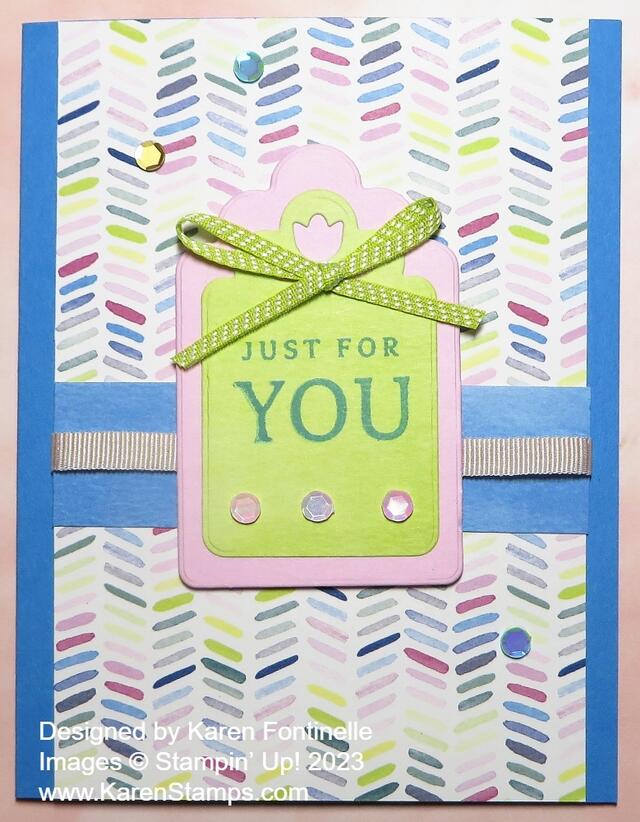
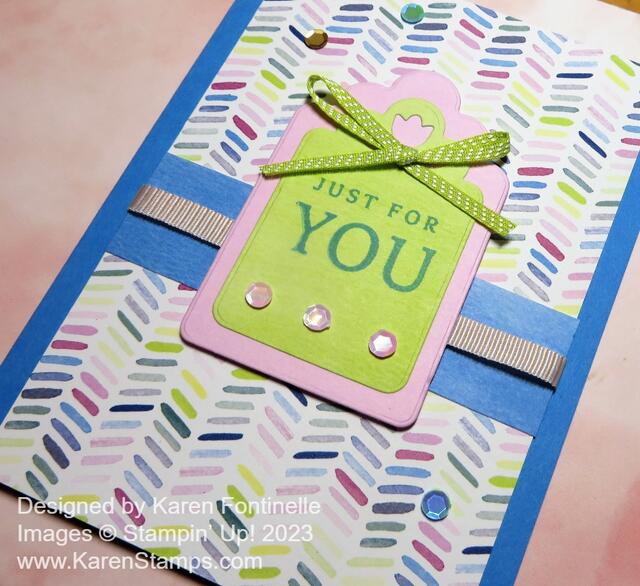
This Bright & Beautiful Just For You Card is just kind of a simple one, but jazzed up with the colorful designer paper! And a few sequins!

The Bright & Beautiful 6″ x 6″ Designer Series Paper is one that you want for making lots of fun and happy cards! It has festive patterns like confetti, stars, squiggly lines, stripes, and circles, but it also has ombre patterns and washes for softer colors. I chose this colorful pattern on the designer paper with all the different colors of these little diagonal markings. I cut it 5 1/2″, the length of the card, instead of 5 1/4″ and 3 3/4″ wide, just for something different with a little bit of margins on both sides to see the Azure Afternoon color. Looking through the scraps, I decided to cut a strip of designer paper in Azure Afternoon just to go across the middle of the card. Before adhering the designer paper to the card base, I wrapped around a piece of the Petal Pink ribbon in the Ribbon Duo Pack.

I used one of the new colors in the Stampin’ Up! Color Refresh, Azure Afternoon, for the card base after I had chosen which designer paper pattern I liked. So many colors to choose from! You’ll find the Azure Afternoon Cardstock in the Brights Family.

For the greeting, I decided to use designer paper for the tag, so I chose a Lemon Lime Twist colored paper on which I stamped the greeting in Azure Afternoon from the Sentimental Park Stamp Set. Then I diecut it with one of the tag dies in the Something Fancy Dies. I thought it needed to stand out a bit more so I die-cut a larger tag in Bubble Bath Cardstock. The greeting tag is popped up with Stampin’ Dimensionals. The bow on the tag is the Lemon Lime ribbon in the Ribbon Duo Combo Pack.

I almost always need some sparkle and pizzazz, so I added some of the Pastel Adhesive-Backed Sequins to the tag and to the card front. I’ve been using these quite often because the colors and sparkle are good!

Don’t forget, the Designer Series Paper Sale has begun at Stampin’ Up! and runs through the whole month of June! This Bright & Beautiful Designer Series Paper is one of the select papers on sale, discounted by 15%. If you already own it, maybe you need more! Check your stash!

SHOP STAMPIN’ UP! ONLINE HERE!

Bright & Beautiful Just For You Card closeup

Celebrate June With a Stampin’ Up! Paper Sale!

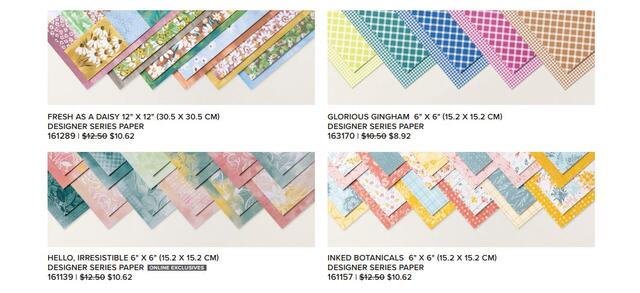
Designer Paper Sale Flyer 1
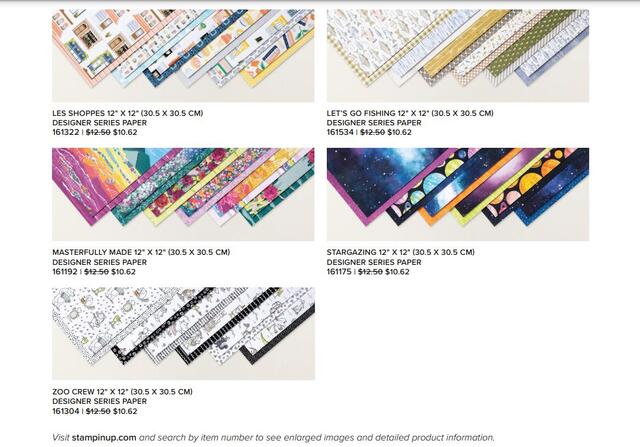
Designer Paper Sale Flyer 2
Designer Paper Sale Flyer 3

The Stampin’ Up! Designer Series Paper Sale begins TODAY, June 1st!

Stampin’ Up! is having a Designer Series Paper Sale on select papers during the month of June! It begins today, Thursday, June 1! Do you have your list made?!

  • There is no limit to how many packages of Designer Series Paper may be purchased during this promotion.
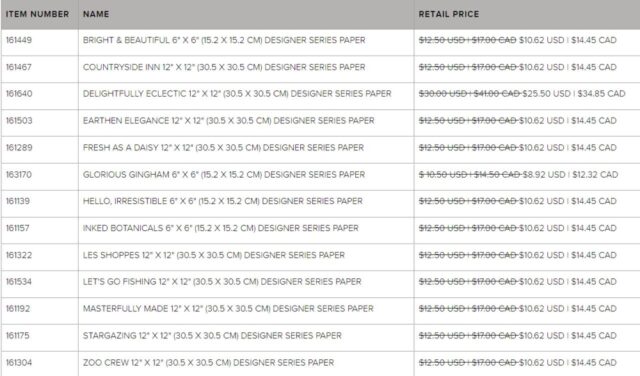
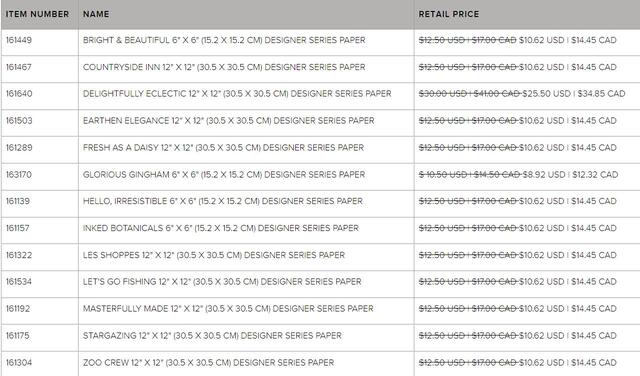
  • Only select Designer Series Papers are available at a 15% discount during this promotion. Please reference the table below to see the papers included in the sale.
  • Orders must be placed—and closed—during the promotion period for the 15% discount to apply.
  • Designer Series Paper ordered as part of a Starter Kit or with Stampin’ Rewards qualifies for the 15% discount.
  • Designer Series Papers are from the new 2023–2024 Annual Catalog (p. 129–132) and Online Exclusives.
  • Click on the chart below or HERE.
Designer Paper Sale June 2023 Listing

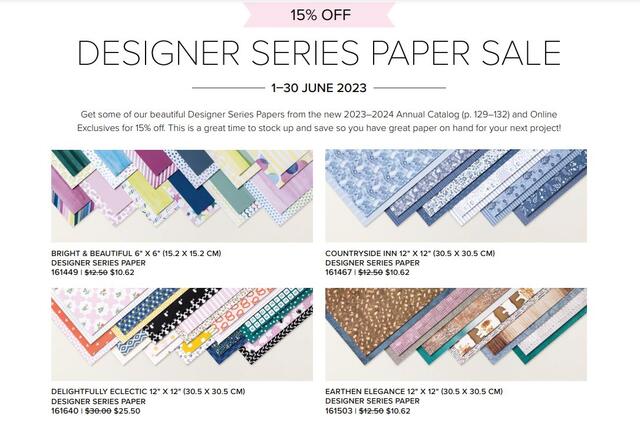
Notice that the big, 48-sheet pack of designer paper, Delightfully Eclectic 12″ x 12″ Designer Series Paper, is on the list!! It seems expensive, but you get a lifetime of paper at 15% off, so it’s a great deal! Interesting and different patterns, like pretzels, (one of my favorite foods), an alphabet, swans, ledger paper, flowers, stripes, everything!

The sale lasts all month, but don’t delay ordering your favorite paper to avoid those pesky backorder situations!

SHOP THE STAMPIN’ UP! DESIGNER SERIES PAPER SALE!

Bright & Beautiful Circle Sayings Birthday Card

Bright & Beautiful Circle Sayings Birthday Card

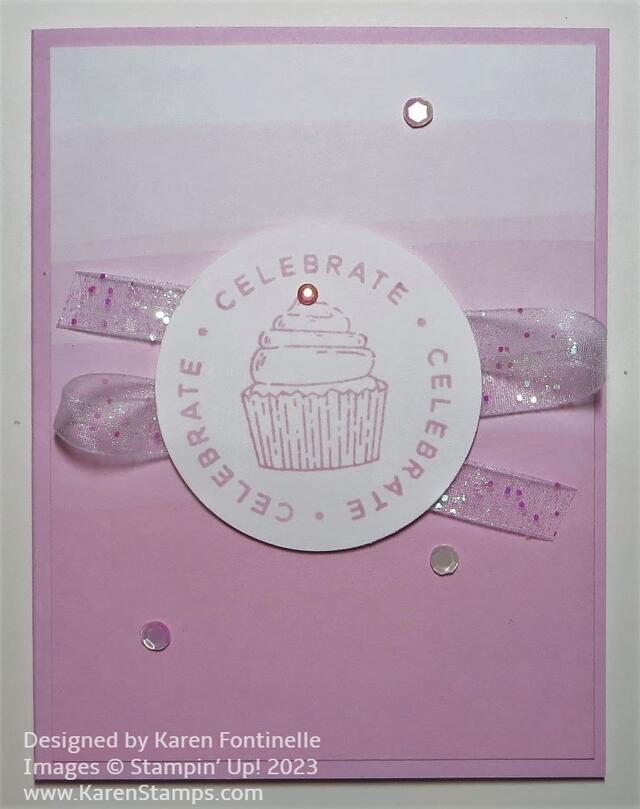
Here’s a quick and easy birthday card to make, the Bright & Beautiful Circle Sayings Birthday Card. I just chose a soft, ombre designer paper for the card layer and added one of the Circle Sayings.

The card base is one of the new colors, Bubble Bath. The designer paper is the Bright & Beautiful 6″ x 6″ Designer Series Paper. This pack of paper has all kinds of colors and patterns that will make lovely and bright & happy cards and projects for you. This particular pattern I chose has ombre shades of Bubble Bath. You almost can’t tell it very well in the photo. It’s like a dip-dye where each dip gets lighter and lighter at the top and darker at the bottom.

For the greeting, I used the Circle Sayings Stamp Set and the 2 3/8″ Circle Punch. You can purchase both together in the Circle Sayings Bundle and save 10%. I simply stamped the circular greeting in Bubble Bath ink on Basic White cardstock and then the cupcake in the center also in Bubble Bath. At first I wished the circle punch was a bit smaller so I could make a layer with the 2 3/8″ Punch, but the 2″ Circle Punch seemed a bit too small. I think it turned out okay the way it is.

To jazz it up a bit, I put some ribbon, back and forth behind the circle. This is the White 3/8″ Glittered Organdy Ribbon, which is still available in the Online Exclusives. Just put “organdy ribbon” in the Search box and it will come up. It is soft enough to go along with the soft colors of the card, but you can see the bits of glitter embedded in the ribbon for a little sparkle. As I got out some Iridescent Rhinestone Basic Jewels, I decided to color one with the Dark Bubble Bath Stampin’ Blend Marker and put it on top of the cupcake! I was going to put more rhinestones on the card but changed my mind to the Pastel Adhesive-Backed Sequins. I just chose three of them and placed them on the card. It adds a little bling but not too much.

This Bright & Beautiful Designer Paper will be on the Designer Series Paper Sale on June 1st at 15% off, so put it on your list if you don’t own it already!

Shop Stampin’ Up! Online!

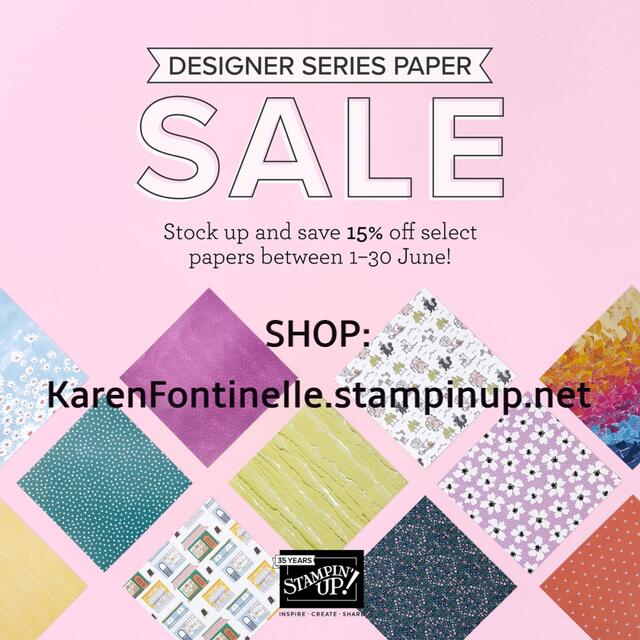
Designer Paper Sale Soon! June 1st! All Month!

DSP Sale Sq Ad June 2023 Info

Stampin’ Up! is having a Designer Series Paper Sale beginning Thursday,

June 1, 2023, and lasting until June 30! All month!!

You can enjoy a 15% discount on select Designer Series Papers from our new 2023–2024 Annual Catalog and Online Exclusives. Whether you’re a scrapbooker, a card maker, or simply a paper lover, this is a great time to stock up and save on gorgeous paper so you have artistic and versatile paper designs on hand for your next projects! And we all need MORE paper, right?! Especially when it is on sale!!

It’s not ALL papers in the catalog so check the lists below! But there are plenty to choose from!

The Bright & Beautiful 6″ x 6″ paper is exactly that! Bright colors and designs for making colorful, happy cards!

The Countryside Inn paper is for those who LOVE blue and little surprise animals on some of the papers! So cute!

***Delightfully Eclectic***…. I really wanted to draw your attention to this pack of paper! This is where that 15% off really makes a difference! It’s a pack of 48 sheets of paper! And let me tell you, these large packs are really a boatload of paper! This one has some fun, unique designs, like pretzels!

Masterfully Made looks really interesting and different! Like torn paper, I think.

Stargazing! So colorful! Watch the Stampin’ Up! video HERE! You’ll want it!

Zoo Crew Paper! If you like whimsical and cute, these darling characters are for you! Some you can diecut or just sit and fussy cut! Fun cards!

Designer Paper Sale Flyer 1
Designer Paper Sale Flyer 2
Designer Paper Sale Flyer 3

Click HERE to download or read the Flyer in its entirety.

This is the perfect time to get those NEW papers and maybe order another package of one you’ve almost used up!

Designer Paper Sale June 2023 Listing

SALES PERIOD: JUNE 1-30

  • There is no limit to how many packages of Designer Series Paper may be purchased during this promotion.
  • Only select Designer Series Papers are available at a 15% discount during this promotion. Please reference the table above or the flyer above to see the papers included in the sale.
  • Orders must be placed—and closed—during the promotion period for the 15% discount to apply. Don’t start your order online early!
  • Designer Series Paper ordered as part of a Starter Kit or with Stampin’ Rewards qualify for the 15% discount.
  • Designer Series Papers are from the new 2023–2024 Annual Catalog (p. 129–132) and Online Exclusives.

This early announcement gives you time to make your list, plan your projects, and check your inventory! Then on June 1st, you will be ready to go!

SHOP STAMPIN’ UP! ONLINE HERE!

Thursday, June 1st, is the day!!

Memorial Day 2023

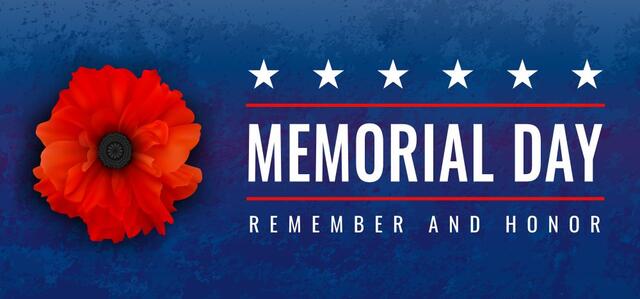
Memorial Day Poppy 2023

Memorial Day is a holiday to remember and honor those men and women who gave their lives while serving our country in the Armed Forces. The poppy seemed to flourish in Europe after World War I, out of the rubble of war. The red poppy is a symbol for the blood shed by soldiers during war. The American Legion made the poppy their official flower in 1920 and in 1924 the American Legion began distributing poppies to honor the fallen and support the living who have served in the military.

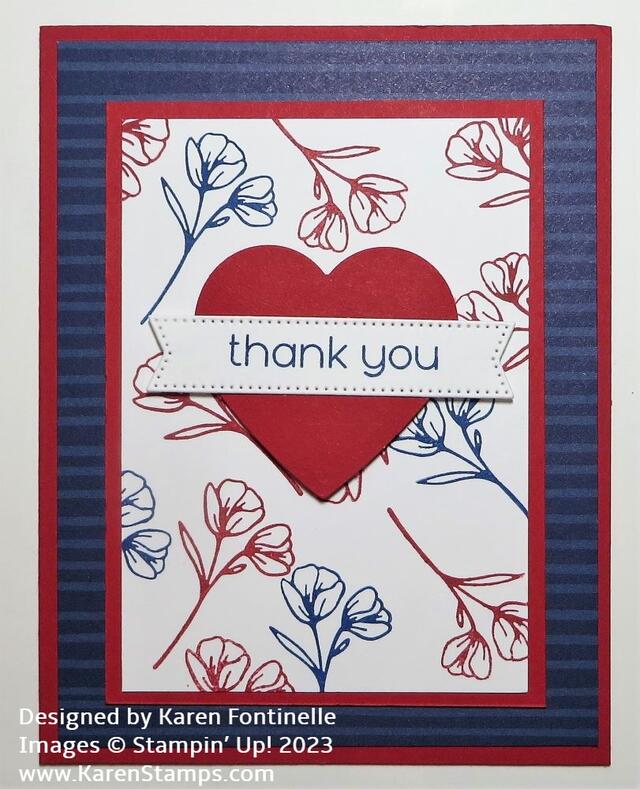
Patriotic Red White and Blue Thank You Card

Patriotic Red White and Blue Thank You Card

With this being Memorial Day weekend, I thought a Patriotic Red White and Blue Thank You Card might be in order. Memorial Day is a day of remembrance for those men and women who died while serving in the United States military. It’s actually a somber holiday even though most of us enjoy the three-day weekend and maybe travel, shop, or have family gatherings. But it is important to think about why we have this special holiday.

I was reminded that poppies are flowers of remembrance on Memorial Day. I’m not sure these flowers in the Timeless Arrangements Stamp Set are poppies, but they could be! I made a card recently similar to this one with this flower randomly stamped for the background of the card front in Sweet Sorbet, a monochromatic card. I put the card in my Tuesday stamping newsletter for an easy project. (You can sign up in the red box in the sidebar.)

That card gave me the idea to make this card using red, white, and blue. The card base is Real Red, with a layer of the “backside” of one of the sheets in the Countryside Inn Designer Series Paper. I thought this dark blue striped paper was perfect for this card.

The center piece is Basic White, 4 1/4″ x 3″ layered on a piece of Real Red cardstock 4 1/2″ x 3 1/4″. I stamped the flower in Real Red ink and also Blueberry Bushel ink. Just stamp randomly with some flowers going in different directions and some running off the page. (Just have scrap paper underneath!)

The heart is one in the Heart Punch Pack, which, unfortunately, retired recently. However, it was still on my punch rack so I used it! I originally intended to use the small heart in the Radiating Stitches Dies, in the Online Exclusives, but I thought it was a little small. You likely have heart punches or dies in your “stash” so you can see what suits you if you were making this card.

The heart is popped up on Stampin’ Dimensionals, and the greeting is stamped in Blueberry Bushel ink on a Basic White banner from the Stylish Shapes Dies. I put Stampin’ Seal in the middle of the banner and the Mini Dimensionals on each end of the banner and adhered it across the heart. The greeting is in the Timeless Arrangements Stamp Set.

You could make this same card design using different colors and a different greeting. It’s actually a very basic card design and easy to make. See what variations you can come up with!

Remember, the Stampin’ Up! Designer Series Paper sale begins on June 1st!

SHOP STAMPIN’ UP! ONLINE HERE!

Cheerful Daisies Friendship Card

Cheerful Daisies Friendship Card

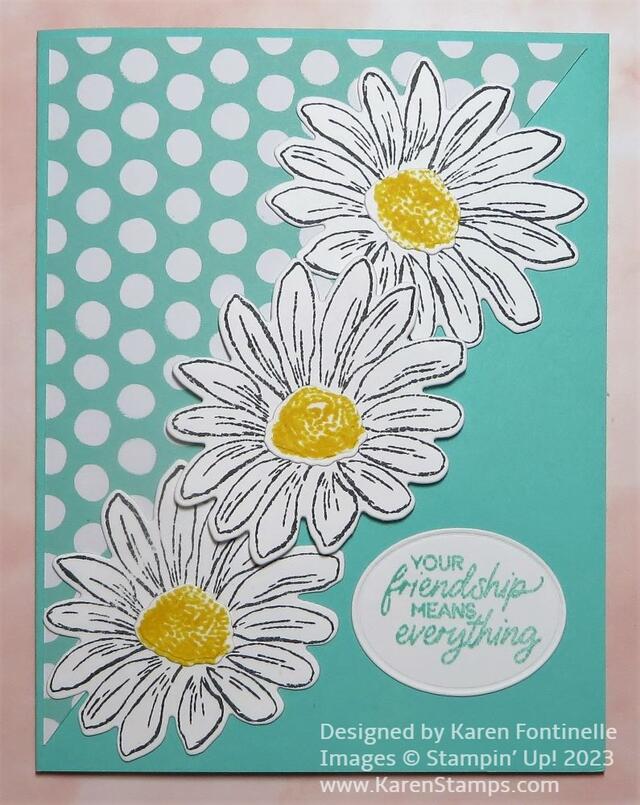
Here’s an easy card to make, this Cheerful Daisies Friendship Card, which is perfect for sending to a friend. There is even a Best Friend Day coming up in June so plan ahead!

This card has daisies, which everyone loves, and the bright, cheerful Coastal Cabana color plus the fun polka dot designer paper. It’s a perfect card for summer and fun.

The card base is Coastal Cabana. For the designer paper, I found this pattern in the Brights 6″ x 6″ Designer Series Paper. To make this diagonal, just cut the designer paper to the normal size you would cut it for a layer, 4″ x 5 1/4″. Or if you want, cut it the full size of the card front, 4 1/4″ x 5 1/2″. Then place it diagonally on your Paper Trimmer and cut. If you don’t want your blade to bang into that tip of the paper, just place the blade somewhere else on the paper and start cutting from there to each end. Then you’ll have two diagonal pieces and you can make another card!

The three daisies are stamped in Memento Ink with the Cheerful Daisies Stamp Set. The flower centers are stamped in Daffodil Delight ink. The daisies and centers are then die-cut with the Cheerful Daisies Dies. You can purchase both the stamp set and the dies in the Cheerful Daisies Bundle and save 10%.

I popped up the center daisy with Stampin’ Dimensionals and the other two are adhered flat on the card along the edge of the designer paper. The greeting is in the Cheerful Daisies Stamp Set. It is diecut with the oval in the All That Dies.

That’s all you really need for this card unless you want to add some bling!

SHOP STAMPIN’ UP! ONLINE HERE!

Stampin’ Up! Designer Series Paper Sale Coming in June!

Designer Paper Sale June 2023 sq ad

Stampin’ Up! has just announced a Designer Series Paper Sale

during the month of June!

You can enjoy a 15% discount on select Designer Series Papers from our new 2023–2024 Annual Catalog and Online Exclusives. Whether you’re a scrapbooker, a card maker, or simply a paper lover, this is a great time to stock up and save on gorgeous paper so you have artistic and versatile paper designs on hand for your next projects! And we all need MORE paper, right?! Especially when it is on sale!!

Designer Paper Sale Flyer 1
Designer Paper Sale Flyer 2
Designer Paper Sale Flyer 3

Click HERE to download or read the Flyer in its entirety.

This is the perfect time to get those NEW papers and maybe order another package of one you’ve almost used up!

Designer Paper Sale June 2023 Listing

SALES PERIOD: JUNE 1-30

  • There is no limit to how many packages of Designer Series Paper may be purchased during this promotion.
  • Only select Designer Series Papers are available at a 15% discount during this promotion. Please reference the table above or the flyer above to see the papers included in the sale.
  • Orders must be placed—and closed—during the promotion period for the 15% discount to apply. Don’t start your order online early!
  • Designer Series Paper ordered as part of a Starter Kit or with Stampin’ Rewards qualify for the 15% discount.
  • Designer Series Papers are from the new 2023–2024 Annual Catalog (p. 129–132) and Online Exclusives.

This early announcement gives you time to make out your list, plan your projects, and check your inventory! Then on June 1st, you will be ready to go!

SHOP STAMPIN’ UP! ONLINE HERE!

All About the Paper Pumpkin Kit May 2023

Paper Pumpkin May 2023 Box Cover

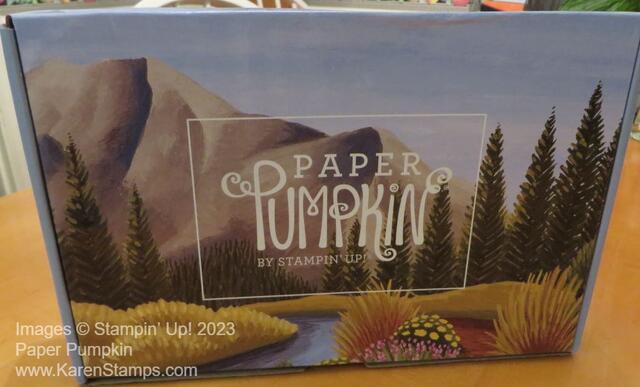
My Paper Pumpkin May 2023 Kit, Exploring In Color, arrived this weekend in my mailbox, and look at the cover of the box!! If this isn’t a beautiful box for this month’s Paper Pumpkin Kit, I don’t know what it would be. Wouldn’t you like to find this Paper Pumpkin Kit in your mailbox? I consider it a gift I give myself!

Open the lid and see the beautiful presentation, just like a gift, as I say!

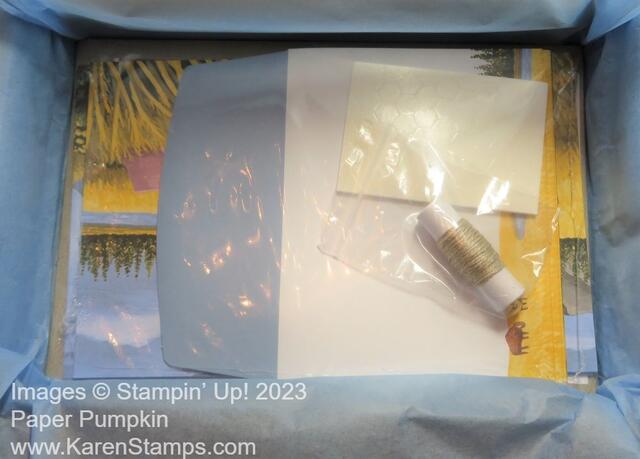
Paper Pumpkin May 2023 Unwrapping

The contents of the kit are all assembled in the package and shrink-wrapped in plastic to keep everything together!

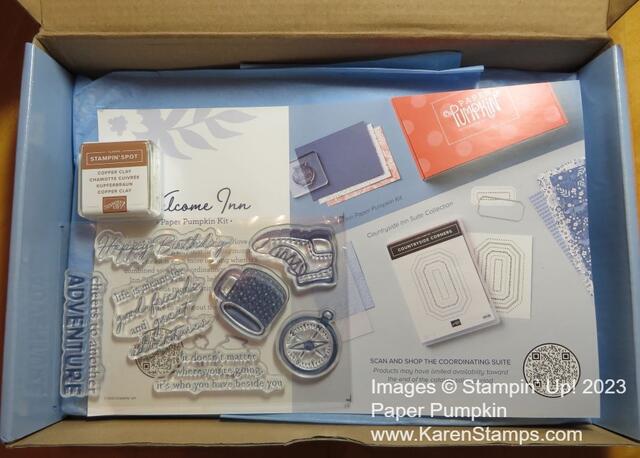
Paper Pumpkin May 2023 Contents

Open it up and look at all the contents of the kit! You get just about everything you need except for scissors! Even adhesives are included, usually tiny Mini Dots and dimensional. This kit has cards, even decorated matching envelopes, plus some twine for embellishing.

Paper Pumpkin May 2023 ink & stamps
Every kit has an ink spot (a mini ink pad!) and an exclusive stamp set that you can keep and use in any other projects you make. With your first Paper Pumpkin Kit, you will receive a special acrylic block to use with your stamps.
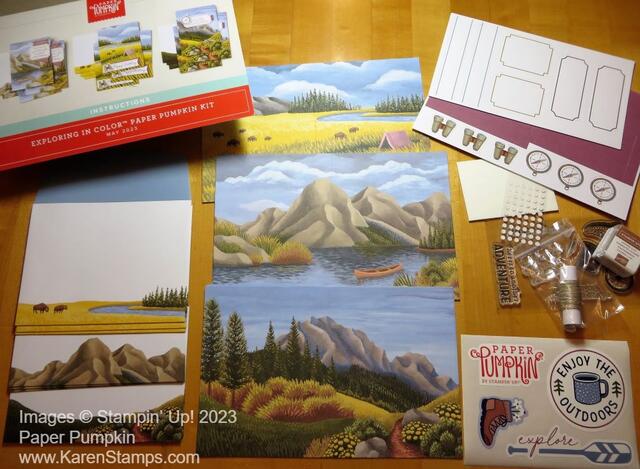
Paper Pumpkin May 2023 Full Contents

I love to take everything out and lay out all the parts and see what I got in my Paper Pumpkin Kit! This May kit came with free stickers (Lower right in photo) just to use anywhere you like. It also had a brand new In Color, Copper Clay for the ink spot.

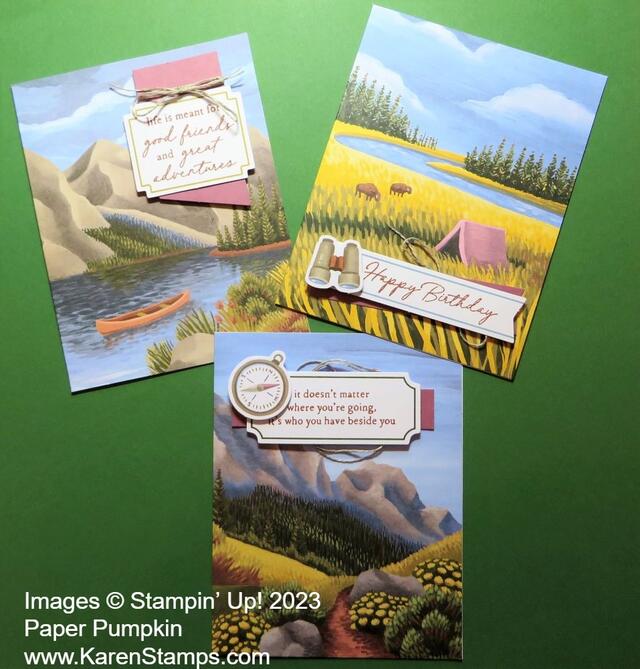
Paper Pumpkin May 2023 Cards

Here are the three cards, as designed in the kit. I always make part of the kit exactly as designed and shown in the instructions, but usually I leave some in case I want to make an alternative idea. Paper Pumpkin, on the back of the instructions, always shows some ideas you can use if you have some of your own stamping supplies. Hundreds of others can be found online after people receive and make their kits.

Paper Pumpkin May 2023 Scrapbook Page Idea

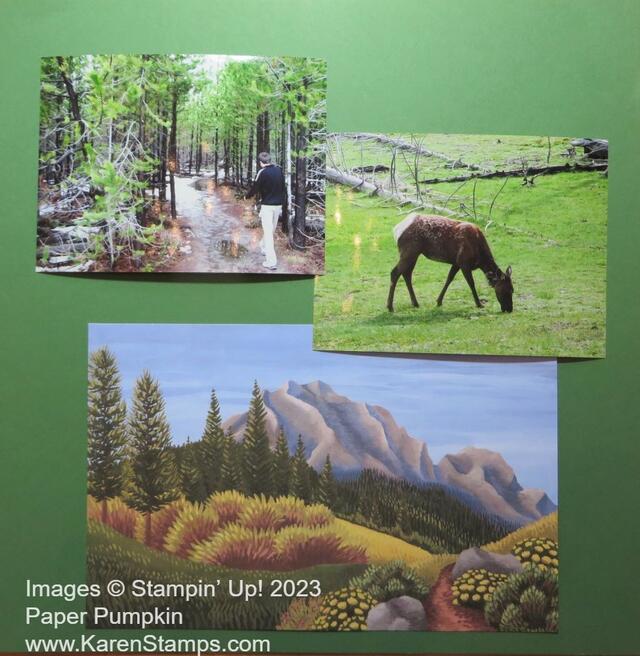
As soon as I saw the Paper Pumpkin box and opened the kit, the cards reminded me of the national parks we have been to. Such beautiful colors and scenery are portrayed on these cards and envelopes! Right away I thought that if I was making scrapbook pages (which I always intend to do!), I could use the cards on a scrapbook page. I pulled out a 12″ x 12″ piece of Garden Green cardstock just to give you an alternative idea.

At the bottom is one of the full cards in the kit. Yes, they have scenery on the front and back! Then, for this example, I grabbed two vacation photos from quite a few years ago when we went to Yellowstone National Park and the Tetons. If I were making this a real scrapbook page, I would layer the photos on some coordinating cardstock and maybe the card also, plus add some journaling and a title. All of that would likely fill up the page, or maybe I could squeeze in one more photo. I know I bought a retired Stampin’ Up! stamp set years ago with which to make scrapbook pages for this exact trip, but as usual, “I haven’t gotten around to it yet!”

Weekends always seem like a good time to play with my newest Paper Pumpkin Kit. If you are interested in trying Paper Pumpkin, just sign up by June 10th to receive the next kit. Once you are a subscriber, you can go in the Stampin’ Up! Online Store, under Paper Pumpkin – Past Kits & Refills. If any past kits are available you can purchase them once you subscribe. Refills are kits without the ink spot and stamp set, the purpose being if you wanted to make more of the same cards, you can get the materials but you can reuse the stamp set and ink spot you already have.

The next Paper Pumpkin Kit for June 2023 is called “Welcome Inn”. Join by June 10!

JOIN PAPER PUMPKIN TODAY!

Paper Pumpkin Logo

Zoo Crew Knitting Alpaca Card

To make this card, I used the Stampin’ Up! Catalog for inspiration and I found it on page 46 in the Zany Zoo Suite Collection samples. I didn’t copy it exactly, but it gave me this idea. I’d been wanting to use this pattern in the designer paper ever since I got it!

The card base is Pool Party with a layer, leaving a little wider margin around the edges than usual. The designer paper is the Zoo Crew Designer Series Paper and as you can see I used the black & white little flowers. You can leave them plain or color them in. Of course, I couldn’t resist coloring them with my Stampin’ Blends. It’s not difficult because really all you are doing is dotting the flowers, centers, and leaves with the tips of the markers! Just wait to color the flowers until you get the center piece on the card so you don’t color the center flowers that are just going to be covered up!

Since I had my Radiating Stitches Dies out on the table I decided to use one rectangle to create a frame for the knitting alpaca! I used Lost Lagoon cardstock. If you want the center cut out of the frame, you need to use the smaller die to do that. Then I added a plain Basic White piece underneath the frame.

The alpaca is stamped with the Zany Zoo Stamp Set and diecut with the Zany Zoo Dies. As I looked at the sample in the catalog, I wondered where they got that little table and flower vase. Well, those are little extras in the dies!! And when I say “little” I mean you have never seen anything as little as the flower dies! Put on your reading glasses!! It is fun, however, to have these extra little pieces in the dies to make interesting little scenes! I cut the table out of Early Espresso, the vase out of Gorgeous Grape, and the flower out of Sweet Sorbet. I even cut the flower again out of Granny Apple Green cardstock in order to get the green stem but that is completely unnecessary. Just die cut the flower, cut the flower off the stem, and draw in a tiny, barely there little stem with a marker

The alpaca is colored with one of the Naturals Stampin’ Blends, a light brown. I looked it up….alpacas can be many colors of brown, to save you the research, so you can choose any brown color you like! Or choose a whimsical color like Stampin’ Up! did! The face is colored with Crumb Cake as are her arms and legs and her hooves with Dark Pecan Pie. The chair is colored with Petal Pink and the yarn with Calypso Coral.

The alpaca is popped up with Stampin’ Dimensionals. The little table, vase, and flower are glued down onto the Basic White.

The greeting is in the Zany Zoo Stamp Set and diecut with an oval in the All That Dies set. I needed something small to fit in that space and this oval is perfect. Because the background looked too plain, I just used some of the markers I used on the card to put three little dots in each color randomly in the empty space.

That’s it! If you don’t want to stamp and color the alpaca, find her on one of the designer papers and cut that out instead. But coloring is easy and oh-so good for us!

SHOP STAMPIN’ UP! ONLINE HERE!

Countryside Inn Thank You Card

Countryside Inn Thank You Card

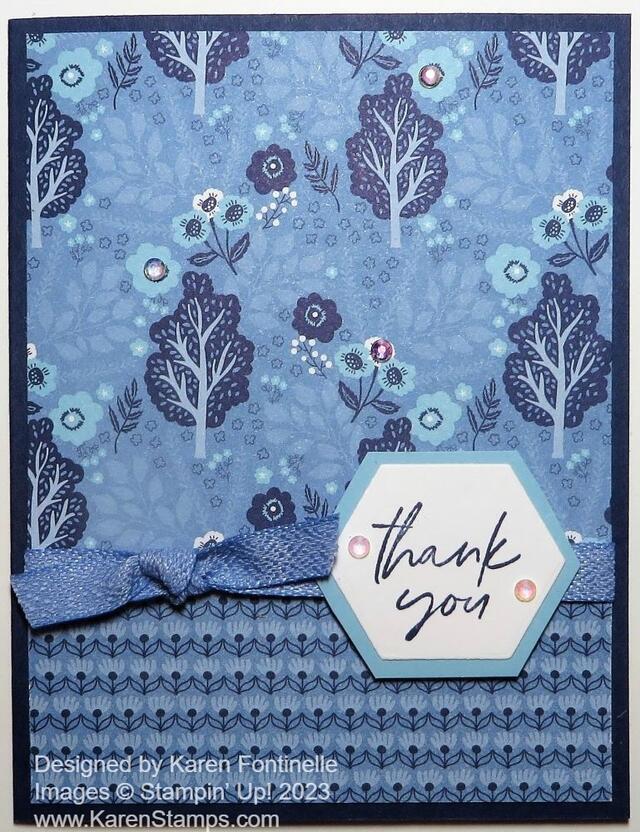
On this Countryside Inn Thank You Card, I used two sides of the same paper in the Countryside Inn Designer Series Paper. I really liked this paper with the trees and then I saw the other side was cute, too, with the small little lines of flowers. There are lots of interesting designs in this package of paper once you look at them! At first, you just think it’s only about little blue and white flowers! But there is even bunny paper in there, which I used on this card.

To make this card, I just used one of the simplest designs! I cut the card layer out of the designer paper, then cut a piece 4″ x 1 3/4″ of the same paper, but turned it over and used the “other side” for the bottom portion of the card. I usually like to hide the seam where two papers meet, so I covered it with a piece of Boho Blue 3/8″ Textured Ribbon. I just tied a knot rather than a bow. I think that was just enough.

The greeting is stamped from the Something Fancy Stamp Set in Night of Navy ink. Then I diecut the greeting with the hexagon die in the Something Fancy Dies. To make the Balmy Blue layer, I just cut it by hand! Stampin’ Up! should have asked me if they should make a hexagon layer die to layer with this die! I would have said “Yes!” I popped up the greeting over the ribbon with Stampin’ Dimensionals.

The card base is Night of Navy, but I could have used one of the other coordinating blues.

Of course, for a little bling, I added some Iridescent Rhinestone Basic Jewels, both to the greeting and on a few of the flowers on the designer paper.

This is always an easy and good way to design a card! You can use any designer papers you like, colors, greetings, and embellishments.

SHOP STAMPIN’ UP! ONLINE HERE!