Playing in the Rain Turtle Card

Playing in the Rain Turtle Card

It’s a new year and almost time for a new Stampin’ Up! Spring Mini Catalog, so here’s a new Playing in the Rain Turtle Card! This little turtle isn’t playing in the rain but some of his friends are in the Rain or Shine Suite Collection in the new catalog coming January 5th! That’s right, just a few more days until a new Stampin’ Up! catalog goes LIVE and we all love that!

Plus, it will be Sale-A-Bration 2023, the biggest promotion that Stampin’ Up! has annually! With every $50 you spend, you earn a FREE product in the Sale-A-Bration brochure, no limits! With a $100 purchase there are a couple of special items you could choose instead of two $50 level items but it’s all your choice. Just think in increments of $50 if you can when you shop to get as many free products as you can! (Before tax and shipping, of course!)

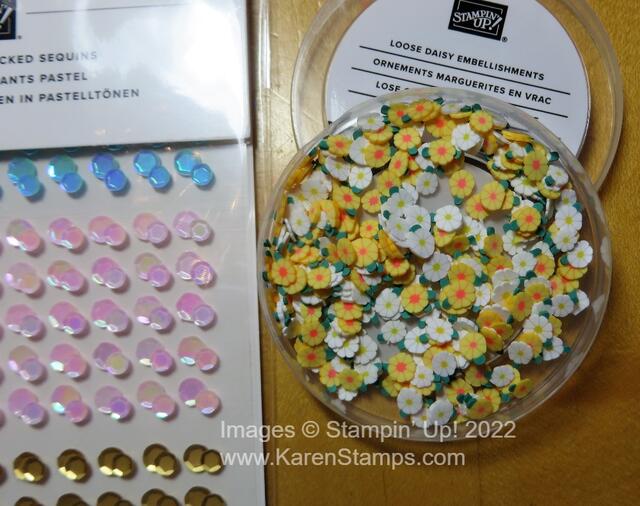
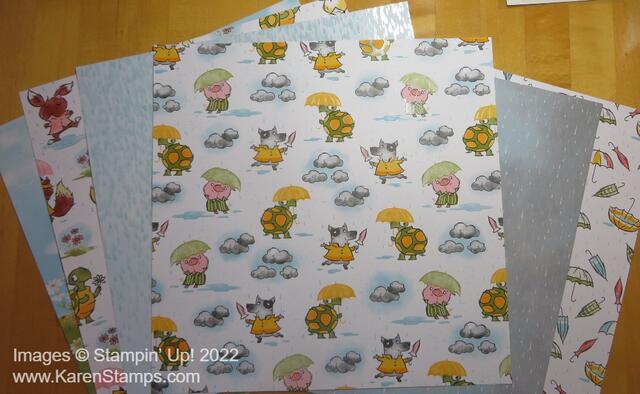
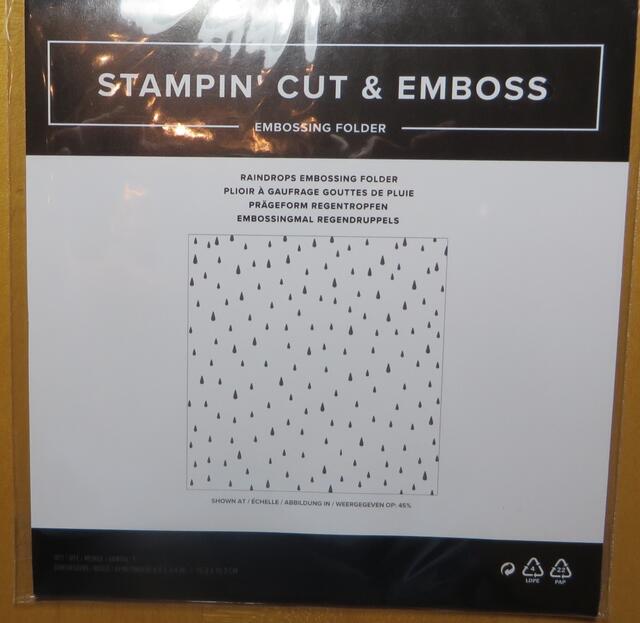
This Rain or Shine Suite was one that I chose during the Demonstrator pre-order because the little animals in the stamp set and designer paper were so cute and fun! And we all need to make some “fun” cards to send out to bring a smile to someone’s face, not to mention our own as we make the card! The Suite contains a Bundle of stamps and dies, a Raindrops Embossing Folder, tiny little daisy embellishments, and very cute designer paper with some images having a UV Coating that adds some shine.

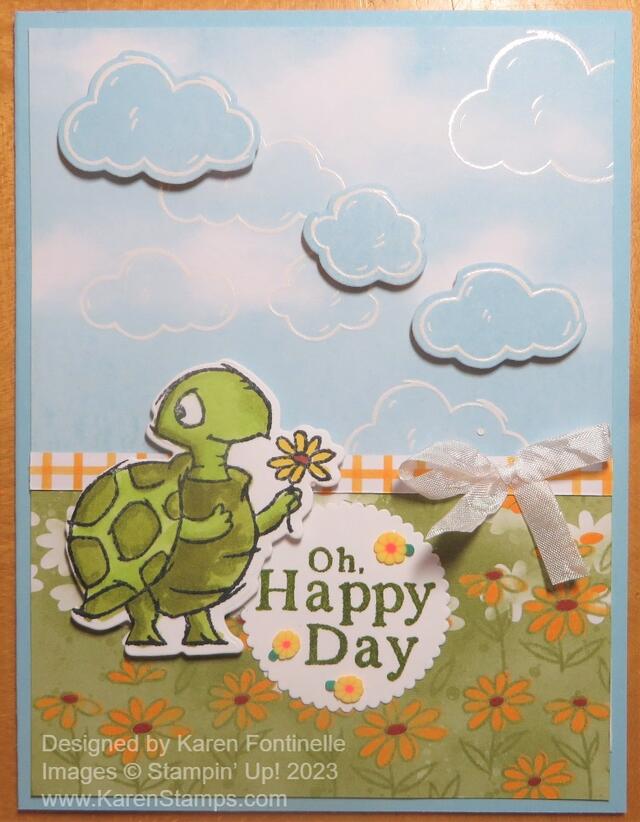
To make this card, I used one of the sample cards on the catalog pages to copy. That card is a “slimline” card, taller and narrower than most cards. My card is the usual size so it looks a little different. Sometimes using a card sample in the catalog is a good way to get your creativity flowing.

This card has a Balmy Blue card base I use a strip of the Rain or Shine Specialty Designer Series Paper which has the sky, clouds and flowers. I trimmed it down and separated the clouds and flowers to fit my card the best. I wanted the turtle to be standing in the field of daisies with the sky behind him so I have two pieces of paper on the card front. After I trimmed off a little of the top of the sky portion I noticed the other side had the Mango Melody plaid design. The catalog sample uses a wider piece but I just used it across the seam of where my sky and flowers meet.

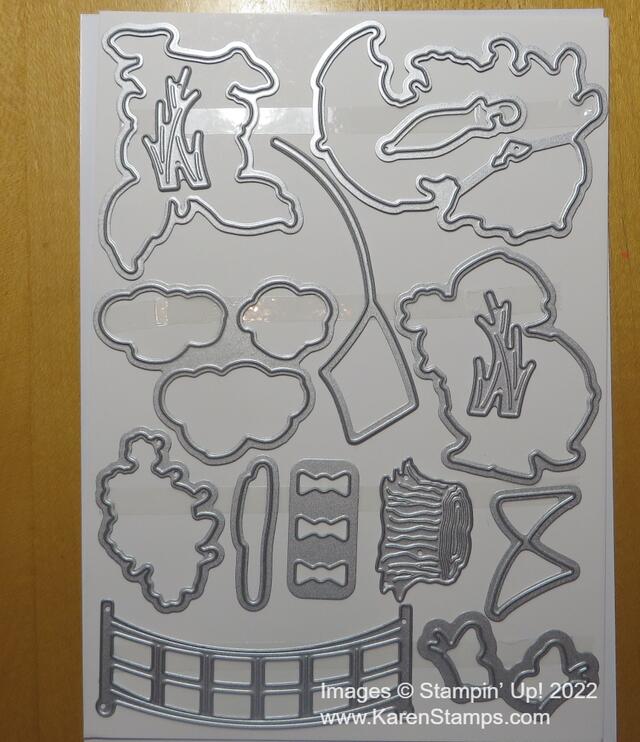
The turtle, in the Playing in the Rain Stamp Set, is stamped with Memento Ink and colored with Stampin’ Blends in Old Olive and Granny Apple Green. The little daisy is colored with Daffodil Delight and a center of Cajun Craze. I was prepared to cut him out with scissors, but there is a die in the Playing in the Rain Dies! There are lots of fun dies in this set to play with! You can buy the stamp set and dies in the Playing in the Rain Bundle and save 10%! (Notice the same name for the stamp set and dies??!)

The greeting is stamped with Mossy Meadow ink and die cut with a small scalloped Layering Circles die. I thought it would be fun to add a bow to the Mango Melody strip. For embellishments, I used the very small Loose Daisy Embellishments on the greeting.

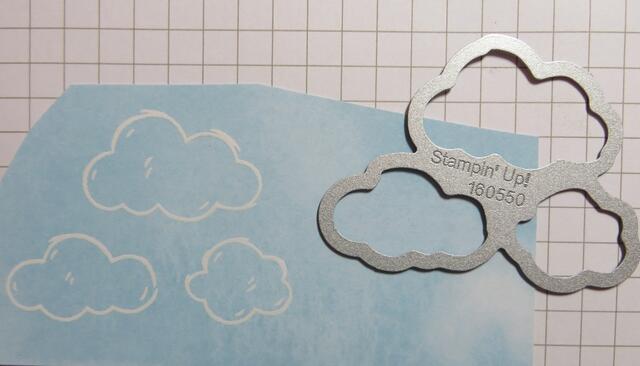
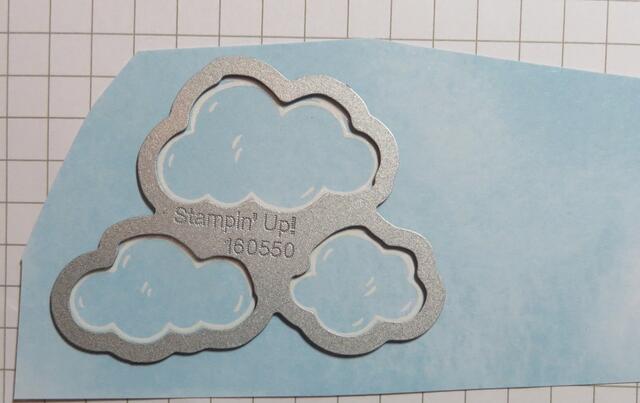
As I looked at the sample card in the catalog again, I noticed that they had some popped-up clouds in the sky and I felt my card needed a little something in the top portion. I was prepared, again, to hand-cut some clouds out of the designer paper, but lo and behold, there is a die that cuts out a certain group of three clouds from the paper!

Clouds Die
Clouds Die on DSP

Be sure to take care lining up the die so you don’t cut off the UV coating that outlines the cloud shape. After cutting out the clouds, I popped them up on the top of the card. I could have popped them up directly over the printed clouds on the paper.

Although it’s supposed to be a rainy, stormy day here in Houston, I chose to make this sunny, happy day card. Whether you choose rain or shine with this suite, you will be making a cute card! Get ready for the January-April 2023 (Spring Mini) Catalog to go live on Wednesday, January 5th, and for Sale-A-Bration to begin the same day! Circle that date on your calendar for sure!

Make a Card For New Year’s 2023

Happy New Year! Happy New Year’s Eve anyway! It’s time to make a card for New Year’s! I haven’t done any stamping since I finished my Christmas cards at the last minute with my kids home for a week or more. Also, most of my stamping stuff is moved into another room due to Christmas decorating so it’s not handy to be stamping right now. I hadn’t even played with my new Spring Mini and Sale-A-Bration things that I was able to preorder as a Demonstrator.

Since today is New Year’s Eve, I thought it was time to try to make an appropriate card. I had various ideas but nothing seemed quite right. I thought I was heat emboss several flowers with gold powder that would make them look like fireworks for New Year’s Eve. I got out all my embossing stuff to do that and came across an actual “Happy New Year’s” greeting in the Brightest Glow Stamp Set. Then I came across this Festive Foils Specialty Designer Series Paper that I had seldom used even though I think it’s beautiful. I thought it looked festive enough for a New Year’s Eve card, especially if I embossed the greeting in gold!

I found this diecut in the Painted Labels Dies and I thought it would make a perfect layer for the greeting. I stamped the greeting on Basic White with Versamark Ink and used the Heat Tool to emboss with Gold Embossing Powder. Then I die cut it with this swirl in the Painted Labels Dies. I also cut one out of Basic Black cardstock and cut out the center of the white swirl with the embossed greeting. I simply layered it on the black swirl and it’s large enough for the center of the card. The paper is fancy and the greeting is fancy. That’s enough for this card….well, except for a few Adhesive-backed Seasonal Sequins!

If you need to take a card to a New Year’s party, this would be a good one to make and take! Have a safe and happy New Year’s Eve!

Join My Stamping Newsletter Mailing List!

Mailing List Mailbox

I’d like to invite you to join my Stamping With Karen Mailing List to keep up with news from Stampin’ Up! and to be inspired by new stamping projects, tips, techniques, and more from me! There is always something new with Stampin’ Up! from products to catalogs and early releases of new products and I know you’ll want to know all about it.

Every Tuesday, I send out a newsletter with at least one free project idea, tip, or technique plus the latest Stampin’ Up! news and updates. Stampin’ Up! usually posts updates to Demonstrators every Tuesday morning so a newsletter on Tuesday from me has the news “hot off the press”!

Stampin’ Up! puts out an Annual Catalog once a year, plus two “Mini” catalogs a year {that aren’t so “mini”) plus the big promotion called Sale-A-Bration in January. These catalogs give you lots of products you will be excited about, want to learn about, and want to see all the ideas for cards and projects possible! Get on my Mailing List to keep up with these exciting events and know what to expect. If you’re one of my purchasing customers I’ll send you these catalogs free of charge when they come out.

Keep up with news about the new Paper Pumpkin Kit every month and subscribe if you want to join in the fun of having a project already planned and prepped for you in the cute Paper Pumpkin box! Always sign up or skip a month if you want by the 10th of any month.

As a special gift to my Mailing List subscribers, every year before the holidays I send out my “12 Weeks of Christmas” newsletters, with one new holiday project each week leading up to Christmas. These are ONLY for my subscribers and you won’t find them on my blog or anywhere else. We just finished this year’s “12 Weeks” right before Christmas!

If you are on my blog, you will see a red sign-up box in the top right corner where you can simply put your name (or first name) and best email. If you are on your phone, you probably need to scroll way down to get to the sidebar things. OR you can go to my sign-up page HERE.

When you sign up, you will receive an email with a link to a free gift from me!

I hope you will enjoy the card and project ideas I send out in my weekly newsletter. Even if you never make the project, maybe just seeing ideas will do your crafty heart good! I know it does mine! I’m all about the creative ideas!!

Let’s stay connected and in touch with each other over our favorite thing to talk about…..stamping with Stampin’ Up!

Last Minute Christmas Gift Wrap Ideas

Gift Wrap Ideas

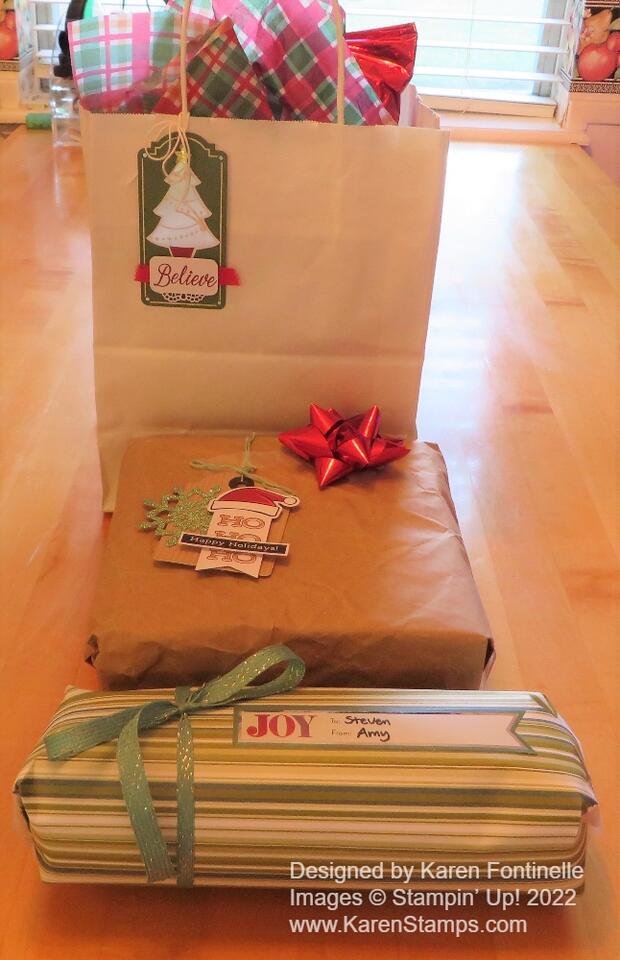
It’s Christmas Eve and if you don’t have your packages wrapped yet or ran out of wrapping paper, you might need these last-minute Christmas gift wrap ideas! I was afraid we might run out of wrapping paper so I did several presents without the fancy stuff just in case!

For the first one, I just used a plain white shopping bag, tied on a nice tag from either a Paper Pumpkin Kit or a Stampin’ Up! Kit from a previous Christmas. So handy to have those gift tags already made up! Put that on your summertime list and you’ll be ready! I just tied on a nice tag and with the colored tissue paper inside the bag it looks great!

I started out thinking I should use some of the brown paper we have from Amazon and other packages. One Etsy gal I have ordered from wraps her customers’ purchases in this paper and ties yarn around! Such a nice presentation, especially for a purchase! I didn’t have yarn handy, but I just added, again, one of my fancy Stampin’ Up! tags I already had ready and a stick-on bow! It’s fine!

Then late last night my daughter came out with one of her wrapped gifts. She used some of my retired designer paper taking up space in her bedroom and tied some retired ribbon around it! She was thrilled that it was such a pretty package!

Hope these last-minute ideas help you if you need it! But you probably have had all your packages wrapped since December 1st!

Merry Christmas! Stay warm!

A Gift Idea! Paper Pumpkin!

Paper Pumpkin Kit December 2022 Good Things

If you are not familiar with Paper Pumpkin by Stampin’ Up!, it is a monthly subscription papercrafting kit that comes in the mail to you! Every month you get this cute box with all the supplies you need, including adhesive, to make the project for that month. Mostly the kits are cards, but they can be little treat boxes or a home decor item, a small album, gift card holders, special projects for holidays….almost anything! With the first kit, you receive a special acrylic block on which to mount your stamps that come in a set in the kit. You can always watch a video, plus read the directions to make each project. And if you want to, Paper Pumpkin always gives you alternative ideas for using the materials in the kit.

Paper Pumpkin Kits are good for the new crafter, for a crafter who doesn’t want to buy a lot of supplies, and even an experienced crafter who just wants to sit down and enjoy making a project without coming up with the idea herself! It’s also fun to do with friends, family members, and grandchildren! Anyone!

This is the December Kit which has already been sent out but you can watch this video and see how a kit comes and how a video shows you everything you need to know to make your project.

Order one for yourself as a monthly subscription HERE OR if you are giving it as a gift, go to the Stampin’ Up! Online Store and check under Paper Pumpkin – Prepaid Subscription. You can choose the length of the subscription from one, three, six, or 12-month subscription. You’ll get an email with all the information on how to set up your account, which you could then give to the recipient if you were buying this as a gift. They can set up their account with their information and it’s already paid for!

The next kit must be signed up for by January 10th. It is called “Key to My Heart” and will have a “love” theme to it which you can use for Valentine’s Day or any occasion! It will ship out mid-January and it will show up in the recipient’s mailbox!

So check out Paper Pumpkin as a treat for yourself or a great gift for someone!

Christmas Tree Triangle Box in Neutral

Christmas Tree Triangle Box in Neutral

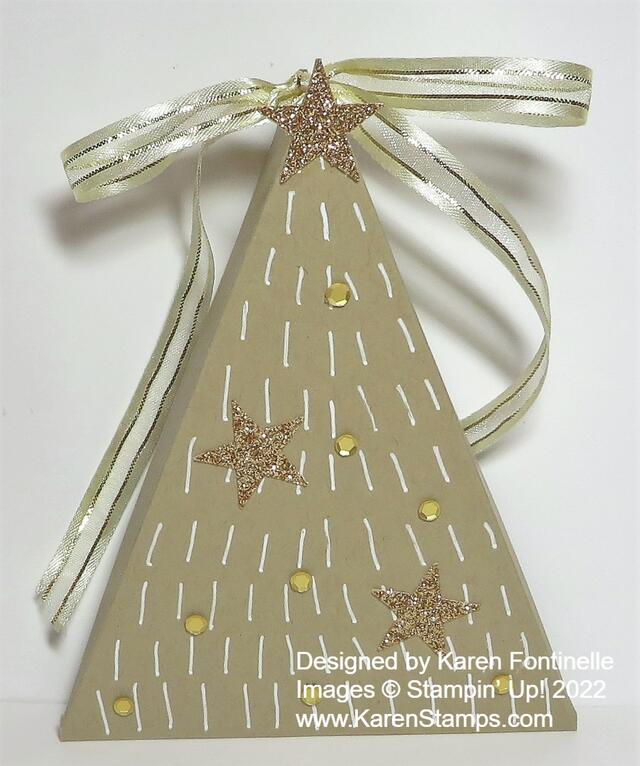
It’s time to be wrapping packages this close to Christmas! If you need something cute for a small gift or treat, this easy triangle box might be just the thing for you! I’ve made a lot of them and they really are easy. Then you decorate however you like.

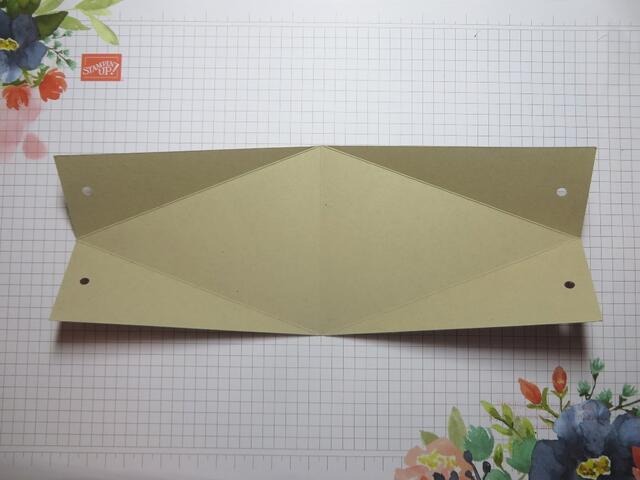
These are the basic instructions for how to make a Triangle Box:

  • Cut card stock in half lengthwise:  4 1/4″ x 11″
  • Score at 5 1/2″.
  • Mark the center of the strip on both ends at 2 1/8″ with a pencil mark.
  • Score with the Paper Trimmer at an angle, putting that center pencil mark on the track on the Paper Trimmer while also lining up the middle score line on that track.
  • Score both sides of the paper and both ends of the paper. That will make two triangles, one on each half of the paper.
  • Fold all the score lines and put the box together.
  • At the top point of the box punch holes for the ribbon to go through.
Christmas Tree Triangle Box scored

Somewhere I saw an idea like this: using a neutral color and a white pen to make the triangle box look like a Christmas tree. Of course, I couldn’t find it again, but I’m happy with my own version!

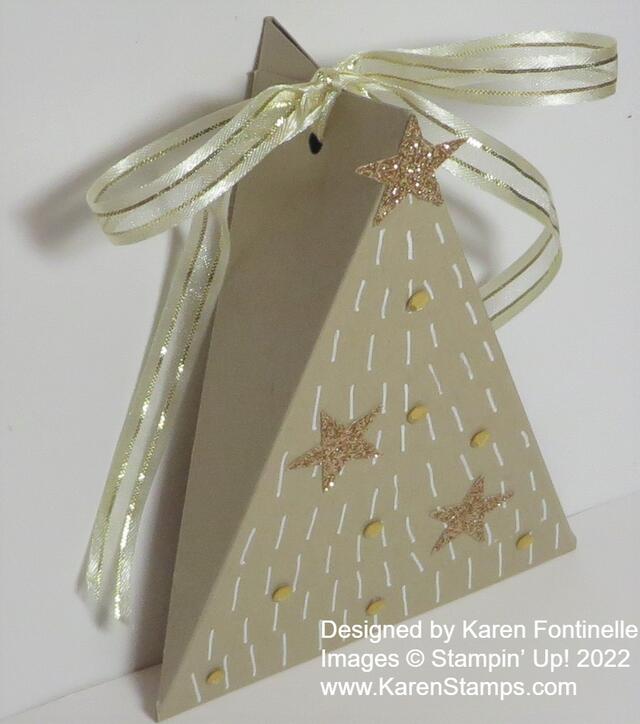
I chose Crumb Cake Cardstock for the neutral-colored tree. Before assembling, I just drew little white lines with a white gel pen to make it look like tree needles, I suppose. To tie the top closed I used a Gold & Vanilla 3/8″ Satin Edged Ribbon.

For the top of the tree, I found a retired star punch and some retired gold glitter paper (you could use Gold Foil Sheets, too). I punched a couple of extra gold stars and decided to use them on the front of the tree. It still needed a little more, so I used the Adhesive Backed Season Sequins in gold to fill in the tree.

Now the triangle box is ready to put a gift or treat inside and then tie up the bow at the top! Try one and see how easy it is! You could emboss the cardstock before assembling it if you like. Decorate one for any occasion!

Christmas tree triangle box

Framed & Festive Painted Christmas Cards

Framed & Festive Painted Christmas Cards

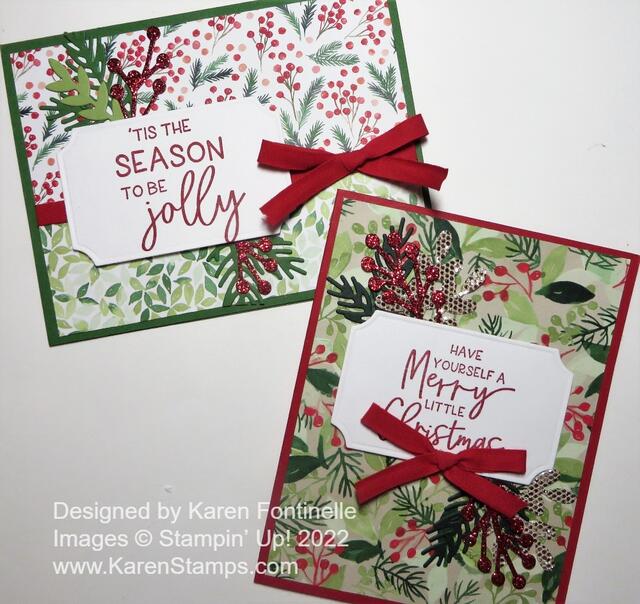
If you are looking for some more fairly easy ideas for Christmas cards, these Framed & Festive Painted Christmas Cards might be the ones. You can make yours even easier by leaving off the diecut greenery and berries. How about just designer paper, a greeting, and some ribbon?

This is the Painted Christmas Designer Series Paper. It was around last year and was carried over this year which I was happy about! I still had some from last year so I was happy to have another chance to use it, and I did use it a lot. I think I only have a little bit of paper left! It is on the Last Chance Sale so you can grab some at a bargain price! I especially loved the two patterns of paper I used on these two cards.

Both greetings are in the Framed & Festive Stamp Set. I loved using these this season. Stampin’ Up! released this stamp set in the Fitting Florets Collection, but this stamp set will not continue on into the Spring Mini Catalog. I loved the font of the greetings and they were ones I would actually use on my Chritsmas cards, either on the card front or maybe inside the card. If you want this stamp set, be sure to get it by January 4th.

The top card has a Garden Green card base. I had to use two patterns of designer paper because I only had this one strip with the evergreens and red berries left, not enough for a full card so I used another pattern for the bottom portion. I used this Real Red Ribbon (retired) to cover up that seam of the two papers, plus for decoration.

The greeting is stamped in Real Red ink and diecut with a one in the Painted Labels Dies. It almost looks like the die is too small for this greeting but it does actually fit.

The second card has a Real Red card base and uses a full front layer of designer paper. I just added a bow to the bottom of the greeting. The greetings are popped up on Stampin’ Dimensionals on both cards.

Now if you have time and energy, use whatever dies or punches you have to cut out some greenery and maybe some Red Glimmer Paper berries! I used the leafy dies in the Christmas Banner Dies and the berry die is in the Organic Beauty Dies. Just stick a few in under the greeting. On the second card, I used that really sparkly paper from the previous Sale-A-Bration! You can’t get any more sparkly than that paper!

It does take a little bit of time to die-cut that greenery and berries so if you are down to the wire (as I am!), just skip that part and make the cards without it!

Snowman Magic Christmas Card

Snowman Magic Christmas Card

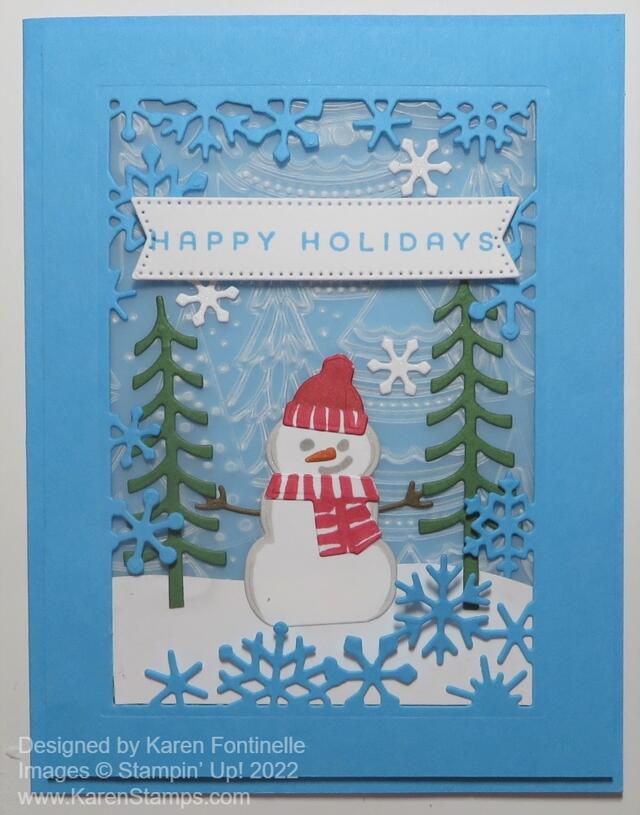
Back in July, I saw a card on the Stampin’ Pretty blog by Mary Fish using the Snowman Magic Bundle and I just loved it! I didn’t even own this Bundle so after a while I order just the Snowman Dies. At any moment, I was going to copy Mary’s card, but it didn’t happen until now! I guess it’s now or never now that it is just a week until Christmas.

My card isn’t “exactly” like hers because I didn’t buy the stamp set and I used a different background. But it is pretty close! I used Tahitian Tide for this card. It’s one of the “new” In Colors that came out in the Annual Catalog. Such a pretty blue to use with a snow scene!

It has turned cold here in Houston and will get even colder for Christmas so I’m hoping for snow, but I don’t think my wish will come true! It did snow many years ago here on Christmas Eve and we went out and played in the snow a bit on Christmas morning! I even made a tiny snowman that I kept in the freezer for months! It probably wasn’t much bigger than the snowman on this card!

Even without the Snowman Magic Stamp Set, I knew I could use the diecut snowman and make him look okay! I added a bit of the Light Gray Granite Stampin’ Blend on the edges of the snowman plus diecut the scarf and hat and added my own stripes and color with the Dark Real Red Stampin’ Blend. The snowman carrot nose is the smallest thing I have ever seen as a diecut! I just colored it with the Pumpkin Pie Stampin’ Blend and somehow managed to glue it down on the snowman’s face. Then I drew in the eyes and mouth with the Gray Granite marker. The arms are the next smallest things I’ve ever die cut! I had a brown scrap of cardstock handy.

The frame of snowflakes is a diecut that does all that work for you! Before adhering to the card base, I embossed a piece of vellum using the Whimsical Woodland 3D Embossing Folder. You can see the trees in the background. I also diecut the two green trees on each side of the snowman and three white snowflakes that I added.

I adhered the vellum to the back of this frame piece and since the snowflakes aren’t adhered except to the edges, I just cut a piece of snow for the base by hand and slipped it down into the frame. The snowman and trees are adhered flat to the vellum. Just slip them in where you want them. Then adhere the whole thing with Stampin’ Dimensionals to the card base.

The greeting is stamped in Tahitian Tide ink and die cut with a narrow banner shape in the Stylish Shapes Dies. It is popped up on Dimensionals also.

This was a fun card to make, maybe a little too much for multiples, but there are many things you can do creatively with this set of dies!

Make Your Own Stamped Gift Wrap

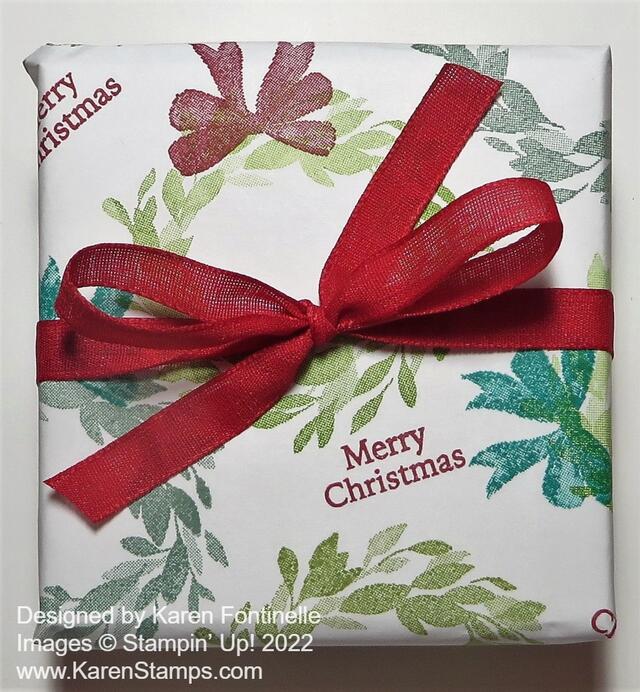
Cottage Wreath Stamped Gift Wrapped Package

It’s that time of year! Time for wrapping presents! But what if you run out of store-bought wrapping paper? Or do you only have Christmas wrapping paper and you need to wrap a birthday gift? Just stamp your own paper! Now, this may only work for small gifts, although if you have some of that brown paper they use inside boxes to protect something being mailed you might be able to use that for larger packages. Anyway, keep this idea in mind for someday when you might need it!

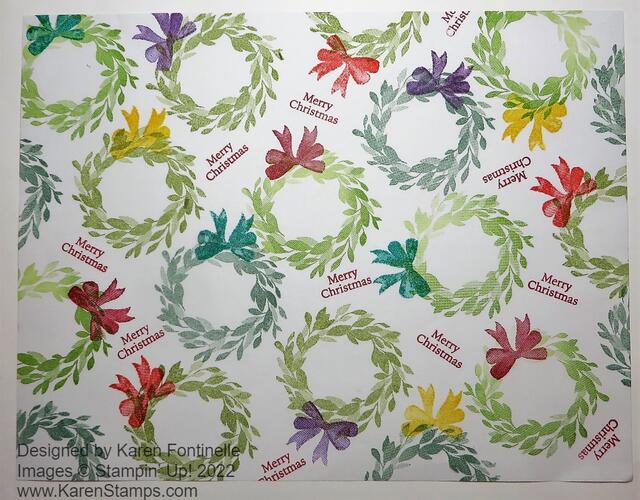
I just used a sheet of computer paper to make the beautiful Cottage Wreath gift wrap in the photo above. You could also use cardstock, but it would be heavier and possibly not as easy to wrap around something. This is actually a fun thing to do because random stamping is fun!

I just stamped one of the wreaths in the Cottage Wreaths Stamp Set randomly on the computer paper. I happened to use three different colors of green ink for fun – Granny Apple Green, Soft Succulent, and Pear Pizzazz. Then I stamped the bows on the wreaths in different colors, too – Real Red, Gorgeous Grape, Bermuda Bay, and Daffodil Delight. For the finishing touch, I stamped the “Merry Christmas” greeting in the stamp set in between some of the wreaths. I think it turned out pretty cute! You could make your own gift wrap with almost any of your stamp sets, even words, actually.

I was going to wrap an empty box just to show what my new wrapping paper looked like, but then I thought, I have a ton of family gifts to wrap, I should wrap a REAL gift! So this is a real gift going to my daughter with my homemade gift wrap. I tied on some Real Red Ribbon in a bow and now I have one gift wrapped! I could actually make a tag out of a stamped or diecut wreath that would be cute also.

Cottage Wreath Stamped Gift Wrapped Package

Whether or not you need wrapping paper, just for fun stamp a sheet of your own gift wrap! It’s good for the soul! Make it for Christmas, a birthday, or something crazy! It’s a good way to get even more uses out of your stamps!

FREE SHIPPING TODAY ONLY!

Time for you to stock up and save on your favorite Stampin’ Up! products! What’s the big occasion? TODAY, December 15, 2022 only, Stampin’ Up! is offering FREE shipping on orders subtotalling $75 USD | $100 CAD or more. This incredible deal lasts for 24 hours only, so head over to the Stampin’ Up! Online Store now and go crazy!

Think about the Last Chance List and the Clearance Rack!

ORDERING INFORMATION:

  • All order types qualify for this promotion (customer, demonstrator, workshop, and online).
  • Free shipping applies after the qualifying amount (per market) has been met.
  • The minimum qualifying amount to receive free shipping is $75 USD | $100 CAD or more (before tax).
  • If you are using a coupon code or product credit, please remember that they are non-commissionable and will lower the order’s retail amount. The order must still meet the qualifying threshold to be eligible for free shipping.
  • Free shipping only applies during the 24-hour period the promotion is live in each market; this means that the order must be opened and closed on 15 December 2022.
  • With the exception of month-to-month Paper Pumpkin subscriptions, all Stampin’ Up! products qualify for the promotion. Subscriptions billed and shipped this month will be charged for the normal amount ($23.50 USD | $32.50 CAD shipping included) + tax.
  • Prepaid Paper Pumpkin subscriptions are eligible for FREE shipping under the same rules as all other Stampin’ Up! items during the promotion.
  • The free shipping promotion does not cover the additional cost for expedited shipping.
  • **Due to increased shipping times and possible shipping delays during the month of December, we can’t guarantee delivery before Christmas.

This sale begins at 12:00 a.m. and ends at 11:59 p.m (MT) on December 15, 2022

We all LOVE Free Shipping! Have fun!

SHOP HERE!

Warm Welcome Christmas Presents Card

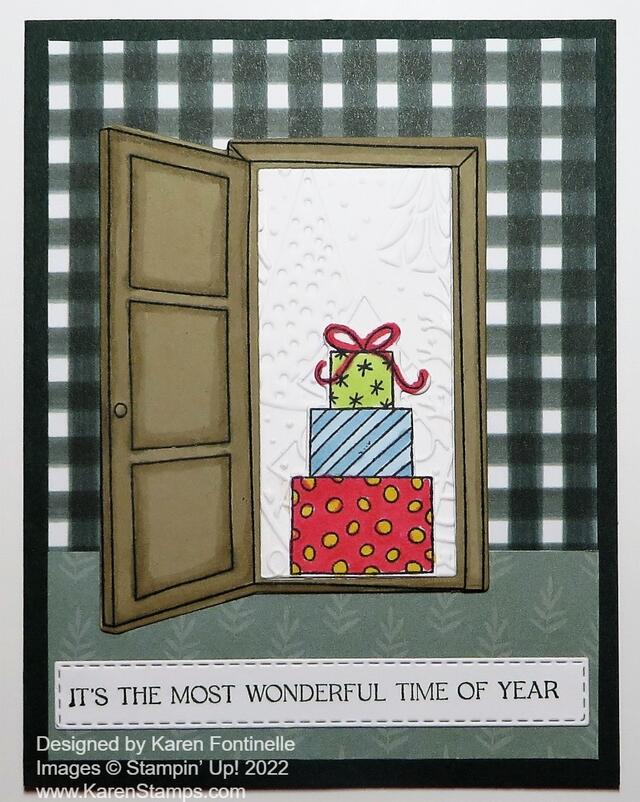
This is a fun card to make for the holidays! This Warm Welcome Stamp Set and Dies, in the Warm Welcome Bundle, make it easy to make this special card. Who wouldn’t love a stack of Christmas presents right outside your door?!

This Warm Welcome Bundle is coming in the Spring Mini Catalog BUT it was released early for a special online Stampin’ Up! event. So we’ve had a little bit of time to play with it. There are a lot of things you can do with a stamp set and dies like these!

To make this card, I started with a card base of Evening Evergreen, one of the current In Colors. The plaid paper to look kind of like the wallpaper inside this house is from the Fitting Florets Designer Series Paper. The bottom pattern of the designer paper is to look like carpeting or flooring, also in the Fitting Florets DSP.

To get the doorway scene, I die-cut the doorway out of Crumb Cake Cardstock. The die cuts out the doorway piece if you want. Then I used that same die to cut out a piece of Basic White Cardstock. I embossed this Basic White piece using the Whimsical Woodland 3D Embossing Folder. You can buy it at 60% off now on the Last Chance Sale. I love the scene that this embossing folder creates. I added a little shading with Stampin’ Blends on the door and frame. I didn’t have to but I love those Blends!

After adhering the door to the card front, I adhered that white embossed piece inside the doorway to look like the snow-covered mountains outside in the distance! The packages are stamped and diecut, then colored with a few Stampin’ Blends.

The greeting is stamped with Evening Evergreen ink on Basic White Cardstock and diecut. I used one of the Stitched Rectangles but had to use that trick to make it longer to fit the greeting. I don’t know how to explain it but you can find it online. You roll the die through only part of the way, then remove the die but position it farther down the greeting while letting the other end nest back into the part that was already die cut so it is still lined up perfectly.

That’s all there is to this card! On the inside I added a Basic White layer and stamped a greeting on it. Now the card is ready to go!

Don’t forget on Thursday will be the FREE SHIPPING DEAL for one day only, with a $75 or more order! Don’t miss it!

Free Shipping Dec 15 2022 (1)

FREE SHIPPING! Thursday, Dec. 15th!

Free Shipping Dec 15 2022 (1)

Time for you to stock up and save on your favorite Stampin’ Up! products! What’s the big occasion? On December 15, 2022 only, Stampin’ Up! is offering FREE shipping on orders subtotalling $75 USD | $100 CAD or more. This incredible deal lasts for 24 hours only, so head over to the Stampin’ Up! Online Store on Thursday and go crazy!

Think about the Last Chance List and the Clearance Rack!

ORDERING INFORMATION:

  • All order types qualify for this promotion (customer, demonstrator, workshop, and online).
  • Free shipping applies after the qualifying amount (per market) has been met.
  • The minimum qualifying amount to receive free shipping is $75 USD | $100 CAD or more (before tax).
  • If you are using a coupon code or product credit, please remember that they are non-commissionable and will lower the order’s retail amount. The order must still meet the qualifying threshold to be eligible for free shipping.
  • Free shipping only applies during the 24-hour period the promotion is live in each market; this means that the order must be opened and closed on 15 December 2022.
  • With the exception of month-to-month Paper Pumpkin subscriptions, all Stampin’ Up! products qualify for the promotion. Subscriptions billed and shipped this month will be charged for the normal amount ($23.50 USD | $32.50 CAD shipping included) + tax.
  • Prepaid Paper Pumpkin subscriptions are eligible for FREE shipping under the same rules as all other Stampin’ Up! items during the promotion.
  • The free shipping promotion does not cover the additional cost for expedited shipping.
  • **Due to increased shipping times and possible shipping delays during the month of December, we can’t guarantee delivery before Christmas.

This sale begins at 12:00 a.m. and ends at 11:59 p.m (MT) on December 15, 2022

We all LOVE Free Shipping! Have fun!

SHOP HERE!

Chocolate Christmas Candy Treat Holders

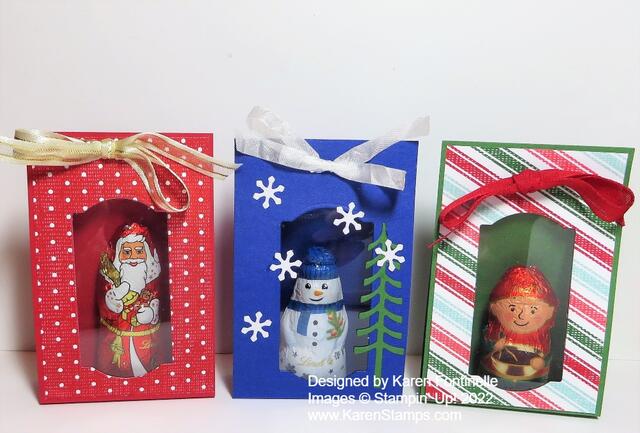
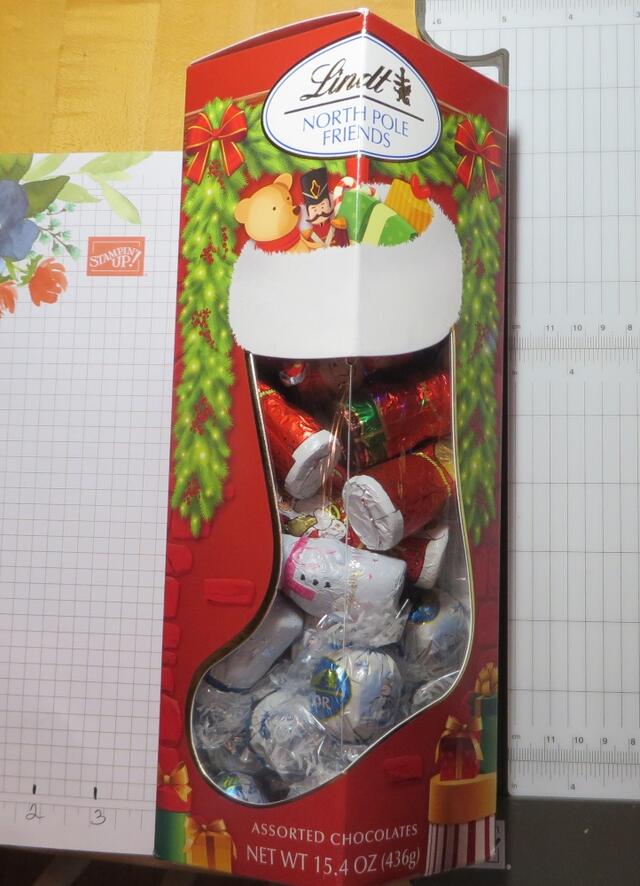
These are the cutest little candy holders that you can make for stocking stuffers or table decorations! And they are easy to make, too! Check out the Christmas candy at the grocery store and see what you can find. I bought this box with these Christmas figures probably at Costco. I knew it might come in handy for “craft supplies”!

To make these, just cut a strip of cardstock at 2 1/2″ x 8 1/2″. Depending on your candy, you might need to vary that measurement but it worked fine for my little candies! Then score at 3 3/4″ and 4 3/4″, or just score 3 3/4″ from one end, turn the paper, and score at 3 3/4″ from the other end. That leaves space inside the treat holder about one inch wide to hold the candy. Instead of these candy figures, you could use a small cello bag of assorted candies and in that instance, maybe you need to make that inside space a bit wider.

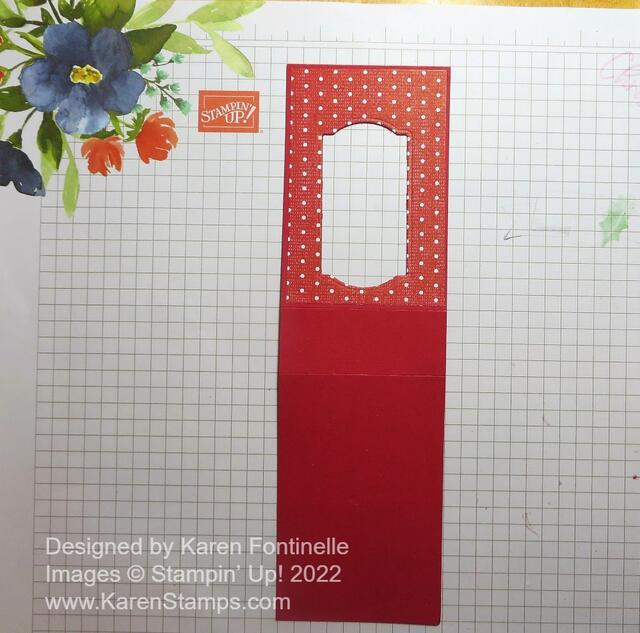
If you want to make a window on the front, (Of course you do!!) just choose a punch or die that will fit your project. For mine, I used one of the Painted Labels Dies. You could also use a punch of some kind. Just make sure that your candy will show through the hole as you like. If you want to decorate with designer paper, as I did with the Sweetest Candy Designer Series Paper, cut that to fit on the treat holder front BEFORE you cut the hole in the cardstock. If you adhere the DSP first, then you don’t have to worry about matching the two openings.

Chocolate Christmas Candy Treat Holder

It might be helpful to adhere a window sheet on the inside to keep the candy safe inside. You may have “official” Window Sheets in your stash or you may find a piece of scrap plastic around the house. I just cut it large enough to cover that window and applied Stampin’ Seal around the edges of the opening. I think the window sheet makes it look quite professional!


Put the candy inside, and to hold it in place, use a few Glue Dots but be very careful not to get any glue in contact with the chocolate. No one wants to eat a Glue dot! I stuck about two or three on the back of the candy figures, but you could also use one on the bottom of the figure.

Once the candy is in place, hold the top together and punch two holes for the ribbon with whatever punch you have. Use your favorite ribbon to tie it closed.

For the snowman treat holder, I added some die-cut snowflakes using the Snowman Dies. Since I had a scrap of White Glimmer Paper I used that for the snowflakes. When I spotted the tree in the die set I cut one out of a scrap of green cardstock I had and adhered that on the side of the snowman. You can decorate these little things however you like! You could add a small greeting or add some jewels or sequins for some bling!

Here are some Easter treats I made almost the same way.

These little Chocolate Christmas Candy Treat Holders are quick and easy to make and will make a fun gift or treat or decoration for everyone!

My Spring Mini 2023 & Sale-A-Bration Preorder

One of the best perks of being a Stampin’ Up! Demonstrator is getting to order the new products that are coming out a month ahead of time! The reason for this isn’t just to do something special for us, the reason is so we can learn about the new products and make samples to show our customers so that YOU can order as soon as these products are available! Right now we are looking forward to (at least after we finish our Christmas cards and projects first!) getting the new Stampin’ Up! January – April 2023 Mini Catalog (I’ll usually call it the Spring Mini Catalog) PLUS Sale-A-Bration 2023! As much as we love the holiday products it’s usually refreshing to get our hands on the new spring products. A new start, a fresh start for the New Year!

I haven’t had a chance to use any of my new products because I’ve been trying to get ready for Christmas. But they are fun to have and to look at! I have taken photos of what I got so you can get a taste of what’s coming!

Spring Mini 2023 Preorder Stamp Sets

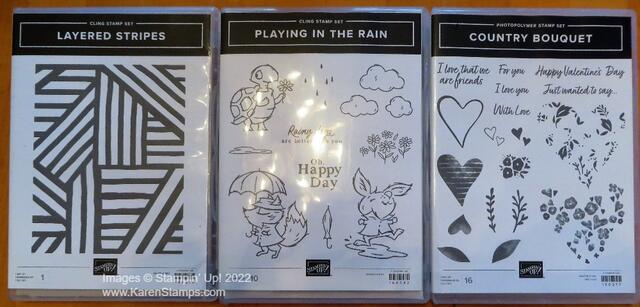
Here are the three stamp sets I chose for now. These are all in the Spring Mini. The Country Bouquet Stamp Set is part of the Country Floral Lane Suite, which I ordered, to get “all” the things!

Spring Mini Preorder 2023 Country Floral Lane DSP

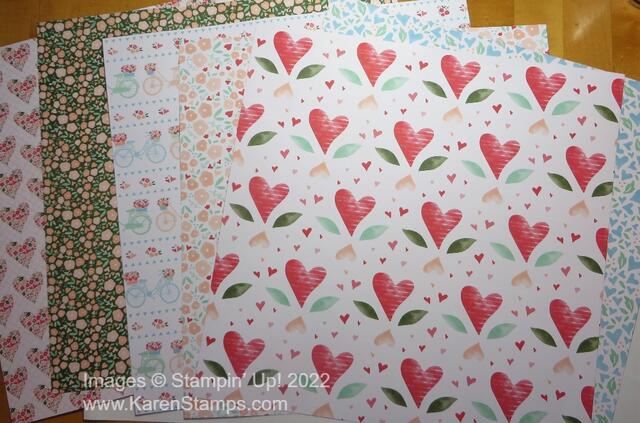
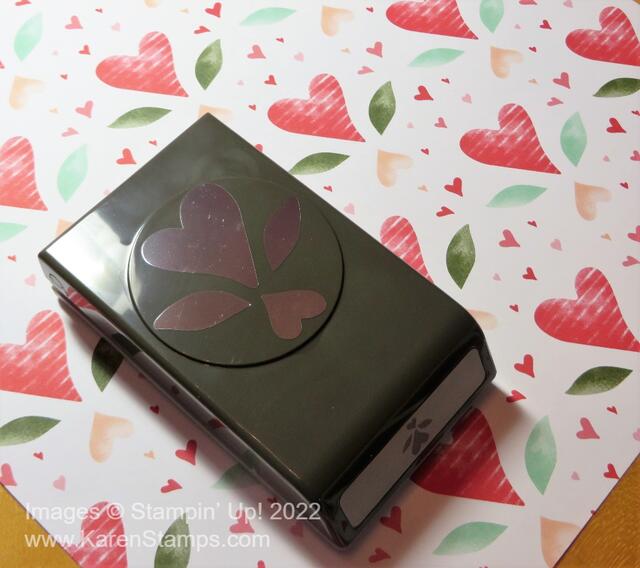
This is one of the designer papers in the Suite, the Country Floral Lane DSP. I love the hearts and leaves and I’m sure this paper and Suite will be very popular!

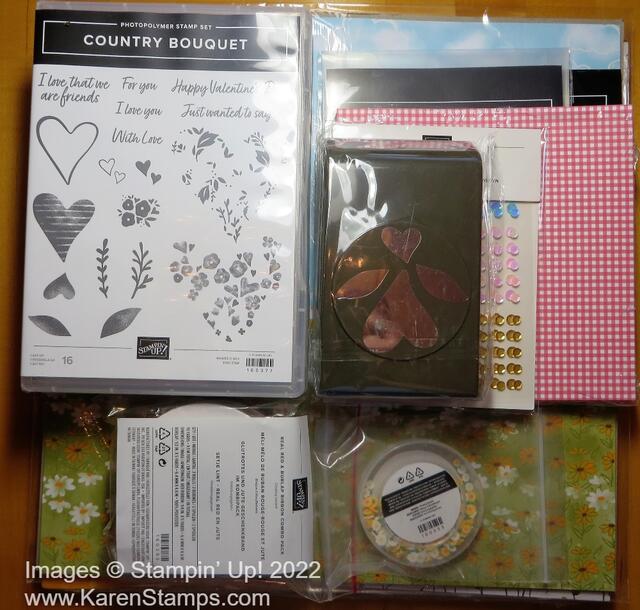
The new Country Bouquet Punch will coordinate with this designer paper pattern. Plus you can just punch this stylish heart design out of cardstock or stamped images from the stamp set.

Spring Mini 2023 Preorder Country Gingham other side

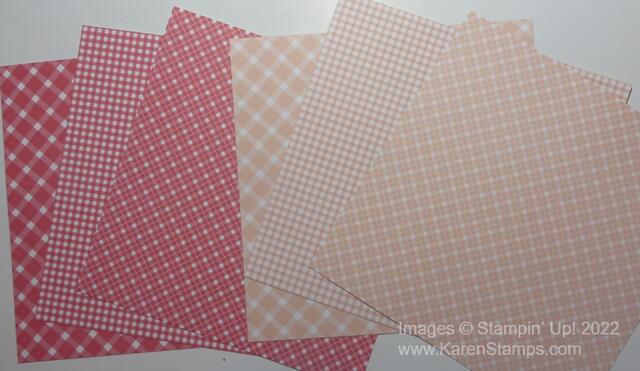
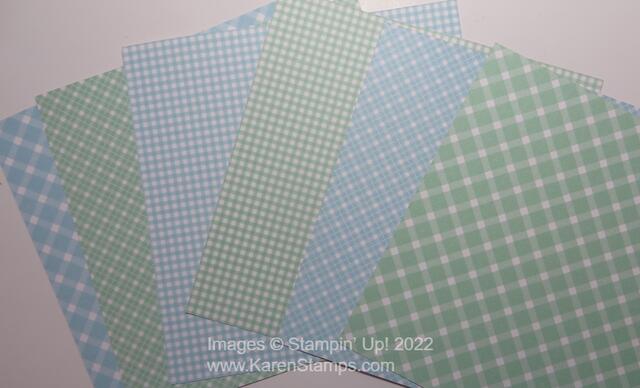
This cute Country Gingham 6″ x 6″ Designer Series Paper is another choice in the Country Floral Lane Suite.

Spring Mini 2023 Preorder Embellishments

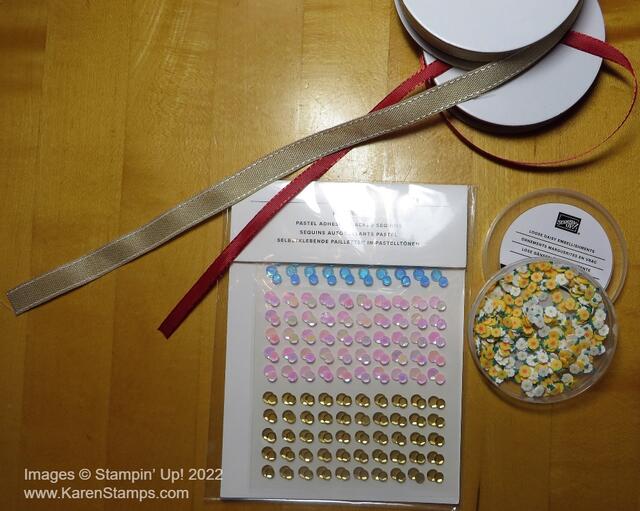
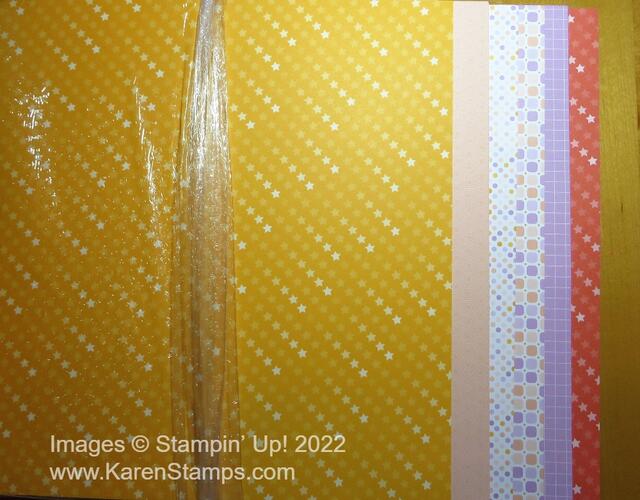
Here are some new embellishments in the Mini Catalog! It’s the Real Red & Burlap Ribbon and the Pastel Adhesive-Backed Sequins in the Country Floral Lane Suite and the Loose Daisy Embellishments in the Rain Or Shine Suite. The center stamp set in the top photo is in this Suit and comes with the Playing in the Rain Dies and the Raindrops Embossing Folder. The Rain or Shine 12″ x 12″ Specialty Designer Series Paper is so cute and has some shiny embossed areas on it which make it very interesting.

Spring Mini 2023 Preorder Dandy Designs DSP Saleabration

And then we have some things I earned as Sale-A-Bration rewards. If you are new to Stampin’ Up!, Sale-A-Bration is an annual special event where for every $50 in products you buy, you can choose a FREE Sale-A-Bration product in the special Sale-A-Bration Brochure. Some items, like the huge pack (48 sheets) of designer paper called Dandy Designs, is available with a $100 purchase. It is so fun to get some great stamping products for FREE!

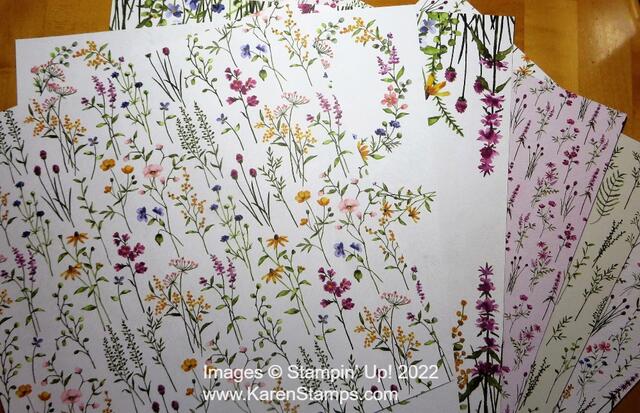
This beautiful paper, Dainty Flowers, is a free Sale-A-Bration item with a $50 purchase. One sheet has floral ovals which will be fun to use and another is like other sheets we have had where you can cut the paper into six panels and each one has pretty flowers plus white space which can easily be made into cards. This paper will coordinate with the Dainty Delight Bundle in the Mini Catalog.

I’m sure I will order more of the new Spring Mini products as time goes on, but this is what I started with! What is more fun than a new Stampin’ Up! catalog?!

Don’t forget the Last Chance Sale and there are still pretty many items on the Clearance Rack if you would like some good bargains!