Splendid Thoughts Sale-A-Bration Card and Envelope

Splendid Thoughts Sale-A-Bration Card and Envelope

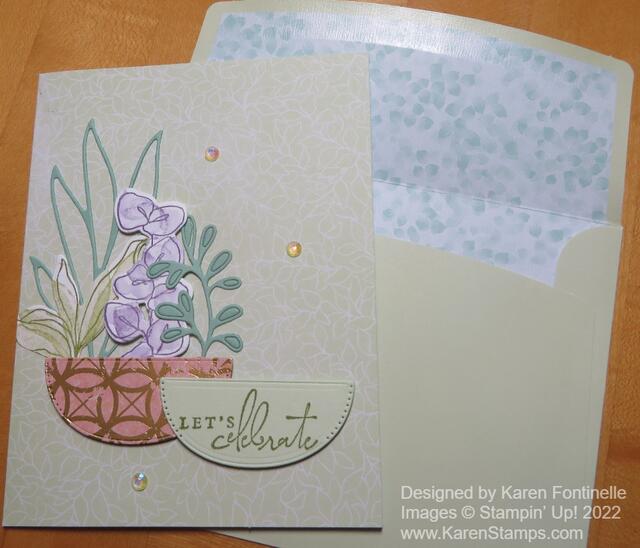
Just as I had made this card using the Sale-A-Bration Pool Party & Soft Sea Foam Cards & Envelopes I saw that Stampin’ Up! had an update that this product was SOLD OUT! Ugh!! It was a great product to have a package of card bases and decorated envelopes ready to go….for FREE! However, we can still make something similar on our own with designer paper, half a sheet of cardstock, and an envelope!

Although I used one of those card bases, you can simply use a very light designer paper background or stamp your own background on Soft Sea Foam cardstock.

I used the Splendid Thoughts Bundle in the Holiday Mini Catalog to decorate this card. The die-cut flower pot is the Texture Chic Specialty Designer Series Paper. I thought it looked fancy with the gold foil design on it plus has a little distressed look to it like a flower pot might have. The rest of the plants are all die cut with the Splendid Stems Dies. There are more dies for stems and leaves than there are stamps in the Splendid Thoughts Stamp Set so you get a lot extra with the dies! In fact, if you needed to save money, you could just purchase the dies to make the stems and leaves and cut out cardstock or do your own coloring. Be aware that the stamps that you would think would color the leaves and flowers(?) of the other stem do not line up with the outline and that’s how they are supposed to be! Maybe a more modern look? It’s fine, but just know that your stamp is not defective or that you’re not crazy!

I popped up the pot on Stampin’ Dimensionals just at the bottom so I could stick in the plants wherever I wanted from the top. I had two that I stamped and overstamped with the “coloring in” stamp and the others were simply diecut from cardstock. I cut quite a few extras so I could play and arrange them in different ways. With this set, as long as you are diecutting some of the plants, do extras and keep them on hand! Some of the stems I cut shorter to fit properly.

I already had the second half-circle die cut in my cardstock in Soft Sea Foam cardstock so I copied a sample in the catalog and stamped a greeting on it. There are very nice sentiments in this Splendid Thoughts Stamp Set. Then I used Stampin’ Dimensionals on the right side of the piece so it could overlap the flower pot and be even. I also added some Iridescent Rhinestone Basic Jewels for a little bling!

If you wanted to decorate the inside of the envelope, just stick a piece of designer paper inside and then you’ll have to trim by hand the top portion to follow the line of the envelope flap but below the glue portion….or cover the flap entirely and add your own glue to mail the envelope. Or easier, adhere the designer paper to the outside of the flap and then trim around the flap to cut off the excess designer paper. A friend I sent a card to the other day noticed and asked about the flap of the envelope I had decorated in that way!

These card bases and envelopes may not still be available during Sale-A-Bration, but you can still make cards in Soft Sea Foam and Pool Party for sure! Remember to shop in increments of $50 if you can during Sale-A-Bration so you can earn the products you want in the Sale-A-Bration Brochure! If you have a large enough order, you may be able to choose $100 level products or mix in some $50 level and a $100 level! Nice choices!

SHOP STAMPIN’ UP! TODAY!

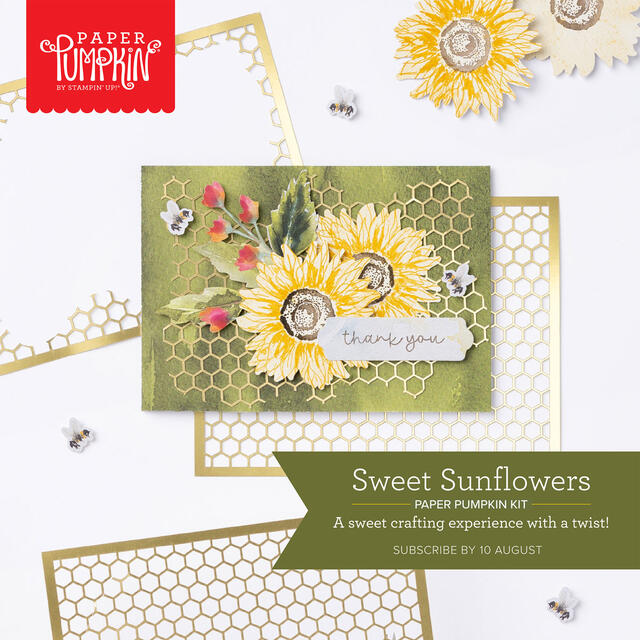
Sweet Sunflowers Paper Pumpkin Kit For August

Paper Pumpkin Kit August 2022 Sweet Sunflowers

Get the Sweet Sunflowers Paper Pumpkin Kit for a crafting experience you won’t forget! This month’s kit includes watercolor designs inspired by nature, two Classic Stampin’ Spots for a Two-Step stamping experience, and an all-new twist technique. As a bonus, this month’s kit includes a FREE gift that will add the perfect golden accent to any of your projects. Time to make smiles bloom!

ABOUT THE KIT
Name: Sweet SunflowersItem Number: 161120


This kit includes:

  • All the supplies you need to create 9 cards: 3 each of 3 designs; and coordinating envelopes.
  • An all-occasion stamp set to express words of gratitude, friendship, greetings, and beautiful wildflower-designed images.
  • Specialty Vellum honeycomb shape pre-cut pieces.
  • 2 Classic Stampin’ Spots (Crushed Curry and Soft Suede) for a Two-Step stamping experience with a twist!
  • Paper pieces and embellishments with watercolor designs and images.
  • Mini Stampin’ Dimensionals.
  • FREE GIFT: 8 Gold Foil Honeycomb Sheets

Completed card size: 5-1/2″ x 4-1/4″ 

Coordinating Stampin’ Up! colors: Blackberry Bliss, Crushed Curry, Evening Evergreen, Melon Mambo, Mossy Meadow, Night of Navy, Pumpkin Pie, Soft Suede


SUBSCRIPTION INFORMATION
Subscribe to the July Paper Pumpkin Kit between July 11 and August 10 at www.paperpumpkin.com! Note: Supplies may be limited toward the end of the subscription period.

This looks like a kit I can’t wait to get!! Even the box is so pretty!


JOIN PAPER PUMPKIN HERE!

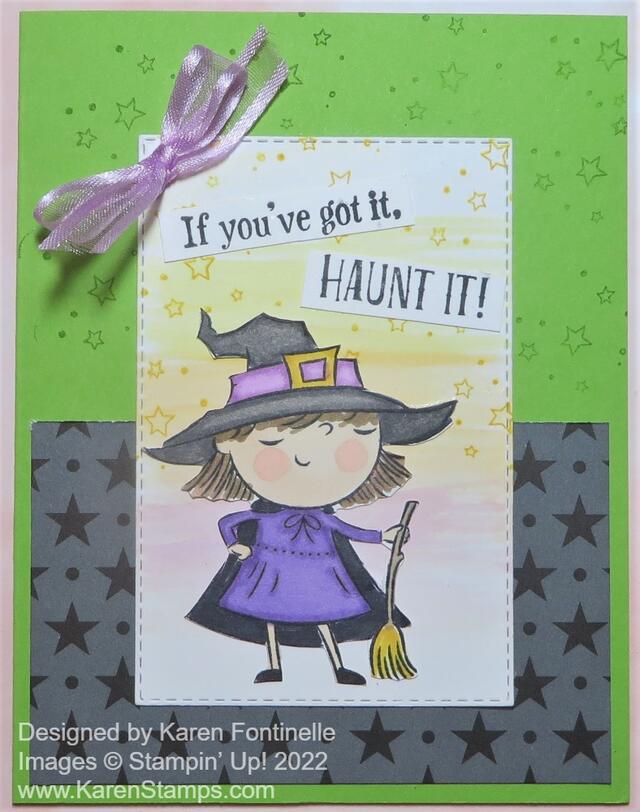
Best Witches Haunt It Halloween Card

Best Witches Haunt It Halloween Card

This Best Witches Haunt It Halloween Card is the first Halloween card of the season! It’s a little early, considering it is over 100 degrees these days here in Houston! I have to say some Halloweens here haven’t been all that much cooler either by October 31st! But weather aside, I wanted to try in my new Halloween stamp set, Best Witches and I was in the mood to color!

You’ll find the Best Witches Stamp Set in the July-December 2022 Mini Catalog or Holiday Catalog, as I like to call it (and type it!) on page 55. The stamp set has two cute witches, a toad, some stars, and some cute sayings! It’s just my kind of Halloween set!

To make this card, I used Granny Apple Green cardstock for the card base. Then I added a piece of Black & White Designs Designer Series Paper to the bottom half of the card. These will be fun papers to use for Halloween or any time. You can leave them black and white or you could color the white parts of the papers.

I stamped the witch in Memento Black and colored her in with Stampin’ Blends. I just chose whatever colors I wanted with no planning so just play and choose whatever colors you are in the mood for. I think I used Smoky Slate and Gray Granite on the witch’s hat, Daffodil Delight for the gold buckle, Fresh Freesia for the hat band, but Highland Heather for her dress. Her face is Ivory with a little pink blush on her cheeks, Petal Pink. Then I cut out the witch by hand with Paper Snips You wouldn’t have to but that was my original idea when I wasn’t quite sure what the background was going to be.

Stampin’ Up! says July is Watercolor Month so I thought I would do a little watercolor background on which to layer the witch. Since I was using Basic White which can’t handle very much water at all, I watercolored VERY lightly. I used the wide Water Painter to pick up just a little bit of ink in the lid of the ink pad with minimal water and just brushed across the paper very lightly. I used Daffodil Delight, Pumpkin Pie, and Gorgeous Grape. You can barely see it but, as I said, I didn’t want much water on the paper which could make the paper pill and look messy. Then I stamped with the small stars stamp in the Best Witches Stamp Set, in Daffodil Delight, on the background. I had also stamped at the top half of the Granny Apple Green with Granny Apple Green ink so that it would just be very light in the background to add a little interest and match the stars on the designer paper.

The Basic White paper was die cut with one of the Stitched Rectangle Dies. The witch is adhered flat on the paper although you could use Stampin’ Dimensionals to pop her up if you wanted to. The greeting is stamped in Memento Black and then cut apart just for fun. I think this would be a fun card to send to a girlfriend for Halloween! I love it! And for a finishing touch, I couldn’t resist adding a bow of Fresh Freesia ribbon in the corner. My other thought was to use Iridescent Rhinestone Jewels for a little sparkle but I did the ribbon for something different.

I love Halloween and I had so much fun making this card! It may barely be the middle of summer but you know time flies so if you enjoy Halloween, don’t hesitate to get an early start on fall. If you are having summer heat like we are, maybe making a fall or holiday card will cool you off! Certainly staying inside in the air-conditioning and stamping will keep you cool! I hope this Best Witches Haunt It Halloween Card will inspire you to think ahead a little bit to the fun days coming up!

SHOP THE HOLIDAY CATALOG ONLINE HERE!

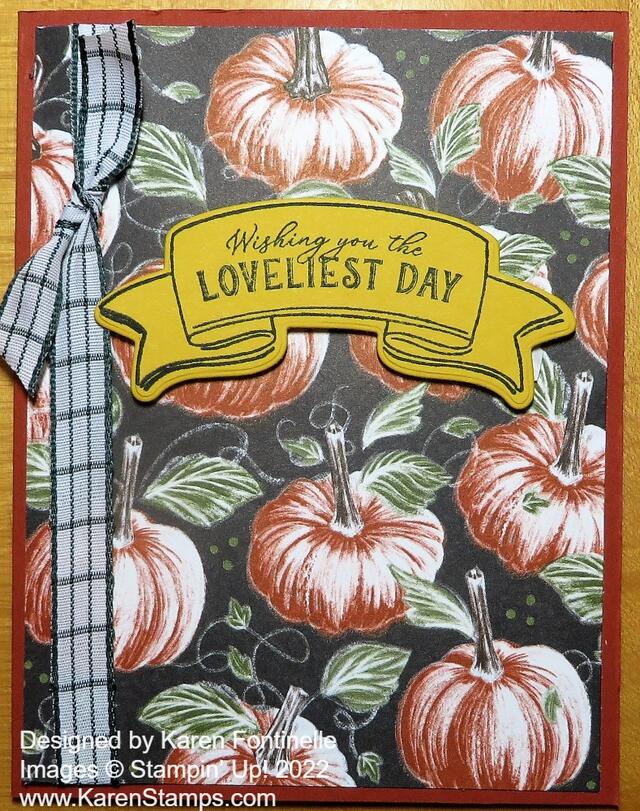
Rustic Harvest Pumpkins Card

Rustic Harvest Pumpkins Card

This photo of this Rustic Harvest Pumpkins Card really doesn’t do this designer paper justice. In real life, the beautiful pumpkins against the black background are really dramatic and elegant. You don’t often see artistic pumpkins like these!

This Rustic Harvest Designer Series Paper is really something special for fall! I could barely wait to get it in my hands to see it in person. There will be so many beautiful ways to use this paper for fall cards and projects you will be making. There is another pattern with beautifully colored fall flowers against a black background and another with fall gourds. If you love fall, you’ll want this paper.

This is a super simple card that mainly showcases the Rustic Harvest Designer Paper. The card base is Cajun Craze and I used the pumpkin designer paper as the full card front. The greeting is in the Hello Harvest Stamp Set. You can purchase this stamp set separately or along with the Rustic Pumpkin Dies in the Hello Harvest Bundle and save 10%.

I stamped the greeting on Crushed Curry cardstock and die-cut it with one of the Rustic Pumpkin Dies. It is popped up on Stampin’ Dimensionals® on the card. Before adhering the designer paper to the card base, I added a piece of the Evening Evergreen 3/8″ Windowpane Check Ribbon and tied a knot. I was just looking for a quick card and to try out the beautiful pumpkin paper! There is lots more creativity to be had with this Rustic Harvest Suite Collection on page 48 of the July-December 2022 Mini Catalog.

Remember, today, July 10th is the last day to get signed up for the July Paper Pumpkin Kit! It’s great for beginning crafters and even experienced ones! This month’s kit has a nautical theme. Join Paper Pumpkin HERE.

The July-December Mini Catalog isn’t just about Christmas! Check it out for lots of fall, Halloween, and Thanksgiving ideas! There are even stamp sets and products that you can use any time of year included in the Holiday Catalog. Not everything is about a holiday or season!

We may be in the heat of summer, but fall will soon be here (I hope!) and we’ll be in full crafting mode! Check out the Rustic Harvest Suite and see what you like!

SHOP STAMPIN’ UP!

Tomorrow: Last Day to Sign Up For Paper Pumpkin July 2022 Kit!

Paper Pumpkin July 2022 Banner 1

Isn’t the thought of sending a message in a bottle something we have all wanted to do? Now you can, (sort of), with the July 2022 Paper Pumpkin Kit! You won’t be throwing a bottle into the ocean, but it will still be fun for you and the card recipient!

“Seas” the day and set sail across the ocean with the Sending Good Thoughts Paper Pumpkin Kit! With beautifully designed nautical imagery, a fun message in a bottle motif, and sentiments that are “shore” to please, this month’s kit is full of warmth and fun.

Each kit contains enough supplies to create 9 cards—3 each of 3 daring designs—and 9 coordinating envelopes. This month’s Paper Pumpkin kit will have your loved ones feeling sand-tastic!

Stampin’ Up! also has a special game for you to play—take part in the Sea if You Know Paper Pumpkin quiz to learn more about Paper Pumpkin and this month’s kit! Plus, subscribers to the Sending Good Thoughts Paper Pumpkin Kit will be entered to win a 1-month prepaid Paper Pumpkin code!

Play the Sea if You Know Paper Pumpkin quiz and share it with your friends! Good luck! (You’ll also get a sneak peek at the August Paper Pumpkin Kit!)

HERE’S A TIP! Right now, during Sale-A-Bration, instead of signing up for the monthly subscription, purchase the 3-month Prepaid Paper Pumpkin Subscription in the Online Store, which is over $50 so you can earn a FREE Sale-A-Bration product along with your Paper Pumpkin subscription! You can still skip a month if you like. And you can add anything else to your order for stamping as you normally would! It’s just putting in a regular Stampin’ Up! order and adding a Prepaid subscription to take advantage of Sale-A-Bration! Or if you have just a few things on your order, add the 1-month subscription to maybe get you to the $50 minimum for Sale-A-Bration! Even if you already have a monthly subscription, you can add a Prepaid subscription to your order to take advantage of Sale-A-Bration! You will get a code to enter into your account and that will be used for the months you purchased, then will revert back to your monthly subscription. Let me know if you have questions!

ABOUT THE KIT

Name: Sending Good Thoughts  

This kit includes:

  • Sending Good Thoughts Photopolymer Stamp Set
  • Bermuda Bay Classic Stampin’ Spot®
  • Printed dry-embossed card bases
  • Printed envelopes
  • Printed die cuts
  • Twine
  • Mini glue dots
  • Dimensionals

Card size: 4-1/4″ x 5-1/2″

Coordinating Stampin’ Up! colors: Balmy Blue, Basic Gray, Bermuda Bay, Fresh Freesia, Pacific Point, Poppy Parade

TOMORROW, SUNDAY JULY 10TH, IS THE LAST DAY TO JOIN!

JOIN PAPER PUMPKIN TODAY!

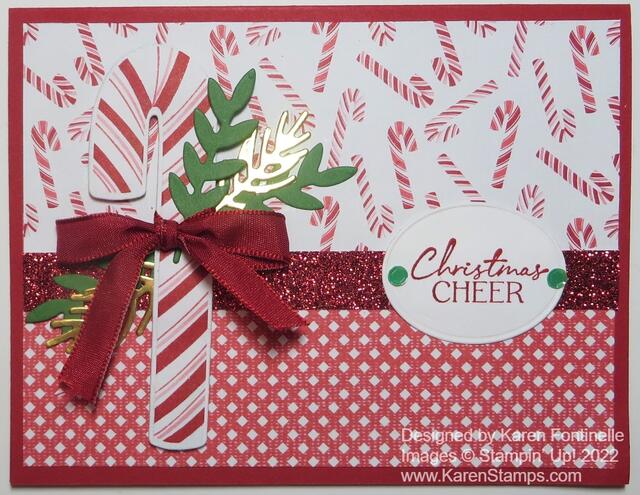
Christmas Candy Cane Card

Christmas Candy Cane Card

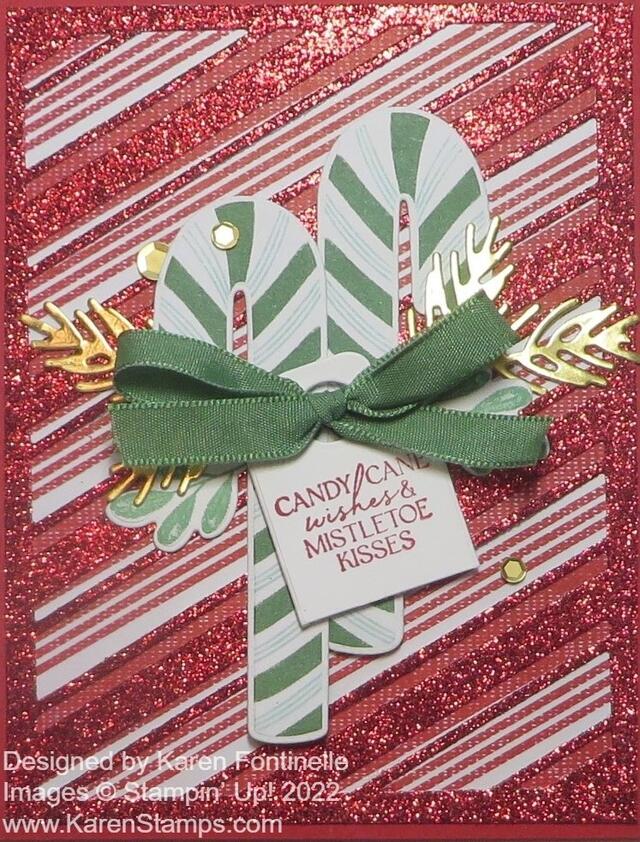
As long as I still had the paper, stamps, and dies out from yesterday’s card I decided to make another card design with all those materials. As I looked through the Sweetest Christmas Designer Series Paper, I liked this small candy cane print with this little red and white print on the backside of a candy cane stripe and that’s how this Christmas Candy Cane Card was born!

The card base is Real Red. I cut the two pieces of the designer paper to overlap a little bit. I intended to use Real Red Ribbon across the seam but I glued the paper down to the card base before I put the ribbon across. So the next best thing, maybe even better, was to use a strip of the Real Red Glimmer Paper! It really makes it festive!

To decorate the card, I die-cut one of the candy canes on the Sweetest Christmas Designer Paper from the Candy Cane Dies. You can cut it out with Paper Snips if you don’t have the dies. However, you can purchase the Sweet Candy Canes Bundle with the stamp set & dies and save 10% over buying them separately. I popped up the candy cane with Stampin’ Dimensionals and tied on a bow with the Real Red Ribbon in the Real Red and Garden Green Ribbon Combo Pack. Then I used some diecuts of leaves, Gold Foil and Garden Green, using the Christmas Banner Dies. You can decorate the candy cane as much or as little as you like.

The greeting is in the Sweet Candy Canes Stamp Set. I used the oval die in the All That Dies to cut it out. I think it fits perfectly along the glimmer band. For a finishing touch, I added two of the Adhesive-Backed Seasonal Sequins in green. They come in four different colors.

This would be a relatively easy card to make multiples of because it’s mostly designer paper. The candy cane is easy enough to cut out by hand or die-cut and the extra greenery, whether gold foil or green doesn’t need to be stamped, just diecut. Only the greeting is stamped. Even if you don’t make lots of multiples, you could make 5-10 of this same card, and little by little as you make new Christmas cards you will end up with enough to mail out to lots of friends and family!

You can get by making this card with just the package of the Sweetest Christmas Designer Series Paper, the Real Red & White Glimmer Paper, some ribbon, and a Christmas greeting (which we all have in our stash!) plus some die-cut leaves (and if you have any die cuts, you probably have some leaves or sprigs or a punch!). This Christmas Candy Cane Card is really a basic card design with two different patterns of designer paper top and bottom, a focal point, and a greeting. Here you can see some cards from a few years ago with the two patterns of designer paper and a greeting. Easy peasy!

Sweet Candy Canes Christmas Card

Sweet Candy Canes Christmas Card

My first order from the new Holiday Mini Catalog arrived yesterday, and after a busy day, I got to open it late last night. The first thing I wanted to make was this pretty Sweet Candy Canes Christmas Card that is pictured in the catalog on page 10 in the Sweetest Christmas Suite Collection. I didn’t want to try to figure out my own design at that moment since it was late, but I look forward to playing more with the paper, stamps, dies, and embellishments as soon as possible! I already had ideas dancing in my head just opening the designer paper package! I didn’t take time to look up the sample recipe for how Stampin’ Up! made this card, I just stared at the catalog page multiple times to figure out at least something close to this sample card! The sparkle is so pretty!

I started with a card base of Real Red and used the large striped die in the Candy Cane Dies to die cut the new Real Red and White 6″ x 6″ Glimmer Paper. I only used it once, but there are a lot of narrow slivers of glimmer paper that will come out of your die-cut piece. I believe that if you turn the glimmer paper over to the other side, you will be able to see the die-cut lines better and see if you got all of them out of your piece.

You can use just the die first to see how it lines up with the diagonally striped designer paper in the Sweetest Christmas Designer Series Paper to make the background look like candy cane stripes, just to get the idea. I’m not sure yet the best way to size a piece of designer paper to line up with that die, so for now I would say either cut a larger piece of designer paper than you need, adhere the glimmer paper, then trim off the excess or just adhere the die-cut glimmer paper on the large 12″ x 12″ paper and then trim. Someone will figure out a less wasteful way to get the diecut placed correctly on the designer paper!

The Candy Canes Dies work with the candy cane printed paper in the Sweetest Christmas DSP. You might want to just cut with your scissors into the candy cane you want to diecut. At that point, it really is almost easier to just cut out the candy cane with your scissors! But the dies do match and that’s what I did for this card. Just make sure you get the candy canes that face different directions if that is what you want. You can also use the stamps, inking up the whole candy cane in one color or use Stampin’ Write Markers to color multiple colors on the different stripes. I think that will be fun too to make your own custom candy canes! I adhered my candy canes flat on the card but you could pop them up on Stampin’ Dimensionals.

Next, I stamped the tag with a greeting from the Sweet Candy Canes Stamp Set. There is a die for making this tag and you can use it a couple different ways. I simply cut off the bottom half of the tag and the bow went over the hole when I adhered it to the card. The ribbon is in the new Real Red & Garden Green 3/8″ Ribbon Combo Pack in the Suite.

The small green leaves on the card sticking out from behind the tag and candy canes are stamped from the Sweet Candy Canes Stamp Set and die cut. The Gold Foil leaves are die cut with the dies in the second Bundle in the Suite on page 11 of the catalog. These are the Christmas Banner Dies. There are several leaf options you can choose from.

For a finishing touch, use a few of the Adhesive-Backed Seasonal Sequins in the Suite. These are metallic and somewhat shiny but not sparkly and come in two sizes and several colors. Since you have a lot of glimmer going on already on this card, you don’t need too much more sparkle!

I think this is going to be a useful and fun Suite to work with making Christmas cards and other projects. There are lots of sample ideas in the catalog to get us started! Soon there will be hundreds and thousands of ideas online I’m sure for using this Suite of products! Maybe you make all your cards the same, but if you like a variety, when you design and make one card you make go ahead and make several more (like 4 more) then you will have five cards that are done and ready to go. When you make the same card over and over it is faster because you are not figuring out the design each time and you can make the additional cards assembly-line style!

If you want ALL of the products on pages 8-11, just use the Sweetest Christmas Suite Collection number #159579. If you want to leave out certain items, then order each product you want separately or order extras of certain ones you want more of! You can try out this Sweet Candy Canes Christmas Card to get you started with a very lovely card to send and then come up with more of your own creative ideas or use the other samples in the Holiday Catalog for inspiration!

SHOP THE HOLIDAY CATALOG HERE!

Splendid Day Sending Hugs Card

Splendid Day Sending Hugs Card

These stamps, paper, and ribbon to make this Splendid Day Sending Hugs Card are the only new things I have at the moment from the new July-December 2022 Mini Catalog that just went live a week ago! But a box of many new things is coming in another day! I can’t wait!

The reason I have this new Splendid Day Suite is that Stampin’ Up! held a virtual stamping event for Demonstrators recently! It was only stamping, no business! We could order this Suite ahead of time so we’d have all the materials to stamp along. I didn’t get to watch it live but “any minute now” I’ll sit down and watch the recording and make my projects along with the Stampin’ Up! stampers. It sounds like so much fun! Even though I haven’t made those projects yet, I just got out the products and came up with this card.

This Suite is something unexpected, I think, in this Holiday Mini Catalog. It’s not holiday, Christmas, Halloween, Thanksgiving, or even fall. It’s just soft and pretty. While it may not have jumped onto my Favorites list the first time I saw it, I think it has lots of potential. And the Splendid Day Specialty Designer Series Paper is very gorgeous with its foil sheets and white printed accents on one side and a more generic pattern on the other side.

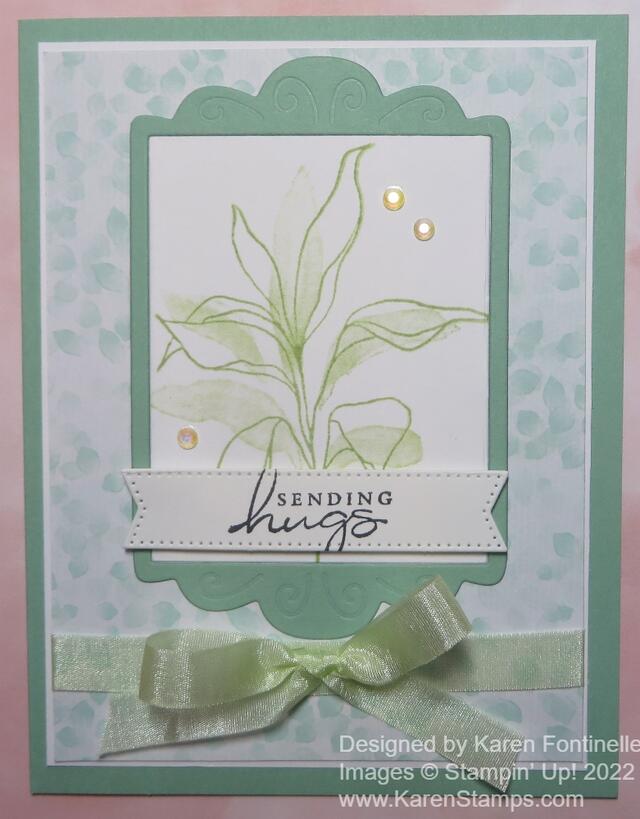
I realized I was getting my “greens” mixed up while making this card! The card base is actually Mint Macaron, but I first was thinking it was Soft Sea Foam. I originally was going to have a strip of the foil paper on the left side of the card which is actually on the other side of this dotted pattern paper. But I just didn’t feel like it was working and I really liked this dotted pattern so I scrapped the foil paper! I added a layer of Basic White under the designer paper just to help set it off a bit from the card base with just a narrow margin.

The plant image is in the Splendid Thoughts Stamp Set. I stamped the outline image of the plant in Soft Sea Foam ink. Then I stamped over it with what looks to be the solid image of the leaves to fill in the color. However, this image does not line up perfectly with the outline leaves as we usually have and that’s how it’s made to be. So it’s a little more modern stamping look. You might like it fine or you might hate that look! If you don’t care for it, then just stamp the outline leaves and color them in with whatever coloring technique you like, maybe Stampin’ Blends markers or Watercolor Pencils. Whatever. I inked up the solid leaf stamp and VERY lightly stamped it off on my Grid Paper, then stamped over the outline. So it is barely there!

I used the beautiful Fabulous Frames dies to die cut that lovely frame. I did one in Basic White to get the inner portion on which I stamped the leaves and Mint Macaron to get the actual frame. The greeting is in the Splendid Thoughts Stamp Set along with some other very nice sentiments. I stamped it in Memento ink and die cut with one of the banner dies in the Stylish Shapes Dies. It just barely fit but it worked. I didn’t want anything too wide or it would cover up too much of the plant. I popped up the greeting on Stampin’ Dimensionals®.

Before adhering the designer paper to the Basic White layer, I adhered the new Soft Sea Foam 3/8″ Seam Binding Ribbon around the designer paper, then tied a separate bow and adhered with Mini Glue Dots. This ribbon is very soft and beautiful. I think since it is so light in weight and color it wasn’t too much with the large Fabulous Frame on the card.

To jazz up the card a little bit, I added some Iridescent Rhinestones Basic Jewels for a little sparkle on the card. I think these are some of the best jewels Stampin’ Up! has had because they can pick up the colors on the card very lightly. A little bling and sparkle on a card is almost always good!

In this Suite are also some Open Leaf Trinkets in gold that you can adhere or tie on to your projects. These are very pretty and will be a great embellishment on projects.

Along with all the holiday stamp sets and products we are drawn to in the new July-December Mini Catalog, be sure to take a look at this Splendid Day Suite Collection on pages 64-65. The Splendid Stems Dies will be fun to use also. I think the colors on this Splendid Day Sending Hugs Card and the greeting are very calming and will be a great card to make and send to someone who needs a card that day.

SHOP STAMPIN’ UP! HERE!

July 4th Red White & Blue Treat Box

July 4th Red White & Blue Treat Box

Tomorrow will be July 4th and if you are looking for a little treat box or even a decoration or a card for the 4th of July, you can use this July 4th Red White & Blue Treat Box idea! It’s always fun to make a little something for every holiday!

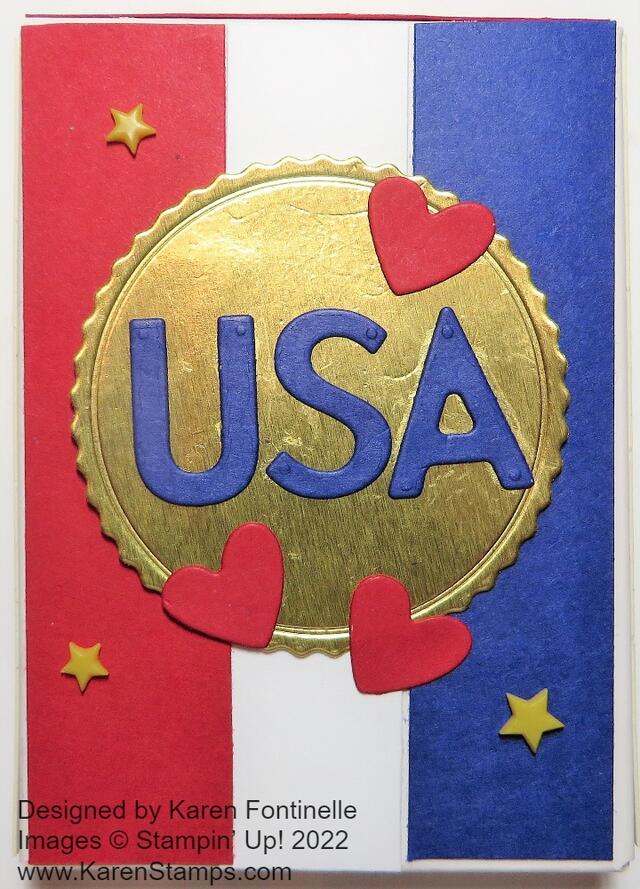
For this project, I used one of the Sweet Little Boxes (which just retired from the Spring Mini but you may have one around!). You can use whatever box you have or make one! You could make a little 2-4-6-8 bag and decorate it this way! I simply used pieces of red, white, and blue cardstock to decorate the front of the box – Real Red, Basic White, and Starry Sky.

For a decoration, I always like stars, but for this box, I die cut a gold foil circle from the All That Dies. Then I used the retired Playful Alphabet Dies to cut out the U, S, and A. The little red hearts are die cut from the Teacup Dies. And since I still had the Resin Stars from the Hey Sports Fan Suite that just retired in the Spring Mini, I added a few of the yellow stars to the front of the box.

Inside the box, you can put a cookie or piece of candy or some other little small gift. Or just use it for a decoration for the 4th of July! Or, copy the front of the box and make it into a card. Whatever you think of!

Just have fun making a little something patriotic before you go out to watch fireworks!

Happy 4th of July tomorrow!

Holiday Catalog 2022 and Sale-A-Bration Are Here Today!

July-December 2022 Mini Catalog

Today is the day we have been waiting for! Well, second most exciting day after the Stampin’ Up! Annual Catalog went live in May! Yes, the July-December 2022 Mini Catalog (known as the Holiday Catalog) is ready for shopping!! If you don’t have your own copy, now you can finally see the full catalog online! PLUS, it is also the second Sale-A-Bration of the year so you can earn a free product with every $50 purchase of current Stampin’ Up! merchandise!

Holiday Catalog PDF to View Catalog

SHOP THE HOLIDAY CATALOG HERE!

Sale-A-Bration Cover July-Dec 2022

Sale-A-Bration Brochure PDF

Sale-A-Bration first began years ago with Stampin’ Up! and used to only be once a year, starting in January. Now there are more choices in products and held twice a year! For every $50 you spend on Stampin’ Up! products you get to choose one Sale-A-Bration item FREE! There are a couple of select items that you can choose with a $100 purchase….or get two $50 items! Check out the Brochure for a free HOST product you can earn with a large order (or party) and also a free bonus product for joining Stampin’ Up! as a Demonstrator.

Watch these short product videos to get to know the new mini catalog!

Enjoy your new shopping day!! If you have any questions just email me at Karen@Karenstamps.com. The website may be quite busy today so be patient and try again a few minutes or so later if you have a problem. Hopefully, all will go smoothly!

HAPPY HOLIDAY MINI and SALE-A-BRATION DAY!

Last Chance For the Last Chance List!

Last Chance Banner 2022 Jan-June Spring Mini Info

TODAY, JUNE 30th is the LAST DAY for the

LAST CHANCE retiring products list before they all retire!

Tomorrow they will be gone!

Here are some of the projects I made with some of the remaining products that are retiring today.

Friends of the Forest Stamp Set

SHOP

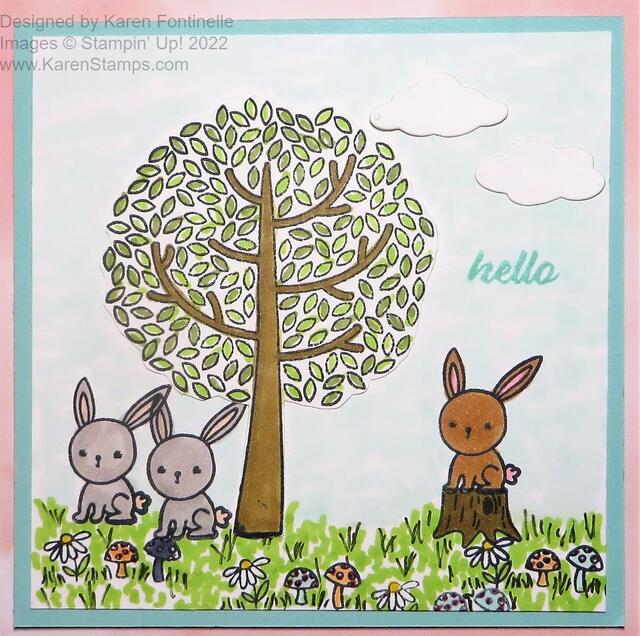
Friends of the Forest Bunnies Hello Card

Nuts & Bolts Stamp Set

SHOP

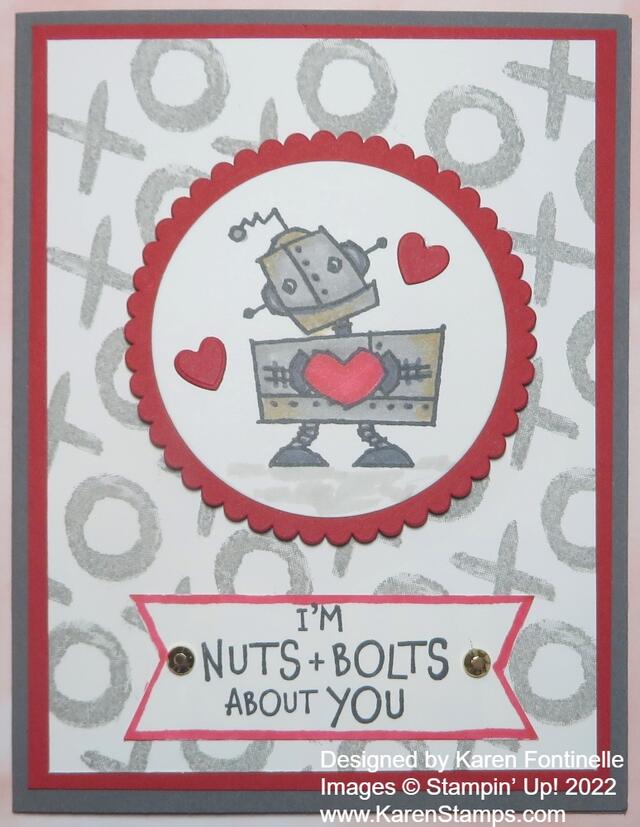
Nuts & Bolts Heart Robot Valentine

Abstract Beauty Ephemera Card

SHOP

Abstract Beauty Ephemera Card

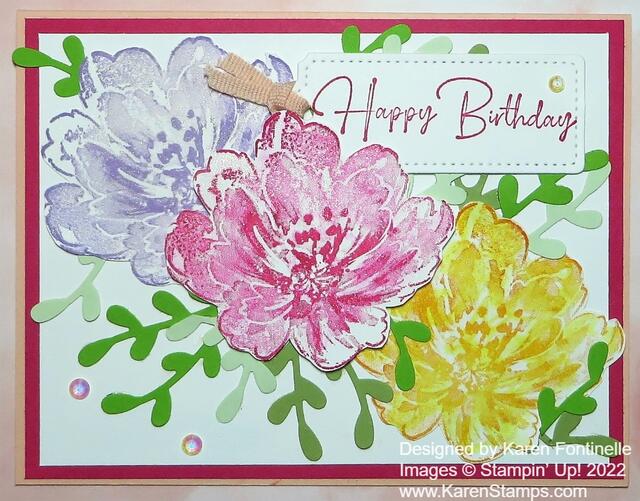
Flowing Flowers Trio Birthday Card

SHOP

Flowing Flowers Trio Birthday Card

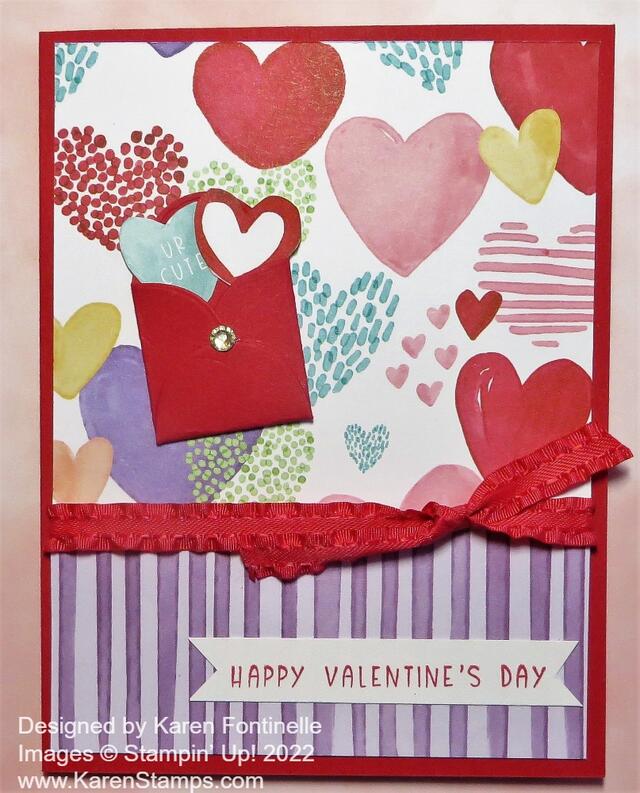
Sweet Talk Little Envelope Valentine Card

SHOP

Sweet Talk Little Envelope Valentine Card

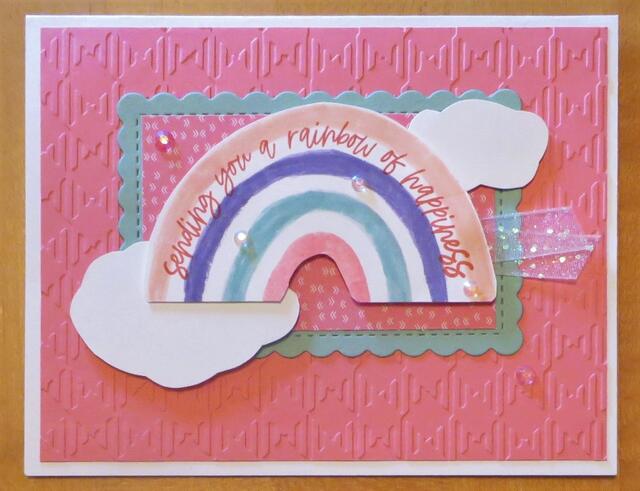
Rainbow of Happiness Card

SHOP

Rainbow of Happiness Card

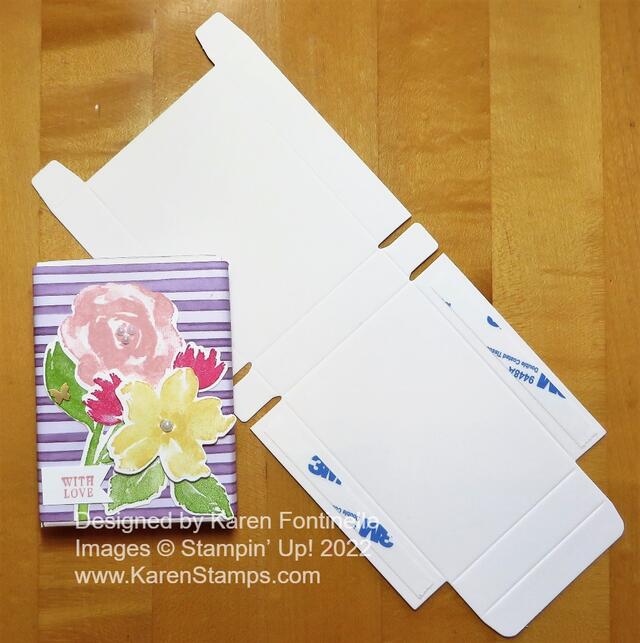
Decorated Sweet Little Box

SHOP

Decorated Sweet Little Box

These are just a few examples of the fun cards and projects you can create with some of the products that are retiring TODAY from the Spring Mini or January-June 2022 Mini Catalog.

SHOP THE LAST CHANCE SALE FOR THE LAST DAY TODAY!

Two Quick & Easy Heart & Home Cards

Heart & Home Just For You Card

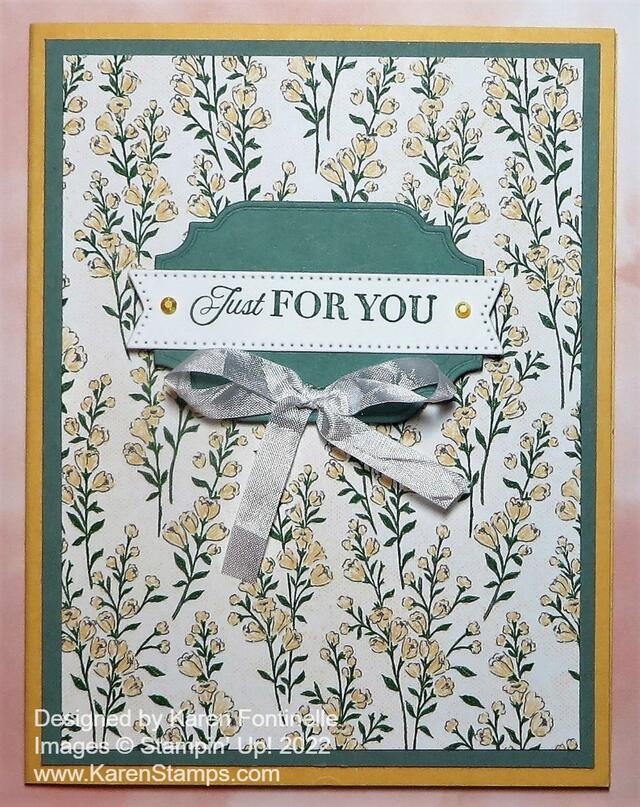
The Heart & Home Designer Series Paper is retiring on Thursday, June 30, so if you need to stock up on pretty papers you might want to consider this one and make these Two Quick & Easy Heart & Home Cards. The paper designs are pretty enough for some simple cards that you can dress up a little bit but they can just be nice, simple, rather basic cards.

The first one has a card base of Pale Papaya and a layer of Soft Succulent. You could leave off the Soft Succulent layer but sometimes I like an extra layer that helps set off the designer paper. I really like this pattern with the little Pale Papaya flowers and green stems.

For the greeting, I chose the “Just For You” from the Celebrating You Stamp Set. It is stamped in Soft Succulent ink and then die cut with the banner in the Stylish Shapes Dies. This is placed over a Soft Succulent label die cut from the All That Dies. I popped that up with Stampin’ Dimensionals and added a Whisper White 1/4″ Crinkled Seam Binding Ribbon bow at the bottom. For a little sparkle, I added two 2021-23 In Color Jewels (retired) in Pale Papaya to each end of the banner. It adds just the perfect finishing touch, I think!

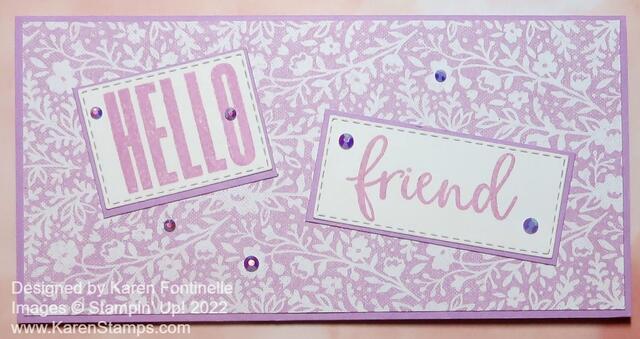
This second card is a monochromatic slimline card using a Fresh Freesia designer paper in the Heart & Home collection. Just start with a 6″ x 6″ square of cardstock and fold it in half to make a slimline card. You can certainly make it longer and wider if you like. Just layer a piece of designer paper on the card base, just slightly smaller than the card base. The words on the card are from the Biggest Wish Stamp Set. I wasn’t sure how I wanted to stamp them together or how to place them on the card. I ended up just stamping the two words in Fresh Freesia ink on Basic White and die cut with the Stitched Rectangle Dies. I layered each on a piece of Fresh Freesia cardstock. It seemed fun to just adhere the words for the greeting “cattywampus” on the card front. Of course, I had to add some bling with the Fresh Freesia colored In Color Jewels. It was hard to stop, but I think 7 jewels isn’t too much on this card!

Sometimes once you get started with a certain designer paper, you get on a roll for making cards! Use these ideas to make a stack of cards next time you have a pack of designer paper you really like but don’t need to make real fancy!

SHOP THE LAST CHANCE SALE! LAST TWO DAYS!

Last Days For the BOGO Kits Collection!

Kits Collection BOGO 50% off

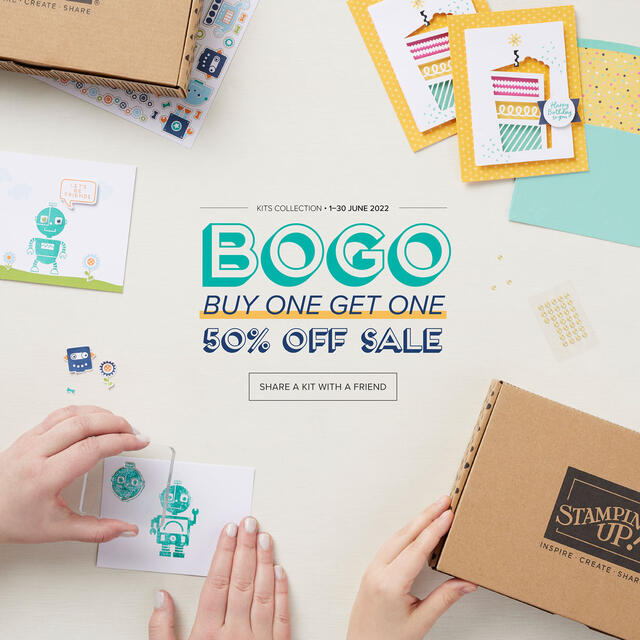
Last Few Days for the BOGO Kits Collection Promotion!

The Kits Collection has been having a Buy One, Get One 50% off promotion. This is the perfect time to share a kit from the Kits Collection with a friend or family member! Or choose two for yourself! As always, the kit selection is based on availability. You can see what’s available in the Kits Collection selection here in the Online Store

Ordering information:

  • The sale runs from June 1–30, 2022.
  • All kits in the Kits Collection by Stampin’ Up! qualify for this sale. 
  • Kit selection is based on availability.
  • You will need at least two kits in your cart for the discount to automatically apply at checkout. 
  • There are no order limits on this promotion.
  • The discount will automatically apply to the most expensive kit in your cart.

The Kits Collection are papercrafting kits (cards and crafts) sold in the Online Store. These are different from Paper Pumpkin, which is a monthly subscription to receive a surprise kit in the mail every month. Both are fun!

Thursday, June 30th is the last day to get this

Buy One, Get One 50% Off offer

with the Kits Collection at Stampin’ Up!

Don’t miss it!

True Beauty Stamped Card

True Beauty Stamped Card

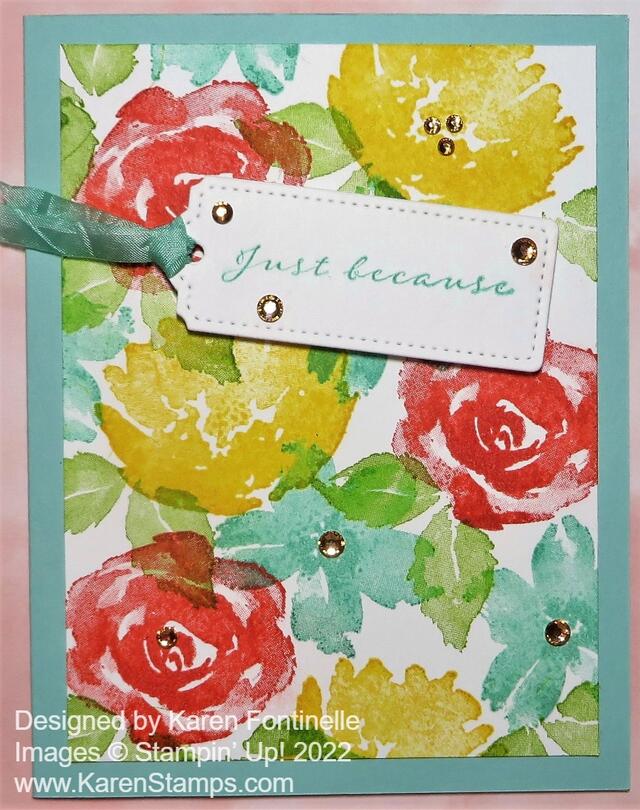
This True Beauty Stamped Card is not at all what I had in mind when I started to make a card! So you never know what you will end up creating, no matter what idea you have in your mind! And it’s okay if you don’t even have an idea in your mind, you will still create something.

I already had this True Beauty Stamp Set out as I used it on another project and some of the ink colors as well. I had some diecut flowers as well on my table, but in the moment I decided to stamp the flowers directly on the Basic White Cardstock. These flowers are a little large for a card front so it was difficult not to overlap them. But I decided that was okay! I still liked the way it looked and continued on with more flowers and leaves stamped in the spaces without getting too overdone!

The card base is Pool Party Cardstock with the Basic White stamped layer. I thought about putting an extra layer, either Basic White or Daffodil Delight under the stamped layer, but I liked it as it was. The stamped layer is a little smaller so the margins of the Pool Party show better. The Basic White layer is 5″ x 3 3/4″. The flowers are stamped in Calypso Coral, Daffodil Delight, and Pool Party inks with the leaves done in Granny Apple Green ink.

I chose a greeting from the same True Beauty Stamp Set, stamped it in Pool Party ink, and die cut it with one of the Tailor Made Tag Dies. I thought a Daffodil Delight ribbon would be good, but I changed my mind to Pool Party and colored the White Crinkled Seam Binding Ribbon with a Dark Pool Party Stampin’ Blend Marker. I popped up the tag with Stampin’ Dimensionals®. Since I saw some ink smudges on the tag (oops!) and added some Champagne Rhinestones Basic Jewels on the tag and around the card. It’s hard to stop!! There are a lot of other “bling” choices I could have used so use what you have.

Here is another card using the True Beauty Stamp Set with the flowers diecut and then adhered to the card front.

That’s all there is to this easy card. It’s fun to do some real stamping all over the page instead of doing a lot of diecuts and designer paper. In fact, if you wanted to make several cards at once, you could stamp randomly all over a piece of 8 1/2″ x 11″ cardstock and then cut it down for individual cards. Then you have made your own background and designer paper for your card! It feels good to stamp and stamp and stamp! Try it! I hope this True Beauty Stamped Card gives you an idea for a simple card using basic stamping!

Shop Stampin’ Up! Online Here! Don’t Forget the Last Chance Products!