True Beauty Stamped Card

True Beauty Stamped Card

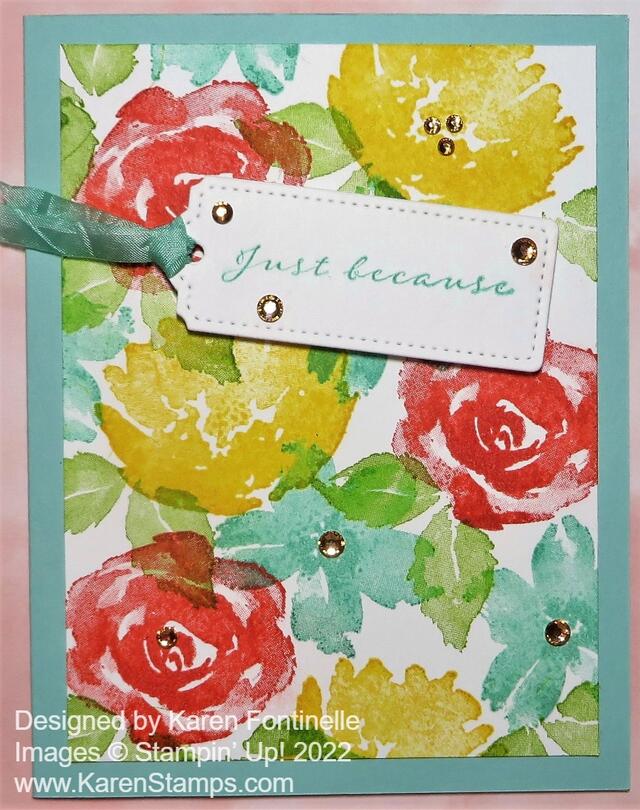
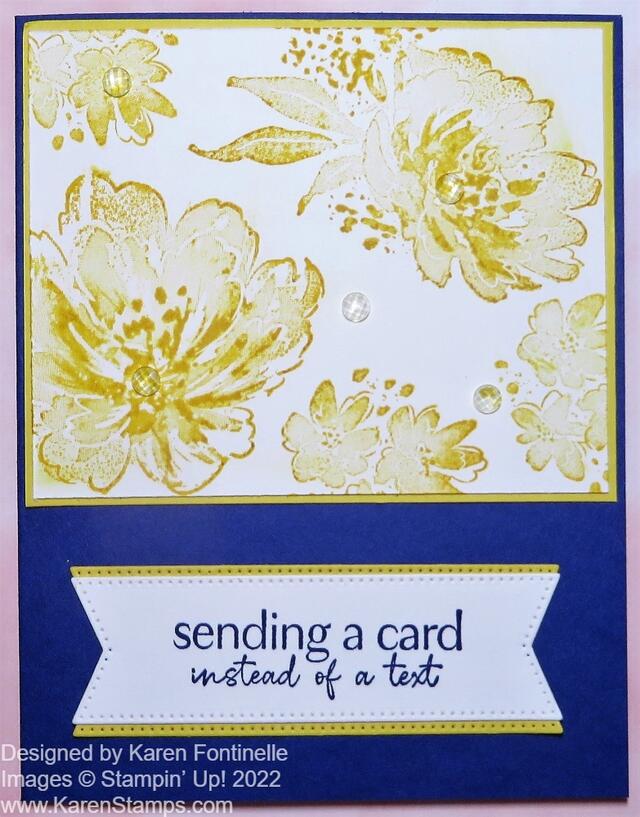
This True Beauty Stamped Card is not at all what I had in mind when I started to make a card! So you never know what you will end up creating, no matter what idea you have in your mind! And it’s okay if you don’t even have an idea in your mind, you will still create something.

I already had this True Beauty Stamp Set out as I used it on another project and some of the ink colors as well. I had some diecut flowers as well on my table, but in the moment I decided to stamp the flowers directly on the Basic White Cardstock. These flowers are a little large for a card front so it was difficult not to overlap them. But I decided that was okay! I still liked the way it looked and continued on with more flowers and leaves stamped in the spaces without getting too overdone!

The card base is Pool Party Cardstock with the Basic White stamped layer. I thought about putting an extra layer, either Basic White or Daffodil Delight under the stamped layer, but I liked it as it was. The stamped layer is a little smaller so the margins of the Pool Party show better. The Basic White layer is 5″ x 3 3/4″. The flowers are stamped in Calypso Coral, Daffodil Delight, and Pool Party inks with the leaves done in Granny Apple Green ink.

I chose a greeting from the same True Beauty Stamp Set, stamped it in Pool Party ink, and die cut it with one of the Tailor Made Tag Dies. I thought a Daffodil Delight ribbon would be good, but I changed my mind to Pool Party and colored the White Crinkled Seam Binding Ribbon with a Dark Pool Party Stampin’ Blend Marker. I popped up the tag with Stampin’ Dimensionals®. Since I saw some ink smudges on the tag (oops!) and added some Champagne Rhinestones Basic Jewels on the tag and around the card. It’s hard to stop!! There are a lot of other “bling” choices I could have used so use what you have.

Here is another card using the True Beauty Stamp Set with the flowers diecut and then adhered to the card front.

That’s all there is to this easy card. It’s fun to do some real stamping all over the page instead of doing a lot of diecuts and designer paper. In fact, if you wanted to make several cards at once, you could stamp randomly all over a piece of 8 1/2″ x 11″ cardstock and then cut it down for individual cards. Then you have made your own background and designer paper for your card! It feels good to stamp and stamp and stamp! Try it! I hope this True Beauty Stamped Card gives you an idea for a simple card using basic stamping!

Shop Stampin’ Up! Online Here! Don’t Forget the Last Chance Products!

Last Days For Last Chance Products

Time is getting short now for the Last Chance Products from the January-June 2022 Mini Catalog. When a new catalog comes out, it seems like we will have those products available forever, but then time flies and it’s soon time for retirement! AND we are always ready for NEW products!! These Last Chance products are ones that are retiring from the Spring Mini and are not carried over into the new Annual Catalog. Some of these products are discounted at up to 50% off! The last day for the Last Chance products is next Thursday, June 30th. Check the Online Store for the availability of any product, which can change at any moment!

Keep in mind that some Bundles, such as the Hello Ladybug Bundle, are retiring, but the Bundle products are available separately in the Annual Catalog. You just won’t get the 10% off Bundle price after June 30th. In some cases the individual product(s) in a Bundle is discounted so during the sale, it is better to buy the products separately rather than in the Bundle. Do the math and see.

You might check out especially the designer papers that are discounted and some embellishments especially if you like to “hoard” paper! Stampin’ Up! always has such pretty papers and even if something is rather “seasonal” it usually has a more generic pattern on the other side of the sheet that you can use any time!

In the next few days, sooner rather than later, check through the products listed in the Online Store, not the printed list, to see what is actually still available in the moment.

And then…..the new July-December 2022 Mini Catalog (Holiday Mini) AND Sale-A-Bration begin on Friday, July 1t, a week from today!

Have fun shopping at Stampin’ Up! Online HERE!

Flowering Fields Tulip Thinking of You Card

Flowering-Fields-Tulips-Thinking-of-You-Card

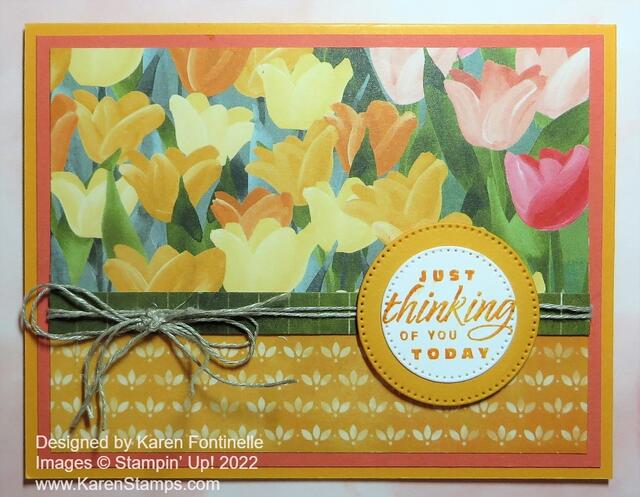
Sad to say, this Flowering Fields Designer Series Paper is retiring soon! Get some, at a discount, so you can make easy but pretty cards like this Flowering Fields Tulip Thinking of You Card. There are so many coordinating colors with this paper so you have a lot of variety!

I actually put an extra layer on this card, under the designer paper, just because there are so many colors to use. The card base is Mango Melody with a layer of Calypso Coral. Then I used two patterns from the Flowering Fields Designer Series Paper. The bottom pattern is cut at 2″ wide so that the top piece can overlap by 1/2″ before adhering to the card. I also added a narrow strip of another pattern of dark green to cover that seam. Then I decided to tie some Linen Thread around twice and tied a separate bow and added that! Then I was able to glue the whole Flowering Fields DSP to the card front!

The greeting is stamped in Mango Melody Ink on Basic White from the Flowering Tulips Stamp Set. It is very closely diecut with one of the Stylish Shapes Dies stitched circle and then layered on the next larger Mango Melody die.

On the inside, I added a Basic White layer but added a strip of designer paper to the bottom edge of the white cardstock. That carries the design to the inside plus the Basic White layer provides a place to stamp a greeting or write a personal note. You could do the same just on the Mango Melody card base but it’s a little bright!

Although the Flowering Fields Designer Series Paper is retiring on June 30th, the Flowering Tulips Stamp Set and Tulips Dies have carried over into the new Stampin’ Up! Annual Catalog. However, if you want the stamp set and dies, I suggest you order the Flowering Tulips Bundle before the end of June. You will save 10% off the total price if you order the Bundle now because in the Annual Catalog the stamp set and dies are sold separately and you will pay full price for both. Note that some other products that are in Bundles that are discounted on the Last Chance Sale will be cheaper to buy separately than in the Bundle!

While you are shopping the Last Chance Products be sure to also check the Clearance Rack for bargains as long as you are ordering!

One more reminder, is that the BOGO sale on the Kits Collection ends June 30. These kits are really cute. You can buy two different kits for yourself or go in with a friend, or buy two of the same kits so you can make them with a family member or friend. Some of the kits are Card Kits and some are slightly different than cards, more like crafts. Hence, the name Crafting Kits! What a fun summer activity that would be to do with a child or someone special during summer vacation! If a Kit is not shown, it is no longer available so there will be no backorders. What you see is what you will get!

There is only a week left of the month of June, believe it or not, so keep checking the Last Chance Products from the January-June 2022 Mini Catalog (Spring Mini) and the BOGO Kits Collection Sale!

Happy Shopping!

Stampin’ Up! Free Shipping Today ONLY!

Today is the day to stock up and save on your favorite Stampin’ Up! products! On June 21 only, Stampin Up! is offering FREE SHIPPING on orders subtotaling $75 USD or more. This incredible deal lasts for 24 hours only, so head over to the Stampin’ Up! Online Store TODAY!

  • Free shipping only applies during the 24-hour period the promotion is live in each market; this means that the order must be opened and closed on 21 June 2022.
  • With the exception of month-to-month Paper Pumpkin subscriptions, all Stampin’ Up! products qualify for the promotion.
  • Prepaid Paper Pumpkin subscriptions are eligible for FREE shipping under the same rules as all other Stampin’ Up! items during the promotion.
  • Month-to-month Paper Pumpkin subscriptions are NOT eligible for free shipping. Subscriptions billed and shipped this month will be charged for the normal amount ($23.50 USD shipping included) + tax.
  • The free shipping promotion does not cover the additional cost of expedited shipping.

Today is great to get those Last Chance products you have been eyeing! Some are discounted up to 50%! Also, the BOGO sale on Kits is ongoing until June 30th! Be sure to check what kits are available!

HAPPY SHOPPING AND HAPPY FREE SHIPPING!

Free Shipping at Stampin’ Up! June 21!

TOMORROW!! TUESDAY, JUNE 21, 2022!

Free Shipping at Stampin’ Up! for one day ONLY!

(with an order of $75 or more!)

Time for you to stock up and save on your favorite Stampin’ Up! products! What’s the big occasion? On June 21 only, Stampin Up! is offering FREE shipping on orders subtotaling $75 USD or more. This incredible deal lasts for 24 hours only, so head over to the Stampin’ Up! Online Store TOMORROW!

  • Free shipping only applies during the 24-hour period the promotion is live in each market; this means that the order must be opened and closed on 21 June 2022. (Don’t start entering your order the day before!)
  • With the exception of month-to-month Paper Pumpkin subscriptions, all Stampin’ Up! products qualify for the promotion.
  • Prepaid Paper Pumpkin subscriptions are eligible for FREE shipping under the same rules as all other Stampin’ Up! items during the promotion.
  • Month-to-month Paper Pumpkin subscriptions are NOT eligible for free shipping. Subscriptions billed and shipped this month will be charged for the normal amount ($23.50 USD shipping included) + tax.
  • The free shipping promotion does not cover the additional cost for expedited shipping.

So if you need or want a few things right now, FREE SHIPPING tomorrow is a great deal! Just remember you need a merchandise total of $75.00 or more. Your other choice is to wait until July 1st when the Holiday Mini Catalog goes live AND Sale-A-Bration begins! No free shipping but you have other benefits. Whatever suits you best!

HAPPY SHOPPING AND HAPPY FREE SHIPPING!

New Horizons Father’s Day Card

New Horizons Father's Day Card

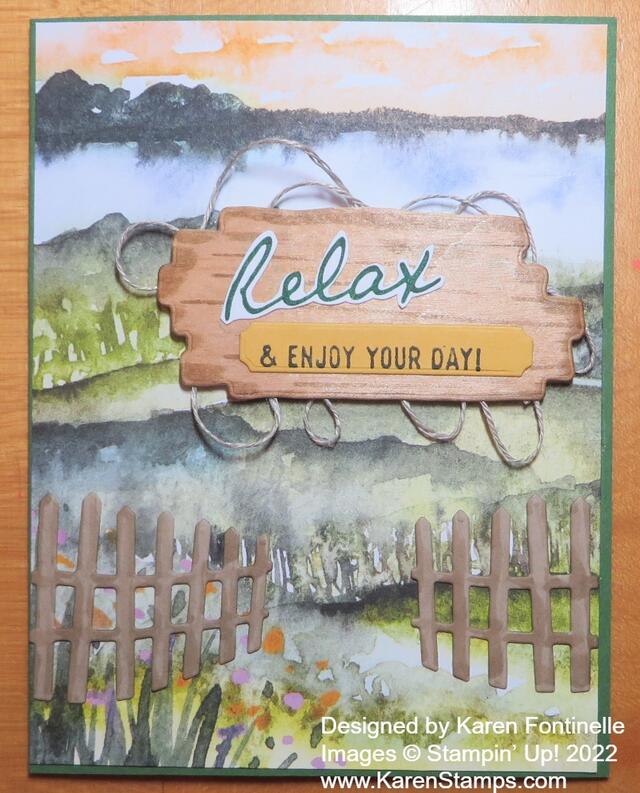
Nothing like making a card at the last minute, but if you are too, I offer you this idea for a New Horizons Father’s Day Card! Father’s Day is Sunday, June 19 so better get busy if you haven’t made a Father’s Day card yet! This one will be for my husband. It also was a good opportunity to use this New Horizons Bundle before it retires on June 30 and the New Horizons Designer Series Paper (retired).

The card base is Garden Green cardstock. I used one of the prettiest pieces of the New Horizons Designer Paper as the layer, if you still have some from the Spring Mini Catalog. I die cut two pieces of fence from the Horizon Dies. I absolutely love these little fences! I cut them from Crumb Cake cardstock and then I shaded them a bit with the Light and Dark Crumb Cake Stampin’ Blends markers. It just gave them a little aging and I just did it very sloppily, not trying to achieve perfection at all. I just kind of scribbled along the edges of the fence posts. Try it!

The “sign” for the greeting is actually a die cut piece of the wood sheets we had not long ago. I shaded it a tiny bit with the same Blends around the edges and made a few lines across to look like wood grain using the fine tip of the marker.

The greeting is stamped two different ways! I stamped the word “Relax” and then cut around it with Paper Snips. The second part is stamped by inking up only that second line of words with the Basic Black Stampin’ Write Marker. Then I die cut with a narrow die in the Sending Dies. On the back of the wood sheet piece I just kind of twirled around some Linen Thread and then popped it up with Stampin’ Dimensionals.

Be sure to keep your eye on the Last Chance Products these last couple of weeks. Some are on sale and some are not so do the math before you buy a Bundle which might be more expensive than buying the pieces separately if they are discounted. This New Horizons Bundle is not discounted individually so you are better off buying the Bundle which is 10% less than the individual prices. Also remember to check out the Clearance Rack and see if you need any of those bargains!

If you haven’t made a Father’s Day card for your dad, your husband, your grandfather…it’s time to do it today! Maybe this New Horizons Father’s Day Card will get you inspired!

SHOP STAMPIN’ UP!

Join the Stamping With Karen Mailing List!

Mailing List Red Seal

I’d like to invite you to join my Stamping With Karen Mailing List to keep up with news from Stampin’ Up! and to be inspired with new stamping projects, tips, techniques, and more from me! There is always something new with Stampin’ Up! from products to catalogs and early releases of new products and I know you’ll want to know all about it.

I send out a newsletter every Tuesday with at least one free project idea, tip, or technique plus the latest Stampin’ Up! news and updates. Stampin’ Up! usually posts updates to Demonstrators every Tuesday morning so a newsletter on Tuesday from me has the news “hot off the press”!

Stampin’ Up! puts out an Annual Catalog once a year, plus two “Mini” catalogs a year {that aren’t so “mini”) plus the big promotion called Sale-A-Bration. These catalogs give you lots of products you will be excited about, want to learn about, and want to see all the ideas for cards and projects possible! Get on my Mailing LIst to keep up with these exciting events and know what to expect. If you’re one of my purchasing customers I’ll send you these catalogs free of charge when they come out.

Keep up with news about the new Paper Pumpkin Kit every month and subscribe if you want to join in the fun of having a project already planned and prepped for you in the cute Paper Pumpkin box! Always sign up or skip a month if you want by the 10th of any month.

As a special gift to my Mailing List subscribers, every year before the holidays I send out my “12 Weeks of Christmas” newsletters, with one new holiday project each week leading up to Christmas. These are ONLY for my subscribers and you won’t find them on my blog or anywhere else

If you are on my blog, you will see a red sign-up box in the top right corner where you can simply put your name (or first name) and best email. If you are on your phone, you probably need to scroll way down to get to the sidebar things. OR you can go to my sign-up page HERE.

When you do sign up, you will receive an email with a link to a free gift from me!

I hope you will enjoy the card and project ideas I send out in my weekly newsletter. Even if you never make the project, maybe just seeing ideas will do your crafty heart good! I know it does mine! I’m all about the ideas!!

Let’s stay connected and in touch with each other over our favorite thing to talk about…..stamping with Stampin’ Up!

In Color Rainbow Card

In Color Rainbow Card

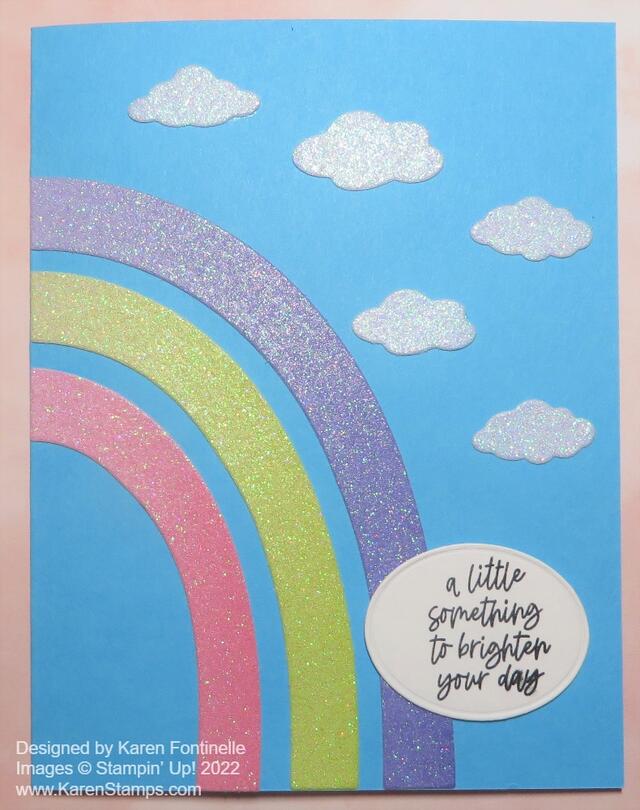
Here’s an easy card to make if you don’t mind diecutting some rainbows and little clouds! I saw some other card that kind of gave me the idea for this card plus I realized I hadn’t used this stamp set and dies enough. It will retire on June 30th which is surprising to me. It seems like we could use rainbows for a longer period of time. But that’s how it goes!

If you don’t want to miss out on making rainbows, be sure to check out the stamp set and dies before June 30, while supplies last. You might even have the rainbow designer paper you could have earned during the previous Sale-A-Bration. Or if you don’t want the stamp set, Rainbow of Happiness, you can just get the Brilliant Rainbow Dies. Here’s a tip: The Brilliant Rainbow Dies are on sale at 50% off so buy the stamp set and dies separately which is cheaper than buying the Bundle since the dies are discounted so much!!

To make this card, I made a card base of just Tahitian Tide, one of the new 2022-24 In Colors. I could have made a Basic White card base with a layer of the Tahitian Tide but I like the way this turned out. I wanted to use the 2022-2024 In Color 6″ x 6″ Glimmer Paper. These papers are so pretty using the new In Colors because they have ombre shading over the whole paper. You get 4 sheets of each of the 5 colors.

I die cut the rainbows out of the Sweet Sorbet, Parakeet Party, an Orchid Oasis Glimmer Paper. Then I just adhered those three pieces to the front of the card. There are small little cloud dies in the set also, so I used the lightest area of the Tahitian Tide Glimmer Paper to die cut several clouds. I adhered five clouds on the card. For the greeting, I chose this one in the Rainbow of Happiness Stamp Set because these glimmer rainbows would absolutely brighten someone’s day! I stamped it on Basic White and die-cut it with the oval shape in the All That Dies. When I went to adhere it, I realized part of the greeting would overlap the rainbow and therefore be a little uneven. To remedy this, I glued on part of another cloud to the side that wouldn’t be overlapping the rainbow. It barely makes a difference, but I thought it would keep it even this way. It’s the same idea as when you put a Dimensional under only one part of a stamped or paper piece that is overlapping another piece that is popped up with a Stampin’ Dimensional.

On the inside of the card, I added a Basic White layer and diecut from the Tahitian Tide glimmer paper the long die with lots of little rainbow designs. It makes a really pretty edge.

I really like these new In Colors in the Annual Catalog and I really liked using the Glimmer Paper with those colors on this card with the Rainbow dies. Check out the Rainbow of Happiness products on the Last Chance List soon!

SHOP THE LAST CHANCE LIST!

Abstract Beauty Ephemera Card

Abstract Beauty Ephemera Card

When I made this card for someone, I didn’t necessarily intend to put it on my blog, but I liked it a lot and decided to share it. If you check the Last Chance List of retiring products from the January-July 2022 Mini Catalog, you will find these fun Abstract Beauty products. That means you only have until June 30 to get them, or while supplies last.

The Abstract Beauty Suite on pages 48-49 in the Spring Mini catalog is a fun group of products. I wasn’t attracted to it at first, but something spurred me on to at least get some of the products. I think it was the designer paper that caught my eye! Then as long as I was getting that, I decided I might as well get some of the other products.

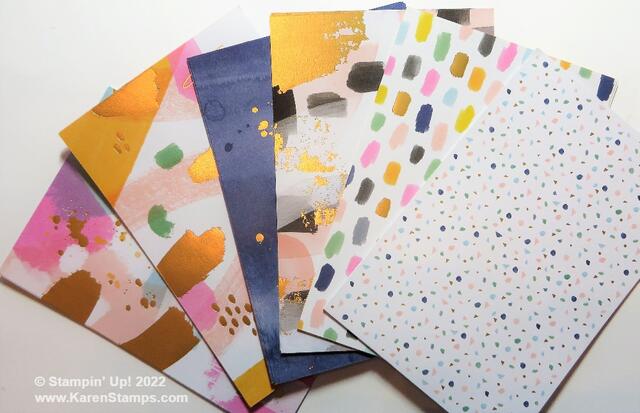
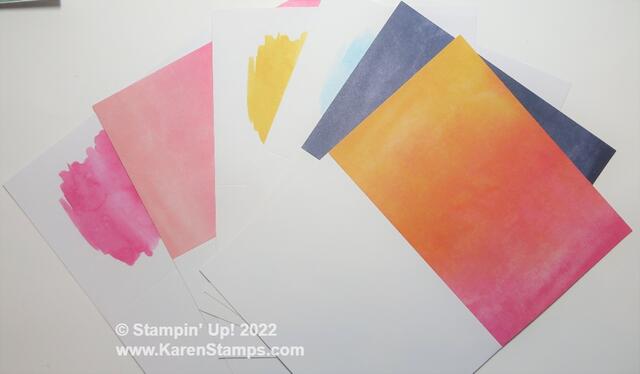
This card starts with the Abstract Beauty Cards & Envelopes (discounted 50%!). These cards are a little bit larger than what we normally make. You get 10 cards and envelopes, each with a different design. Each card has some design printed on the card front, but then you add to it with stamping or whatever you like with embellishments or ephemera. The envelopes have printed paper lining them. You can mix and match however you like.

The Abstract Beauty 4″ x 6″ Specialty Designer Series Paper (also discounted 50%) is something different because of its size! I don’t think we have had this size in designer paper before! You get 48 sheets, 4 each of 12 designs. You will enjoy all the different designs.

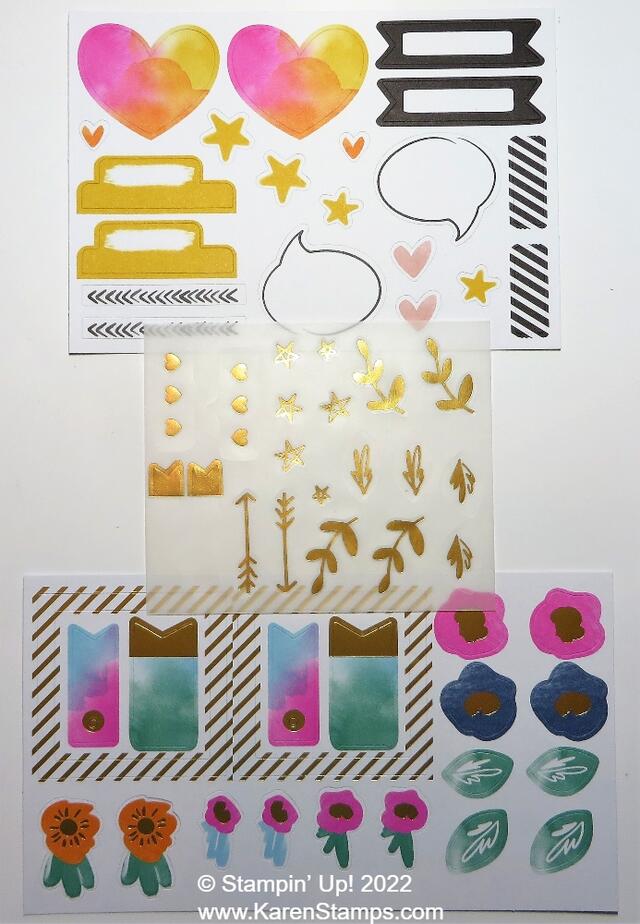
For embellishments, get the Abstract Beauty Ephemera Pack (discounted 30%) which has 60 precut pieces of all kinds, 2 each of 30 designs. This pack is fun to have on hand to play with! And since it is “abstract” you can make whatever kind of designs you want. It doesn’t even have to make sense!

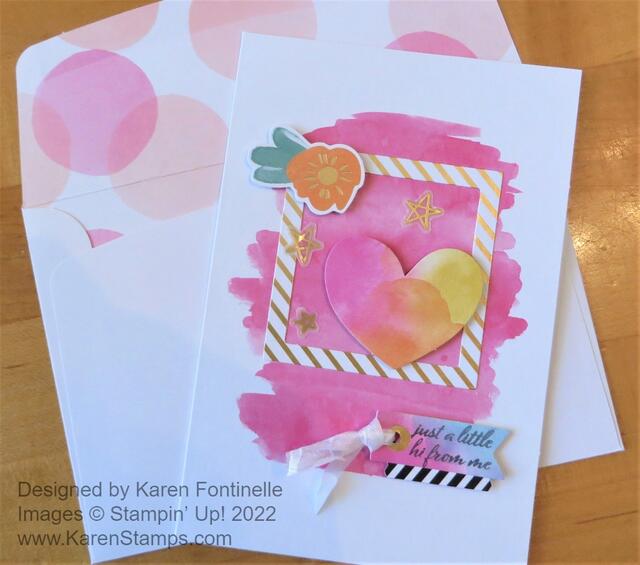
My card came with the watercolor look of pink in the background, then I added pieces from the Ephemera Pack – the frame, the heart, the flower, and the gold foil stars on vellum. For the greeting, I found a very small sentiment in a Sale-A-Bration stamp set from last time that has so many great greetings in it and stamped that on one of the little ephemera tags. I added a small piece of the White 1/4″ Crinkled Seam Binding Ribbon to the tag. I even added another little black and white ephemera piece to the bottom of that tag to help it stand out.

Here are some photos of just some of the products.

Abstract Beauty Paper1
Abstract Beauty Ephemera Pack
Abstract Beauty Cards

I hadn’t used these products for a little while but I certainly had fun making this card….and even getting it into the mailbox! You can also get the Hello Beautiful Bundle as a Bundle and save 10% off before June 30, but if you wait, you can get the stamp set and dies separately in the new Annual Catalog but not with the 10% discount. Get the Bundle now while you can and save some money! There are also Adhesive Backed Hexagons (discounted 30%) to use as embellishments on any cards, which I forget to use!

You might not be “into” abstract designs, but I think you will find this Abstract Beauty Suite a fun one to work with. I suggest ordering the products you want individually so you get discounts on some of the individual products. Here is a card I made with the Abstract Beauty Designer Paper. I loved this pattern! You have lots of creative possibilities with these products as you can see on my Abstract Beauty Ephemera Card.

Sending Good Thoughts…in a Bottle! Paper Pumpkin July Kit!

Paper Pumpkin July 2022 Banner 1

Isn’t the thought of sending a message in a bottle something we have all wanted to do? Now you can, (sort of), with the July 2022 Paper Pumpkin Kit! You won’t be throwing a bottle into the ocean, but it will still be fun for you and the card recipient!

“Seas” the day and set sail across the ocean with the Sending Good Thoughts Paper Pumpkin Kit! With beautifully designed nautical imagery, a fun message in a bottle motif, and sentiments that are “shore” to please, this month’s kit is full of warmth and fun.

Each kit contains enough supplies to create 9 cards—3 each of 3 daring designs—and 9 coordinating envelopes. This month’s Paper Pumpkin kit will have your loved ones feeling sand-tastic!

We also have a special game for you to play—take part in the Sea if You Know Paper Pumpkin quiz to learn more about Paper Pumpkin and this month’s kit! Plus, subscribers to the Sending Good Thoughts Paper Pumpkin Kit will be entered to win a 1-month prepaid Paper Pumpkin code! Demonstrators can also play the quiz and all active subscribers (demonstrators included) are eligible to win the prize.

Play the Sea if You Know Paper Pumpkin quiz and share it with your friends! Good luck!

ABOUT THE KIT

Name: Sending Good Thoughts  

This kit includes:

  • Sending Good Thoughts Photopolymer Stamp Set
  • Bermuda Bay Classic Stampin’ Spot®
  • Printed dry-embossed card bases
  • Printed envelopes
  • Printed die cuts
  • Twine
  • Mini glue dots
  • Dimensionals

Card size: 4-1/4″ x 5-1/2″

Coordinating Stampin’ Up! colors: Balmy Blue, Basic Gray, Bermuda Bay, Fresh Freesia, Pacific Point, Poppy Parade

JOIN PAPER PUMPKIN TODAY!

Flowing Flowers Blue & Yellow Card

Flowing Flowers Blue & Yellow Card

I wanted to use the Flowing Flowers Stamp Set a little bit more before it retires in a few weeks. Well, maybe in only about two weeks and a few days! This pretty floral stamp set is in the January-June 2022 Mini Catalog which is retiring on June 30. It is one of Stampin’ Up!’s Distinktive designs, which means that with just stamping one time, you get a special texture that makes for a photo-realistic image. No need for two- or three-step stamping.

When I chose the new In Color Starry Sky to be the card base, I thought I would like yellow for the flowers. I stamped the flowers in Daffodil Delight ink on Basic White cardstock. I wanted to keep this a very simple card so I just stamped the whole flower and leaves in Daffodil Delight ink. If I were to do it again, I would use different colors for the flowers and color the leaves green.

For something different, I made the Basic White piece shorter and layered it on a piece of Daffodil Delight cardstock. The greeting is a fun one and is in the stamp set. I stamped it on a scrap of Basic White in Starry Night ink and die cut it. I used the banner die in the new Stylish Shapes Dies set in the new Stampin’ Up! Annual Catalog. I thought I wanted some Daffodil Delight as a layer behind the greeting but there’s not really a die that layers well with this banner. So I used the same die to cut a piece of Daffodil Delight and then I cut it in half horizontally and layered it just under the top and bottom of the banner piece. It fits like that just perfectly.

For some sparkle and embellishment, I added some Elegant Faceted Gems on the top portion of the card in and around the flowers. I used the clear gems out of the three colors in the package. These gems are in the new Annual Catalog so you may already have some from the previous catalog.

On the inside of the card, I added a Basic White layer since the card base is too dark to stamp or write a message. I also stamped the small grouping of flowers in the lower corner of the Basic White for a little interest when the person opens the card. It’s usually good if you can add a piece of designer paper or stamp a little something inside the card!

This Flowing Flowers Stamp Set holds lots of creative possibilities with the pretty flower images! Here’s another card I made earlier that shows how you can use multiple colors on one flower stamp which makes it different than these all-yellow flowers. Be sure you check out this stamp set before it retires on June 30.

Last Day For Paper Pumpkin!

“Give your card collection a reFRESH with this month’s Paper Pumpkin Kit We’re talking FRESH ideas, designs, cards, and crafts. Each month we strive to deliver a seasonal selection, and this month is no different. It’s time to express your love, gratitude, and style with summer’s hottest trends in crafting.”

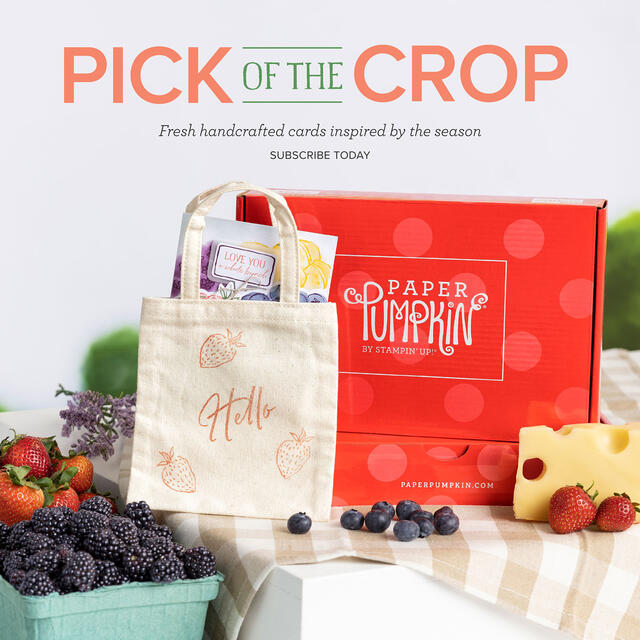
Now isn’t that little bag adorable that you will receive in your Paper Pumpkin Kit for June 2022?! Put some of the cards you make with the kit into the bag for a gift! Be sure to sign up by today, June 10th, so you don’t miss this kit! And during June, you can purchase additional mini canvas shopping bags for a fun twist on card packaging.

You can also add a Prepaid Subscription to your Stampin’ Up! order in the Online Store for a certain number of months, from 1 to 12. This adds to your order if you want to reach Stampin’ Rewards!

TODAY IS THE LAST DAY TO SIGN UP OR BUY A PREPAID SUBSCRIPTION AND SET UP AN ACCOUNT!

ABOUT THE KIT

Name: Pick of the Crop

This kit includes:

  • This month’s kit contains enough elements to create 9 cards—3 each of 3 designs—and 9 coordinating envelopes. This all-inclusive kit includes printed card bases, die-cut paper pieces, adhesive, and more!
  • The Pick of the Crop Paper Pumpkin Kit includes a Calypso Coral Classic Stampin’ Spot!
  • This kit’s stamp set is perfect for expressing your love, gratitude, and style. With sentiments that say “Love you a whole bunch”, “You’re the pick of the crop”, “You are the sweetest,” and so many more, you’ll be able to use this photopolymer stamp set for all of your summer projects.
  • This kit also includes specialty vellum pieces to add a fresh touch to your cards.
  • And you’ll get a Mini Shopping Bag (5-3/8″ x 6″) which can be used to hold a couple of cards for a unique craft element. (Additional bags will be available to purchase separately.)
  • Card size: 4-1/4″ x 5-1/2″
  • Envelope size: 4-1/2″ x 5-3/4″
  • Coordinating colors: Blackberry Bliss, Cajun Craze, Calypso Coral, Crushed Curry, Garden Green, Night of Navy, Soft Succulent 

Mini Shopping Bags Add-On

-Available for purchase on stampinup.com starting June 13, 2022.

-Item Number: 161922 

-Item Price: $13.00 USD

Add-on details:

  • You must be a current Paper Pumpkin subscriber to purchase these extra mini bags.
  • Includes 4 mini canvas bags.
  • You can fit a couple of cards in each bag. Perfect for a fun twist on card packaging!
  • Stamp or color on the bags for a personalized touch.
  • Mini Shopping Bag size: 5-3/8″ x 6″

JOIN PAPER PUMPKIN TODAY!

No risk, no obligation! Continue your subscription as long or short as you like. Skip a month now and then. Stampin’ Up! guarantees all Paper Pumpkin Kits.

True Beauty Floral Birthday Card

True Beauty Floral Birthday Card

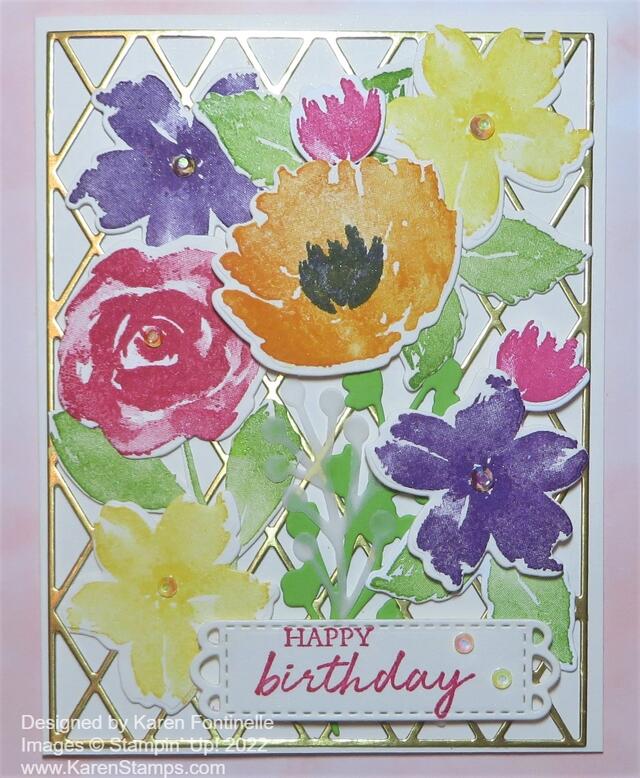
I had so much fun decorating the Sweet Little Box on yesterday’s post, that I wanted to stamp and die cut more flowers and make a full-size card. I really wanted to try out the diecut background on this card. So here we have the True Beauty Floral Birthday Card!

I used the Shimmery White Cardstock, one of my all-time favorite papers. You can’t see it in the photo but this paper has just the slightest glimmer to it so it looks quite elegant, especially with flowers I think! I used the diamond-shaped lattice die, included with the other flower and leafy dies in the Organic Beauty Dies. If you have the Adhesive Sheets, you could attach that to the back of the paper you are using for this lattice die so that you can easily adhere it to your card or project after diecutting it. Or use teeny tiny dots of glue on the back. I cut mine out of Gold Foil.

The flowers are all stamped on Shimmery White Cardstock using the True Beauty Stamp Set and then diecut with the Organic Beauty Dies. You can get these stamps and dies together in the True Beauty Bundle and save 10%. I just chose some random colors for the flowers: Melon Mambo, Mango Melody, Daffodil Delight, Gorgeous Grape, and Granny Apple Green for the leaves.

I stamped and cut out a lot of flowers, stems, and leaves to play with. Then I just placed them around on the lattice background after it was adhered to the card front. Even when you have them how you like them, by the time you pick them up to apply adhesive, you might end up changing the design a little bit. I added some diecut stems and leaves, even one out of vellum.

The greeting is stamped from the Shaded Summer Stamp Set. It is die-cut with one of my favorite dies, this label die in the Meadow Dies. And for my favorite embellishment, I added some Iridescent Rhinestone Basic Jewels. You could add a different greeting on this card and it would still be appropriate. Flowers are good for lots of occasions!

Check out this Bundle or even the full Awash In Beauty Suite in the new Stampin’ Up! Annual Catalog and you will be ready to make all kinds of floral cards!

SHOP STAMPIN’ UP! ONLINE HERE!

Decorated Sweet Little Box

Decorated Sweet Little Box

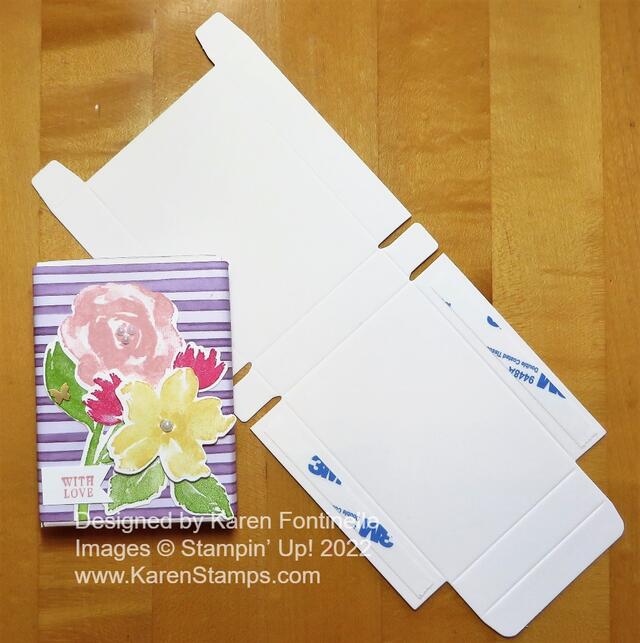
If you remember seeing the Sweet Little Boxes (157628) in the retiring January-June 2022 Mini Catalog, you might have thought they were only for Valentine’s Day and the designer paper in the Suite was also only for Valentine’s Day. But here I have decorated this assembled Sweet Little Box with “Valentine” paper and a brand new stamp set. So you can stock up while they are half-price and have them on hand!

These Sweet Little Boxes are on page 9 of the Spring Mini in the Sweet Talk Suite. The boxes are a small size and are food safe. You can stick a gift card inside, a small gift like a necklace or earrings, or maybe some candy or a small cookie. The boxes assemble easily and even come with adhesive on the sides! I cut a piece of the Sweet Talk Designer Series Paper, the purple stripe, which can be for any occasion. This paper is on sale for 50% off, by the way. I cut a piece 3 3/8″ x 7 1/4″ and wrapped it around with the seam at the back of the box. You could also cut a front and back piece to just glue on the front and back of the box. I also cut a very slim piece for the top of the box, 2 1/2″ x 1/2″.

I stamped some flowers and leaves from the True Beauty Stamp Set to decorate the box. This is a new stamp set and Bundle with the dies in the new Stampin’ Up! Annual Catalog. I used Blushing Bride and So Saffron ink for the two large flowers and Melon Mambo for the small ones for a pop of brighter color. The leaves and stem were all stamped in Granny Apple Green ink. Then I used the Organic Beauty Dies to cut them all out. The little greeting is also in the True Beauty Stamp Set.

For embellishments, I used a little Brushed Brass Butterfly and some of the Iridescent Pearl Basic Jewels on the flowers. I love how this little box turned out! Just remember, during the Last Chance Sale you can save 50% on both the Sweet Talk Designer Series Paper and the Sweet Little Boxes!

SHOP STAMPIN’ UP! ONLINE HERE!

Make a 2-4-6-8 Gift Box With a Lid

2-4-6-8 Gift Box and Card

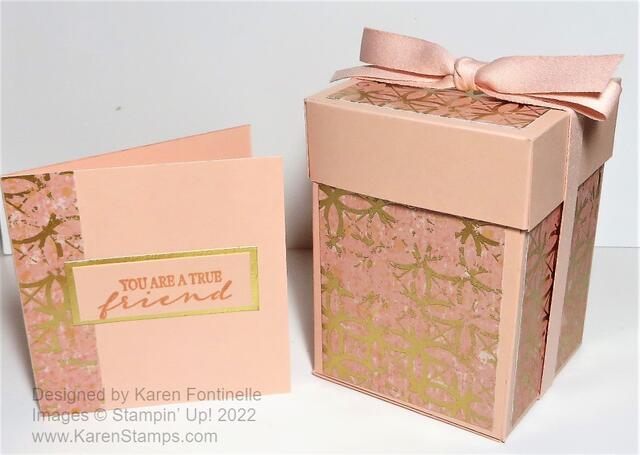
Make this elegant-looking gift box and matching card with an easy pattern and pretty designer paper! The gift box is the basic 2-4-6-8 box that has been around a long time and is a standard kind of box for paper crafters to make! Sometimes we just pinch in the sides and close up the top with ribbon or some other closure or sometimes we leave it open like a little gift bag. But for this gift box, I made an easy lid!

My real point in this project was to play with the new Texture Chic 12″ x 12″ Specialty Designer Series Paper. It is in the new Stampin’ Up! Annual Catalog and honestly, you might overlook it or not be impressed with it. But in person, the paper is GORGEOUS! The one side has textured gold foil patterns that look aged. It’s very different and very pretty when you see it! I even couldn’t resist making a little 3″ x 3″ card with just a scrap of the paper I used on the box!

The 2-4-6-8 gift box is the same as we have made many times! I used Petal Pink cardstock for the basic box and added the panels of the Texture Chic designer paper.

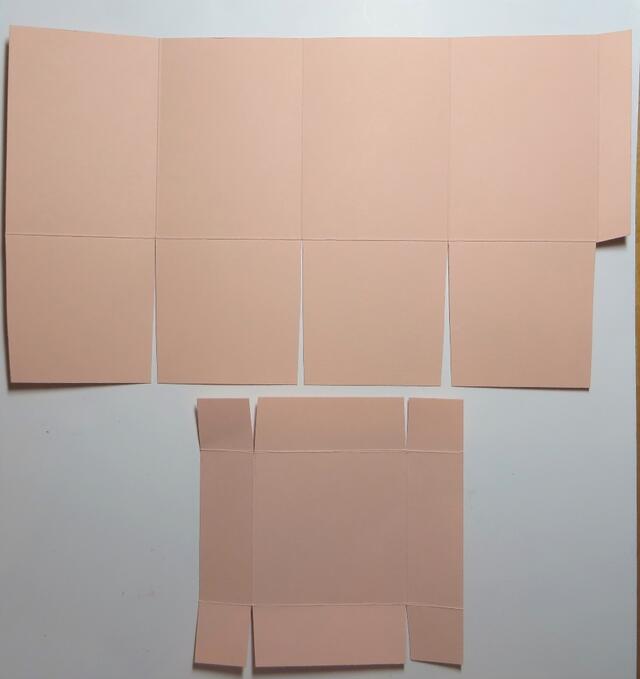
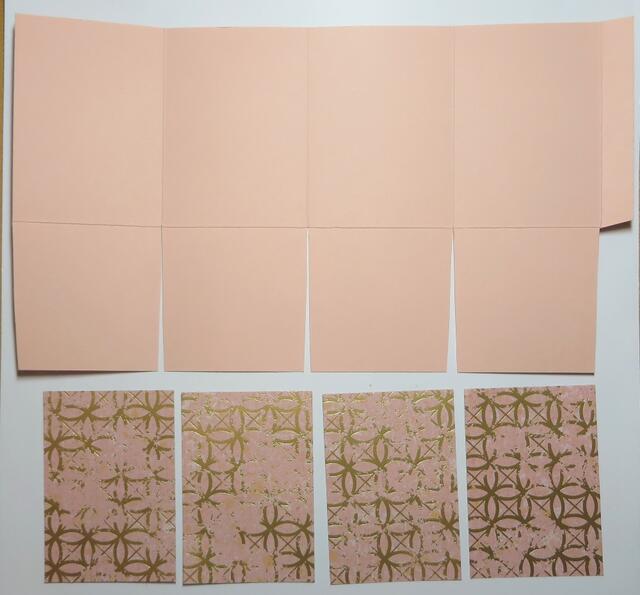
Cut a piece of cardstock 10 1/2″ x 6″. Scoring across the paper in landscape position, score at 2 1/2″, 5″, 7 1/2″, and 10″. Turn the paper to portrait position (narrow edge, up and down), score at 2 1/2″ to form the bottom flaps of the box.

Cut up on all those score lines in landscape position from the bottom up to the 2 1/2″ score line going across. This makes the bottom flaps for the box. Cut off that little 1/2″ piece at the end. You can cut straight up on the scored lines or cut them slightly angled just to have a little less bulk when you fold everything together.

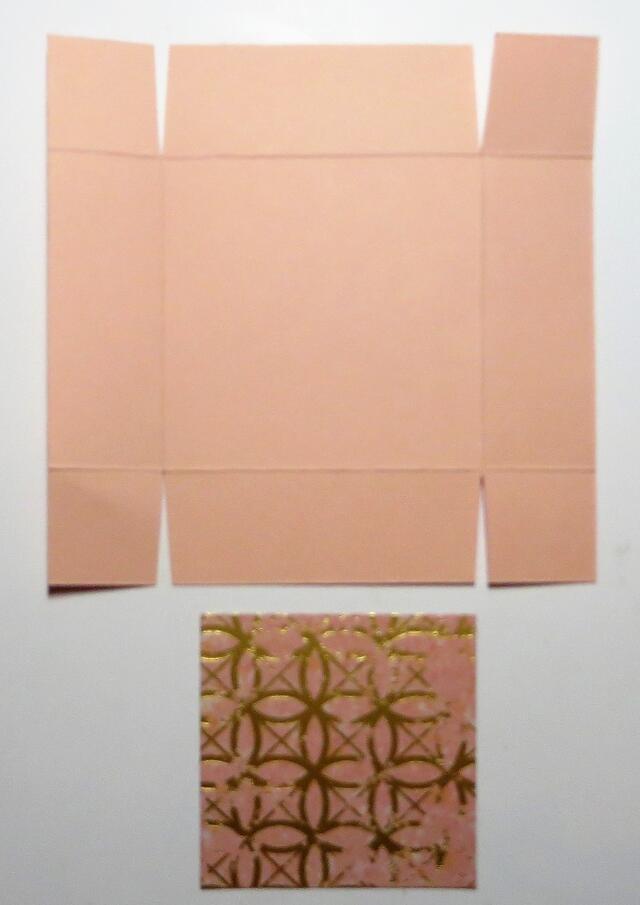
For the box lid (in the photo below under the scored box piece), cut a piece of cardstock 4 1/2″ x 4 1/2″. If you score at 1″ on all sides, you may find that the lid will be too tight to fit on the box without squishing the box inward. So I scored just a “smidge” inside the 1″ mark. So actually I scored at 15/16″ instead of exactly 1″. That gave me the tiniest bit of extra space for the lid to fit properly. Cut up to the score line as you see in the diagram as you did for the box.

2-4-6-8 Box and Lid Scored

Now that you have the box and the lid cut, scored and ready to be assembled, decide how you want to decorate the box and lid. If you want to stamp it, do that before you assemble it. For my box, I cut panels of the Texture Chic Designer Series Paper at  3 1/4″ x 2 1/4″. You could make them slightly wider if you wanted smaller margins on the sides. For the lid, I cut a 2 1/4″ square of the designer paper. If you wanted to, you could cut smaller pieces of designer paper for the four sides of the lids. I left mine plain. You can adhere these papers after assembling the box and lid, but I think it is actually easier to do it while the box and lid are flat, so do it before you assemble anything.

2-4-6-8 Box and Designer Paper
2-4-6-8 Box Lid and Paper Topper

To assemble the box and lid you can use your favorite adhesive, like Multipurpose Liquid Glue or Tear & Tape. Stampin’ Seal or Stampin’ Seal+ is good too. I like the liquid glue because I have that extra second to move the pieces to make sure everything is aligned properly. For the box, just leave it flat on the table, apply adhesive to the narrowest side flap, then fold the other side of the box over to overlap. That is easier than holding it in the air and trying to line up and press the sides together! Figure out which is the back side of the box and fold and adhere the bottom flaps accordingly. It might not matter much, but it’s best to have the box seam toward the back so it is not noticeable. Assemble the lid as well, keeping it all as straight as possible.

I had planned to tie the ribbon around the middle of the box, then thought about tying it around the sides of the lid. Then I got the idea to tie it vertically around the box and lid. This holds the lid on once you put a gift or treat inside. I used the brand new Petal Pink 3/8″ Soft Polyester Ribbon. Wow! I don’t know how to describe this ribbon! It really is soft yet it ties very nicely because it’s not flimsy. At first I thought it felt like a very soft, fine suede, but it also feels so soft it’s like satin. Order some and you can check it out yourself! It’s very nice!

After I had the box all made, I thought a small gift card would be nice to go along with the gift box! I cut a 3″ x 6″ piece of Petal Pink cardstock and scored and folded in half. I had a small scrap of the designer paper, so I just adhered that to the side of the 3″ x 3″ card and trimmed off the excess. I stamped a greeting from the True Beauty Stamp Set, simply because it was on my table and handy! I stamped it in Petal Pink ink on Petal Pink cardstock simply because I didn’t think introducing Basic White into the whole project would look very good. I added a layer of Gold Foil under the greeting.

Check out the beautiful Texture Chic Specialty Designer Series Paper in the Stampin’ Up! Annual Catalog so you can make a 2-4-6-8 gift box like this one!

SHOP STAMPIN’ UP! ONLINE HERE!