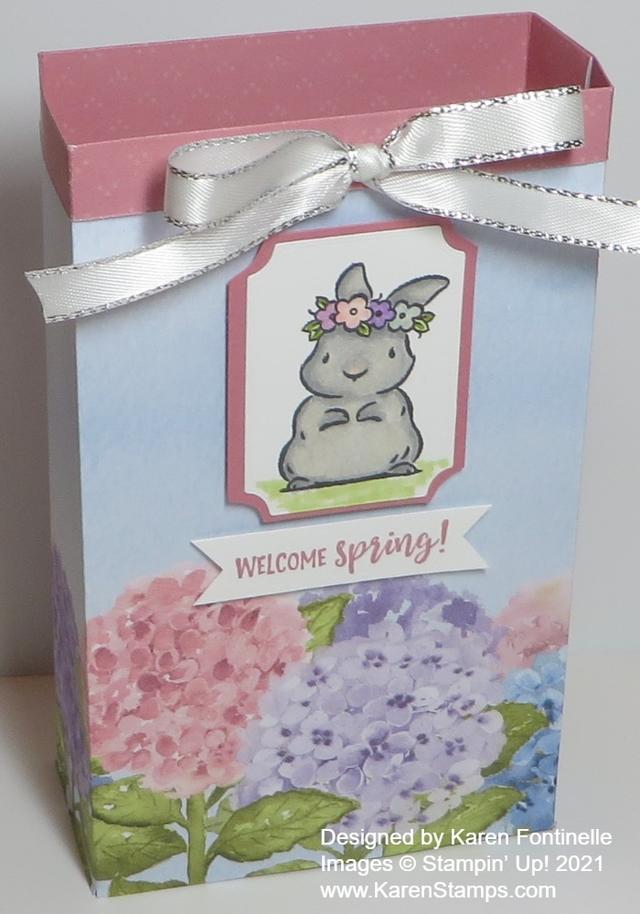
Spring will be coming even though many places are in the midst of a very cold winter right now, so I combined hydrangeas and a bunny for spring in this Springtime Joy Gift Bag. This would be cute for Easter treats or a gift or for Mother’s Day in May or any other time!
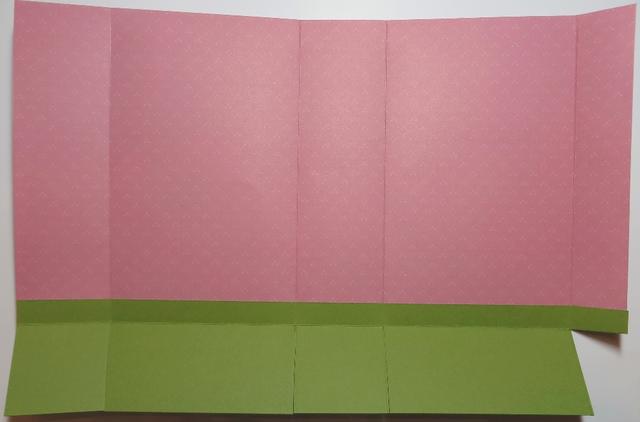
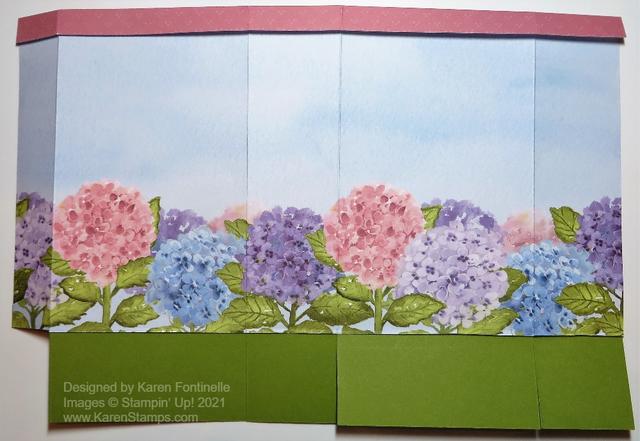
I started off wanting to make this gift bag with the Hydrangea Hill Designer Series Paper just as you see, with the border of hydrangeas at the bottom of the bag with room in the plain area for a greeting or whatever I would come up with. I wanted to use that sheet that has the borders of hydrangeas at the top and bottom. Shortly, I realized that if i scored the paper like normal, most of the hydrangea images would end up at flaps at the bottom of the gift bag! So I had to engineer an extra piece of cardstock at the bottom to make the bottom flaps without cutting into the hydrangeas!
I did a little math and added on a 12″ strip of Old Olive cardstock to the bottom of the hydrangea piece.

To make this gift bag, I cut the designer paper at 6 3/4″ x 12″. Make sure your hydrangeas are where you want them before you cut! The Old Olive piece is 2 1/4″ x 12″. I adhered just 1/2″ of the Old Olive to the designer paper because I wanted 1 3/4″ to be the bottom of the gift bag.
Score the bag and Old Olive piece at 1 3/4″, 5 1/2″, 7 1/4″, and 11″. Then turn the paper and score the Old Olive portion at 1 3/4″ and 8″. This gives a 1/2″ lip at the top of the bag I folded over to show the inside color of the bag for contrast.

Cut up from the bottom on all the scored lines up to the edge of the designer paper. Normally this would all be the same paper, of course! Then cut off just the little narrow piece of the Old Olive as shown in the photos above.
Next, crease all the score lines, fold and assemble. Put some adhesive on that narrow side about the cut-off piece and fold the other side over to make the seam. Form into a box shape and fold in the flaps at the bottom, applying as much adhesive as you think necessary to close the bottom of the bag. Reach in from the top of the bag with a ruler or bone folder to press down from the inside on those bottom tabs to make sure everything is stuck together well.
Once you have the bag made, you can embellish however you like. You can even punch some holes in the top and tie ribbon through to hold the bag closed. Just pinch in the sides a little to get the top to close. But on my bag, I just tied a separate bow and adhered it with a couple of Mini Glue Dots.
The little bunny is from the cute spring stamp set, Springtime Joy. You’ll find it in the Spring Mini Catalog on page 22. I stamped the little bunny (the lamb was too big!) in Memento Ink and colored in with several Stampin’ Blends markers. For the bunny, I just used the light and dark Smokey Slate plus a little Crumb Cake and then pink and purple flowers for the little crown. I die cut the bunny with a die in the Tasteful Labels Dies. I wanted a layer underneath it so I just cut a Rococo Rose rectangle to fit underneath and with my Paper Snips, cut those curved corners after I adhered the two pieces together. I popped up the bunny with Stampin’ Dimensionals. The greeting is from the same Springtime Joy Stamp Set and stamped in Rococo Rose Ink to match the paper.
I think it’s a cute little bag, a relatively easy gift bag to make. You’ve probably made one just the same way. With the rest of that same sheet of hydrangea paper, check out the cards I made in this post. It would have been nice if the cards fit in the bag, and I could have made them smaller, but I just made regular size cards as a separate project! I can use this little bag as a decoration around Easter time or as a gift! Just think of this Springtime Joy Gift Bag filled with chocolate Easter eggs or a chocolate bunny!
