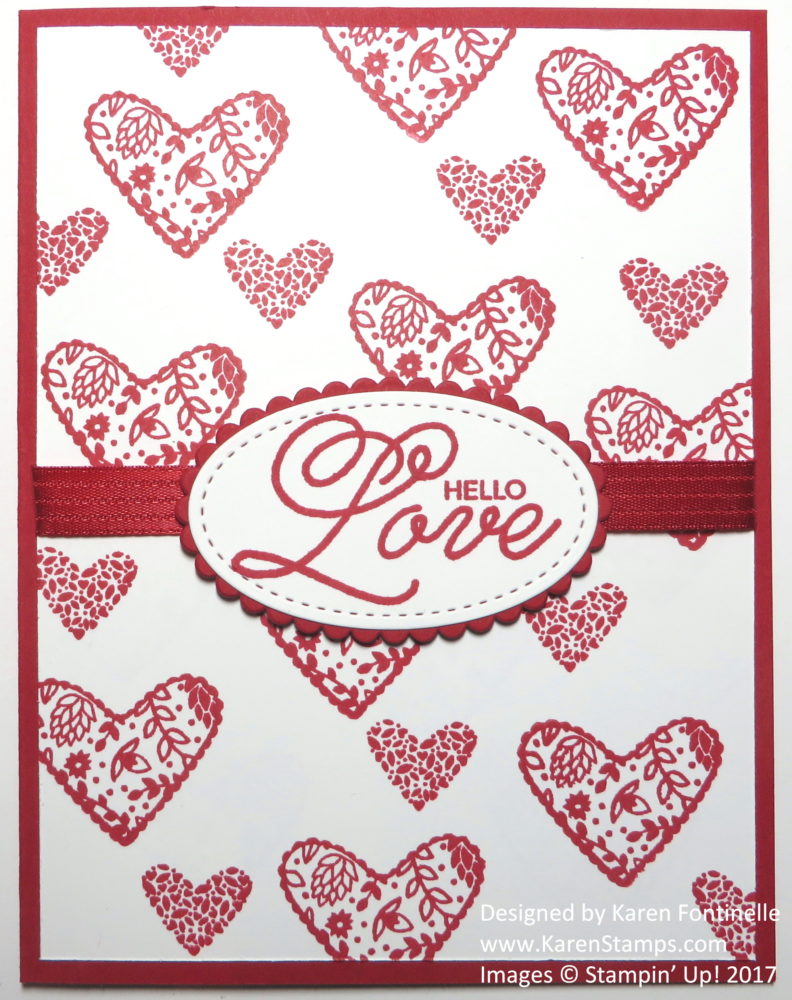
If you haven’t started already, it’s time to get busy making valentines. Valentine’s Day is a week away so you might want to make some easy valentines with the Sealed With Love Stamp Set like this valentine. Essentially I made my own designer paper by stamped two different hearts all over the Whisper White layer on my card. The hearts are from the Sealed With Love Photopolymer Stamp Set in the Occasions Catalog. This set has a great selection of stamps from which to choose, and its use doesn’t have to stop at Valentine’s Day.
When you stamp like this, start with your largest image and stamp randomly on the paper. Years ago I heard a tip to stamp kind of in a triangle. I don’t know that I always follow that, but you can try it. In the end, although the stamping will be random, you want to try to have it look somewhat balanced. You will know if it looks right or not! After you have stamped the large image, then go to the smaller ones. This makes it easiest to fill in the empty space.
This monochromatic card was easy to make because I just used a Real Red card base and stamped with Real Red ink. You could also do an assortment of colors and have it be very pretty as well.
For the greeting, I chose the one in the photo above from the Sealed With Love Stamp Set, stamped it on Whisper White and then die cut with the Stitched Shapes Framelits Dies. They are available again after being so popular when they were first released! And for a layer underneath the greeting I chose the proper Layering Ovals Framelits Dies to put a scalloped layer underneath.
And a little ribbon was in order, so I chose the Real Red 3/8″ Stitched Satin Ribbon. There is a narrow red ribbon in the Occasions Catalog but it didn’t show up as well with this background so I chose the wider ribbon.
How simple is this valentine? Go stamp a few in whatever colors or combinations you like and choose your own greeting! Valentine’s Day is February 14th as you know! Make some valentines and send them to your friends and loved ones!

