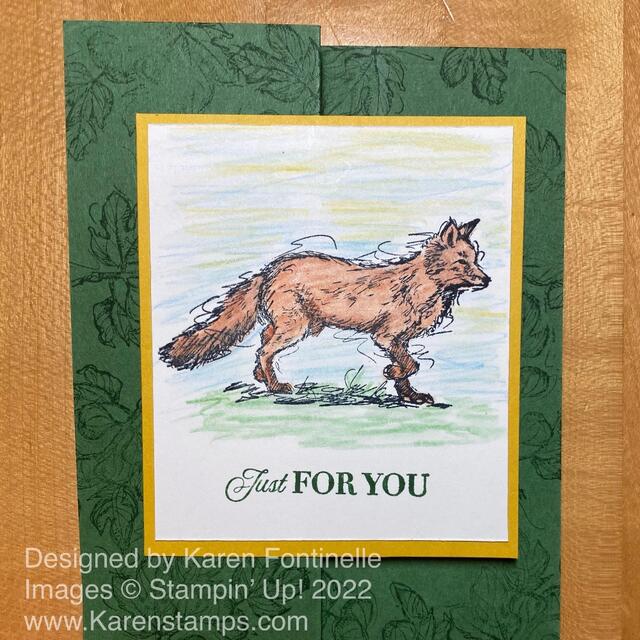
This Stylish Sketches Stamp Set is one that will make you look like an artist by simply stamping with the fox or geese stamps. Just stamp one of the sketchy-looking images and color in if you like! Maybe the best part is that you can earn this stamp set FREE during Stampin’ Up! Sale-A-Bration until August 31 with a $50 purchase!
This stamp set appealed to me because my son likes foxes (for some reason!). He has seen some out in the wild. This card is easy to make but makes a great presentation because it is a Z-Fold card. It may look extra-special and sound extra-special but all you have to do is fold back the front of the card on itself! That’s how easy Z-Fold cards are! That’s the basic instruction, anyway, then you can stamp the panels or add designer paper.
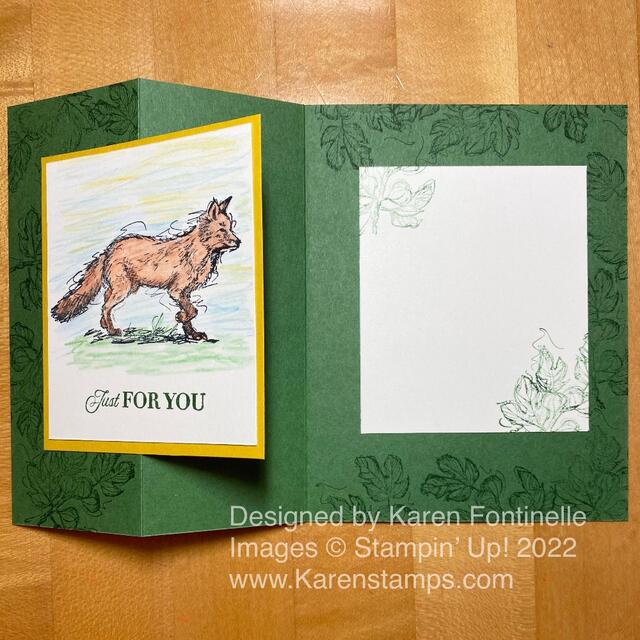
This card is cut just like a regular card base at 8 1/2″ x 5 1/2″. Score at 4 1/4″ for the fold to form the card. Now on the front of the card, score at 2 1/8″, which is half of the 4 1/4″ front. Fold back on the score line so you have a z-shape. This card base is Garden Green and the folded back panel on the front is stamped in Garden Green ink with leaves in the Stylish Sketches Stamp Set.
The fox is stamped on a 3″ x 3 1/2″ piece of Basic White cardstock. The fox is stamped in Memento Ink. I colored in with Watercolor Pencils and blended in a little bit with a Blender Pen. This just smooths out the coloring a little bit. I also colored in the sky and some grass very lightly and in a scribble fashion just to lay down some color to ground the fox and give him a place to run. The greeting is stamped in Garden Green and is in the Celebrating You Stamp Set. This fox piece is then layered on a piece of So Saffron Cardstock, 3 1/4″ x 3 3/4″.
For the inside of the card, since the Garden Green is a rather dark color for stamping a greeting or writing a message, I cut out another piece of Basic White, the same size as the fox piece on the front. I stamped some leaves in the corners and also around the edge of the inside of the card. When you stamp randomly like that, turn your stamp so it goes different ways.
Now for the only tricky part. You want to place that Basic White piece so it will be completely under the front panel and not show from underneath. Adhere the fox piece and layer to the folded panel on the front by only putting adhesive on the left side to adhere to the folded panel and not the inside of the card! Then open the card, put adhesive on the back of the message piece of cardstock, and lay it face down on the inside of the left side of the card, lining it up behind the yellow portion you can see. Then fold over the back panel of the card so that it adheres to the message panel and will be perfectly placed behind that front panel. Check out the photo of the opened-up z-fold card and inside below.
That’s all there is to making this Stylish Sketches Z-Fold Fox Card which would make a great masculine card for a birthday or any occasion. Here is another regular card using the fox stamp and coloring in with Stampin’ Blends. It’s a fun stamp to work with as your creative juices start flowing! Sale-A-Bration ends in just two weeks so don’t miss out on getting some free product with every $50 Stampin’ Up! purchase!


