Tag Archives: anniversary card

Layers of Beauty Anniversary Card

Layers of Beauty Anniversary Card

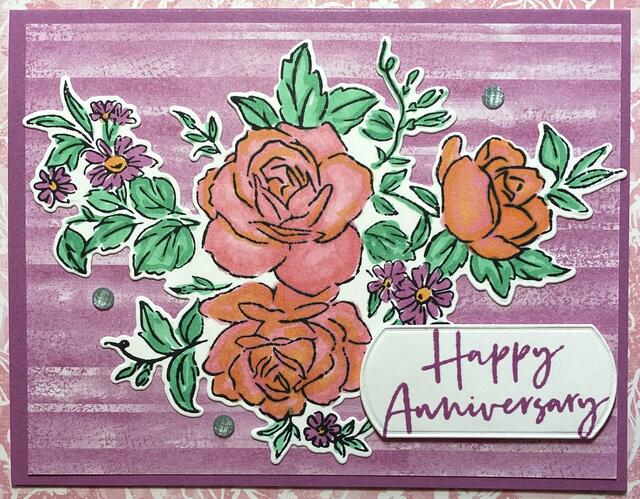
I thought I would try out this lovely new stamp set to make this Layers of Beauty Anniversary Card. We may have lots of floral stamp sets and dies but there’s always a new one that is so pretty we must have that one, too! This Layers of Beauty Stamp Set and Die is something new coming in the Stampin’ Up! Annual Catalog 2024-2025. There are also Layers of Beauty Decorative Masks in this Bundle that can be used to color this large floral piece.

My other goal with this card was to use some of the new In Colors 2024-2026. The card base is Petunia Pop cardstock. The layer of striped paper is in the Unbounded Beauty Designer Series Paper. I thought it looked good as a background to the floral piece without being too distracting.

The large floral piece fits on the largest acrylic block we have! That’s how big it is! It is stamped with Memento Ink on Basic White cardstock. I stamped it on a piece of 4″ x 5 1/4″ Basic White. Be careful how you place it before you put the stamp down on the paper so you get all the areas of the stamp.

To color in the floral piece, I used my brand new Stampin’ Blends Markers of the In Colors 2024-2026. For the roses, I colored in with Pretty in Pink, both Dark and Light. The daisy-like flowers are colored with Petunia Pop with little Peach Pie centers. The leaves are all colored with Light Shy Shamrock and then highlighted a little bit with Dark Shy Shamrock. Then I went back over the roses with a little bit of the Peach Pie Stampin’ Blend Marker just for fun.

After coloring the floral piece, I used the die to cut it out. It’s not too hard to figure out which way it fits on your stamped image, but take some time to make sure all the edges are lined up properly so you get a good diecut. This was glued down flat on the card but I almost popped it up with Stampin’ Dimensionals.

The greeting is stamped from the Layers of Beauty Stamp Set with Petunia Pop ink. I used one of the dies in the Unbounded Love Dies to cut it out. However, that die was a little big to fit on the card without taking up too much space. I took the die cut piece back to my Stampin’ Cut & Emboss Machine to trim off each end of the label by placing the die right on the diecut piece but sliding it down a tiny bit to make it shorter. I did this on the opposite end also. You can feel that the sides are lined up in the lines on the sides of the die. I only ran the die through just over each end, not across the whole piece. I popped up the greeting with Stampin’ Dimensionals.

Lastly, I added three 2024-2026 In Color Shimmer Gems in the Shy Shamrock color. It was hard to stop at three, but I did it!

Right now you can shop the Last Chance Sale at Stampin’ Up! to get select products at a discount or to stock up on your favorite papers, stamps, dies, and embellishments before they retire (or before the prices go up in the new catalog!). This sale lasts until April 30, 2024. And then the new Annual Catalog begins on May 1st!

SHOP STAMPIN’ UP! ONLINE HERE!

Expressions In Ink Wedding Anniversary Card

Expressions In Ink Wedding Anniversary Card

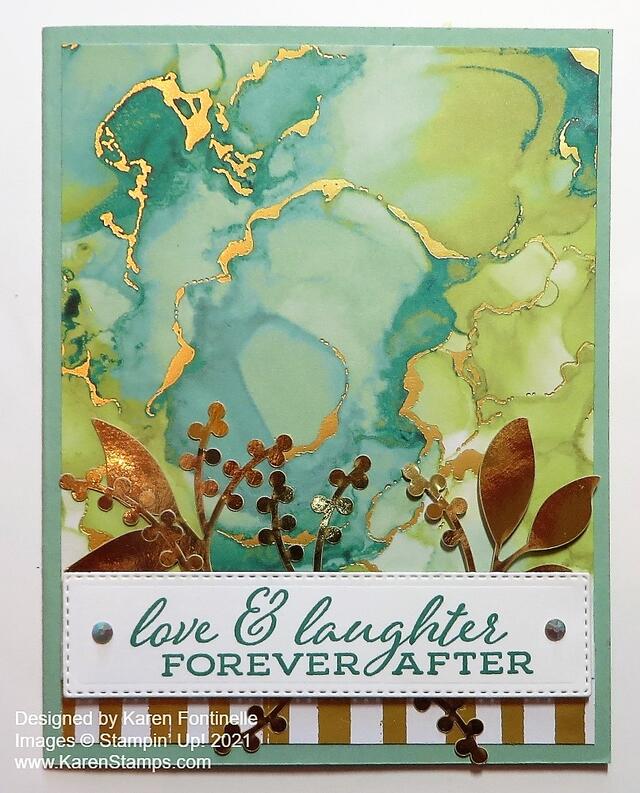
If you want to make a truly beautiful card, just start with the Expressions In Ink Specialty Designer Series Paper, as I did with this Expressions In Ink Wedding Anniversary Card. I use the word “beautiful” not to brag about my card and not to just toss the term out there as an adjective describing a card. I think this designer paper is some of the most beautiful we have ever had.

The floral patterns and colors in this Expressions In Ink Paper are pretty enough themselves, then add the kind of alcohol ink look or watercolor look to the patterns, plus the gold foiling, and it is over the top! If you want to make a really simple card, just adhere a layer of this designer paper to the front of the card base, add a greeting, maybe a bit of ribbon if you like, and you are done!

This anniversary card was specially made for my daughter and son-in-law for their wedding anniversary. The card base is Mint Macaron (I think!). You can test which color you would like to use with this paper! Now this paper has a lot of white space throughout the 12″ x 12″ paper. I particularly wanted a lot of the blues and greens on this card and not so much the white, so I had to cut into the paper at the right portion to get the look I wanted.

The greeting is stamped in Just Jade Ink and is in the Forever Fern Stamp Set. I thought it was a good sentiment for an anniversary card and especially for this couple! Then the greeting was diecut with one of the Stitched Rectangle Dies.

Just for a little interest, there is a strip of a gold striped pattern in this designer paper at the bottom of the card. It just adds a little “something” to catch your eye.

I also added some gold foil leaves and foliage in the Expressions In Ink Ephemera Pack. Some I cut apart to get everything where I wanted it! I just tucked those in above and below the greeting. I didn’t want anything to interfere with the colors of the paper in the top area of the card. And of course, I added a little bling to the sides of the greeting. You can use whatever gems or jewels you like! Or place some around on the card. Whatever makes you happy!

Even in the midst of the beginning of the holiday season, don’t forget this beautiful Expressions in Ink Designer Paper! You still will need some “regular” cards like this Expressions In Ink Wedding Anniversary Card so make some cards using this pretty paper for birthdays, anniversaries, sympathy, thinking of you, any occasion you want.

SHOP STAMPIN’ UP! ONLINE HERE!

Pandemic Anniversary Card 2020

Pandemic Anniversary Card 2020

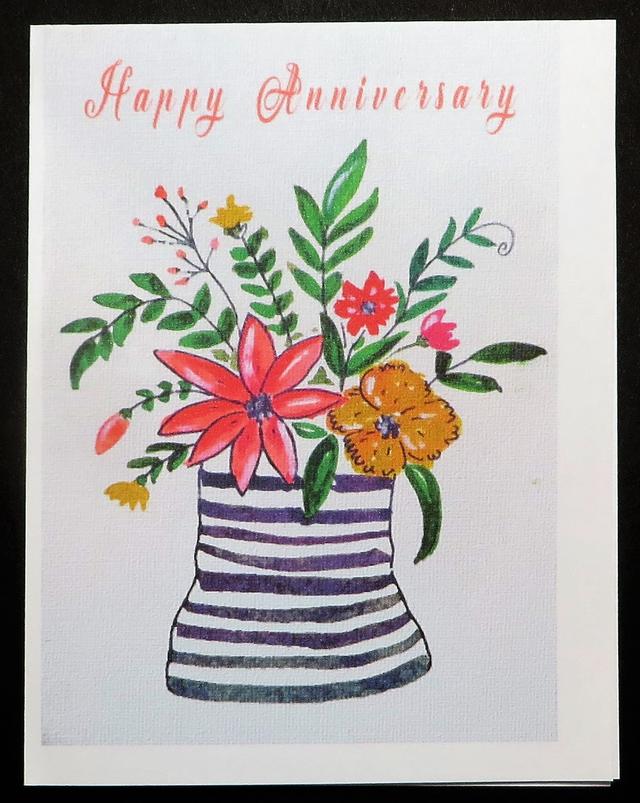
This isn’t my usual stamped Stampin’ Up! card but it is extra-special nonetheless as it is a Pandemic Anniversary Card handmade by my husband! Yesterday was our wedding anniversary of many years and he put his cardmaking skills to work to make me this card!

Due to the pandemic, of course, we have been staying out of stores so he hasn’t been able to buy cards for me. But he found a way to make them on the computer! As my son texted last night, “Making cards on the computer! How retro!” I know when we bought our first computer it was really cool to buy some software that had card designs you could make and print out! I don’t know that people do that any more, at least not with software, but there are online sites where you can design cards, apparently!

So the card base is computer paper, not cardstock, and the colors are whatever the printer ink colors are combined together! I think the card design is something similar to the Boho Indigo Medley in the new catalog on page 9. Maybe a little bit like the Forever Fern Bundle!

For Mother’s Day he also tried to make me a card, but it printed out on a full sheet of paper, not a card he could fold up, so this one was progress! But the Mother’s Day “card” was beautiful, the floral designs around the “Happy Mother’s Day” was similar to the florals Stampin’ Up! has been using in their new logos.

I really appreciate my husband going to all this trouble to make cards for me during the pandemic. He got lucky yesterday when I was in the bedroom having a long phone call with a girlfriend and he could work on the computer without me popping in!

I think if he were a stamper, we might have the same style! Even cards he has bought at the store in the past I always like and think I could copy it somewhat with my stamping supplies! Maybe he is subsconsciously absorbing my cardmaking style from being surrounded by Stampin’ Up! products!

Last year I had laryngitis so we didn’t go out for dinner on our anniversary! This year is the pandemic and right now with things being really bad in Houston we aren’t even picking up food right now, not to mention that he just had a partial root canal the other day so can’t chew on that side. Wouldn’t be any fun to go out to eat anyway for him! Maybe the third year will be the charm…next year! If I ever get to go back to my favorite seafood restaurant I am ordering EVERYTHING I love there!!

I hope you get to celebrate your anniversary and other occasions better than we did this year! And I hope WE get to celebrate our anniversary better NEXT year! But the important thing is we HAD an anniversary together and it doesn’t matter if we ate at home or had a card made on the computer.

Beautiful Bouquet Floral Anniversary Card

Beautiful Bouquet Floral Anniversary Card

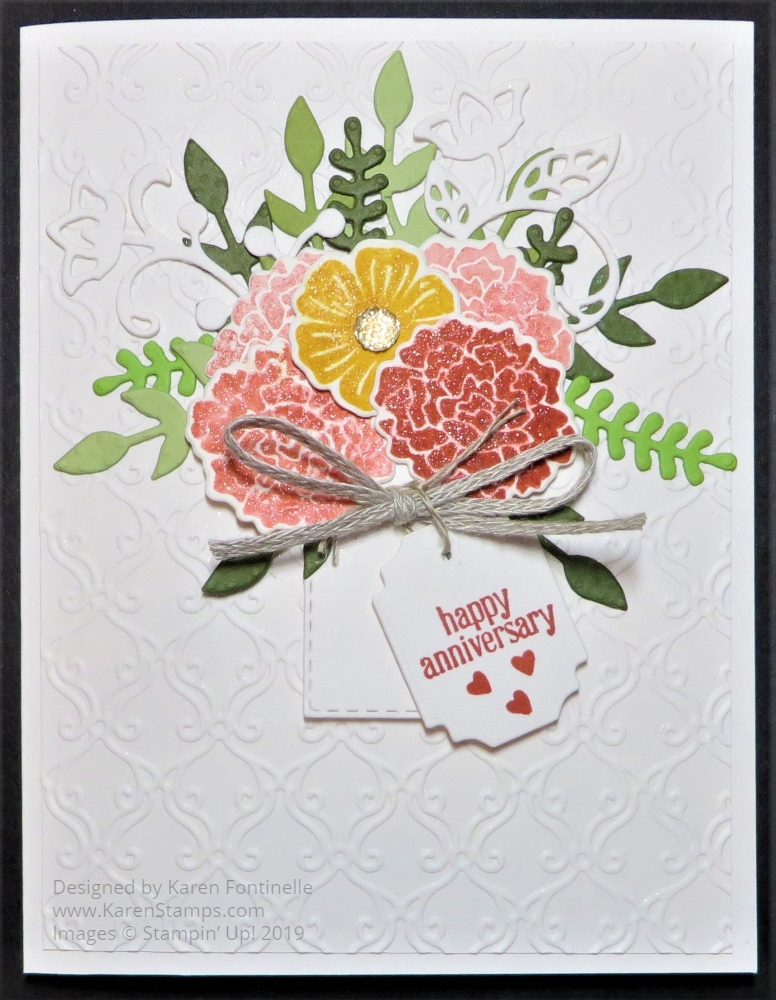
For a change from Halloween and Christmas ideas, here is the Beautiful Bouquet Floral Anniversary Card I made for my daughter and son-in-law. I can’t believe they are starting to rack up quite a few anniversaries now.

I started with one card idea and as I began putting the card together I didn’t like it. What to do?? Sometimes I can keep playing with something and it will turn out, but this time I turned to the Stampin’ Up! catalog for inspiration. I found it on page 85 up in the top corner. I already had stamped and die cut some of the Beautiful Bouquet flowers for the original card idea so that’s why I immediately went to the Beautiful Bouquet Stamp Set in the catalog.

Often you may not have the same products they used on a card or project in the catalog. It is highly likely that you can substitute something you DO have at that moment. Then if you really want that product, you can put it on your next order. But if you need something right away, just choose something in your stash!

For example, on the catalog sample on page 85, behind the bouquet of flowers is a die-cut made with the Stitched Lace Thinlits. I don’t own that so instead, I chose to emboss the entire background with the Stylish Scroll Embossing Folder. I think that works out fine even though I didn’t have the lace background.

For all the leaves, I just chose several colors of green cardstock and punched or die-cut sprigs and stems of leaves.

The flowers can either just be stamped or you can play a little in the way the sample was made and do some “faux watercoloring”. In this technique, the stamp is inked up and then spritzed with water before stamping. Just spritz lightly to barely moisten the ink and then stamp on Watercolor Paper. You probably want to make extras and then decide which ones came out the best or which ones maybe have an edge that didn’t come out well but you can stick underneath another flower! There is even a Whisper White die-cut scroll of flowers and leaves die-cut with the Flourish Dies.

For the suggestion of a vase, I die-cut a piece with the Stitched Rectangles Dies. The bow is tied with a piece of Braided Linen Trim and adhered with Mini Glue Dots. The tag in the sample is made from a punch in a kit, but I just used a die from the Ornate Frames Dies. The greeting stamped on the tag is from the Itty Bitty Greetings Stamp Set. This is a great stamp set to own! Then the tag is tied on to the bow with Linen Thread.

For some extra sparkle, I colored the flowers with some Wink of Stella and added a Gold Faceted Gem to one flower. Some of the flowers are popped up on Stampin’ Dimensionals.

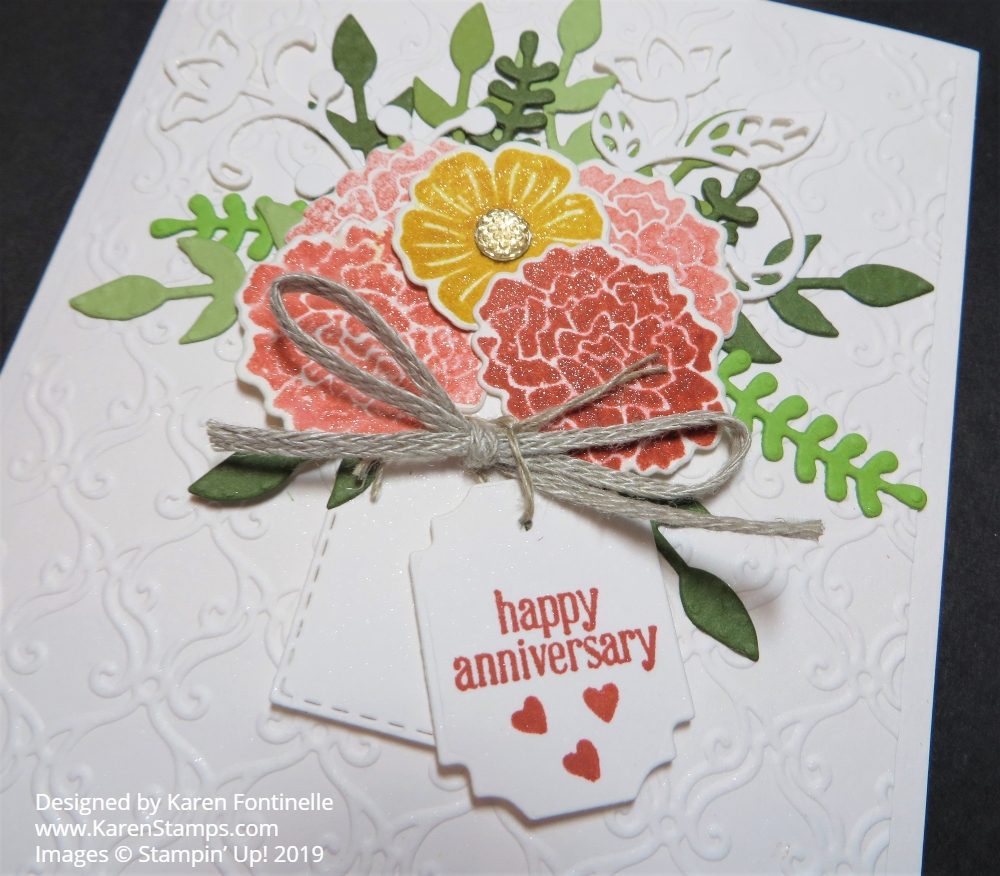
Beautiful Bouquet Floral Anniversary Card Closeup

I made this card for an anniversary, but of course, a bouquet of flowers whether real or on a card can be given for many occasions. This exact same card with a different greeting could be for a birthday, sympathy, congratulations, even a wedding. That’s what makes the Beautiful Bouquet Stamp Set so useful and versatile.

SHOP STAMPIN’ UP! ONLINE HERE!

Modern Heart Anniversary Card

Modern Heart Anniversary Card

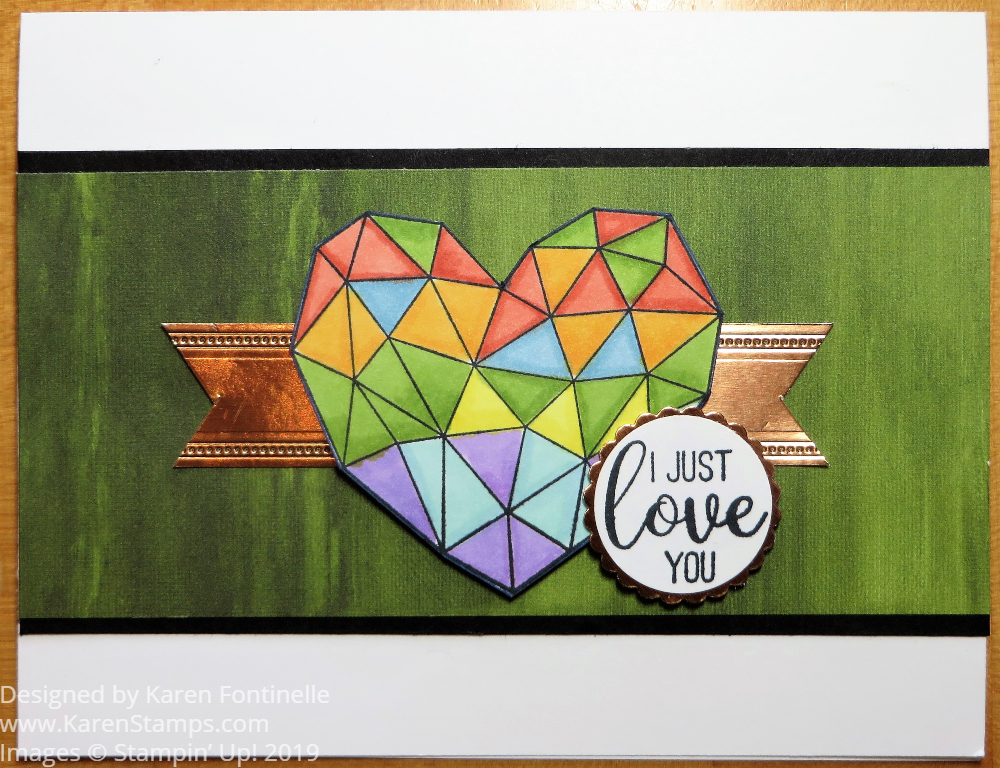
This Modern Heart Stamp Set is one that I skipped over initially and then soon discovered was kind of cute and had really nice sentiments. I love the fonts on the sentiments. You can stamp this heart many ways and make many types of cards with it. I made it a Modern Heart Anniversary Card for my husband.

You can just stamp the heart and color it in, or stamp in a color and leave it as is. You can stamp the “swooshy thing” and then stamp the heart over it. You can emboss the heart if you like some dimension. You can use the new Fluid 100 Watercolor Paper and use the new Pigment Sprinkles. So many opportunities for creativity!

In this case, I wanted to do some coloring using my Stampin’ Blends. I just stamped the heart on Whisper White in Memento Ink and used several shades of markers……Calypso Coral Combo, Mango Melody Combo, Pineapple Punch Combo, Balmy Blue Combo, Granny Apple Green Combo, Pool Party Combo, Highland Heather Combo and Night of Navy Dark just to color around the edge after I cut out the heart.

The background piece is from the Perennial Essence Designer Series Paper. I decided to add narrow strips of Basic Black to each side of the designer paper. Underneath the heart is a strip of Copper Foil that I decorated the edge with the straight die in the Stitched Nested Labels Dies.

The greeting is stamped in Memento Ink on Whisper White and punched with the 1″ Circle Punch. Then I layered it on the 1 1/8″ Scallop Circle Punch in Copper Foil. Both the heart and this greeting are popped up on Stampin’ Dimensionals.

Take a look at this Modern Heart Stamp Set and see if it is one you want in your collection! Remember, for every $50 you spend in July, you will receive a $5 coupon code to use on your order in August! No limit! It’s Stampin’ Up! Bonus Days! Keep your code(s) in a safe place so you will have them handy to use in August.