Tag Archives: Be Dazzling Specialty Paper

Be Dazzling Pretty Pumpkins Halloween Card

Be Dazzling Pretty Pumpkins Halloween Card

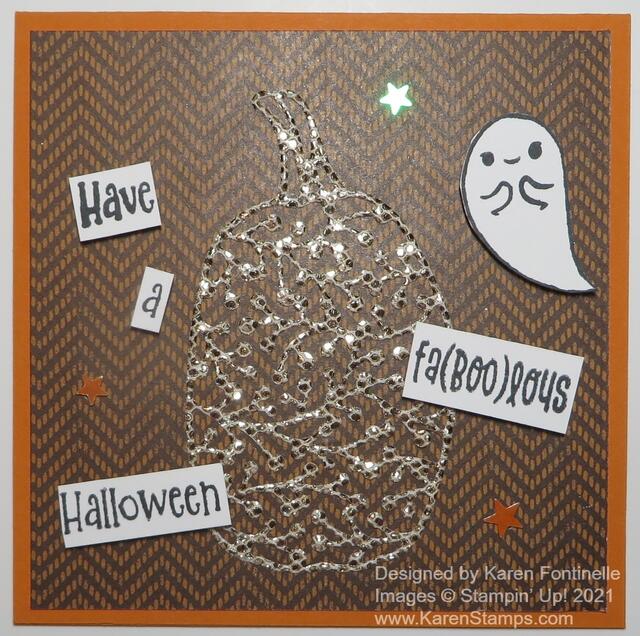
Here’s a fun Halloween card, the Be Dazzling Pretty Pumpkins Halloween Card, that came about simply because I found a square Pumpkin Pie card base already in my Pumpkin Pie cardstock. I immediately got the idea that I would make a quick card out of it right away. I don’t know if this one was quick in my fiddling with the words in the greeting, but it would be an easy one for you to copy since I already did the design!

Beyond the 4 1/4″ x 4 1/4″ Pumpkin Pie card base and putting a pumpkin on the front, I didn’t know exactly how it would all come together. Just to start, I looked through the Blackberry Beauty Specialty Designer Series Paper simply because it was laying out on my desk. Right away I saw the backside of one of the gold foil accented papers, probably one of the prettiest papers. We often don’t use the “other side” of the fancy or themed paper but sometimes we have to sacrifice the pretty side in order to use the “other” side! I immediately liked the herringbone design of this paper for a background. It is cut at 4″ x 4″.

The pumpkin is die-cut from the Sale-A-Bration Be Dazzling Paper using the Detailed Pumpkins Dies. As I write this, this paper is not coming up in the Online Store so it may not be available any longer. However, if you can’t get it, you can use a Gold Foil Sheet or any other metallic papers which will look just as pretty! This particular die is SO pretty and detailed! If you think ahead, it would be best to use an Adhesive Sheet on the back of the paper before you die cut it so that you don’t have to put teeny tiny drops of glue on the back to adhere it.

The greeting is in the Cutest Halloween Stamp Set and is quite lengthy in size. Just for fun, I decided to cut up the individual words and see if I liked that on the card. With the pumpkin taking up a lot of room on the card, front and center, it was a little difficult to arrange the words to my liking. Finally, I decided to go with a placement I liked and stamped and cut out a ghost as well from the same stamp set.

Sometimes, even when you are not totally pleased with a card, it is the addition of some little embellishment that just makes the card satisfactory! In this case, since I had struggled with the word placement and the ghost, it wasn’t like this was my favorite card of all time, but when I added the Cute Stars Adhesive-Backed Sequins, that was the final touch! I think the stars added so much and I loved the card then!

Sale-A-Bration ends on September 30, a Thursday, two weeks from yesterday! That’s all the time you have to get your free products with every $50 or more purchase! It always seems like we have lots of time in the beginning but now the end is coming up fast! Don’t disappoint yourself by forgetting or not getting free products during this favorite promotion!

Be sure to shop soon and hopefully get something FREE during Sale-A-Bration!

SHOP STAMPIN ‘ UP! ONLINE!

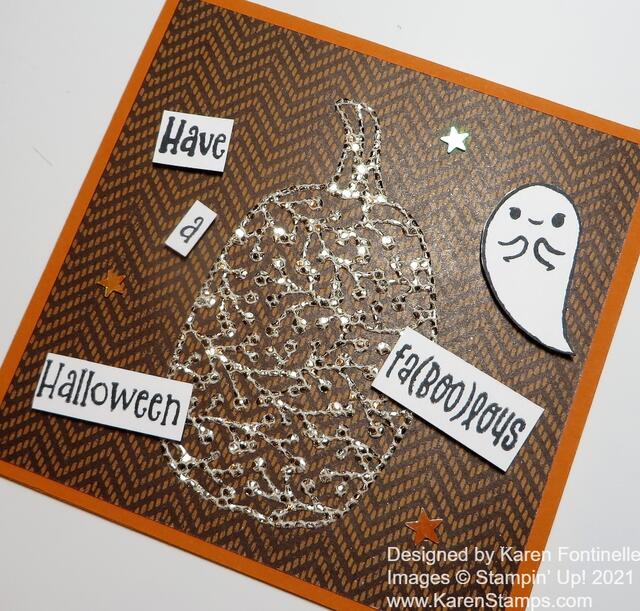
Be Dazzling Pretty Pumpkins Halloween Card Closeup

Pretty Pumpkins Gather Together Fall Card

Pretty Pumpkin Gather Together Fall Card

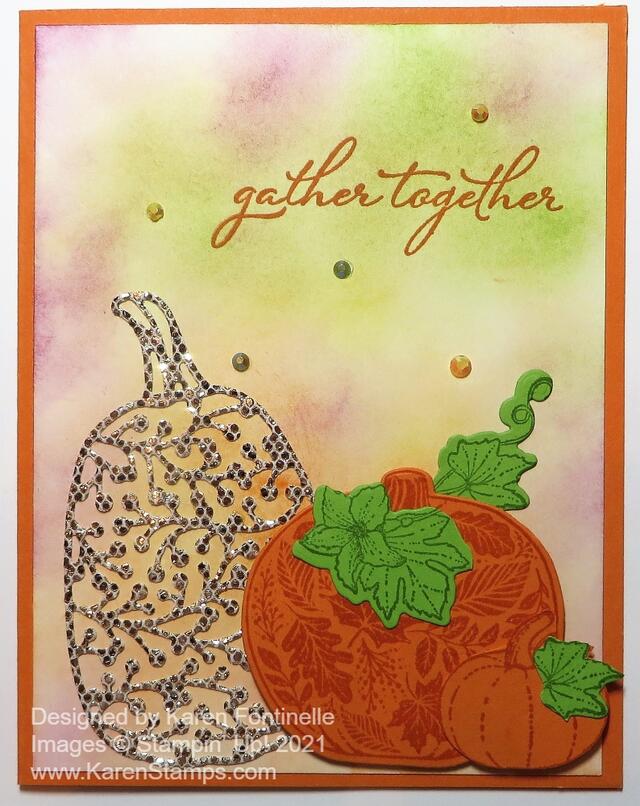
I just love the possibilities of this pumpkin stamp set and dies with my first attempt being this Pretty Pumpkins Gather Together Fall Card. On my first opportunity to order from the Stampin’ Up! Holiday Catalog I chose only holiday things and left fall and Halloween until later. I couldn’t wait to get my hands on this stamp set. As it is rightly named “Pretty Pumpkins” I think you will be able to make many pretty pumpkins on your fall cards and projects!

My card has a Pumpkin Pie card base and I started off planning to make it a horizontal card rather than this vertical. But I often change my mind as I go! I also started with a Basic White layer for the background. It definitely needed something and what I came up with was using my Blending Brushes to add color to the white paper! I got the idea from the bottom sample in the Holiday Catalog on page 48. The colors of ink I used were Pumpkin Pie, Crushed Curry, Granny Apple Green, and Rich Razzleberry. I only added the colors lightly, rather randomly around the white cardstock and I just LOVED those colors together! If you don’t have the Blending Brushes yet, you can use a sponge or Sponge Daubers.

As you may have guessed, the stamp set used on this card is the Pretty Pumpkins Stamp Set. If you want the Detailed Pumpkins Dies too (and yes, you do!), then purchase the Pretty Pumpkins Bundle and save 10% on the set. The sparkly pumpkin is die-cut out of the Sale-A-Bration Be Dazzling 6″ x 6″ Specialty Paper. You may think this paper looks sparkly in this photo, but I guarantee you, you will not believe how sparkly it is until you see it yourself! You can get it FREE with a $50 purchase during Sale-A-Bration through September, but don’t wait until the last minute in case they run out. Dazzling describes this paper well.

When you die-cut the Be Dazzling Paper, there is a note in the catalog that cutting glittered paper leads to dulling of the blades. I say take a chance and don’t worry too much about it. Maybe if you are going to cut the whole stack of paper with the same die, you might wear out your die. One thing I did with my pumpkin was tearing off the backing paper before die-cutting. That makes the glittered paper a little thinner and is a tip I learned a long time ago with specialty paper like this. It would also be wise to use the Adhesive Sheets on the back of the glittered paper so that the delicate design will already have adhesive on the back. Otherwise, just use teeny tiny drops of Multipurpose Liquid Glue on the back.

Now for the stamped pumpkins! I stamped the printed pumpkin with Pumpkin Pie Ink on Pumpkin Pie Cardstock. Then I used the die to cut it out. I also stamped the group of pumpkins on Pumpkin Pie but I cut them apart by hand and only used the small pumpkin. I also stamped two groups of leaves with Granny Apple Green Ink on Granny Apple Green Cardstock. After die-cutting them, I cut some of the leaves apart to make them fit how I wanted them. The greeting is stamped directly on the card in Pumpkin Pie Ink from the Pretty Pumpkins Stamp Set.

For a little bling, I also added a few 2021-23 In Color Jewels to fill in the space a little bit and add a little more sparkle! Your rhinestones and jewels don’t always have to match exactly as you can see. I doubt people pay attention to the exact color of the jewel as they do to the total look of the card with the sparkle. This Pretty Pumpkins Gather Together Fall Card has it all for fall!

SHOP STAMPIN’ UP! ONLINE HERE!