Tag Archives: birthday card

Gingham Pansy Petals Birthday Card

Gingham Pansy Petals Birthday Card

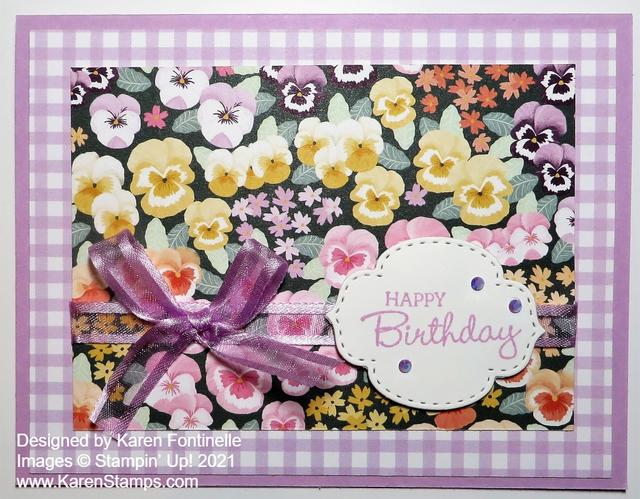
I got this Gingham Pansy Petals Birthday Card idea from a sample in the new Stampin’ Up! Catalog, coming May 4. I changed it up a little bit as often happens even when you think you are going to copy a card exactly! I’ve been seeing so many pansies around the neighborhood recently and I think of this beautiful new Pansy Petals Suite coming soon!

I love this Pansy Petals Designer Series Paper, not only for the pansies, but for the designs on the non-floral sides, like this gingham pattern. The sample in the catalog uses this pattern of the tiny pansies all close together and then uses the opposite yellow side for a layer underneath. I chose this Fresh Freesia gingham pattern on another sheet and layered it on a card base of Fresh Freesia. Fresh Freesia is one of the incoming In Colors 2021-23 so be sure to look for those!

I left a wide margin, about 1/2″ of the gingham showing, which them always makes the top layer look very small. In reality, it all fits just fine. I added a piece of the Fresh Freesia 3/8″ Open Weave Ribbon around the pansy paper and tied a bow separately and adhered it with a Mini Glue Dot.

The greeting is stamped with “Happy Birthday” in a pretty font in the Pansy Patch Stamp Set. I didn’t want too small of a die-cut but nothing too big and I think this one in the Stitched So Sweetly Dies is just right. These dies are in the current catalog and thankfully are carrying over to the new catalog! They’re very versatile.

I couldn’t resist adding some of the new In Color Jewels that are so pretty! Be sure you put a package or two of those on your first order! They are beautiful colors for a little embellishment.

The Pansy Petals Suite Collection comes with the Pansy Patch Bundle (stamp set and dies), the Pansy Petals Designer Series Paper, plus the cute little Bumblebee Trinkets. If you like this Gingham Pansy Petals Birthday Card, I hope you will take a look at the Pansy Petals Suite because it will make pretty cards for you!

SHOP STAMPIN’ UP! ONLINE HERE!

Fine Art Floral Golden Garden Birthday Card

Fine Art Floral Golden Garden Birthday Card

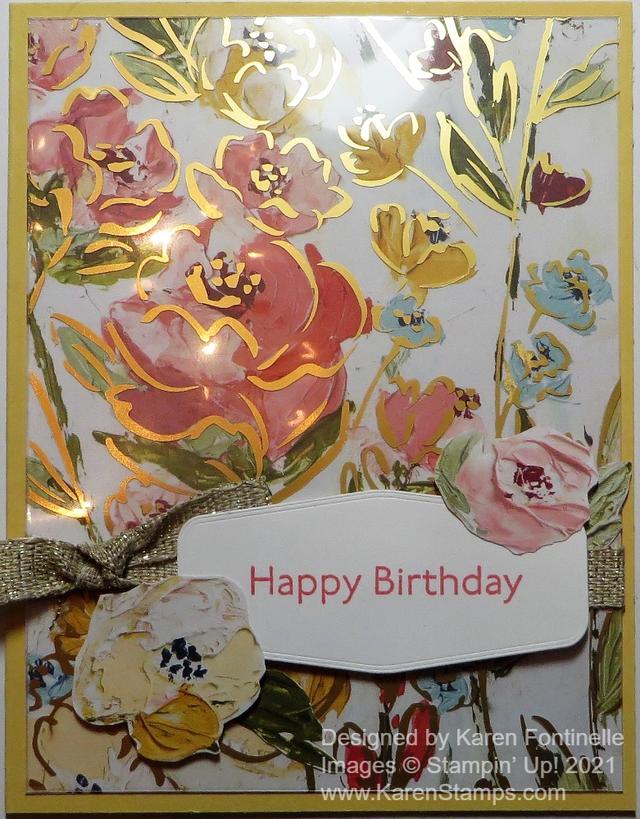
I thought I would make an easy but beautiful card for this blog post and of course that meant using the Fine Art Floral Suite to make this Fine Art Floral Golden Garden Birthday Card. I know the title is a little weird, but it’s because I used the Golden Garden Designer Specialty Acetate Sheets. I didn’t even know what they were called, just that they were in the new spring mini catalog and I had them! If you place them just right, some parts match this designer paper!

First I made the card. I wanted to use the Fine Art Floral Designer Series Paper. I chose the sheet that has one top corner bare of flowers. Actually, there is another sheet with a blue background and yellow flowers, but this one has the white background with pinkish flowers. You’ll see it in your package. You could also just frame this sheet of paper, kind of like some other designer paper we had one time! Or use it for a scrapbook page. I chose So Saffron for the card base, one of the paper’s coordinating colors….and there are a lot of coordinating colors with this paper!

Next, I got out the Golden Garden Acetate Sheets and found the portion that matched the flowers on the paper and cut it out. I just put tiny dots of Multipurpose Liquid Glue on the back of the acetate on the widest parts of the printed design in hopes of hiding the glue. Actually, when you turn the acetate over, you could use that side instead! Then I carefully overlaid the acetate on the floral paper. Be sure to adhere the ribbon around the designer paper and acetate before you adhere to the card base. I added a piece of the 3/8″ Fine Art Ribbon which is soft, pliable, and has gold in it!

The greeting is stamped in Flirty Flamingo Ink from the Art Gallery Stamp Set in the Suite. I die cut the piece with one of the Tasteful Labels Dies. Next, I cut out two flowers from a scrap of the designer paper and popped them up on the corners of the greeting. I’m not sure if I like them or not, but they are there.

That’s all there is to this card! Once again, the beautiful designer paper does most of the work to give you a lovely card! The acetate overlay is a bonus. HERE is another card I made recently with both sides of the same designer paper.

You’ll find all of these supplies in the January-June 2021 Mini Catalog. And while you are ordering, be sure to keep Sale-A-Bration in mind and order in $50 increments so you earn FREE Sale-A-Bration products! No limits!

If you want EVERYTHING, order the Fine Art Floral Suite Collection (155982) and get it all by just putting in one item number. It has been on backorder but as I write this it should be available next week. Or just order the individual products that you want, or the Bundle. I’m sure you will want these beautiful products to make a card like this Fine Art Floral Golden Garden Birthday Card!

Arrange a Wreath Happy Birthday Card

Arrange a Wreath Happy Birthday Card

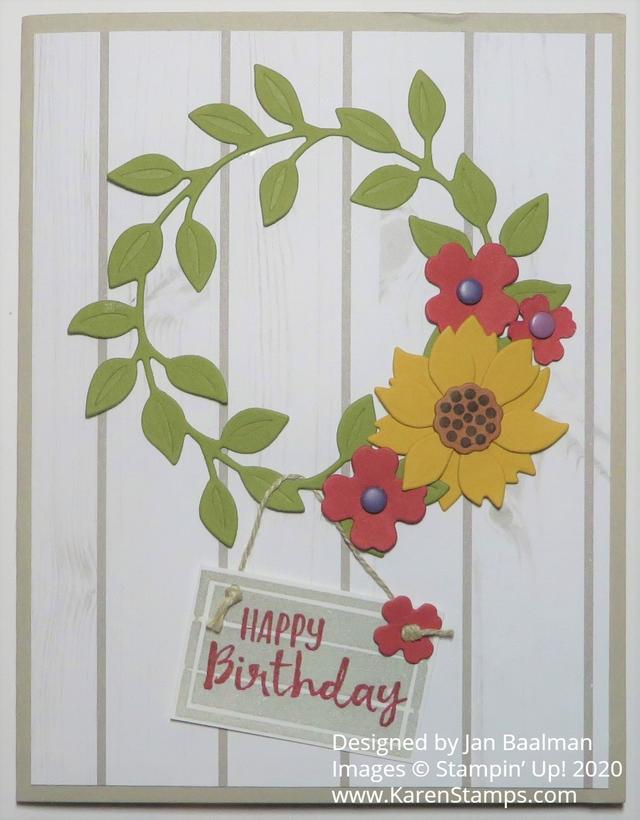
I got several very nice cards for my birthday a couple of weeks ago and this Arrange a Wreath Happy Birthday Card was made by my dear, long-time friend who got me into Stampin’ Up! in the first place!

I still remember stopping by her house when we were in town to go to a wedding shower and her taking just a few minutes to show me some projects she had made at a party by this company called Stampin’ Up! that I had never heard of. I barely knew anything about rubber stamping and had not been successful in my stamping attempts with stamps from the craft store, but her projects were so cute!! She had just received her Starter Kit but hadn’t opened it yet and we didn’t have time that day anyway. When I went back later in the summer for our friend’s wedding, I got to spend time stamping with her and fell in love with it! I didn’t really want to go anywhere else or do anything else, just stay at her house and stamp or look at the cards and things she had made. A few months later, I think, I signed up to be a Demonstrator.

This card was made with the Arrange a Wreath Stamp Set and Wreath Builder Dies. You can purchase both together in a Bundle and save 10%. I have seen some really cute cards made with this Bundle so I just might have to purchase it myself someday!

The card base is Sahara Sand with a layer of designer paper. You could choose something from the In Good Taste Designer Series Paper that might look similar. The wreath is die cut with the Wreath Builder Die out of Old Olive Cardstock. Then you can diecut some flowers from the set in any colors you like to decorate the wreath She used some enamel dots for the flower centers. I think the little Happy Birthday sign hanging from he wreath is so cute!

Obviously you can use this wreath for LOTS of occasions and all the seasons of the year, making this a very versatile stamp set. I love this card!

The latest reports about Hurricane Laura are that Houston is “out of the cone” so we should just have minimal effects, maybe some bands of rain and some gusty winds. The storm will go in around the Texas-Louisiana border which is certainly bad for those people. I just hope our power stays on! We’ve been lucky through many storms but you never know when your power might go out seemingly for no reason! We were making hurricane preparations anyway when it looked like it was coming directly here, so we have batteries and candles and lanterns and a ton of chocolate chip cookies I baked last night!

Take a look at the Arrange a Wreath Bundle for your next Stampin’ Up! order. You’ll find it in the Stampin’ Up! Annual Catalog on page 127 with the dies on page 173. Don’t forget to use your Bonus Coupons from July by August 31 when they expire.

SHOP STAMPIN’ UP! ONLINE TODAY!

Banner Blooms Colored Flowers Birthday Card

Banner Blooms Colored Flowers Birthday Card

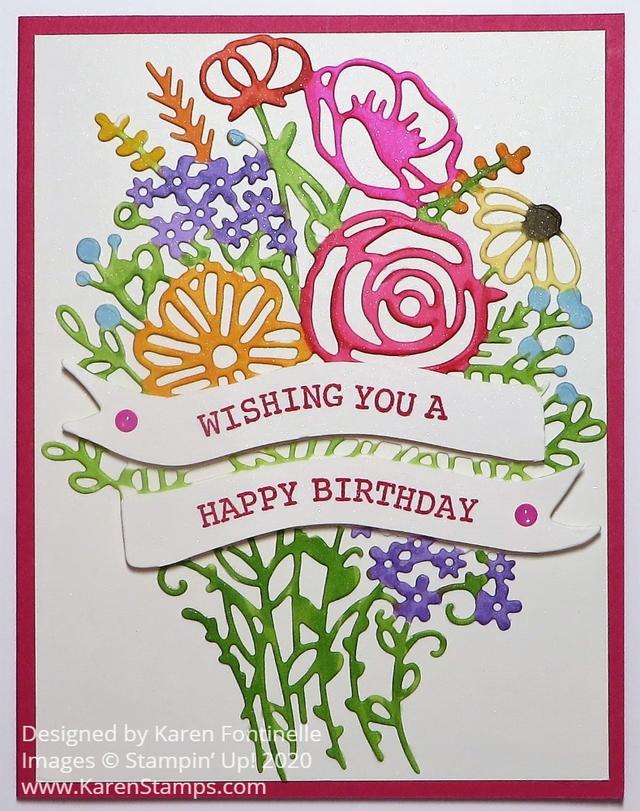
This Banner Blooms Colored Flowers Birthday Card is another example of how I did something different than I planned to! I originally thought I would color this die-cut by sponging on some color, maybe in a very soft look. But when I went to actually color on the die-cut, I grabbed my Stampin’ Blends markers instead and went to town!

When I stamp, I am always, always, always using Grid Paper on my table. It is handy for lining things up and especially for measuring quickly and easily. When I took a decorative painting class years ago, the teacher had us put down a towel on the table and after that, I couldn’t paint unless I had a towel underneath my project! Now you can even choose from several kinds of Grid Paper from Stampin’ Up!, even colorful ones! For coloring these die-cut flowers, I needed a plain white paper underneath (and you always need a paper underneath when coloring with Stampin’ Blends because they do bleed through the paper) so I could see the die-cut well. I simply turned my Grid Paper over to the other side.

This card uses Melon Mambo Cardstock for the card base. I chose it after coloring the flowers. I used Shimmery White Cardstock, my favorite, for the die-cut and also for the card layer, because it is good to color on and it has a very subtle shimmer to it. The paper is very pretty all on its own!

I die cut the flower bouquet with the Banner Blooms Dies. This die is really different from the ones we have had. I found that it works best placing the die cutting side up with the paper on top rather than face down on the paper. I don’t know why, but it does! I also ran it through my machine three times and after that, almost all the pieces popped out on their own and the few that were left I used the Take Your Pick Die Brush Tip to roll over the die cut piece and also over the die to get out just a few pieces of paper that remain in the die.

As I said, I planned to use maybe Sponge Daubers to lightly sponge on ink colors on the flowers and leaves over the die, not really being precise, just adding color. But then I grabbed my Stampin’ Blends Markers and had fun coloring the whole thing! I didn’t try to be absolutely perfect but used mostly the brush tips of the markers to quickly color in the different areas. On the really narrow areas, I used the tip ends of the markers. I usually started with the Light color and also added the Dark for a tiny bit of shading. Since I LOVE coloring with these markers I didn’t find the coloring tedious.

To make the banners going across the bouquet, just stamp the greeting in the Hand-Drawn Blooms Stamp Set on a scrap piece of paper. Then line the die up over the stamped greeting (but you don’t need a full piece of paper or you’ll be wasting it). You will end up with the portion with the stamped banners. Then just trim these off the rest of the bouquet and adhere to the bouquet you have just colored. The greetings in the stamp set are doubled-up to fit perfectly on the banner areas. You could also cut out the banners and use stamps from other sets that would fit.

The banners are stamped in Melon Mambo ink. I popped them up on Stampin’ Dimensionals®. I added two Magenta Madness 2020-22 In Color Enamel Dots to the banners.

The whole bouquet is adhered to the card with lots of teeny tiny dots of Multipurpose Liquid Glue. I placed the bouquet on the Silicone Craft Sheet which held it steady and it didn’t matter if a little glue got on the craft sheet.

A good thing to use for delicate die-cuts like this is the Adhesive Sheets which you adhere to the paper before die-cutting and it turns the die-cut into a sticker when you remove the backing paper. I just never think ahead to use it!

Here is another card I made with the Banner Blooms Die using Rainbow Glimmer Paper, another great option if you don’t want to color in!

Remember, we only have about a week left of Bonus Days! When you spend $50 on any order, you will receive via email a $5 Bonus Coupon to use on an order in August. No limit to how many coupons you can earn with every $50 you spend! Bonus Days ends on July 31.

SHOP STAMPIN’ UP! ONLINE HERE!

Dinoroar Dinosaur Birthday Card

Dinoroar Dinosaur Birthday Card

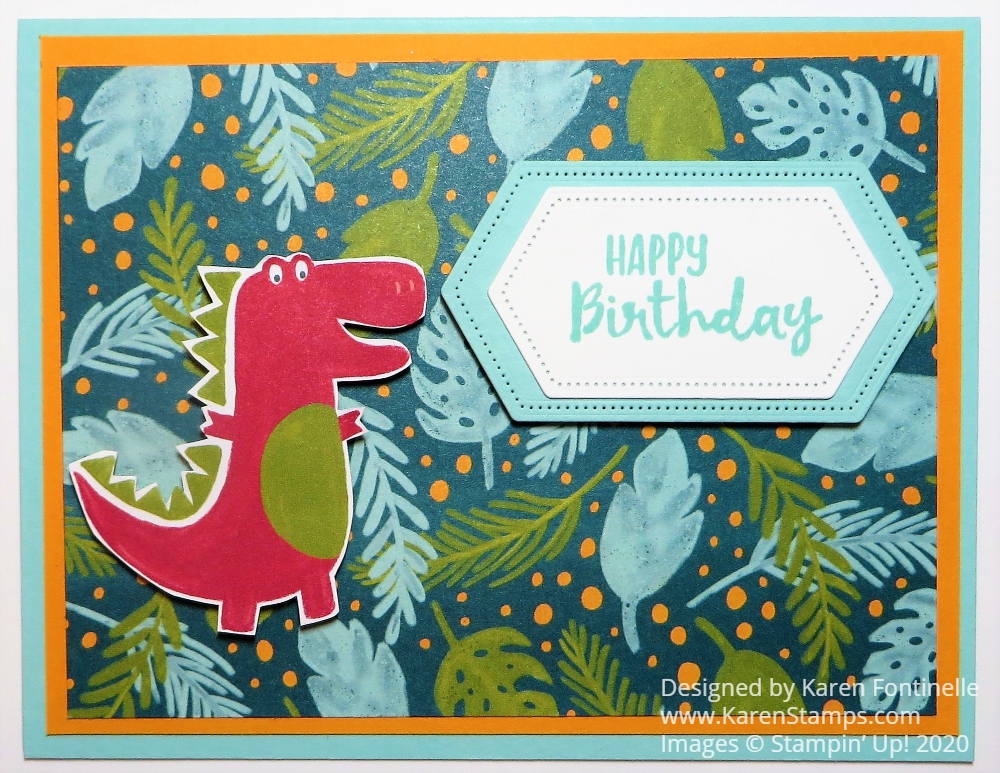
It certainly is fun to make cards with this designer paper as you can see on this Dinoroar Dinosaur Birthday Card! Perhaps you already ordered this paper from the catalog or maybe you choose it during the last part of Sale-A-Bration. If you don’t own it yet, you can purchase it as a Last-Chance product even at a discount!

The Dinoroar Designer Series Paper is a fun paper to have in your stash for children’s and baby cards…..or even for anyone else! Why not?! Some adults might enjoy getting a dinosaur card for their birthday!

This card has a card base of Pool Party and then a layer of Mango Melody underneath the designer paper. I wanted to use a pattern that had leaves and foliage to look like the dinosaur was roaming the forest! The dinosaur is even cut out from one of the patterns of designer paper!

The greeting is stamped from the Peaceful Moments Stamp Set. The greeting and the layer are cut with the Stitched Nested Label Dies. I wanted to just keep the front of the card simple since the background paper is pretty busy with rather large images and I wanted the dinosaur to stand out.

Here is another dinosaur card I made recently. Now that card you could send to almost anybody just to say “Hello” or put a smile on their face when they open the envelope!

You can still purchase the Dino Days Bundle, consisting of the Dino Days Stamp Set and the Dino Dies for 10% off. The stamp set and dies will be in the new catalog but not bundled for the 10% off price. So if you like it and want to save 10%, get it now. The little Dinoroar Enamel Shapes are on sale also right now in the Last-Chance Products at more than 50% off!

These Last-Chance retiring products are available through June 2, while supplies last, until the new Stampin’ Up! catalog comes out June 3rd! Get some bargains while you can and don’t forget to check the Clearance Rack, too!

SHOP STAMPIN’ UP! ONLINE HERE!

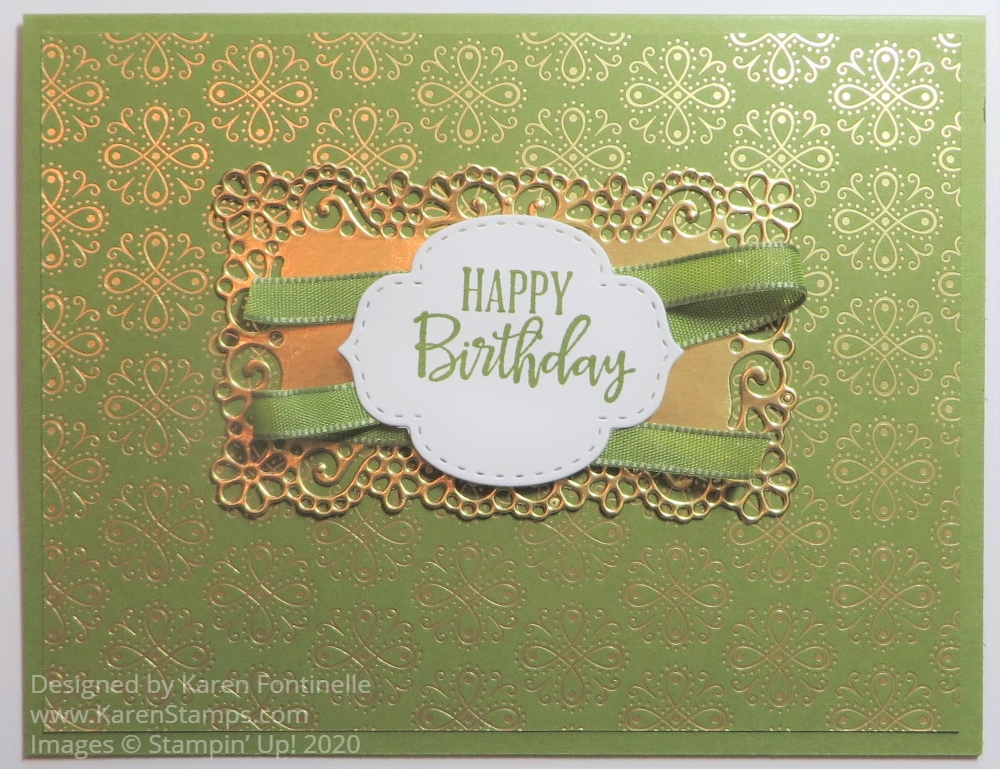
Ornate Garden Elegant Gold Foil Birthday Card

Ornate Garden Elegant Gold Foil Birthday Card

This Ornate Garden Elegant Gold Foil Birthday Card is actually elegant because of the gold foil accents on the specialty designer paper and also the gold foil die underneath the greeting. It’s not elegant because it is a fancy card to make as far as design. There are no real bells and whistles on this card, just pretty designer paper, the gold accent layer and some ribbon behind the birthday greeting.

The Ornate Garden Specialty Designer Series Paper is so pretty it will be hard to select which paper you want to use! I actually started out thinking I wanted to use one of the small floral prints, like on the backside of this paper. But I can do that another time!

I wanted to use one of the Ornate Layers Dies so after I chose a greeting for this card I selected this one you see on the card. I didn’t want it to be too large and layered on this card and take away from the designer paper. The card base is Old Olive, one of the coordinating colors of the papers. It would also be pretty to put a layer of Gold Foil underneath the designer paper to enhance the gold accents, but I didn’t think of that early enough!

The “Happy Birthday” greeting is from the Peaceful Moments Stamp Set, one of those really good sentiment stamp sets to have on hand. This is one of the stamp sets that is a part of the Peaceful Poppies Suite in the Occasions Mini Catalog. In fact, you can buy it as a Bundle with a set of dies.

For a minute I didn’t quite know what I wanted to do with the greeting which I die cut with one of the Stitched So Sweetly Dies. I thought maybe I should stamp it again and die cut with another shape. But then, the lightbulb came on, and I thought to just place some of the Old Olive Ornate Garden Ribbon in the Combo Pack back and forth in loops on the back and pop it up on Stampin’ Dimensionals®. That took up some of the empty space, made the greeting stand out, and made the whole card look elegant!

Remember to check your Inbox this afternoon for my “Best of the Blog” newsletter with info about the new catalog. If you are not on my Mailing List, sign up in the red box or the Pop-up box today!

SHOP THE ORNATE GARDEN SUITE COLLECTION!

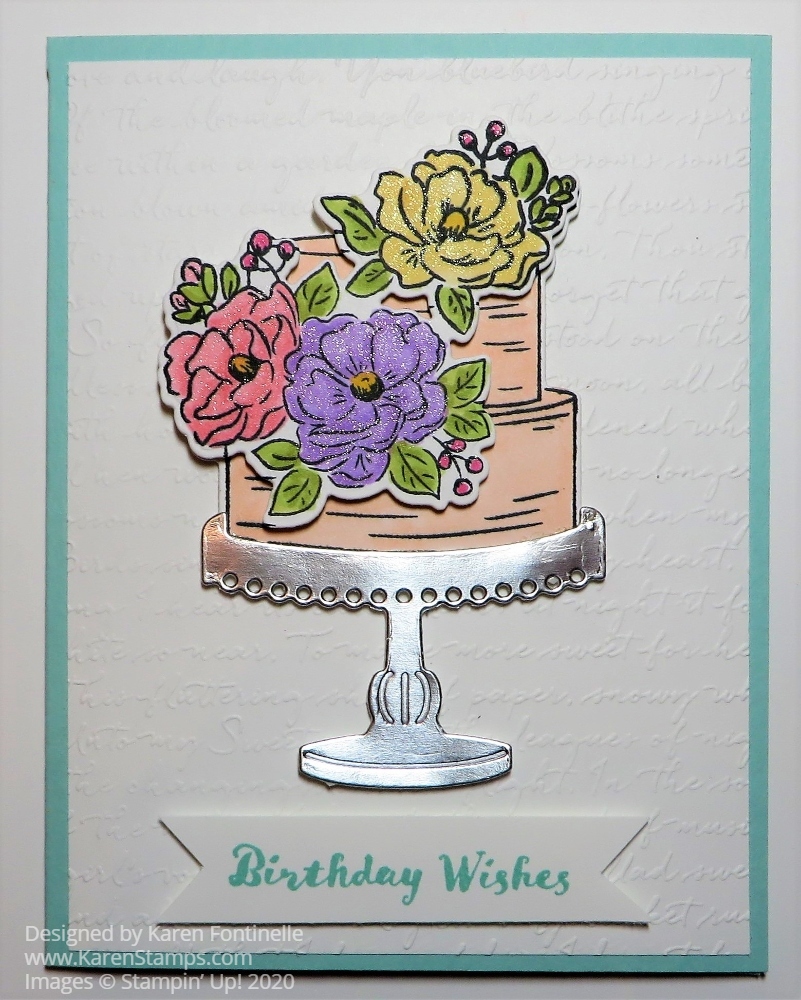
Happy Birthday To You Decorated Cake Card

Happy Birthday To You Decorated Cake Card

If you are looking for a perfect birthday card, you can’t do much better than this Happy Birthday To You Decorated Cake Card. You can even earn the Happy Birthday To You Stamp Set FREE during Sale-A-Bration! Who wouldn’t like to receive a card with a beautiful birthday cake stamped on the front and decorated with flowers?! I’d like to have a real birthday cake that looks like that (with lots of icing!).

Stampin’ Up! released new Coordination Products yesterday and one of them is the set of Birthday Dies. You can stamp the cake and then die-cut it or die-cut just the flowers and pop those up on the stamped cake.

Change the look a little by die-cutting the cake stand. It doesn’t “fit” over the stamped cake pedestal so you will have to do a little adjusting or embellishing. But I think it is a very pretty die and is one we will all enjoy using.

For my card, I started with a card base of Pool Party and a layer of Whisper White. I embossed this white cardstock with the Scripty 3D Embossing Folder. I wanted just a little texture to the background layer.

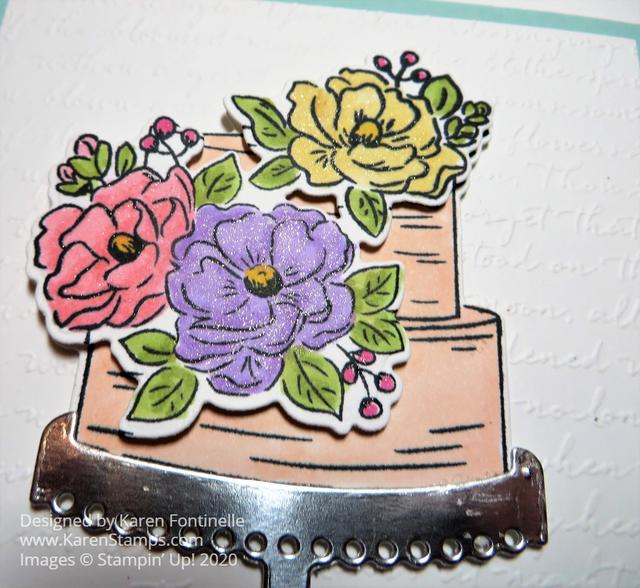
I stamped the cake on another piece of Whisper White Cardstock and die cut it with the Birthday Dies, plus stamped it again on another piece of Whisper White and die cut the flowers only. As I mentioned, I wanted to use the die-cut cake stand so I just cut off the stamped cake stand to it would not show. The cake stand then fits perfectly! I die cut it out of Silver Foil Paper. The flowers were then popped up over the stamped flowers on the cake with Stampin’ Dimensionals®. Everything is colored with Stampin’ Blends markers. I also used Wink of Stella on the flowers to add some glimmer. You can see a little of the sparkle in the close-up photo below.

Happy Birthday To You Decorated Cake Card Closeup

The greeting is from another stamp set, Itty Bitty Birthday Greetings, because I needed an itty bitty greeting to fit below the cake stand! The Happy Birthday To You Stamp Set has two greetings but the size was too large for my card. It’s okay to mix and match stamp sets! Here’s another card I made with just the Happy Birthday To You Stamp Set and the greeting fit right underneath the cake on this card, so you can do it either way.

Be sure to check out the new Coordination Products (dies and a package of designer series paper) and add them to your order.

Shop Online at Stampin’ Up!

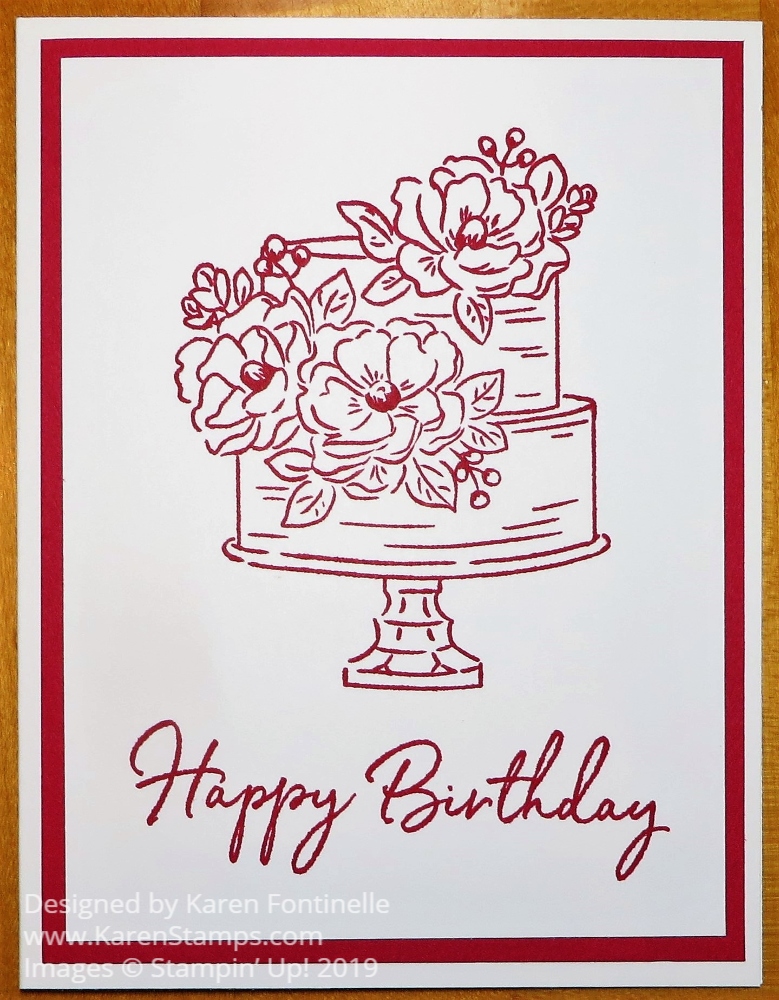
Monochromatic Lovely Lipstick Birthday Card

Monochromatic Lovely Lipstick Birthday Card

When you want to make a pretty card in a very short time, try monochromatic like this Monochromatic Lovely Lipstick Birthday Card. I thought this stamp set might be a perfect one for a monochromatic card and I think I was right! Talk about quick and easy cardmaking!

I used the Happy Birthday To You Stamp Set, only available FREE during Sale-A-Bration with a $50 purchase. And even more exciting, coming in February, you will be able to purchase a set of dies for this stamp set as an extra! There will be several new coordinating items for you.

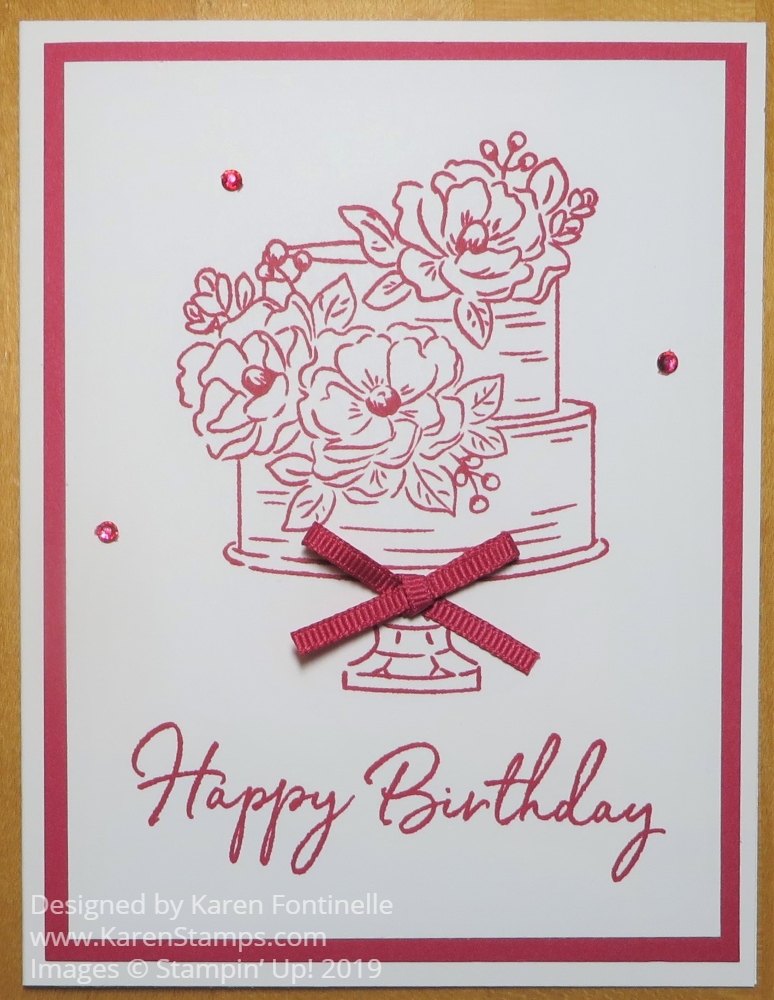
The card base is Whisper White and the layer is Lovely Lipstick. I realized I have barely used these In Colors and thought I would give Lovely Lipstick a whirl. Then I stamped the fancy cake with Lovely Lipstick on another layer of Whisper White and the greeting at the bottom. I mean, you can’t make a card any faster than this one!

Monochromatic Lovely Lipstick Birthday Card With Bling

But if you did want to make a quick and easy monochromatic birthday card and you wanted a little bling on it, you could make this card! I had some very narrow Lovely Lipstick 1/8″ Grosgrain Ribbon so I made a very small bow to go on the cake stand. Next, I colored three small rhinestones with the Lovely Lipstick Dark Stampin’ Blend marker and placed them on the card. A monochromatic card with a little extra bling!

Whatever you want to order, be sure to try and do it in $50 increments so you can take advantage of Sale-A-Bration 2020 and earn some free product(s). After you have entered your order, it will prompt you to choose your Sale-A-Bration items.

You can shop Stampin’ Up! Online HERE!

Christmastime Is Here Z Fold Rose Birthday Card

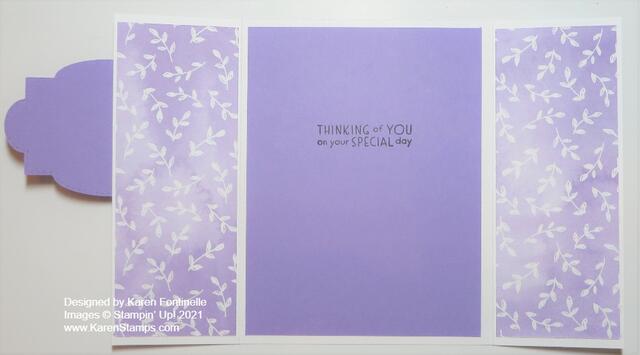
Christmastime Is Here Z Fold Birthday Card Open

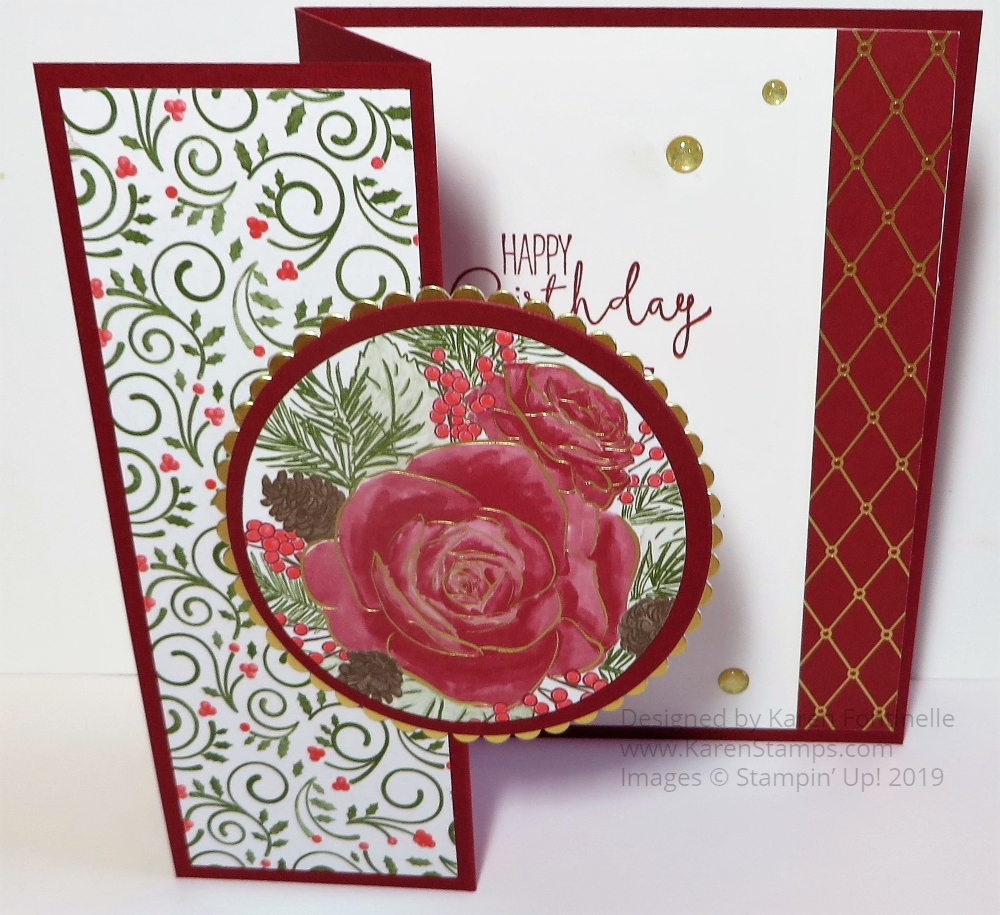
I think these Z-Fold cards, such as this Christmastime Is Here Z Fold Rose Birthday Card, just look impressive and yet they are perfectly easy to make! This is a birthday card, in spite of the fact that the designer paper and suite of products is called “Christmastime Is Here”. Just think of the people with December birthdays that maybe get tired of their birthdays being completely tied in with holiday designs. This paper, while recognizing the season, can be used for birthdays or other occasions. And some of the patterns have no hint of any season so you can use them at any time.

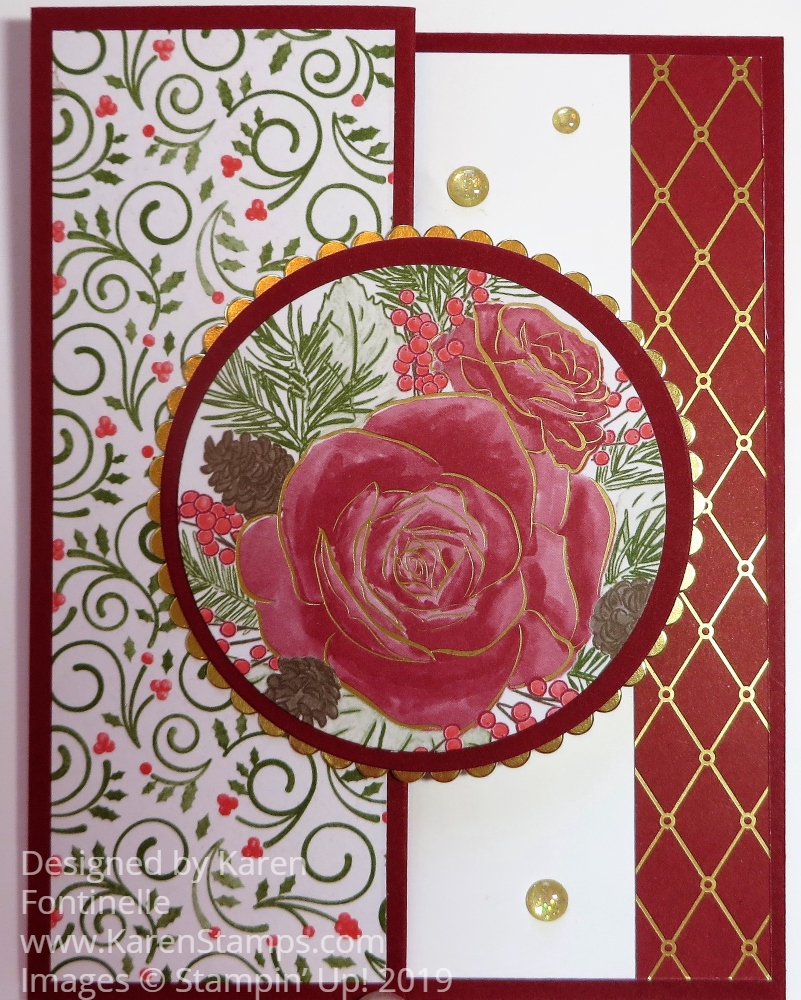
This card base is Cherry Cobber Cardstock, folded in half as usual. To make it a z-fold card, just score the front of the card in half (so half of 4 1/4″ would be 2 1/8″). Basically, you fold half of the front of the card back on itself. This makes the “z”.

For the front panel of the card, I cut a piece of the Christmastime Is Here Specialty Designer Series Paper at 5 1/4″ x 1 7/8″. The inside of the card is Whisper White 5 1/4″ x 4″ with a 3/4″ x 5 1/4″ strip of the designer paper down the side. Stamp the greeting inside the card if you are putting one inside and then adhere the layer inside the card. (If you mess up with the stamping, you haven’t ruined the card!)

For the front of the card, I die-cut a portion of the floral paper with the Layering Circles Dies which was then layered on a Cherry Cobbler die cut circle layered on a die-cut circle scalloped circle of Gold Foil to match the gold accents on the designer paper.

Christmastime Is Here Z Fold Rose Birthday Card

To finish the card, I added a few Gold Glitter Enamel Dots and that was it! As you can see in the photos and in the Online Store, this Christmastime Is Here Specialty Paper is just gorgeous with its gold foil accents on many of the sheets. I added the Gold Glitter Enamel Dots and the Gold Shimmer Ribbon to my order even though I did not purchase the stamp set and dies. The good part about this Christmastime Is Here Suite is that you can get it all or pick and choose what you like or need.

If you are still considering choices for Christmas cards and projects, I would remind you to check out this Christmastime Is Here Suite. It only came out in November, is not in the Holiday Catalog, and is available while supplies last.

SHOP THE CHRISTMASTIME IS HERE SUITE IN THE ONLINE STORE!

World Card Making Day 2019

World Card Making Day 2019

Today is the annual World Card Making Day 2019 which those of us in the cardmaking business like to celebrate! Take some time today to make a card, any kind you want! Then, the real trick is to mail the card next week! Lots of times we make cards for fun or because we saw a cute idea and then we don’t get around to mailing our cards to someone! Don’t let your beautiful artwork go to waste! Send those cards!

Next week Stampin’ Up! has a goal of sending 50,000 cards from Demonstrators and Customers, so if you send a card let me know and I will put it in the count with Stampin’ Up! Apparently, it will be the first annual World Card Sending Week! (Isn’t every day and every week some “holiday”?!)

If you are ever stumped for a card idea, copy yourself! That’s right! Just look back at some of the cards you have made and make another version! Change the paper, the colors, the embellishments or the greeting! Use one of your own good ideas!

Here is a card I made for my niece’s birthday. I realized I hadn’t used my Magnolia Lane Designer Paper in awhile. Instead of coming up with a new design, I just made another card like one I’d made before. I just changed the greeting and the embellishments a little bit.

Magnolia Lane Birthday Card

This card uses Petal Pink Cardstock for the card base with a striped layer from the Magnolia Lane Designer Series Paper. I think this paper is one of the most beautiful Stampin’ Up! has ever had. Even the large flower and leaves are cut out from one of the sheets in the package! The flower is layered on a circle of Vellum Cardstock.

The greeting is stamped in Mossy Meadow Ink from the Itty Bitty Birthdays Stamp Set. Then it was die-cut with the Stitched Nested Labels Dies. I used a piece of Braided Linen Trim across the strip of designer paper. On the greeting, I added three Heart Epoxy Droplets. And to the area with the large magnolia, I added three Basic Adhesive-Backed Sequins.

Magnolia Lane Birthday Card closeup

I just thought I would remind all of us, myself included, that it is okay to copy ourselves! Sometimes we search and search for an idea and the best one might be one right under our noses!

Take some time on World Card Making Day to make a card for someone or anyone and then send it next week during World Card SENDING Week!

Over The Moon Masculine Birthday Card

Over The Moon Masculine Birthday Card

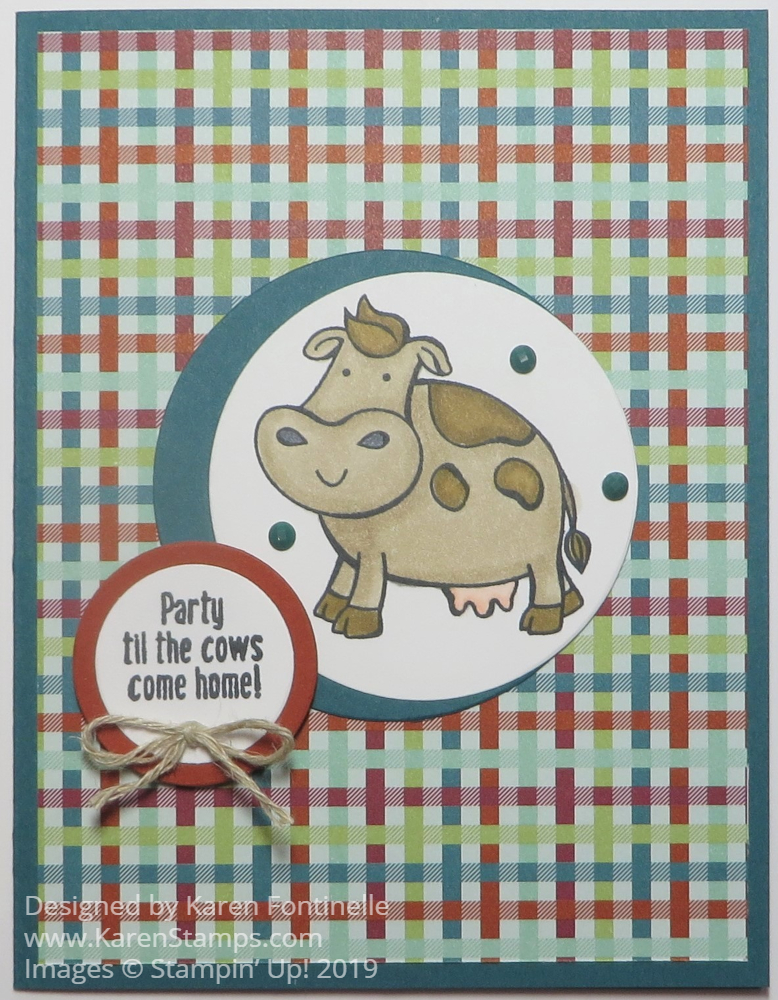
Often times we rack our brains to think of a good masculine card, I don’t know why! I guess more stamps and papers are geared toward women so we find ourselves at a loss when we have to make a card for our husband, son, grandfather, uncle, etc. It took me a while of looking online to come up with this idea, the Over The Moon Masculine Birthday Card, for my brother’s birthday. Not that he has anything to do with cows, but the Over The Moon Stamp Set is so cute I wanted to use it for a whimsical birthday card!

The card base is Pretty Peacock with a plaid design in the Come to Gather Designer Series Paper. The cow is stamped in Memento Ink and colored in with Stampin’ Blends markers. Have I ever said before how much I LOVE coloring with these markers??! I love coloring with these markers! I find it very relaxing! Coloring is good therapy!

After the cow was stamped, I die cut it with a circle in the Layering Circles Dies. Then I cut a slightly larger circle in Pretty Peacock and layered the cow on top of that but not centered. I saw that idea somewhere online and thought I would try it for something different.

I thought the greeting in the set was perfect for a birthday so I stamped and die cut that and layered on a circle of Cajun Craze. I found a little scrap of Linen Thread and tied a small bow for the greeting and stuck it on with a smooshed up Mini Glue Dot. And for a finishing touch, I added three
2019-2021 In Color Faceted Dots in Pretty Peacock.

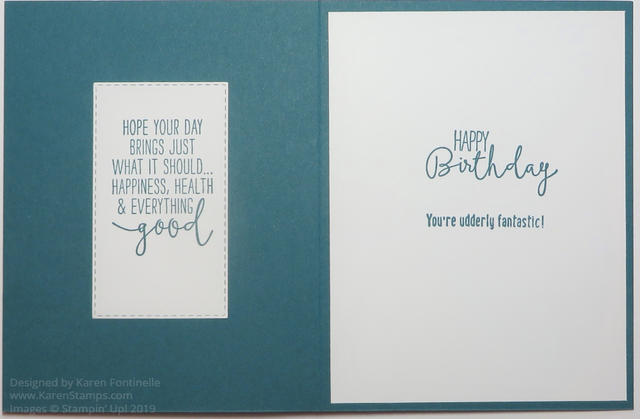
Here is how I stamped and decorated the inside of the card.

Over The Moon Masculine Birthday Card Inside

The greetings are from the Special Celebrations Stamp Set and you can guess which one is from the Over The Moon Stamp Set with the cows! Since I wanted to use the long greeting but not fill up the inside of the card, I opted to stamp it and then die cut it with the Stitched Rectangles Dies so I could add it to the inside front cover of the card.

The Over The Moon Stamp Set was one I did not think I needed until I saw some cards made with it. I think it is fun making cards with this stamp set. It’s probably a good idea to have at least one “funny” stamp set in our collection! Check it out in the Stampin’ Up! Online Store!