Tag Archives: Blending Brushes

Scary Cute Slimline Halloween Trick or Treaters Card

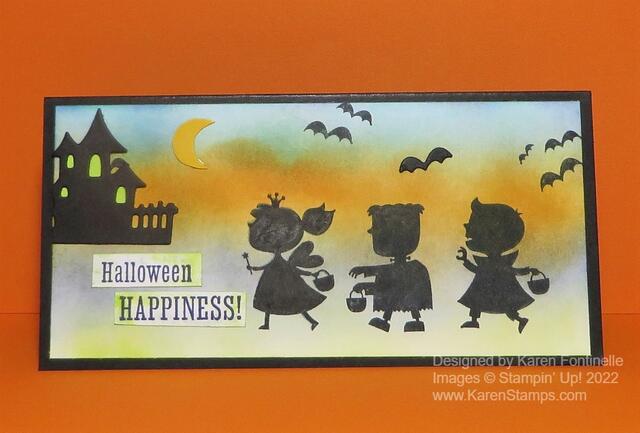
Halloween will be here before we know it so get your new stamp sets and accessories in the Stampin’ Up! Holiday Catalog and start creating! On this Scary Cute Slimline Halloween Trick or Treaters Card, I couldn’t resist making a colorful spooky background with the trick-or-treaters heading up to the house for their treats!

This is a slimline card made with a Basic Black cardstock card base. The card base is a 6″ square that is scored in half at 3″ so when it is folded, the card will be 3″ x 6″. The layer on the front of the card is Basic White cardstock 2 3/4″ x 5 3/4″.

To make the Basic White cardstock look spooky for Halloween Night, I used the Blending Brushes to add all kinds of ink colors! I used some of the new In Colors. Well, maybe all of them except Sweet Sorbet. I also used some Pumpkin Pie and Crushed Curry. I only have three Blending Brushes but if you are careful to work from light to dark ink in similar colors and really rub off the excess ink after each color on scrap paper or Grid Paper, you can use each brush for several ink colors. When you are finished, just rinse them out at the kitchen sink! Be sure to rub off a little bit of ink before applying the Blending Brush to the project to avoid getting a dark blob of ink.

Next, I stamped the three separate trick-or-treaters in black Memento Ink as if they were walking around on Halloween Night going trick-or-treating with their little baskets. You need to have a juicy ink pad to get a good, dark impression of the image. The Stamparatus would work well for this so you could stamp it over and over if necessary. You can also fill in the areas that didn’t stamp heavily enough with a black marker if the blacks match pretty well.

The Scary Cute Stamp Set has some fun stamps and greetings in it. I stamped some of the bats up in the sky. I stamped the Crushed Curry cardstock with the moon stamp but I cut it out according to the shape and used the plain cardstock side because I liked the cardstock color better than the inked side.

The haunted house is a diecut and I already had that cut out. I decided to use it but away from the trick-or-treaters so it wouldn’t look like the wrong size. I adhered tiny pieces of Parakeet Party card stock behind the windows and after adhering it to the card layer, I trimmed off the excess side so the house would fit better.

For the greeting, I stamped the “Halloween Happiness” on Basic White but decided to cut the words apart so they would fit in the corner. They were stamped with the Starry Sky In Color Ink and then I added a little Parakeet Party ink around the edges with a Blending Brush just to make the words look a little spooky and fit the card just right.

On the inside of the card, I adhered a Basic White layer just like on the front of the card. I stamped the other stamp with the three smaller trick-or-treaters and a greeting from the stamp set. Then I used the Blending Brush and just a light layer of Parakeet Party ink. You could use any color you like.
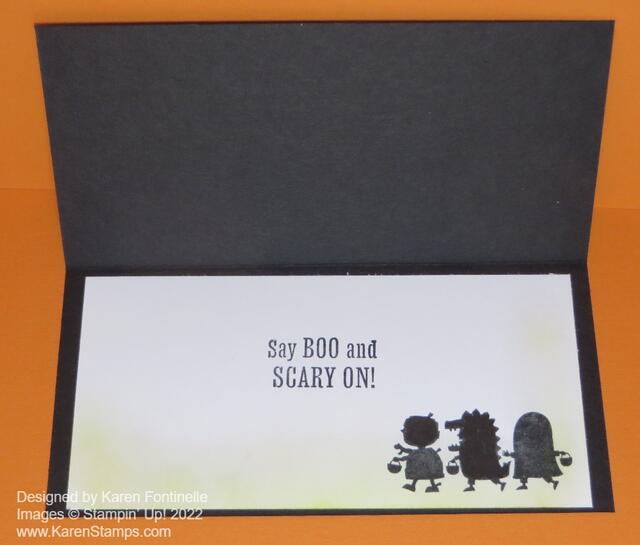
Scary-Cute-Slimline-Halloween-Trick-or-Treaters-Card-Inside

This Scary Cute Stamp Set will be fun to use making Halloween treats and other projects as well! Here is a Scary Cute card I made the other day using the spooky frame die with the tree branches. Just get the Scary Cute Bundle of stamp set and dies and you will be all set for making a card like my Scary Cute Slimline Halloween Trick or Treaters Card or many others!

SHOP STAMPIN’ UP! ONLINE HERE!

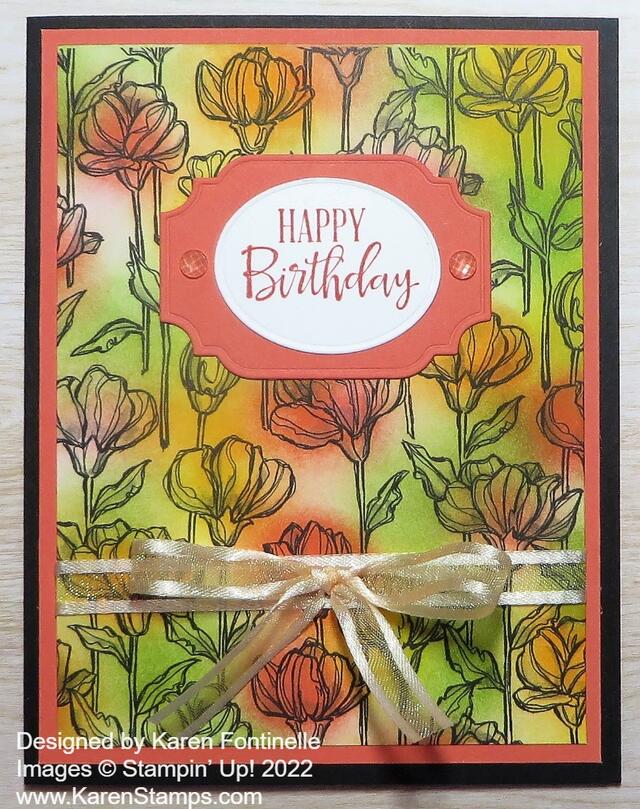
Perfectly Penciled Colored With Blending Brushes Card

Perfectly Penciled Colored With Blending Brushes

Even though I love this designer paper just in its black and white design, one of my first thoughts was one of the ways to add color would be to use Blending Brushes or some kind of sponge. It could be soft and intermittent or more precise, as far as this coloring could go.

This new black and white paper is the Perfectly Penciled Designer Series Paper. While black and white can be very stunning on their own, it also begs for the rather new trend of coloring in! Coloring takes us back to our childhood! I think of some times when my mother would sit down and color in our coloring books with my brother and me with crayons and we thought her coloring was perfection!

Stampin’ Up! has so many different ways you can color in stamped or printed images. With this designer paper, you don’t have to worry about which ink to use or if anything will smear. We have two different kinds of markers, Watercolor Pencils, ink and Blender Pens, ink and Water Painters, Pastels, and more. It’s all fun!

For this card, I colored this floral pattern of the Perfectly Penciled Designer Paper using ink pads and Blending Brushes. Blending Brushes come in a set of three. That’s all I have, at least at the moment. I have found that I can rub them on scrap paper really well after using a color and then go on to use another color. After using them, you can just wash out the ink, but if you wanted to use them over and over, you probably wouldn’t want to work with a wet blending brush. Some people like to have more so they can use a clean brush for every color.

For most of the flowers, I just rubbed the Blending Brush on the ink pad and lightly colored on the paper already cut into a layer for the card. After picking up some ink on the brush, be sure (usually) to lightly rub the brush on scrap paper so you don’t get too dark of a color on your image. After I had lightly colored some of the images, I decided to add a darker layer of color to some of the flowers. Obviously, with this method, you cannot color precisely on any image, which makes it easy because you don’t have to worry about going out of the lines! It’s all out of the lines! The colors I used for the flowers were Daffodil Delight, Calypso Coral, Mango Melody, and Granny Apple Green for the leaves. You can use any combination of colors you want. I also added a layer of Calypso Coral cardstock under the Perfectly Penciled paper. Before adhering, I added a piece of Pale Papaya Ribbon around the lower part of the paper. Even though I didn’t use Pale Papaya as a color, the ribbon looks perfect on the card. It blends in with the other colors and doesn’t compete with all the other pattern and colors happening on the card. I tied a separate bow and adhered it with a Glue Dot.

For the greeting, I stamped “Happy Birthday” in the Peaceful Moments Stamp Set in Calypso Coral ink. It is die-cut with the oval in the All That Dies set and then layered on a Calypso Coral piece also in the die set. For embellishment, I added an Elegant Faceted Gem to each side of the die-cut.

Since the card base is Basic Black, you will need to add an inside layer so you can stamp a greeting or write a personal message on the inside of the card. You could also make the card without the black card base and just use the Calypso Coral or whatever color you like.

If you want to see a card that is just left black and white, check out THIS POST of a card I made with the Perfectly Penciled Designer Series Paper.

Just play with this paper and see what you come up with as I did with this Perfectly Penciled Colored With Blending Brushes Card.

SHOP STAMPIN’ UP! ONLINE HERE!

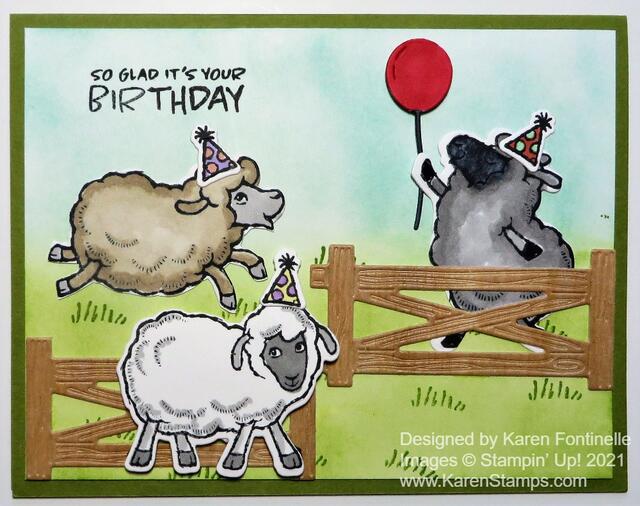
Counting Sheep Birthday Card

Counting Sheep Birthday Card

If you like sheep, I hope you are able to get this cute stamp set and dies to make a card like this Counting Sheep Birthday Card. I really had fun making this card and coloring the sheep and the background of the card. I think it’s the party hats and balloon that made me so happy! Who can’t be happy when you have party hats??!

The card base is Old Olive and the top layer is Basic White, but I colored it with ink. For the grassy area, I used Granny Apple Green ink and applied it with the Blending Brush. For the sky, I used Coastal Cabana ink. The fences are cut with the Sheep Dies. When I was going through some retired stuff in my stash, I found these wood sheets that Stampin’ Up! sold several years ago. It’s so thin it’s meant to be used like paper almost. So I die cut the fences using the wood sheets rather than paper! I also thought about using the Cork Paper! You can use any card stock you like.

The sheep were stamped on Basic White Cardstock with Memento ink and I colored them in with various Stampin’ Blends. The party hats were also stamped and colored with Blends and then everything was die cut with the Sheep Dies. The stamp set for everything is the Counting Sheep Stamp Set. After I had everything planned where I wanted it placed, I stamped the greeting at the top, which is in the same stamp set. I stamped the “You’re Amazing” on the inside of the card as well.

You can earn the Counting Sheep Stamp Set or the Sheep Dies during Sale-A-Bration with a $50 purchase. If you want both the stamps and the dies, you would need a $100 order. Sale-a-Bration ends Thursday, September 30 so don’t let it pass you by! It’s the biggest promotion of the Stampin’ Up! year and this year we had TWO Sale-A-Brations so that was pretty special…and historic! Check HERE under Sales & Specials in the Online Store to see what is currently available during Sale-A-Bration. Right now the only thing that is gone is the Be Dazzling Designer Paper.

I hope you are having as much fun as these sheep are on this Counting Sheep Birthday Card celebrating someone’s birthday!

SHOP STAMPIN’ UP! ONLINE HERE!