Tag Archives: Christmas

October Paper Pumpkin: Home For the Holidays!

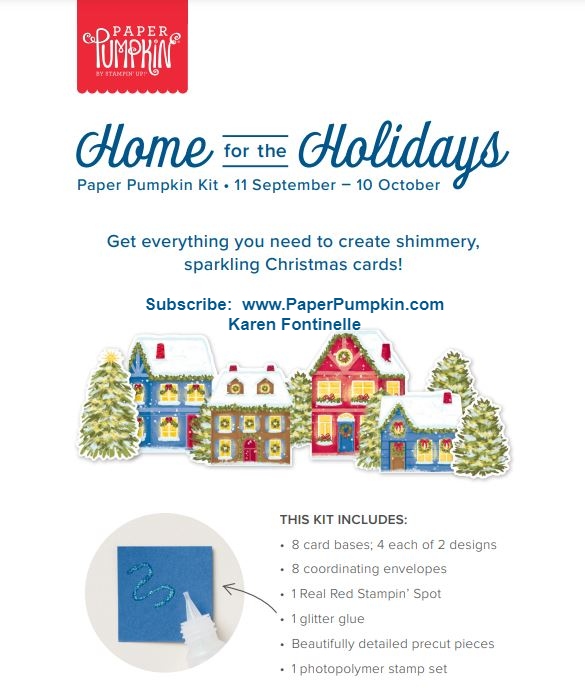
It’s a new month for Paper Pumpkin and the October Paper Pumpkin Kit is called Home For the Holidays!

Create dazzling traditional Christmas cards with the Home for the Holidays Paper Pumpkin Kit! This kit includes eight beautiful cards—four each of two designs. Whether you want to send a few to your loved ones or fill your home with some extra special Christmas cheer, this kit has everything you need to make some sparkly, festive cards. Keep reading to learn more!

One extra fun feature of the Home for the Holidays Paper Pumpkin Kit is the bottle of glitter glue! You can use this glue to add shimmery, shiny details to the Christmas scenes on your cards. You can add some glitter to the trees, houses, snow, and more. That sounds like fun!

ABOUT THE KIT

Kit Name: Home for the Holidays

This kit includes:

  • All the supplies you’ll need to create 8 sparkly and dazzling Christmas cards—4 each of 2 designs—and eight coordinating envelopes.
  • A coordinating photopolymer stamp set with endearing holiday sentiments and festive designs.
  • A Real Red Stampin’ Spot
  • A bottle of Glitter Glue
  • Beautiful Christmasy-themed precut pieces

Finished folded card size: 4-1/4″ x 5-1/2″ (10.8 x 14 cm)

Coordinating Stampin’ Up! colors: Balmy Blue, Blueberry Bushel, Cherry Cobbler, Crumb Cake, Crushed Curry, Daffodil Delight, Lemon Lolly, Mossy Meadow, Night of Navy, Old Olive, Pecan Pie, Real Red

SUBSCRIBE to Paper Pumpkin by October 10th by clicking HERE!

Penguin Punch Christmas Gift Tags

Penguin Punch Christmas Gift Tags

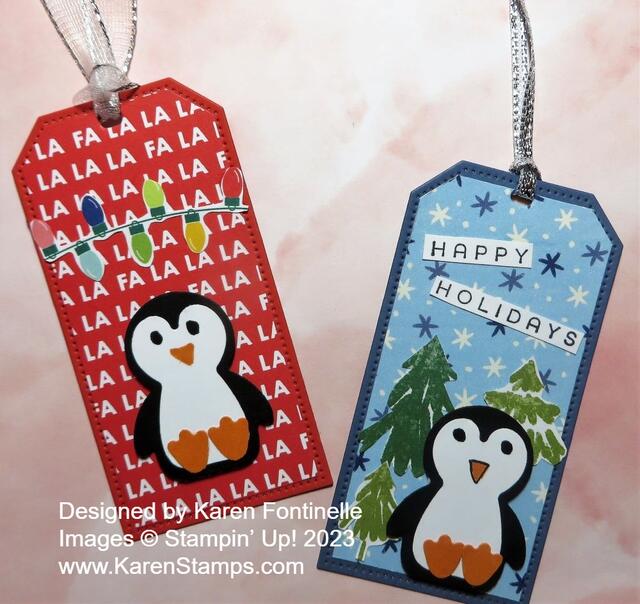
If you don’t already own the Penguin Builder Punch, run and get it on the Stampin’ Up! Clearance Rack so you can make these Penguin Punch Christmas Gift Tags! I can’t believe it is still available but it is marked down to $4.50 instead of $19.00! You may as well buy one for that price! Or you may already have one from a previous catalog so dig it out and make something fun for Christmas!

I thought it would be fun to make a couple of gift tags using the Penguin Punch and some new designer series paper. You can use a tag die that you have or cut your own rectangle and then cut the top corners at an angle. I intended to use the tag die in the new Merriest Trees Dies (coming soon!) but then I came across the Tailor Made Tags Dies. If you have those, just use either of the die shapes.

I cut out a piece of designer series paper and cardstock for each of the tags. That makes them both the same size so you can’t layer them, but I just trimmed off inside the stitched marks on the designer paper, which made it fit just inside the stitched lines of the cardstock tag.

The Penguin tag on the left is made with Poppy Parade Cardstock and the Fa La La La La pattern in the Merry Bold & Bright Designer Series Paper (161945). This paper is so bright and happy, you will love it! I adhered the designer paper onto the cardstock tag and popped the penguin up with Stampin’ Dimensionals. For a finishing touch, I got the idea to just cut out a short strand of the Christmas lights on another of the papers and put it on the tag up at the top. If you want, you can put a piece of Basic White on the back of the tag if you think you need something to write your “To & From” on or a personal message.

The penguin tag on the right is made with Misty Moonlight cardstock and the snowflake paper in the Beary Christmas Designer Series Paper (162015). Before I adhered the penguin with Stampin’ Dimensionals, I got the idea to cut out some trees from the A Walk in the Forest Designer Series Paper (162377). It’s the paper at the top of page 5 in the Holiday Mini so don’t miss it. Maybe some dies would have cut out some of these little trees but I didn’t look! (Actually, some dies will cut out the fuller trees, not the skinny straight ones.) For a greeting, I used one in the Brightest Glow Stamp Set but cut the words apart and cut them smaller so they would fit on the tag.

The penguins are super easy to make with the punch. Just cut the two pieces out of black and white and the little feet out of Pumpkin Pie cardstock or something similar. I do not have the coordinating stamp set so I just drew in the little black eyes with a marker and the little beak with a Pumpkin Pie Stampin’ Write Marker. If you want, you could add a scarf around his neck or make a little hat.

The die punches out the hole in the tag so you don’t have to do that. Just pick a ribbon you like to tie through the hole so your tag is ready to go when you start wrapping gifts!

Remember to check out the Clearance Rack and see what other bargains you need plus the Penguin Punch!

SHOP STAMPIN’ UP! HERE!

Rudolph the Reindeer Gift Bag

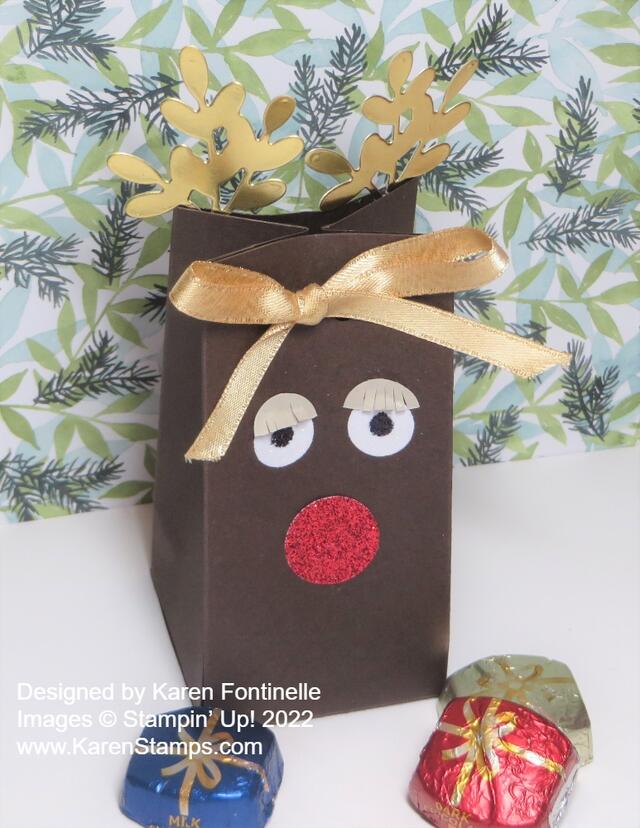
I think every year I make some kind of Rudolph Gift Bag so here is one for 2022. It’s so quick and easy to make, not to mention fun to see Rudolph develop right before your eyes!

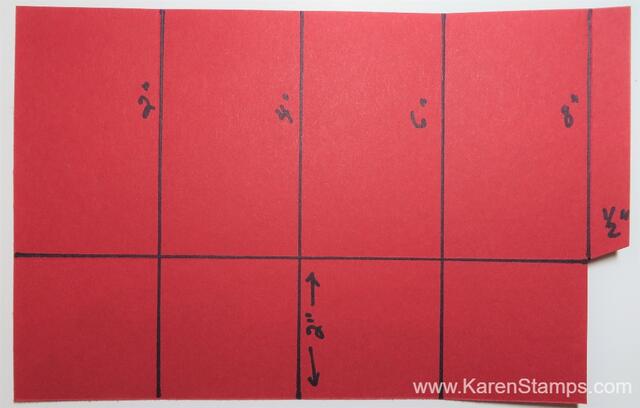
This is a typical 2-4-6-8 bag (or box, however you want it to end up!) that we all know how to make. I used a piece of Early Espresso Cardstock since in previous years I usually use Soft Suede. This reindeer has darker fur! Start with a piece of cardstock cut at 6″ x 8 1/2″. Score at 2″, 4″, 6″, and 8″, then turn the paper lengthwise and score at 2″. Cut on the score lines of those small squares which will be the bottom of the bag, up to the 2″ score line. Cut off the tiny 1/2″ piece in the bottom corner. See diagram below.

2-4-6-8 Treat Bag Diagram

Apply adhesive to that 1/2″ flap and fold over to adhere to opposite side. Fold in the bottom flaps and use adhesive to hold them closed. Pinch the sides and the top of the bag to close. Before closing the bag for good, adhere the gold foil diecut antlers to the inside of the bag . I used a leafy die in the Christmas Banners Dies. I thought this reindeer should be spiffy with golden antlers!

For the eyes, use any white paper, but since I had scraps of the Real Red & White Glimmer Paper handy, I thought Rudolph might look good with glimmery eyes! I colored in the center of the eye with a Sharpie. I used a retired 1/2″ Circle Punch to make the eyes but you could just cut them out by hand.

Rudolph’s red nose is the Red Glimmer Paper. If you don’t have red glimmer paper, color some other glimmer paper with a red marker or red ink. I used a retired 3/4″ Circle Punch for his nose.

I thought maybe Rudolph, for something different, should have some fancy eyelashes! To make them show up, I used Sahara Sand cardstock and punched half circles with the 1/2″ Circle Punch and cut the little lashes by hand. Not sure I think they look that great but maybe it’s ok! Gotta try new things!

If you want to close up the top of the box, just punch a couple of holes and thread some ribbon through to tie a bow. I used the Gold Shimmer Ribbon to match the gold antlers.

Use the gift bag for a small gift or candy or anything that will fit! Modify the measurements if you want it a little taller or shorter. It’s such an easy thing to make, but you might not know that until you make one!

Check out the Last Chance Sale in the Stampin’ Up! store plus the Clearance Rack! Some items went fast yesterday!

Do You Have Any Shiny Brite Vintage Ornaments?

Shiny Brite Vintage Ornaments

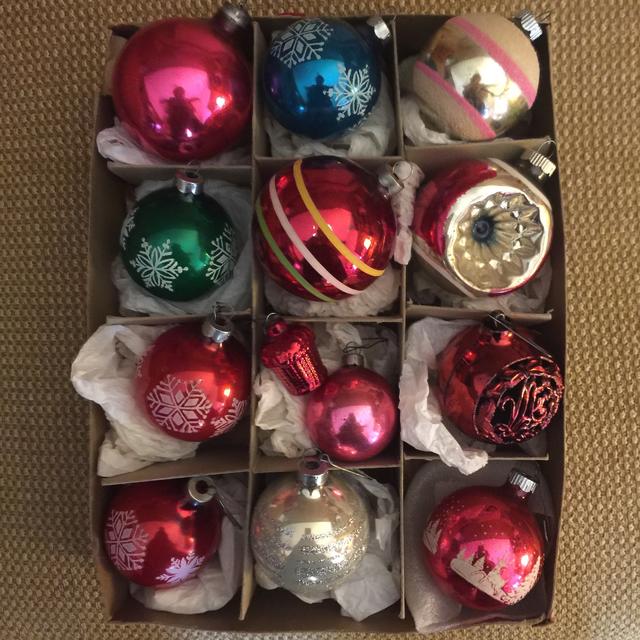
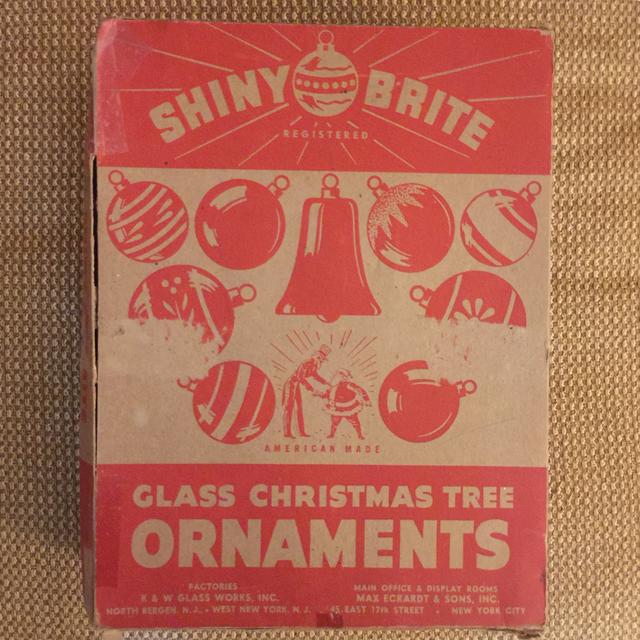
You might be surprised to hear I have not completely finished my holiday decorating, but finally yesterday I came across my Shiny Brite box of ornaments. While I can’t vouch that they are all Shiny Brite ornaments, I do know they are “vintage” (which means from my childhood!).

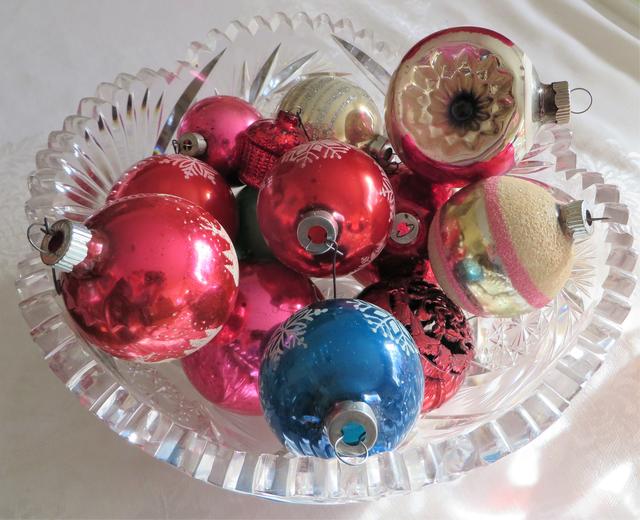
The other day I came across an article about Shiny Brite ornaments and their history that I found quite interesting. I was pretty sure that I had an old box that said Shiny Brite. I even see a written “10 cents” on the side of the box! I know these ornaments hung on our family’s Christmas tree every year. Now I put them all in a glass bowl as a decoration rather than hanging them on a tree.

Shiny Brite Ornaments in Bowl

The ornaments are even in a vintage crystal bowl! Maybe I should add some greenery too. Besides my big tree in the family room, full of ornaments, I have my dad’s small tree that he started putting up when it was too much work to put up his big tree, but I have certain small ornaments on it and these are a little large. So I think a bowl, where they won’t fall off a tree limb, is maybe a safer place and makes a nice table decoration.

Here’s the box. Like I said, I can’t say for sure all these ornaments came in this box, but some ornaments must have!

Shiny Brite Ornament Box

If you are interested in these old ornaments and perhaps have some yourself, please read this article I came across on Facebook. (I don’t know how to embed part of the article like I used to know how to do so I’m just putting this link!)

Happy Christmas Decorating!