Tag Archives: Christmas card

Merriest Trees Stenciled Christmas Card

Merriest Trees Stenciled Christmas Card

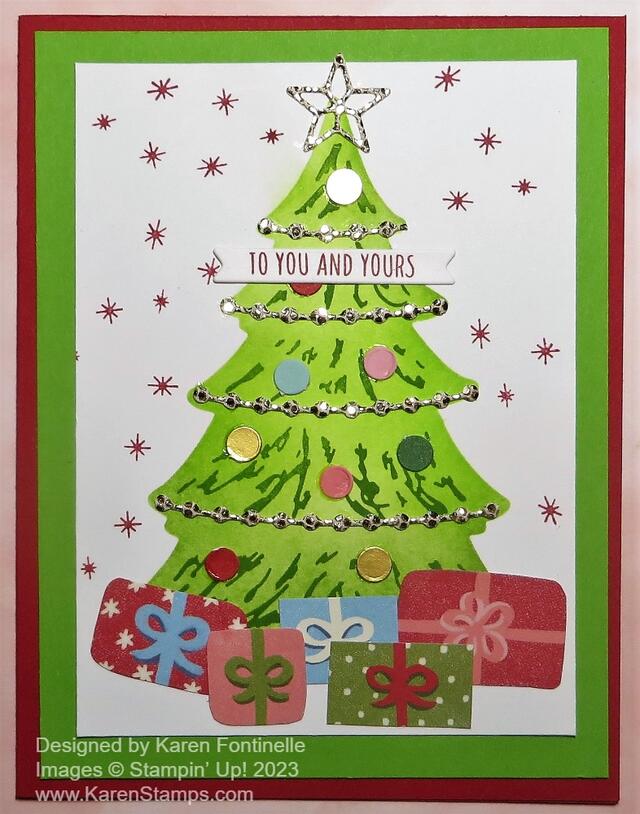
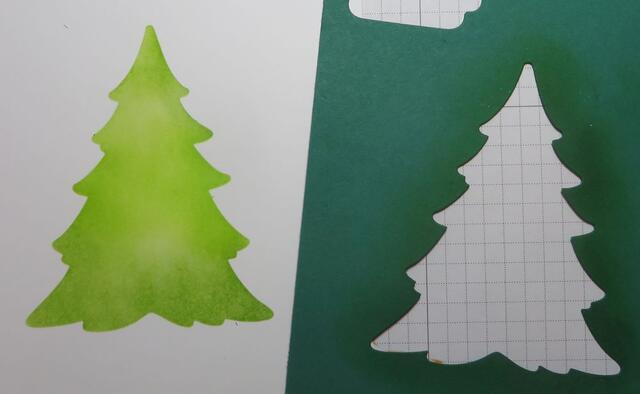
You’ll find many ways to work with the Merriest Trees Bundle in the Stampin’ Up! Holiday Mini Catalog. This Merriest Trees Stenciled Christmas Card was inspired by a scrap piece of cardstock from which I had diecut a tree for another card I made. That scrap laid around here and every time I saw it I thought of using it as a stencil.

Merriest Trees Stencil

My intention was to use several colors to give the tree kind of an ombre effect. I used Parakeet Party, Lemon Lime Twist, and Granny Apple Green. The Granny Apple Green stood out a little more against the other two and I also used it as a little bit of shading on each side. But in the end, it seemed all three colors blended together and the tree looked like one green! But it was still fun doing it. I used one of the Small Blending Brushes to add the color, starting with the lightest color. When I was finished, I just rinsed the Blending Brush under the faucet to rinse out the ink. Let it dry before you use that brush again. After you are finished with the stenciling, you can stamp with the detailed branch stamp in the Merriest Trees Stamp Set to add some interest to the tree. I stamped that using Granny Apple Green Ink.

To decorate the tree, I used the More Dazzle 6″ x 6″ Specialty Paper (or you may have some left of the Champagne color from Sale-A-Bration a little while ago). There is a die in the Merriest Trees Dies in the Bundle that cuts out these cute little chains. There are also several stars you can choose from for the top of the tree. The little red starry images are stamped with Real Red ink with one of the small Merriest Trees stamps. The gifts under the tree are cut from the Beary Christmas Designer Series Paper. I actually trimmed some of them smaller to make them fit under the tree better.

The colored circles on the tree that look like decorations are actually punched out pieces from the Festive Tags Kit in the Kits Collection after I made all the tags. They looked too cute to just trash so I saved them. Gluing a few to the tree seemed like a perfect idea!

For the greeting, I needed to choose something small. In fact, I considered not even adding a greeting to the front of the card since the card is pretty busy already. But the smallest die in the Countryside Corners Dies was the perfect size to make this little banner with the greeting that fit on the tree without being too big or distracting.

Here is the other card I made with the Merriest Tree Bundle.

Today is the last day to purchase on sale any of the kits in the Stampin’ Up! Kits Collection! If there is one you like be sure to get it and save a little bit of money. I especially like the Festive Tags Kit, as I have said before. It will be so useful in a couple of months!

SHOP STAMPIN’ UP! ONLINE HERE!

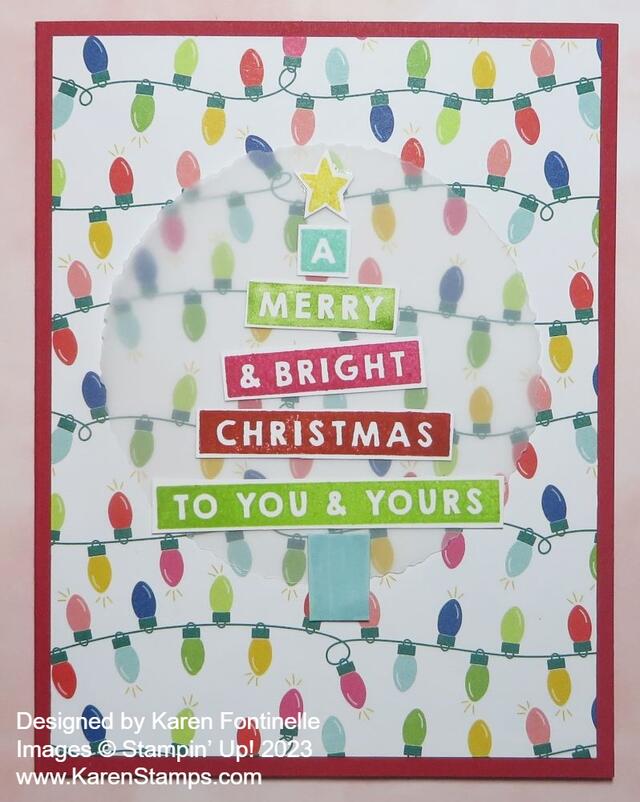
Fa La La La La Christmas Card

Fa La La La La Christmas Card

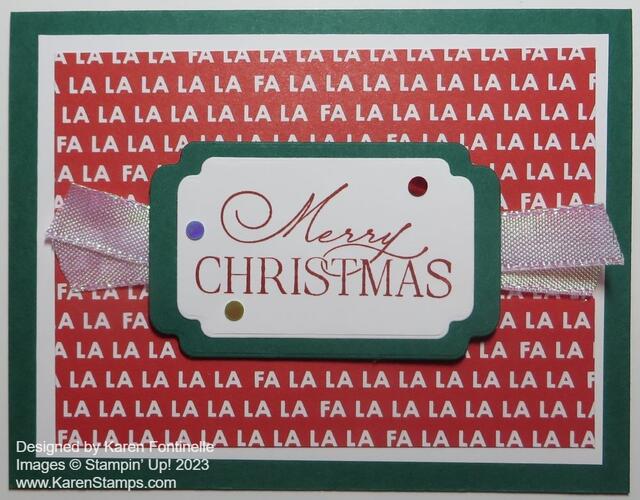
I often say sometimes all you have to do is get out your designer papers and you will be inspired with at least one idea for making a card. That’s what happened with this Fa La La La La Christmas Card. In just a little over a week, you will be able to order this Merry Bold & Bright Designer Series Paper (161945) in the September-December 2023 Mini Catalog, or the Holiday Mini as I prefer to call it (and type it!).

So far (so far!!) I have only ordered the paper in this cute Merry Bold & Bright Suite and I really love it! When you spread those papers out with their bold & bright colors and designs, it just brings joy to your heart! Except for the Christmas lights, it’s not exactly your traditional Christmas designs, but it’s fresh and new! I love working with it!

For this card, I chose a card base of Shady Spruce and the Fa La La La La pattern in the package of designer paper. I thought a layer of Basic White underneath helped it stand out a little bit. I made the Basic White layer a little smaller for a slightly wider card base margin. The designer paper piece is 3 1/2″ x 4 3/4″.

The greeting is stamped with Poppy Parade Ink on Basic White and then diecut with this label in the Something Fancy Dies. I used a larger die to cut out a piece of Shaded Spruce for a layer. The greeting is from the Brightest Glow Stamp Set, a carry-over set from last year’s holiday mini. You can find it online, still available, but not in a catalog. It’s a perfect set for holiday greetings.

To jazz things up, I added two folded bits of the White Iridescent Ribbon (161955) which you will find on page 9 of the Holiday Mini, and adhered them under the greeting on each side, then popped up the greeting on Stampin’ Dimensionals. And I love the Iridescent Adhesive-Backed Discs (161954) in the Holiday Mini. I added three of the different colors to the greeting. They’re very cute and shiny.

Turn that Christmas paper pattern over to the other side and see what you can make! I’ll have an example in my Tuesday newsletter later today! If you want to see it, sign up in the red box here on my blog! You’ll be glad you did because before we know it, I’ll be sending out my exclusive 12 Weeks of Christmas newsletter with a holiday idea every week.

SHOP STAMPIN’ UP! HERE!

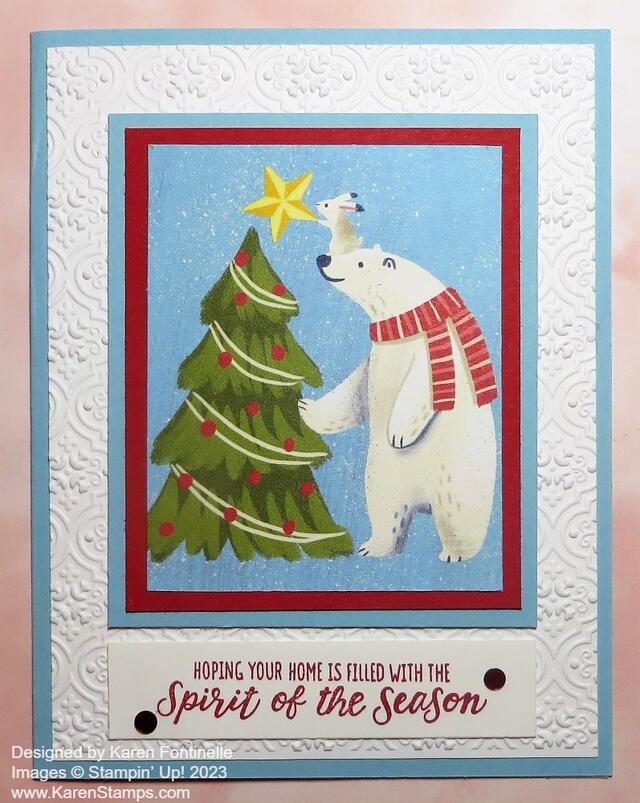
Beary Christmas Spirit of the Season Card

Beary Christmas Spirit of the Season Card

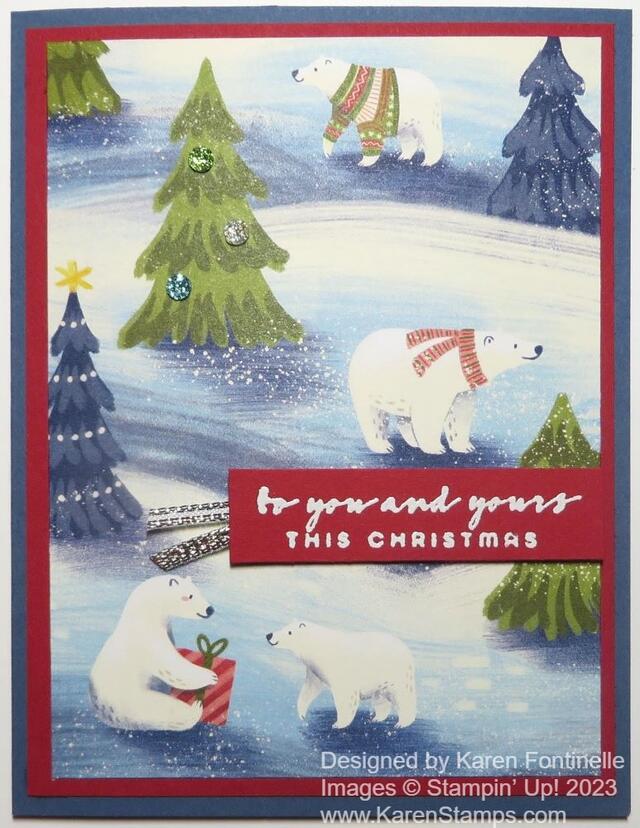
I didn’t even know what card I was going to make when I started, but when I saw my package of this designer paper, I had an idea right away. I decided to use this bear and Christmas tree and came up with this Beary Christmas Spirit of the Season Card.

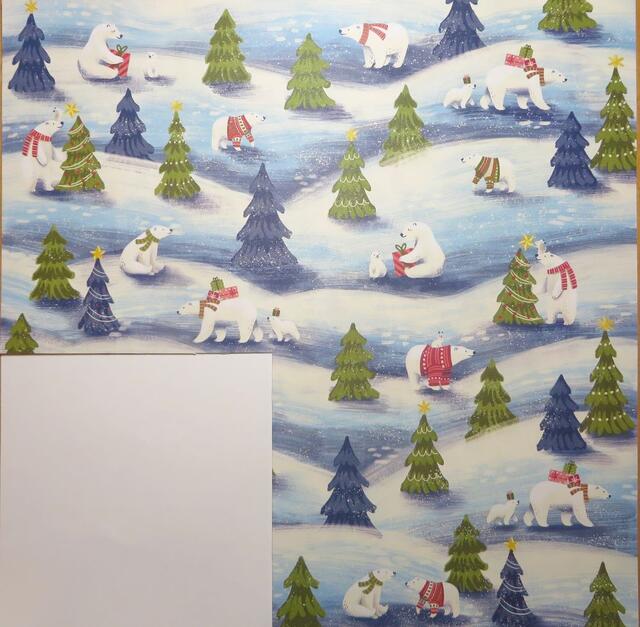
This Beary Christmas Designer Series Paper (162015) is a fun one for holiday cards with all the cute polar bears and other animals! For this card, I chose to use this one piece with the bear and bunny decorating the Christmas tree in the forest. If you want to cut out just a piece of this designer paper, you will have to figure out how to cut out that area properly. I used a ruler to see about how wide and tall the bear and tree were. Then I used my Paper Trimmer to cut out that image while trying not to get any neighboring images. I had to cut it down pretty close.

After I had my image cut out of the designer paper, I layered it on a piece of Real Red and then on a larger layer of Balmy Blue.

The card base is Balmy Blue with a layer of Basic White. It almost looked fine and simple with just the plain white layer, but I decided to emboss it with the Quatrefoil Tile Embossing Folder. Another good choice would be the Snowflake Sky 3D Embossing Folder.

The greeting is in the Merriest Trees Stamp Set and is stamped in Real Red ink just on a narrow strip of Basic White. I added two Iridescent Adhesive-Backed Discs (161954). They are red (really Poppy Parade) but they appear very dark in the photo. You definitely want this Discs for fun additions to your cards!

The Holiday Mini Catalog is coming next week! Woohoo!

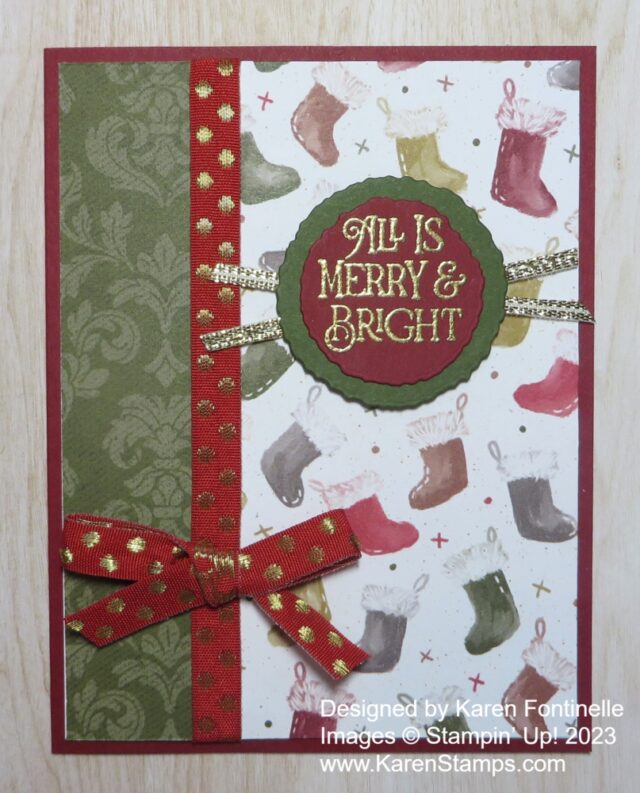
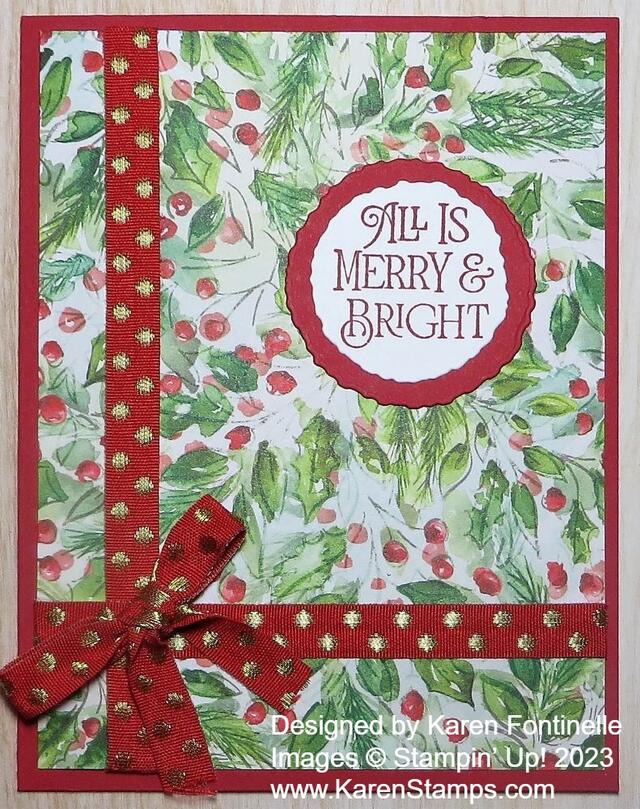
Joy of Christmas Merry & Bright Christmas Card

Joy of Christmas Merry & Bright Christmas Card

This Joy of Christmas Merry & Bright Christmas Card idea came to me and I followed through on it and made the card. Something about this designer paper made me think of wrapping paper, and I got the idea to make the card front look like a wrapped package for Christmas. It’s an easy card to create so it might be good if you are looking for ideas for making multiple Christmas cards to send.

The card base is Real Red cardstock. The layer is one of the patterns in the Joy of Christmas Designer Series Paper (161958). You’ll find it in the Stampin’ Up! Holiday Mini Catalog on page 29 in the Joy of Christmas Suite. This whole Suite is beautiful and you get two different stamp sets and two sets of dies plus the paper and embellishments. I only bought the paper and ribbon at this point, but we’ll see how long I can resist the rest!

The ribbon I used is one of the Online Exclusives that you will find in the online store. It is the Real Red & Gold 3/8″ Dotted Ribbon. It is a very nice ribbon, a little heavier and stiffer than some, but it worked fine on this card. Since I love red, I had to have it and I really like the gold dots on it for something different. I added two pieces of ribbon, one horizontal and one vertical. I even applied a little Stampin’ Seal to the back of the pieces so it would lay flat and stay in place. The bow is tied separately and adhered with a few Glue Dots. To make sure the bow stayed on, I even added a glue dot under each loop of the bow and under each tail. Since the ribbon is a little heavy, the glue dots don’t show at all.

The greeting is in the Brightest Glow Stamp Set (159542), which was carried over from last year’s Holiday Mini catalog. This is a great stamp set for holiday greetings. I stamped this sentiment in Real Red ink and die-cut it with the new Deckled Circles Dies. I also cut a larger Deckled Circle out of Real Red for the layer. You will be AMAZED to open this package of Deckled Circle Dies and see the size and the number of dies you get! They are in the Holiday Mini on page 63 in the upper right corner. It’s not a small picture but I think it’s not very noticeable. I didn’t notice it until I heard about “Deckled Circles” from other Demonstrators! Of course, with so many new beautiful products it’s hard to take it all in!

You could add a little bling to the greeting or on the card if you wanted, maybe some Iridescent Rhinestones or sequins, but I left this card as is. I’m pretty sure I will be making more of this card to send in December! Once you have the idea, it’s easy to make more cards assembly-line style. Get an early start!

Remember to spend your July Bonus Coupons if you have some. Check your email for the codes if you ordered $50 or more in one order in July. The codes expire August 31 and that is coming up soon!

The September-December 2023 Mini Catalog (the Holiday Mini) goes LIVE on Wednesday, September 6th! Make your Shopping List!

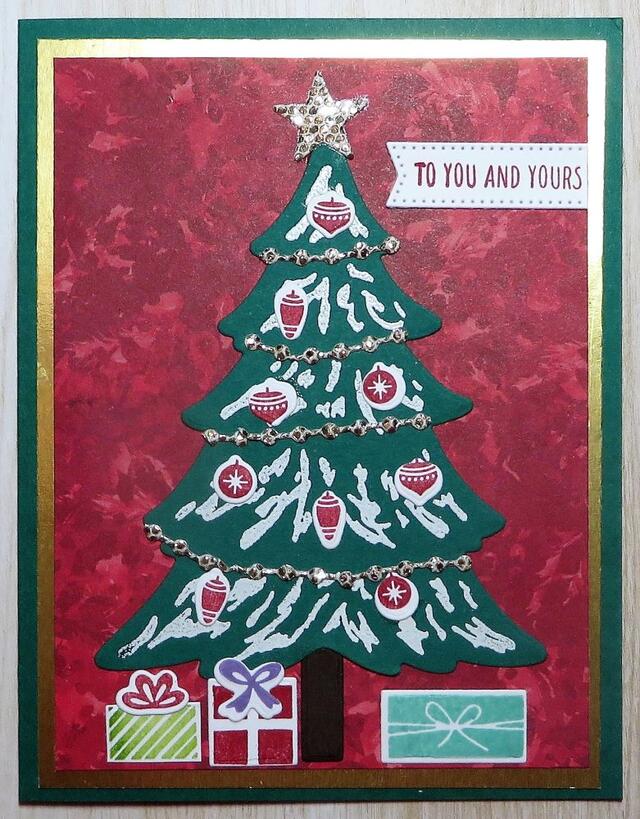
Merriest Trees Decorated Christmas Card

Merriest Trees Decorated Christmas Card

This Merriest Trees Decorated Christmas Card is the first card I’ve made with this Merriest Trees Bundle (162048) in the upcoming Stampin’ Up! Holiday Mini Catalog! You can make all kinds of cards with this Bundle from simple to fancy. I think I started with fancy on this one! This card is for someone who likes “little bitty” things. I’ll explain as I go along in this blog post!

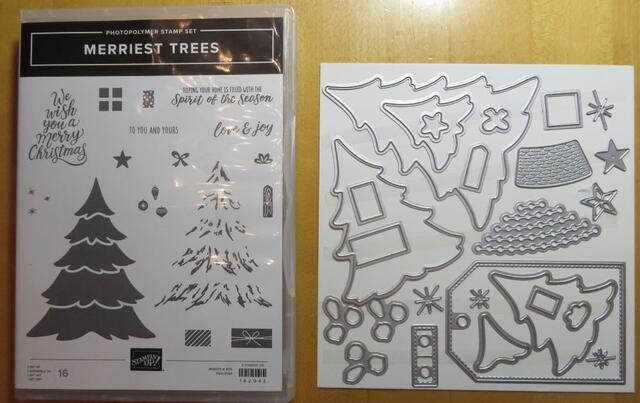
This Merriest Trees Bundle comes with the Merriest Trees Stamp Set and the Merriest Trees Dies. (Do you like how they are now naming the stamp set and dies the SAME?!) If you buy them both together in the Bundle, you will save 10% on the price. The stamp set has a tree that you can ink up and stamp as is, or you can use the second tree stamp for some added highlights on that tree. There are some nice sentiments to use and several accessories. There is a tree trunk, gifts, bows, ornaments, a star, and some little twinkles I suppose you would call them! The trees are actually pretty large so you will need Clear Block E for sure!

Merriest Trees Bundle

As you can see in the set of dies, there are LOTS of extra pieces! On the one hand, that is extra-fun and on the other hand, there are some LITTLE pieces there to work with! One great thing is that when you stamp the little ornaments, they are on one stamp and there is a die that matches that arrangement so the die will cut out all three ornaments at one time! The other great thing is that there are THREE ornament dies so you can stamp three sets of three ornaments and die-cut them all in one fell swoop with your machine! You can cut out chains or garlands for the tree with the one die that makes all the different lengths of garlands from that one die. It would be good if you used Adhesive Sheets on the back of the paper before you cut those out! I don’t know how you would get glue on the back of those except with the teeniest drop of glue. Even with the Adhesive Sheets on the back to turn them into stickers, they are very fragile although even if you accidentally tear them apart you can match the ends back up again.

If you stamp the solid tree, it may work better to lay the stamp and block face up on the table and then apply the ink rather than try to ink up the tree by patting it on the ink pad. Even better if you have the retired Stamparatus. Be sure to use a cushion underneath your stamp. It’s often a little difficult to get a perfect impression the first time with a large solid image like this tree.

This card has a card base of Shaded Spruce. I added a layer of Gold Foil underneath this interesting red pattern of designer paper in the Joy of Christmas Designer Series Paper (161958). This designer paper has all kinds of different patterns that can be for Christmas or for other occasions.

The Christmas tree is die-cut from Shaded Spruce. I used the other tree piece with Versamark Ink to stamp and embossed with white embossing powder using a Heat Tool. This makes it look like a little bit of snow on the Christmas tree! Then I used Adhesive Sheets on the back of a small piece of gold More Dazzle 6″ x 6″ Specialty Paper. It’s in the Annual Catalog but you may already have some from a previous catalog. Then I used the die to cut out several different lengths of garlands. If you have the Take a Pick Tool or some other piercing tool it makes it easier to pry off the backing sheet. As I said before, these little diecut garlands are very delicate and fragile.

The little ornaments are stamped in Real Red on Basic White and then diecut. They just need a tiny drop of glue on the back to adhere to the tree however you would like to place them. Use different colors of ornaments if you like. There are two different styles of stars to choose from to put at the top of the tree.

No Christmas tree would be complete without packages! You can stamp little gift boxes and bows and die-cut them, or you could die-cut the presents out of solid cardstock or scraps of designer paper.

The greeting is one in the Merriest Trees Stamp Set. It is stamped in Real Red Ink and die cut with a small banner in the Stylish Shapes Dies. I cut off the banner end on the right so it would line up with the edge of the designer paper background. Once again I will point out that this greeting is very small.

If you like lots of detail when you make a card, this card might be for you. If you want to make a few of these cards to send for Christmas, I say go for it! Once you have your design and make everything in an assembly-line fashion it will be easier than it looks. But if you are making 50 Christmas cards to send, maybe you want a simpler design with fewer little pieces! This exact card takes more than a few minutes to make, so plan ahead!

SHOP STAMPIN’ UP! ONLINE HERE!

A Walk in the Forest Christmas Card

A Walk in the Forest Christmas Card

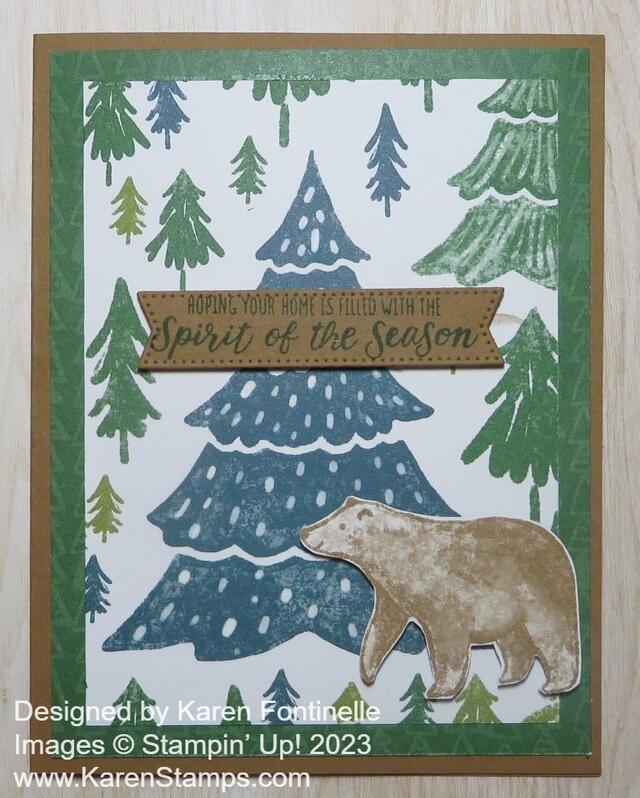
It’s the first Christmas card of the season! It’s the A Walk in the Forest Christmas Card! One of the perks of being a Stampin’ Up! Demonstrator is getting to preorder new products coming up in the next catalog so that we can become acquainted with the new things and make samples to show our customers. I’m not usually into animals, but there are brown bears and polar bears in this upcoming Holiday Mini Catalog. For some reason, this time I had to have them! The designer paper, anyway!

For this card, I used the new A Walk in the Forest Designer Series Paper (162377), which you will find at the top of page 5. You might miss it even though there are many samples across the two-page spread, but this paper stands alone. It is not part of a suite or bundle or anything. It’s just paper.

However, if you read the Stampin’ Up! Making a Difference box on page 5, you will find that with each purchase of this designer paper, Stampin’ Up! will donate $3 to support organizations dedicated to spreading cheer and providing support to those in need. So with your fun purchase, you will be helping others during this holiday season.

This A Walk in the Forest Designer Series Paper has bears, trees, snowflakes, stripes, evergreen branches and red berries. Some of the images work with the Merriest Trees Dies and some of the bears can be punched with the Beary Cute Punch.

For this card, I decided to use Pecan Pie cardstock although I was tempted to use Real Red or Cherry Cobbler. I decided Pecan Pie would go better with the outdoor, rustic theme of the card. The “other side” of this paper with the trees and the bears, is this Garden Green with tiny little triangle trees all over it. I chose that side of the paper for the layer on the Pecan Pie card base.

The top layer with the tree in the forest was strategically cut out of the designer paper so that I would have that big tree but not part of a bear along the edge. It worked out to cut it a little smaller than a normal layer which was fine because then a larger margin of the green paper would show. The tree layer is 3 1/2″ x 4. Out of another section of the paper, I cut out the brown bear. You can purchase the Beary Cute Punch, on page 67. It is actually part of a Bundle with the Beary Cute Stamp Set. But for this card, I just used my Paper Snips to cut out the bear by hand. I used a LOT of Stampin’ Dimensionals on the back of the bear because I wanted him popped up but sturdy! It was easy enough with my mostly used-up Dimensionals because I cut along the edges and cut itty bitty pieces for on his legs.

The greeting is in the Merriest Trees Stamp Set on page 12 of the Holiday Mini. I stamped it with Garden Green ink on Pecan Pie cardstock. I wasn’t sure if it would show up well enough but it does. It was diecut with a banner in the Stylish Shapes Dies. It just barely fit but I like it. I popped it up on Stampin’ Dimensionals also.

I have to be honest and say it took everything in me to NOT put any rhinestones or jewels or bling of any kind on this card! I really wanted to add some sparkle to the tree, but I also liked the rustic look of the trees and the bear and didn’t want to spoil that.

The Holiday Mini (officially known as the September – December 2023 Mini Catalog) goes live on September 6 for you to order from. It ends on January 3 (which right now we can’t imagine!). Be sure to order your very favorite things as soon as you can so you don’t have to wait for a backorder situation.

If you liked this A Walk in the Forest Christmas Card just know that it is an easy card to make although you couldn’t make a ton of the same card because you need to work with the trees and the bears on the paper. But otherwise, you just have to glue the layers to the card, punch or cut out the bear and add a greeting. That’s it!

Shop the Holiday Mini Sept. 6th!

Snowman Magic Christmas Card

Snowman Magic Christmas Card

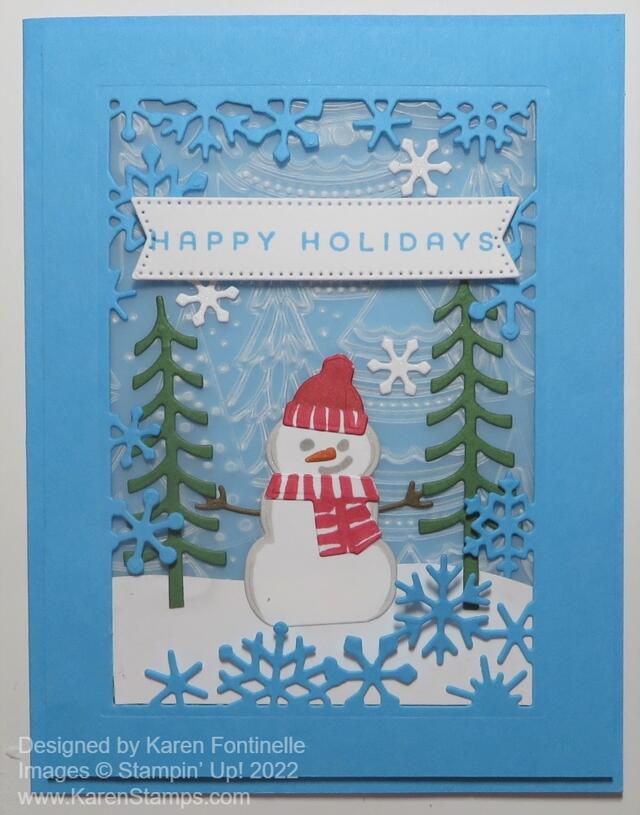
Back in July, I saw a card on the Stampin’ Pretty blog by Mary Fish using the Snowman Magic Bundle and I just loved it! I didn’t even own this Bundle so after a while I order just the Snowman Dies. At any moment, I was going to copy Mary’s card, but it didn’t happen until now! I guess it’s now or never now that it is just a week until Christmas.

My card isn’t “exactly” like hers because I didn’t buy the stamp set and I used a different background. But it is pretty close! I used Tahitian Tide for this card. It’s one of the “new” In Colors that came out in the Annual Catalog. Such a pretty blue to use with a snow scene!

It has turned cold here in Houston and will get even colder for Christmas so I’m hoping for snow, but I don’t think my wish will come true! It did snow many years ago here on Christmas Eve and we went out and played in the snow a bit on Christmas morning! I even made a tiny snowman that I kept in the freezer for months! It probably wasn’t much bigger than the snowman on this card!

Even without the Snowman Magic Stamp Set, I knew I could use the diecut snowman and make him look okay! I added a bit of the Light Gray Granite Stampin’ Blend on the edges of the snowman plus diecut the scarf and hat and added my own stripes and color with the Dark Real Red Stampin’ Blend. The snowman carrot nose is the smallest thing I have ever seen as a diecut! I just colored it with the Pumpkin Pie Stampin’ Blend and somehow managed to glue it down on the snowman’s face. Then I drew in the eyes and mouth with the Gray Granite marker. The arms are the next smallest things I’ve ever die cut! I had a brown scrap of cardstock handy.

The frame of snowflakes is a diecut that does all that work for you! Before adhering to the card base, I embossed a piece of vellum using the Whimsical Woodland 3D Embossing Folder. You can see the trees in the background. I also diecut the two green trees on each side of the snowman and three white snowflakes that I added.

I adhered the vellum to the back of this frame piece and since the snowflakes aren’t adhered except to the edges, I just cut a piece of snow for the base by hand and slipped it down into the frame. The snowman and trees are adhered flat to the vellum. Just slip them in where you want them. Then adhere the whole thing with Stampin’ Dimensionals to the card base.

The greeting is stamped in Tahitian Tide ink and die cut with a narrow banner shape in the Stylish Shapes Dies. It is popped up on Dimensionals also.

This was a fun card to make, maybe a little too much for multiples, but there are many things you can do creatively with this set of dies!

Monochromatic Jingle Christmas Card

Monochromatic Jingle Christmas Card

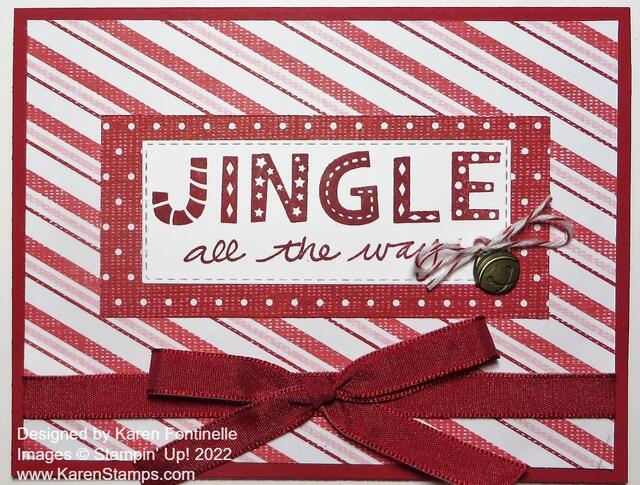
You can make this simple Monochromatic Jingle Christmas Card in red and white, and if you have them, you can add a Flat Jingle Bell Trinket (no longer available). It’s so funny how you can “know” when you have your card right. I kind of tried out some different layouts with the designer paper and cardstock layers but the card was too plain. Once I added the ribbon and bow across the bottom, and especially the Jingle Bell, I knew that was IT! Just that little touch, for me, made it perfect!

The card base is Real Red and I used the ever-popular Sweetest Christmas Designer Series Paper. This paper will be retiring with the Holiday Mini Catalog on January 4th or while supplies last. It’s not discounted but it is on the Last Chance List. It’s best now that the sale started to just look in the Online Store and see what is still available rather than looking at the original list.

The diagonal stripe paper is 5 1/4″ x 4″. The “Jingle” is stamped in Real Red ink on Basic White Cardstock. The name of the stamp set is Jingle Jingle Jingle so that is easy to remember! I diecut it with one of the Stitched Rectangles Dies. At first, I was going to layer it on another rectangle in Real Red but I wasn’t happy with that. Then I decided to add the red piece with the white polka dots as a layer under the greeting. It measures 4″ x 1 1/4″. The “Jingle” rectangle is 3 1/4″ x 1 1/4″. You can vary the sizes of both.

The ribbon is the Real Red Ribbon in the Combo Pack with Garden Green. I just adhered a strip across the bottom portion of the designer paper and added a bow separately, adhered with Mini Glue Dots.

As I said, for the finishing touch I added one of the Flat Jingle Bell Trinkets that I already had. They are sold out now, unfortunately. I looked in my retired stash and found this red & white twine so I used that on the bell. Otherwise, you can just add some white twine or Linen Thread, whatever you have. If you don’t have the bell, you can stamp one in the Jingle Jingle Jingle Stamp Set.

Now that you have all the information to make this card, it would be pretty quick & easy to make! On the inside, I added a layer of Basic White stamped with a greeting from the Brightest Glow Stamp Set. And in the corner, I stamped the little bell in the Jingle Jingle Jingle Stamp Set and the little bow that goes with it.

This is the fun season of making Christmas cards so put on some Christmas music and just enjoy the process (if you are still working on Christmas cards!).

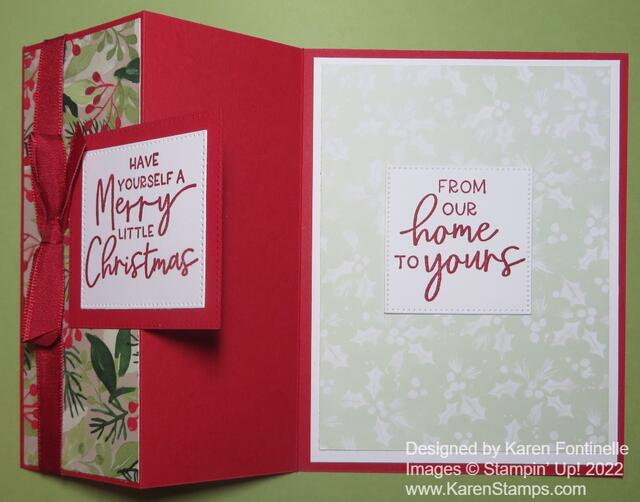
Painted Christmas Z-Fold Card

Painted Christmas Z-Fold Card

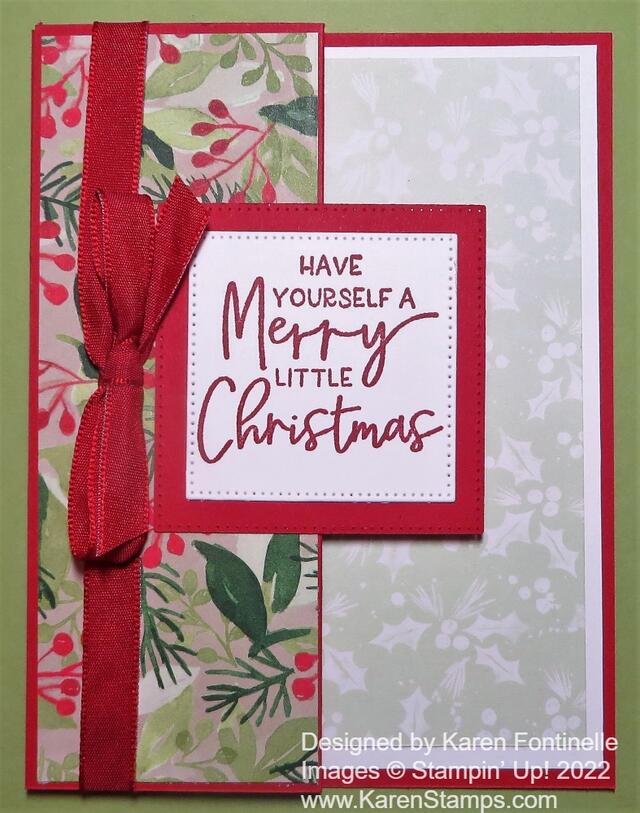
If you are looking for a fairly quick Christmas card to make but still something a little special, this Painted Christmas Z-Fold Card might be the card for you! I have always thought a Z-Fold card, while easy to make, looks a little fancy. The only difference from a regular card is that you fold the front of the card back on itself.

This Christmas card starts with a Real Red card base. After cutting the cardstock at 5 1/2″ x 8 1/2″, score it at 2 1/8″ and 4 1/4″. That gives you a score line on the front of the card. After creasing the card in half as you usually do, fold on the 2 1/8″ score line, which is the center of the card front, back toward the fold. See the photo below.

Painted Christmas Z-Fold Card Open

Depending on where you want to put the designer paper on this card, or stamping, choose which patterns you want to use and where you want to adhere them. On this sample, I cut a piece of the Painted Christmas Designer Series Paper for that narrow front area at 2″ x 5 3/8″. You can make it a bit narrower and shorter if you want. You could also add a piece on the inside of the front fold. I did not on this card.

Since the inside of the card is a somewhat dark color, I added a layer of Basic White. When I saw this light green pattern of designer paper, I decided to add that as another layer that would show from the front and coordinate with the design on the front. Another choice would be to just add a narrow strip of designer paper to the right side of the inside of the card on the Real Red cardstock or on the Basic White layer if that was added.

For the greeting, I chose one from the Framed & Festive Stamp Set, a new offering in the Fitting Florets Suite. It is only available until January 4th or while supplies last. I love the font and the variety of greetings for Christmas cards and projects in this set! I stamped the greeting on Basic White with Real Red ink and diecut with one of the squares in the Stylish Shapes Dies. Then I cut out the next larger square in Real Red to be a layer for the greeting. When you adhere this to the front of the card, make sure you are only putting adhesive on half of the back so it only adheres to that folded front part of the card and not the inside too!

The “tricky” part is adding a greeting to the inside of the card. Ideally, you would like it not to show from the front of the card, so you want the greeting on the inside of the card to be completely behind the greeting on the front of the card. You could mark lightly with a pencil the area where that front greeting covers the inside so you know your boundaries. For this card, I stamped a greeting on Basic White the same size as on the front. I put adhesive on the back of that greeting and layered it face down on the back of the greeting on the front from the inside. When I had it placed properly, I folded the back of the card over so that the greeting would then adhere to the inside of the card in the correct spot. That worked pretty well, but you could use pencil marks or eyeball it!

For a finishing touch, I added some Real Red Ribbon tied around the front fold of the card. I anchored it under the bow and inside the fold with some Mini Glue Dots. You could add a Basic White panel to the back of the card if you wanted to write a note so that it wouldn’t show from the front.

This Painted Christmas Z-Fold Card is an easy one to make and the recipient will think you are a talented cardmaker! Try it today!

SHOP STAMPIN’ UP! ONLINE HERE!

Whimsical Woodland Embossed Christmas Card

Whimsical Woodland Embossed Christmas Card

I’ve had this Whimsical Woodland 3D Embossing Folder for a while but have forgotten to use it! This is my first try with it. Actually, I was trying to copy a card I saw I think just yesterday, maybe the day before, but when I wanted to look at it again, of course, I couldn’t find it! Does that happen to you?! It was just this white embossed Whimsical Woodland background and a greeting on red cardstock. But I still wish I could see it again!

In the meantime, I made my own card! I used Basic White for a card base and cut the embossed piece at the regular layer size, 4″ x 5 1/4″. I could have made it as large as the card base, too.

The greeting is in the Brightest Glow Stamp Set. I stamped it with Real Red ink and then just cut it out with my Paper Trimmer. The Real Red layer behind it is a die in the Painted Labels Dies. I popped up the greeting with Stampin’ Dimensionals.

Very easy card to make and you can do different things with the same card design. Instead of a white card base, use colored cardstock. Or use the white card base but put another colored layer under the embossed layer. Just play with different designs and see what you like!

If you like this Whimsical Woodland Embossed Christmas Card, try one of your own and try varying the design and see what you come up with!

SHOP STAMPIN’ UP! HERE!

Lights Aglow Colored Strips Christmas Card

Lights Aglow Colored Strips Christmas Card

This Lights Aglow Colored Strips Christmas Card came about after seeing a pretty similar card in the Stampin’ Up! Holiday Mini Catalog on page 32. It’s a great way to use up designer paper scraps by using various designer paper strips for the background of the card. It shows off lots of the pretty paper and provides a nice card front. And no waste if you have saved a bunch of scraps!

This card starts with a Cherry Cobbler Cardstock card base. I had a lot of scrap strips from the Lights Aglow 6″ x 6″ Specialty Designer Series Paper. In whatever way I had cut up the paper, I had a lot of 4″ x 3/4″ strips. I began laying out the strips on the card base, just eyeballing it. Then I got the idea that with the paper having gold foil accents, it might look nice if there was gold foil in between the strips. Finally, I decided to cut a piece of Gold Foil for the background of the strips. Fortunately, six strips fit just right on that layer of Gold Foil! If you want to do all the math and figure out the space measurements and all that, go right ahead, but you are very likely to just lay out the strips and have them spaced apart pretty evenly! My Stampin’ Up! Grid Paper was a little bit of help but mostly I just eyeballed it.

I die-cut a Christmas tree out of one of the green Lights Aglow papers using the Twinkling Lights Dies. I also cut out a tree in Gold Foil just with the outline die to adhere behind the tree die so the gold would show through the little holes in the Christmas tree! The tree was then adhered to the card front. You can pop it up if you like, I just glued mine flat. You could instead pop up the background with the strips of paper. If you are going to mail the card, though, you don’t want it

For the greeting, I stamped the banner in Cherry Cobbler ink in the Christmas Banners Stamp Set and cut it out with the Christmas Banner Dies. You can get both in the Christmas Banners Bundle and save 10%. Since I wanted the greeting to be gold to match the card, I stamped the greeting with Versamark Ink and embossed it with Gold Powder using the Heat Tool. The greeting is in the Christmas Banners Stamp Set. I popped up the banner using Stampin’ Dimensionals.

To finish off the Christmas tree, I die-cut the little “star” at the top of the tree with one of the dies out of Gold Foil. I also placed a few Red Rhinestone Basic Jewels on the tree for just a little more sparkle!

I don’t think you would want to mass-produce this card to send, but if you have some scraps, it is easy enough to make one or a few more cards with this design!

Twinkling Lights Christmas Tree Card

Twinkling Lights Christmas Tree Card

Here’s a Christmas card idea with a pretty diecut Christmas tree, the Twinkling Lights Christmas Tree Card. I felt like I was missing out, not having cards with a Christmas tree on the front! I already purchased this pretty Lights Aglow 6″ x 6″ Designer Series Paper but I found I couldn’t do without a Christmas tree!

This card begins with a Cherry Cobbler card base, one of the coordinating colors of the Lights Aglow paper. Next, I layered a piece of Gold foil (if you want to “cheat”, cut a piece out of the middle of the Gold Foil to use later, it won’t show on the front of the card!) and then a print layer of the Lights Aglow paper.

The Christmas tree is die cut with the tree shape in the Twinkling Lights Dies. Actually, there are two dies to use. One cuts out the tree with the little punched-out dots to look like lights and the other cuts out the same size and shape solid tree. On this card, I die cut the tree out of the Lights Aglow patterned paper with the die that cuts the little holes but I also cut a solid tree out of Gold Foil to show through from the underside of the tree. They are adhered together.

The tree is popped up on Stampin’ Dimensionals with some Gold 1/4″ Shimmer Ribbon that is adhered back and forth on the back of the tree.

The greeting is stamped in Cherry Cobbler Ink from the Brightest Glow Stamp Set. I just cut the banner ends and layered it on a piece of Gold Foil. It is popped up on Stampin’ Dimensionals.

There are so many variations you could make of this same card with different colors and patterns of paper or using cardstock along with the designer paper. Everyone loves a Christmas tree for Christmas cards so if you need one, use the trees in the Twinkling Lights Dies to make a card like this Twinkling Lights Christmas Tree Card.

SHOP STAMPIN’ UP! HERE

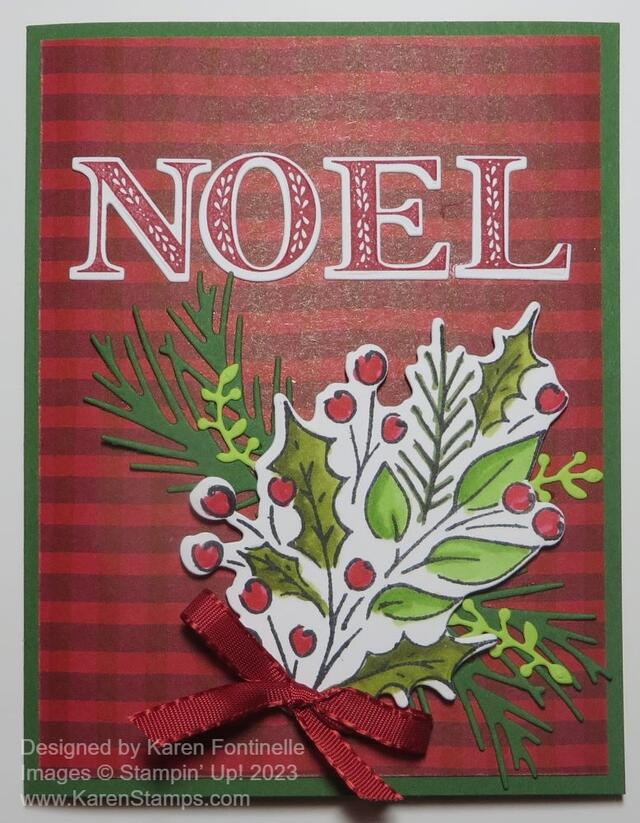
Cottage Wreaths Christmas Card

Cottage Wreaths Christmas Card

To make this card, I started off with the designer paper in the Fitting Florets Designer Series Paper, a new release coming November 1st. It has lots of flowers so you wouldn’t think you could use it to make a Christmas card. But this Evening Evergreen plaid pattern is perfect for this Cottage Wreaths Christmas Card. I even made it easier than I originally planned on!

The card base is Evening Evergreen to match the designer paper. I thought about putting a layer of Real Red in between the card base and designer paper, but I didn’t. I used the Stitched Rectangle Dies to cut out a piece of Basic White and a layer of Real Red. My Basic White piece is about 2 5/8″ x 4″ and the Real Red layer is 3″ x 4 3/8″. You can just cut out rectangles with your Paper Trimmer if you do not have the dies or you can make yours different sizes.

I simply stamped the wreath and berries in the Cottage Wreaths Stamp Set on the Basic White. I originally thought I would of course die cut it, but then I thought let’s just stamp it. I inked the wreath with Pear Pizzazz ink BUT then I added some other greens with Stampin’ Write Markers. I think I used Garden Green, Old Olive, and Granny Apple Green. I just randomly and lightly added the marker on various leaves of the wreath, trying not to do all of them. This is a Distinktive stamp set so just inking up a stamp and stamping automatically gives that textured look to the image. I thought it worked especially well with this wreath. Then I stamped the groups of three berries around on the wreath in Real Red. They were a little light so I couldn’t resist just adding a dab of Real Red Stampin’ Write Marker to each berry.

The bow in the stamp set was also stamped on a scrap of Basic White and die-cut with the Country Wreaths Dies. I just glued it onto the bottom of the wreath. You could also pop it up on Stampin’ Dimensionals. The greeting is stamped in Real Red and is also in the Cottage Wreaths Stamp Set. The size is perfect for this card design.

To finish it off, I used a few of the Red Rhinestone Basic Jewels. I like a little sparkle but you could easily leave these off or use ones that are not red. You could also color plain rhinestones with a Real Red Stampin’ Blend Marker.

If you want fancier, then use the wreath die cut and leaves and go for it! You can purchase the stamp set and dies in a Bundle, the Cottage Wreaths Bundle.

SHOP STAMPIN’ UP ONLINE HERE!

Jingle Jingle Jingle Christmas Card With Bells

Jingle Jingle Jingle Christmas Card With Bells

This Jingle Jingle Jingle Christmas Card With Bells was fun to design! This stamp set, Jingle Jingle Jingle, is probably a less noticed one in the Holiday Mini Catalog because it’s not part of a Suite or Bundle. However, it’s a fun stamp set with cute words and extra little stamps like a candy cane, Christmas lights, stars, and Santa hat, plus fun words to use as sentiments.

This card has a card base of Real Red and a layer of Basic White. I simply spaced out the stamped word “Jingle” using my Stamparatus to make sure I had it straight and that it stamped the image well in Real Red ink. I didn’t really do it the “right” way with my Stamparatus (I should have just moved the plate down instead of placing the stamp on the card where I wanted it!) but it turned out just fine. Using the lines on the Stamparatus, I could see if I had the word straight.

In between the words, I stamped the string of Christmas lights. These are stamped in Memento ink and colored in with Stampin’ Blends. I used Real Red, Pumpkin Pie, Granny Apple Green, Orchid Oasis, and Daffodil Delight. You can use the Light or Dark marker or any other colors you like for Christmas. Another tip would be to add some Wink of Stella Glitter Brush to each light bulb for a little bit of sparkle up close.

I added two Flat Jingle Bell Trinkets to the bottom of the card. I’m not sure where the red and white baker’s twine came from but it was on my desk so I used it! I ran the twine through the holes in the bell trinkets but glued down the bells with Mini Glue Dots. These bells are flat which is great because they will be easier to go through the mail. So cute!

I almost added some Iridescent Rhinestones or some jewels for a little sparkle, but then I decided to use the star stamp in the set stamped with Daffodil Delight ink.

On the inside of the card, I added a Basic White layer stamped with two rows of Christmas lights and one of the phrases in the set that goes with the bells. I could also stamp or write “Merry Christmas” underneath when I send the card and sign it.

Jingle Jingle Jingle Christmas Card With Bells inside

Whether we like to think so or not, it’s the middle of September already, and time to get ahead of ourselves and start making our cards and projects so we won’t be so rushed when the holidays arrive! I am saying this to myself!

This Jingle Jingle Jingle Stamp Set is a good stamp set to use because you can make several different versions of cards with this set. The whimsical images will be fun to use!

SHOP STAMPIN’ UP! ONLINE HERE!

Lights Aglow Gold Christmas Card

Lights Aglow Gold Christmas Card Closeup

I looked through the Lights Aglow Designer Paper and chose this pattern without knowing what I would make. That’s a good way to get started when you are trying to come up with an idea. In a little while, I had this Lights Aglow Gold Christmas Card made!

After deciding on this gold foil snowflake pattern of paper in the Lights Aglow 6″ x 6″ Specialty Designer Series Paper, I decided to make the card base Cherry Cobbler cardstock. I started with Real Red, but I think just knowing the coordinating color for this designer paper pack was Cherry Cobbler, Real Red just didn’t feel right. I cut the snowflake layer down a little so I could add some Gold Foil strips to the top and bottom. I cut two Gold Foil strips 3/4″ x 5″ to add a 1/4″ edge peeking out.

For the greeting, I stamped “Merry Christmas’ in the Brightest Glow Stamp Set. I stamped it with Versamark ink so I could heat emboss it with Gold Embossing Powder in the Metallics Embossing Powders using the Heat Tool. I used Very Vanilla cardstock.

To help the Very Vanilla greeting stand out, I diecut it with one of the Painted Labels dies and immediately cut another one out of Gold Foil. The gold foil is then cut in half horizontally so that it could be layered just a tiny bit under the top and bottom of the greeting piece. It’s not absolutely perfect, but plenty close enough.

For a little embellishment, I remembered that I had Gold Holly Leaves leftover from last year’s Holiday Catalog but carried over to the current Holiday Mini. They are almost like little fabric leaves and come in two sizes in the package. Then I die cut some Cherry Cobbler berries from the Christmas Banners Dies. I think they are a little larger than I would have liked but they still are okay. I popped the greeting up not on Stampin’ Dimensionals but on Foam Adhesive Strips. They seem to be a little higher than the Dimensionals so I might have preferred the Dimensionals. But it is fine!

So once you know what the design is on this card, it’s really fairly simple! You can change the background designer paper and make it a little different or even make the card for a different occasion, instead of this Lights Aglow Gold Christmas Card.

Lights Aglow Gold Christmas Card Closeup

SHOP STAMPIN’ UP! and SALE-A-BRATION (until Aug. 31st)!