Tag Archives: Christmas card

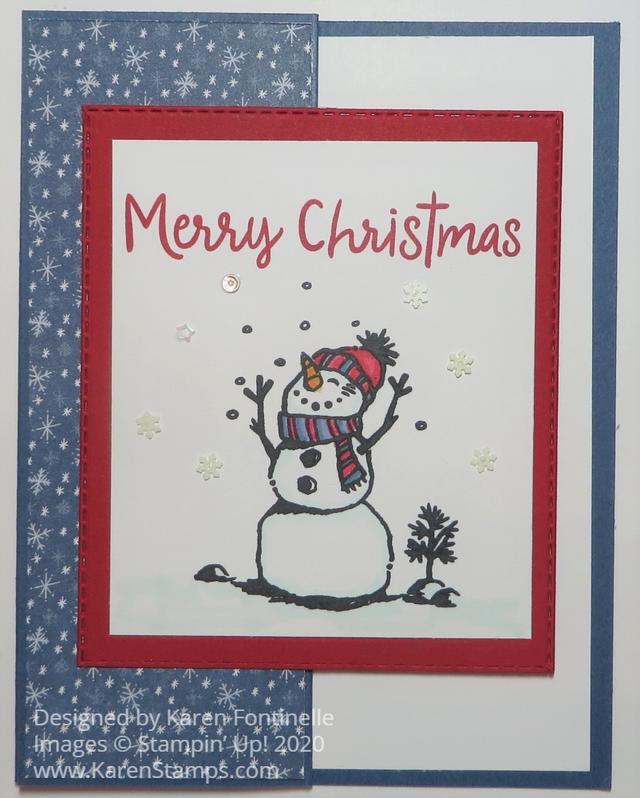
Snowman Z-Fold Merry Christmas Card

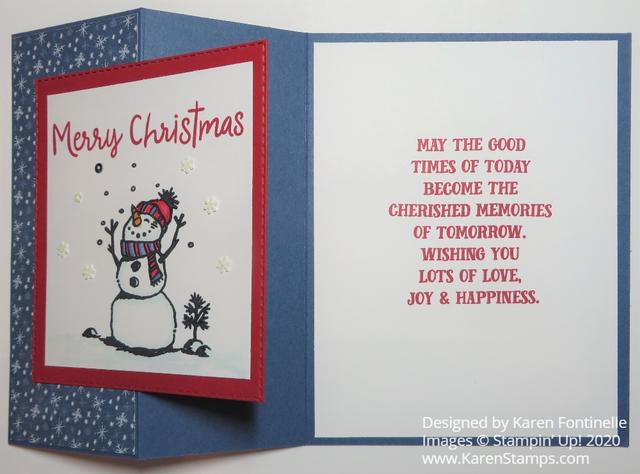
Snowman Z-Fold Merry Christmas Card Open

I was in a snowman mood when I made this Snowman Z-Fold Merry Christmas Card. I started off looking at the Trimming The Town Designer Series Paper and when I saw this snowflake print, I thought it would go well with one of the snowmen in the Snowman Season Stamp Set! Sometimes you get inspired with a card idea just by looking through your designer paper.

I decided to make a Z-Fold card. It’s something VERY easy and looks extra special. All you have to do is make a card base the usual way, then fold the front back on itself in half. So cut the cardstock like usual at 8 1/2″ x 5 1/2″. Score at 2 1/8″ and 4 1/4″. If the front of the card is 4 1/4″ wide, then you want to score that in half which would be 2 1/8″ to fold half of the front back to make that z-fold. It’s easy!

The card base is Misty Moonlight cardstock with a snowflake piece of Trimming the Town DSP. I cut it at 2″ x 5 3/8″. I could also have made it 1 7/8″ x 5 1/4″ for a slightly wider margin that would have matched the Whisper White inside layer.

The snowman is stamped in Black Memento Ink on Whisper White with the greeting, in the same stamp set, stamped in Real Red Ink. That piece is cut 3″ x 3 1/2″. It is layered on a piece of Real Red Cardstock die cut with a special technique using the Rectangle Stitched Dies. I cut out the rectangle, then moved the die so that it would make the rectangle shorter.

The snowman is colored the little bit it needs with Stampin’ Blends in Real Red, Misty Moonlight, and Pumpkin Pie with a tiny bit of Pool Party as shading on the snow. Then I adhered a few Snowflake Sequins around the snowman. The Take Your Pick tool is really handy for picking up and placing sequins on teeny tiny drops of Multipurpose Liquid Glue.

When adhering the snowman panel to the front of the z-fold, but sure to only put adhesive on the portion of the back of the snowman that will be adhered to the z-fold. You want to make sure that the panel you add to a z-fold card will cover any message inside so sometimes you have to play with positioning a little bit. The message I stamped inside this card is from the Tag Buffet Stamp Set.

Click HERE to see another z-fold card I made recently!

This really was an easy card and if you follow my design and directions, it will be even easier and faster for you to make a card like this Snowman Z-Fold Merry Christmas Card!
Snowman Z-Fold Merry Christmas Card

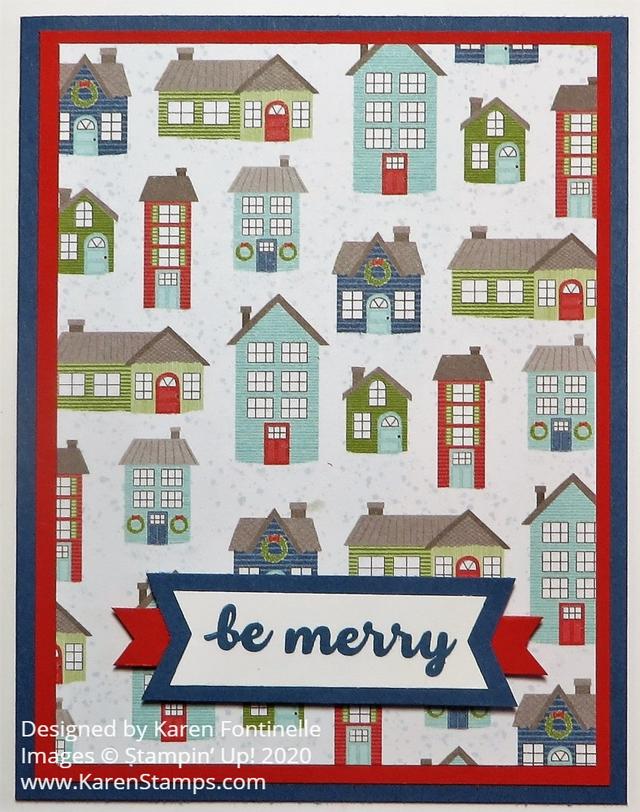
Easy Trimming the Town Christmas Card

Easy Trimming the Town Christmas Card

Don’t forget about the Designer Paper Sale going on this month (which is just about over) at Stampin’ Up! and the paper on this Easy Trimming the Town Christmas Card is one that is on sale, just in time for the holidays! This particular card is one that is about as simple as they get yet is colorful and festive and will spread holiday cheer!

The card base is Misty Moonlight, one of our In Colors, with a layer of Poppy Parade. I originally thought the red color on this paper was Real Red, but it is actually Poppy Parade. Not that you can’t use Real Red because I did on this other card I made!

I just cut a layer of the Trimming the Town Designer Series Paper with the smaller buildings on it. It is bright and colorful and makes a “happy” holiday card! Then all I had to do was add a greeting!

The greeting is from the Banner Year Stamp Set. This is a set that you might overlook but I have gotten a lot of use out of it with its many greetings and cute little images. I stamped it in Misty Moonlight Ink on Whisper White Cardstock and layered on a piece of Misty Moonlight Cardstock. I used the Banners Pick a Punch to punch the banner ends. If you don’t have the punch, just eyeball it and cut with Paper Snips. To help the greeting stand out, I layered a piece of Poppy Parade underneath and popped it all up on Stampin’ Dimensionals®.

The designer paper already had snowflakes printed on it, but you could add some Adhesive-Backed Snowflakes or some other sequins or gems if you wanted to jazz up the card a little bit more.

Just add a layer of Whisper White inside the card since the Misty Moonlight card base is a dark color. Maybe cut out one of the little buildings or add a strip of the designer paper or stamp a Christmas greeting inside if you like.

Be sure to check out the Designer Series Paper Sale, going on now in the Stampin’ Up! Online Store, only until October 31!

Designer Paper Sale 2020 Banner

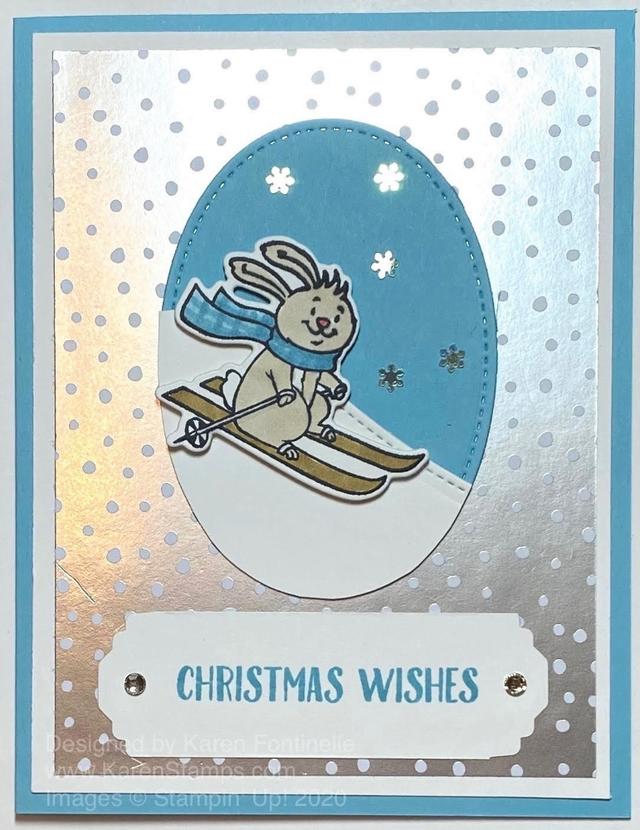
Freezin’ Fun Christmas Wishes

Freezin' Fun Christmas Wishes

Here’s a cool and icy looking Christmas Card, perfect for the skiing bunny, called Freezin’ Fun Christmas Wishes. The little guys in this stamp set are so cute you can’t help but love them! This little bunny is having fun skiing down a pretty steep slope amid the snowflakes! If you are making several designs of Christmas cards, you might like this one for a fun, whimsical card to send someone special.

I had planned to use the Feels Like Frost 6″ x 6″ Specialty Designer Series Paper. It was brought back from last year. I guess all the snowy, wintery photographic scenes on the paper were hits! As pretty as those scenic papers are, the other side with silver foil designs is also pretty and fun. It’s hard to use one side and miss out on the opposite side! For this card, the foil side won out, even though I had planned on the wintery scenes! You never know when you start creating!!

The card base is Balmy Blue with a layer of Whisper White to help the Feels Like Frost paper stand out a little. Cards with foil are always hard to photograph because of glare, but this paper is silver foil with white dots that look like snow.

I stamped the bunny from the Freezin’ Fun Stamp Set and cut him out easily with the Freezin’ Friends Dies. You can buy both the stamp set and the dies together in the Freezin’ Fun Bundle and save 10%.

The Balmy Blue oval is die cut with the Stitched Shapes Dies. In the Freezin’ Friends Dies is just a long curvy die with which I made the snowy slope. I die cut the slope just out of a scrap of Whisper White, then adhered it to the oval and trimmed off the excess with Paper Snips.

The bunny is popped up on Stampin’ Dimensionals skiing down the slope! Of course, I colored him with Stampin’ Blends first, which I love to do! After adhering the layers together to make the card and adhering the oval to the front, I added some Adhesive-Backed Snowflakes. Those were sure fun to stick on! You could also glue on Snowflake Sequins with teeny tiny drops of Multipurpose Liquid Glue. Be sure to grab your Take Your Pick tool when you are handling these tiny pieces! It makes it a lot easier!

The greeting is stamped in Balmy Blue Ink from the Banner Year Stamp Set. I simply stamped it on a long scrap and then punched the ends with the Lovely Labels Pick a Punch. Not being able to leave something plain alone, I had to add a couple of Rhinestones to the ends!

Even with the die-cutting, this card is pretty easy to make, simple design! Check your stash and see if you bought this designer paper last year and if so, get it out and start making some cards with it. It doesn’t even have to be just for winter or Christmas with the foil designs! If you don’t own it, you can purchase it, but wait until October 1st! There’s a designer paper sale coming!!

SHOP STAMPIN’ UP! ONLINE!

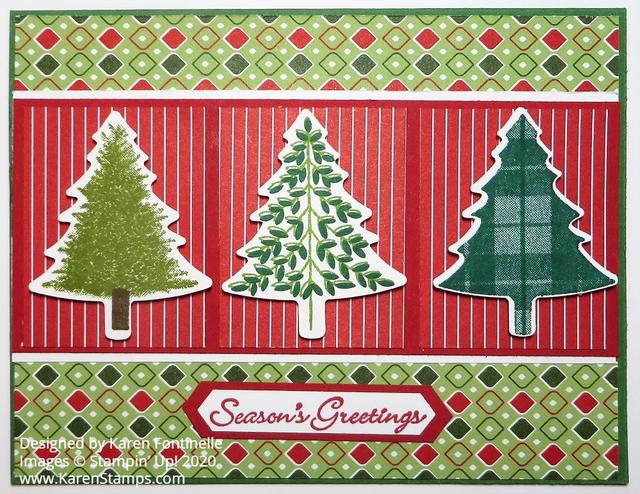
Perfectly Plaid Christmas Card With Trees

Perfectly Plaid Christmas Card With Trees

This Perfectly Plaid Christmas Card With Trees is one you can make with two stamp sets that will on sale at 15% off tomorrow, September 23 during the Stampin’ Up! Stamp Sale! This sale will only last 24 hours!

You can check out the list of select stamp sets that will be on sale on my blog post from yesterday HERE.

The sale will last basically for 24 hours on Wednesday, September 23, 2020—from 12:00 AM to 11:50 PM (MT) Remember, just select stamp sets but there are a lot to choose from.

For this Christmas card, I chose Garden Green for the card base with a layer of paper from the Heartwarming Hugs Designer Series Paper. So many great patterns to choose from for cards in this collection!

The stamp set that will be on sale is the Perfectly Plaid Stamp Set. This is a great Christmas set from last year that is now in the Stampin’ Up! Annual Catalog. There is a coordinating Pine Tree Punch that works great with the stamped trees if you want them to be cut out. I owned this Perfectly Plaid Stamp Set last year and used it a lot.

While that stamp set has lots of great holiday greetings, I also used another stamp set that will be on sale tomorrow for 24 hours, the Itty Bitty Christmas Stamp Set. I LOVE all these Itty Bitty stamp sets! Sometimes you need a small greeting to fit on the card and these sets always have something I can use! In this Christmas set, I chose “Season’s Greetings” and then punched it out with the Classic Label Punch. To help offset it, I added a piece of Real Red behind it and snipped the ends to match the punched ends.

I stamped each tree and punched it out, then layered it on a small piece of Heartwarming Hugs DSP. Those are layered on a strip of Real Red Cardstock. To help that stand out, I added a strip of Whisper White top and bottom on the Real Red strip. The trees are popped up on Stampin’ Dimensionals, the Minis and the Black ones.

If you need some stamp sets, make your list and check it twice! Save 15%! It’s something!

Stamp Sale September 23!

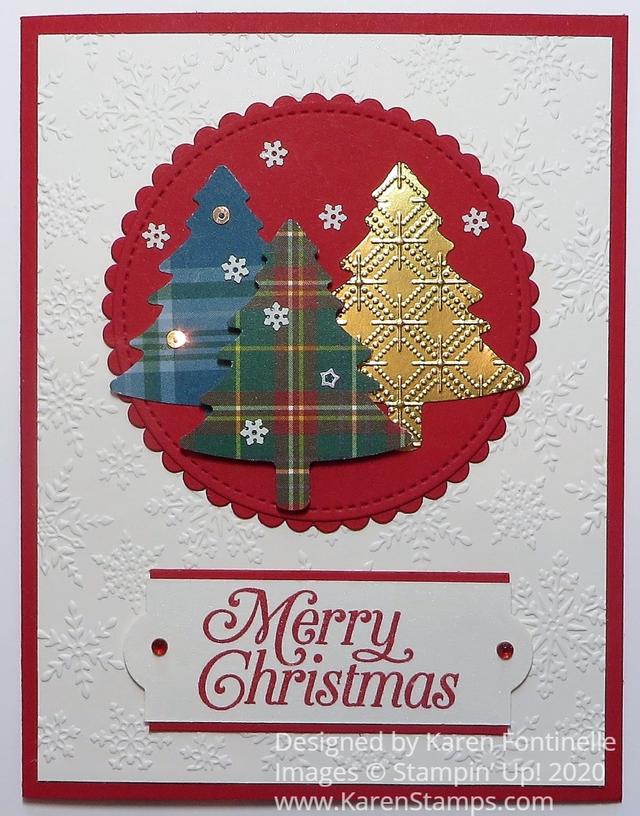
Pine Tree Punch Christmas Card

Pine Tree Punch Christmas Card

Even though we always want new things, I was happy to see a few things I already purchased last year show up in the new Stampin’ Up! Annual Catalog. Two things I used on this Pine Tree Punch Christmas Card were the Perfectly Plaid Stamp Set for the greeting and the Pine Tree Punch for the Christmas trees.

I got the idea for this card by looking back at last year’s Holiday Catalog at a sample of a tag. I changed it a little bit plus made it into a card. Of course, I could have stamped the trees from the Perfectly Plaid Stamp Set and punched them out as they did on the sample from last year’s catalog, but instead, I wanted to use our new Plaid Tidings 6″ x 6″ Designer Series Paper for the trees. One punch and done!

Instead of doing all three trees in plaid, I punched one out of Gold Foil, but then I embossed it with the new Dainty Diamonds Embossing Folder. Two trees are adhered flat to the background and the front green and red plaid tree is popped up on Black Stampin’ Dimensionals.

The card base is Real Red with a layer of Shimmery White Cardstock. I love the Shimmery White Cardstock for its very subtle shimmer. It is basically white but just a tiny shade off-white. I embossed this layer with the new Winter Snow Embossing Folder.

The circle behind the trees is actually two die cuts in Real Red. The outer one is the largest Layering Circle Die with a scalloped edge and then a Stitched Shapes Die circle on top of that.

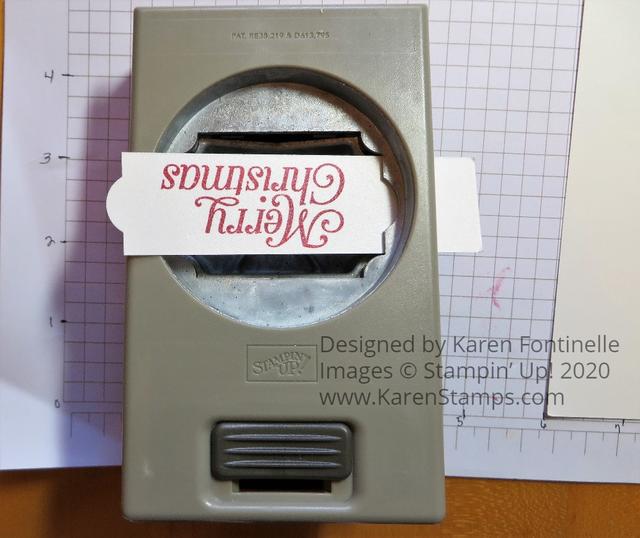
The greeting is stamped in Real Red Ink from the same Perfectly Plaid Stamp Set on Shimmery White. I got the idea to punch just the ends out of this narrow strip using the Everyday Label Punch.

Be sure you stick in the label from the top of the punch, not from the side like usual or you will punch both ends, unless that would happen to fit perfectly, but usually when you do a trick like this you have to punch one end at a time.

I tried various ways of layering some color underneath the greeting, even thinking about leaving the greeting without a layer, but finally, I came up with red just under the top and bottom of the greeting. Then I added a Red Rhinestone on each end. If you don’t have the Red Rhinestones, just color one of your clear rhinestones with a Stampin’ Blend marker! You can have rhinestones in any color!

I also added some Snowflake Sequins on the layer behind the trees and also on two of the trees. The gold embossed tree didn’t seem to need anything else! Mixed in with the sequins are other sequins that are not snowflakes so I used a few of those on the trees almost like ornaments. Put just the teeny tiniest dab of Multipurpose Liquid Glue where you want the sequin and place the sequin with the Take Your Pick tool. If you don’t already own this tool, you should put it on your next order! It is handy for picking up sequins with the sticky end and the pointy end or spatula end are great for picking rhinestones and other things up off their sheet getting underneath the adhesive. You will use it a lot!

Once you make one of this Christmas card, you could easily do an assembly-line process of making more. Get all the pieces punched or embossed or stamped and then just assemble. Don’t make one whole card at a time, except for maybe the first one for a sample. Cut all the strips for the greeting, emboss all the card layers, punch all the trees of one color, punch all the trees of the other color, etc. etc. In some ways, you almost get muscle-memory while you are working doing the same thing over and over and it makes assembly go faster! And it’s fun to make multiple cards without having to thing of designing each one! Try it with this Pine Tree Punch Christmas Card.

SHOP STAMPIN’ UP! ONLINE HERE!

Snowflake Splendor With So Many Snowflakes Dies

Snowflake Splendor With Many Snowflakes Dies

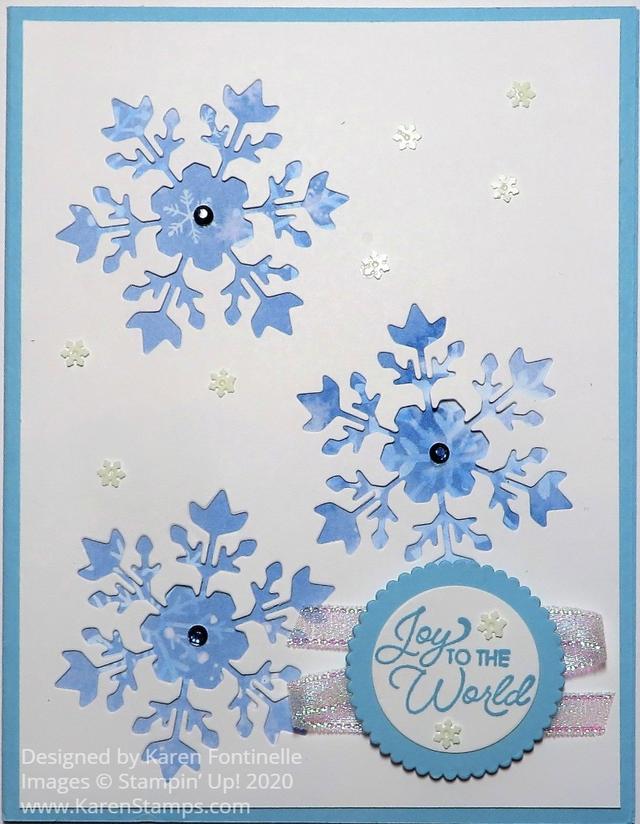
Brand new designer paper, dies, ribbon, and even a new die-cutting machine to make this Snowflake Splendor With Many Snowflakes Dies card for the holidays! Actually, I am hoping the snowflakes will cool me off in this very hot Houston weather!

This card is actually pretty simple! The card base is Balmy Blue Cardstock and I used the new Snowflake Splendor Designer Series Paper as a layer underneath the die-cut snowflakes. The snowflakes are die-cut out of Whisper White Cardstock (Shimmery White Cardstock would be really pretty, too!) using the So Many Snowflakes Dies. As a bonus, I now have three beautifully die-cut snowflakes to use on another card or project!

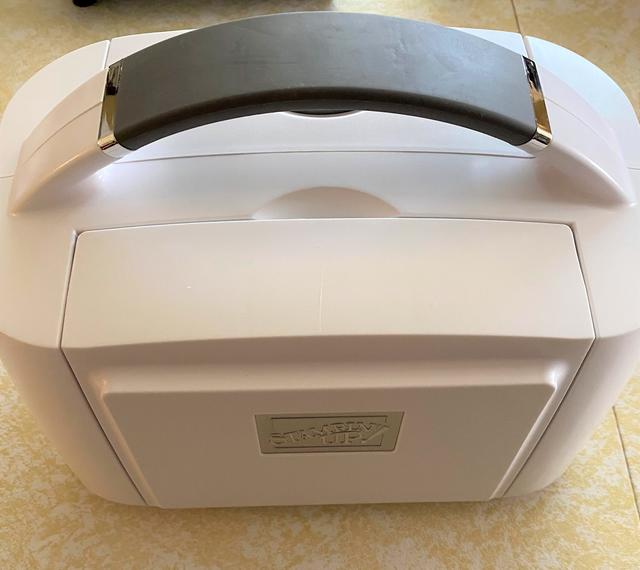
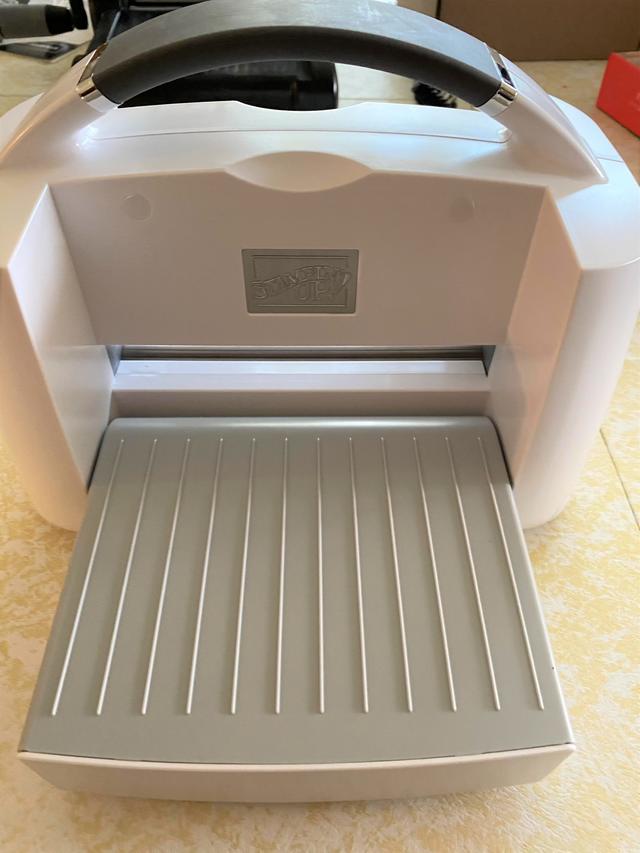
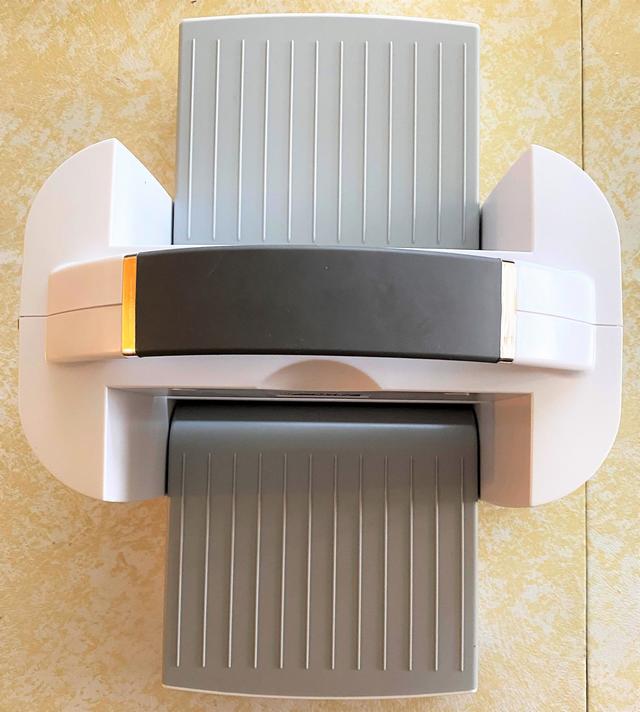
The new Stampin’ Cut & Emboss Machine, pictured in the Stampin’ Up! Annual Catalog is almost available! It will be available to customers on September 1, which is coming up soon! It IS available for preorder for Demonstrators (which is always a good reason to sign up!), but only the large machine. The cute Mini is not available and we don’t have a date yet. Mine just arrived and I’ve only played with it a little bit! I will post some quick photos I took of it, but I didn’t have the handle attached to it yet!

Stampin' Cut & Emboss Machine Closed
Stampin' Cut & Emboss Machine Open
Stampin' Cut & Emboss Machine Both Sides

The Stampin’ Cut & Emboss comes separately from any order you also placed with it, in a box of its own, very well packed. There are some instructions and I encourage you to read them. The handle assembly instructions are just drawings, as most manuals are these days, but there is important information in the written information just inside the cover. Please read it so you don’t void your warranty and keep it handy. Be sure to save the little wrench that comes with the machine you need to attach the handle because you may need it in the future possibly.

The machine itself is gorgeous, especially the silver embossed Stampin’ Up! logos! It’s so nice the way the platform folds up on each side for storage or just to take up less space wherever you have it. Since mine is always out on the dining room table, this might neaten things up a bit!

The platform and plates are numbered and have directions printed on the platform for the sandwiches to use for dies, thinner embossing folders and the 3D embossing folders. That is so great! Before you start, though, take a good look at your beautiful, new clean clear plates with no marks on them yet!! Just admire the beauty before they get messed up with die-cutting marks! LOL!

I found the machine to work very well and did I mention how pretty it is?! My Big Shot is still working but is ten years old and has been overhauled once by my husband a few years ago so I wonder how much longer until it konks out. I will certainly keep it as it may work for many more years, but I did have to have the new one!!

But back to the card! I die-cut the three snowflakes and then tried various designer papers underneath to see what I liked. If you want to be real persnickety, you can see if you can line up any snowflake designs underneath your die-cuts. I kind of did that and drew a pencil line around the Whisper White die-cut layer on to the designer paper and cut it out by hand, but even that wasn’t perfect so I don’t know that I would bother with that again.

The greeting is stamped in Balmy Blue Ink and die cut, as well as the Balmy Blue Cardstock layer, with the Layering Circles Dies. I was trying to make the whole greeting as small as possible to avoid covering up my die-cut snowflakes, so if you were making this same card, you might try to plan ahead with the greeting and try to arrange your dies so you have the space available that you want for your greeting. It doesn’t hurt, though, if a tiny corner of the snowflake is covered. The greeting is from the Itty Bitty Christmas Stamp Set.

Since I had just received the Snowflake Splendor 1/4″ Ribbon, I wanted to use it and just zig-zagged it behind the greeting before adhering with Stampin’ Dimensionals. The ribbon is a little stiff and is making the greeting pop up so I probably need to work on that a little bit!

For some bling I added some Holiday Rhinestone Basic Jewels in Night of Navy to the center of each snowflake. You could use other things, too. Then I added a few Snowflake Sequins randomly on the card front and on the greeting. The Take Your Pick is handy for picking up these tiny snowflake sequins and placing them on the teeny tiny dot of Multipurpose Liquid Glue. I hope this Snowflake Splendor With Many Snowflakes Dies card has cooled you off from the summer heat and gotten you in the mood for holiday cardmaking!

Shop Stampin’ Up! Online in the New Store! Make sure you see my name as your Demonstrator since this is a new site. If you have questions, just let me know!

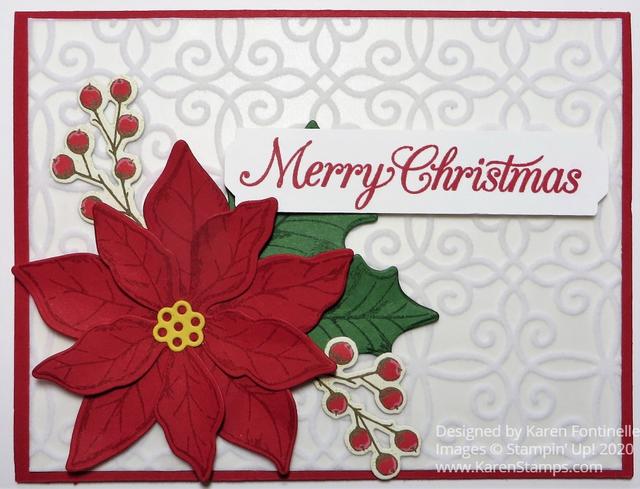
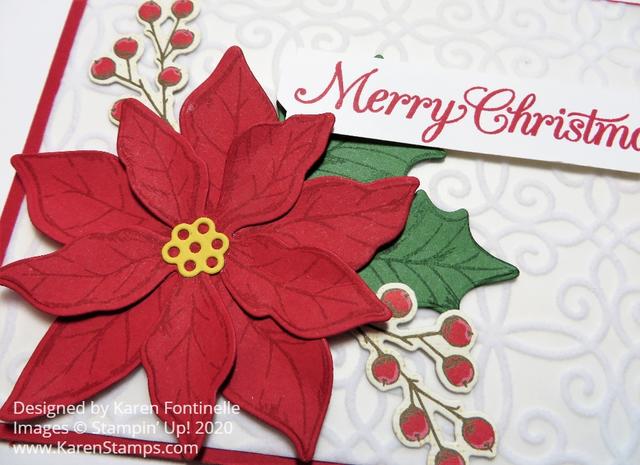
Poinsettia Petals Merry Christmas Card

Poinsettia Petals Merry Christmas Card

I finally had some time to play and make this Poinsettia Petals Merry Christmas Card. Not knowing exactly what I would ultimately need, I stamped extra flowers of two sizes, many leaves of two sizes, and the yellow flower centers. This worked out well because I was able to make two cards, slightly different, and I already had the pieces stamped and cut out.

If you like poinsettias during the holidays, this whole Poinsettia Place Suite is for you! The papers, stamps and dies in this suite just provide so many opportunities for cardmaking and creativity!

To make this card, I used a Real Red card base. Real Red has always been my favorite Stampin’ Up! color. You will not find a more perfect “red” color anywhere! I’m still not happy that they moved it out of the Brights Family and put it in the Regals!

I was going to put a Whisper White layer on the card base, but then I decided to add the beautiful Plush Poinsettia Specialty Paper on top of the Whisper White. This Plush Poinsettia Paper is just gorgeous! It has very pretty flocked designs on six sheets, 2 each of 3 designs.

Next I assembled my poinsettia stamped with the Poinsettia Petals Stamp Set in Real Red Ink on Real Red Cardstock. I used the largest flower for the bottom layer and the next smaller one for the top. On the bottom flower, I tried out the embossing piece for the leaves in the Poinsettia Dies. The flower center is Daffodil Delight Cardstock. Before I glued the poinsettia petals together I kind of folded the petals a little bit and worked them with my fingers a little bit just to make them stand up a little bit and not be completely flat. Same with the Garden Green leaves, also die cut.

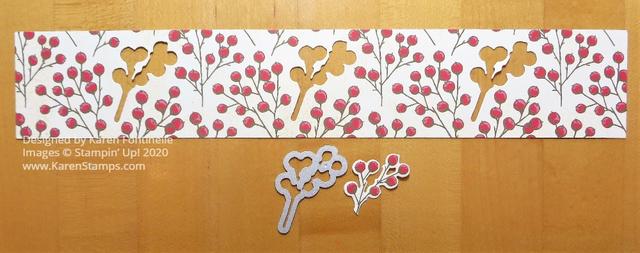
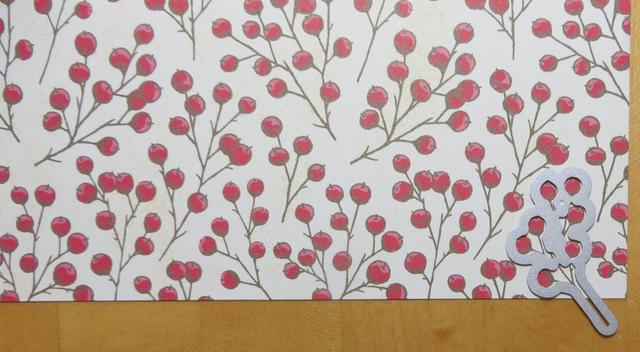
In the catalog, I saw that on one of the card samples the poinsettias had little red berry sprigs stuck out the sides of the flower. I noticed there was a die for them and I discovered it matches up with certain sprigs on the one patterned designer paper in the Poinsettia Place Designer Series Paper. I actually cut a strip of the designer paper all the way across and was able to die-cut three of the sprigs out of the strip. When you study the paper, you will find the exact sprigs that fit in the die and you will see how they repeat across the 12″ x 12″ paper. See the photos below.

Poinsettia Place Designer Paper Red Sprigs

Here you can see how I found one with a partial sprig that I could still die-cut and use on the corner of this paper so that was handy!

Poinsettia Place Paper Red Sprigs Die
See how the die fits the sprig in the lower right corner of the paper.

After die-cutting the cute sprigs, I just stuck a couple under the flower.

The greeting is also in the Poinsettia Petals Stamp Set. I happened to pull out a 3/4″ wide strip of Whisper White Cardstock and stamped the greeting in Real Red Ink. Then I used the new Lovely Labels Pick A Punch. I tried ideas for a green layer under the greeting, but decided I liked it as it was.

Poinsettia Petals Merry Christmas Card Closeup

You can purchase the Poinsettia Petals Stamp Set and Poinsettia Dies in the Poinsettia Petals Bundle and save 10%! That discount is also included in the price of the Suite if you decide to get the whole thing. Or you can order whichever products you would like individually.

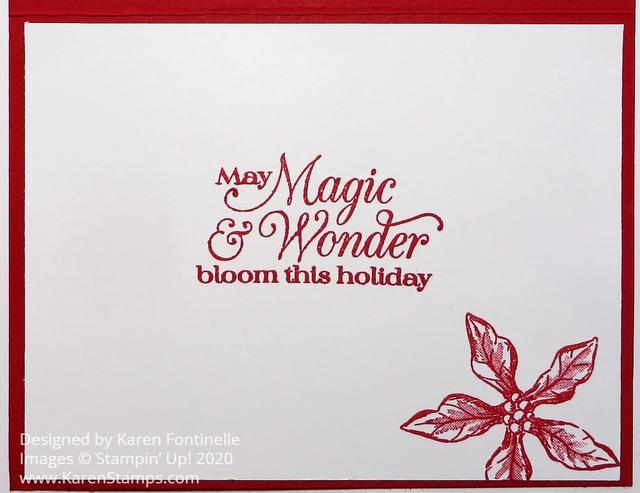
And for the inside of the card, add a Whisper White layer for a greeting or personal note. This greeting is also in the stamp set and I stamped the smallest poinsettia in the corner.

Poinsettia Petals Merry Christmas Card Inside

Nothing says Christmas like poinsettias, so if you like them, get an early start on your poinsettia cards and projects this year. Use my Poinsettia Petals Merry Christmas Card for your inspiration or I’m sure you will come up with many of your own ideas!

SHOP STAMPIN’ UP! ONLINE IN THE NEW STORE HERE!

Christmas Card With Flowers For Every Season

Christmas Card With Flowers For Every Season

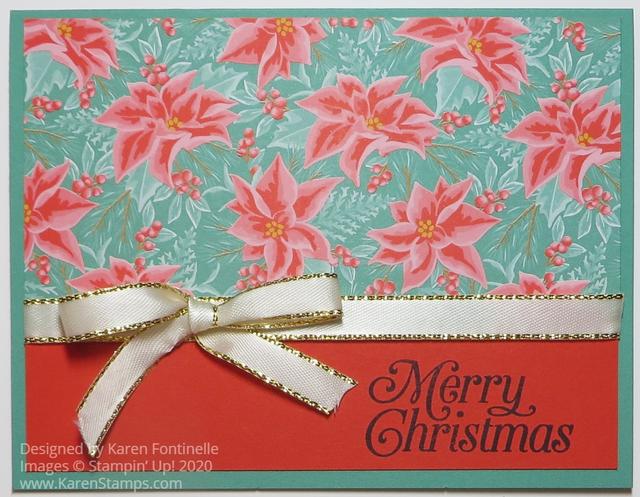
It’s never too early to start on Christmas cards and this one is the first of the season! It’s easy to get started on holiday cards like this Christmas Card With Flowers For Every Season with this poinsettia paper pattern and Christmas stamp sets in the Annual Catalog.

It’s amazing that the Flowers For Every Season 6″ x 6″ Designer Series Paper has a holiday pattern of poinsettias in the package! Just three days ago was 6 months until Christmas Day so I should have made this card for that day!

The card base is Just Jade, one of the new In Colors and one that coordinates with this designer paper. There is a layer of Poppy Parade with a piece of designer paper covering just part of the Poppy Parade. The designer paper layer is 5 1/4″ x 2 3/4″.

Before adhering the designer paper and Poppy Parade layer to the card base, I added a strip of Gold 3/8″ Metallic-Edge Ribbon around the edge of the designer paper.

The greeting stamped on the Poppy Parade at the bottom is from the Perfectly Plaid Stamp Set in the Annual Catalog. You could stamp this on another piece of cardstock and layer it or even heat emboss it in gold, but I went for the simple method!

After adhering the layer to the Just Jade, I tied a bow with the ribbon and adhered it with Mini Glue Dots to the ribbon. You could also put it in the center of the card

This is just a very simple card to get started on the holidays! It’s quick and easy and you can make several cards with the four sheets of this paper in the package.

Get the Flowers For Every Season Designer Series Paper in the Stampin’ Up! Online Store!

Christmas Gleaming Holly Leaves Christmas Card

Christmas Gleaming Holly Leaves Christmas Card

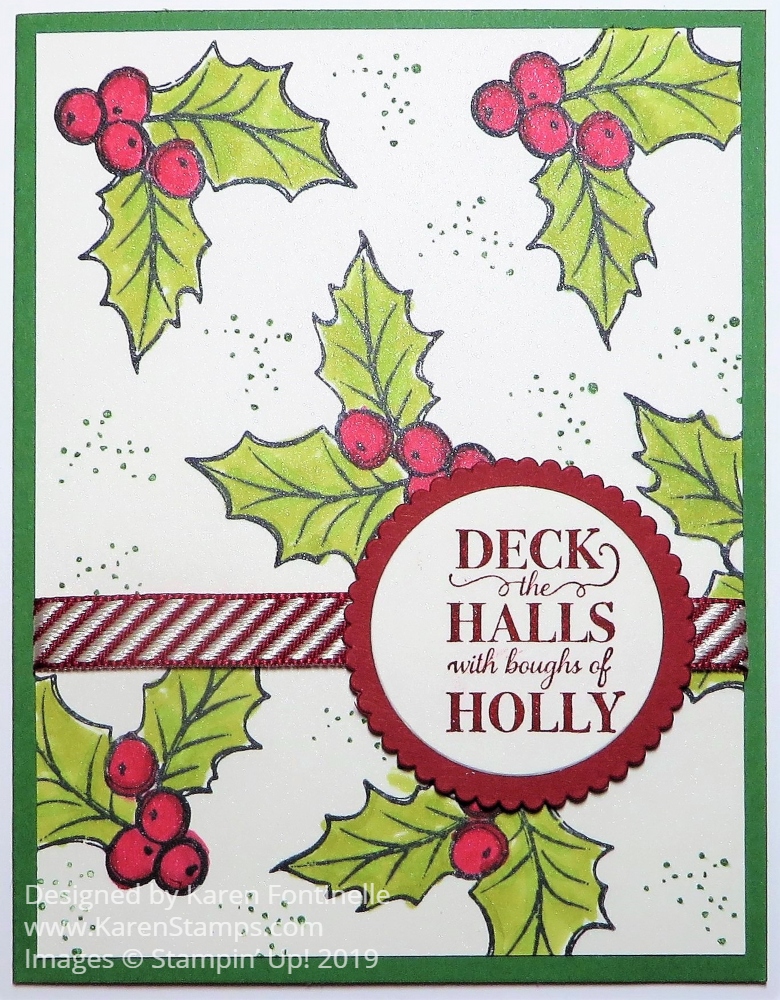
Here is a card I mostly copied from one I found online except I think she die-cut all the holly leaves and adhered them to the card. I simply stamped them randomly on the card front and colored them in on my Christmas Gleaming Holly Leaves Christmas Card.

The card base is Garden Green although you could also use Cherry Cobbler as the sample I saw did. I used Shimmery White Cardstock, one of my favorite papers. I think you can kind of see the shimmer in the photo a little bit on the colored areas. Even in person, you can barely see it, but it is there! It’s also the next best paper on which to watercolor if you don’t have real watercolor paper.

I stamped the holly leaves and berries in Memento Ink and colored in with Stampin’ Blends. It takes a little time to color even only using green and red. I used two shades of green to give a subtle bit of variation in the leaves.

There is a stamp in the Christmas Gleaming Stamp Set that makes those little dots. I stamped some of those around in Garden Green just to fill in the space a little bit around the leaves. I didn’t want to stamp too many holly leaves because then I’d have to color them in!

The greeting from the same stamp set is stamped in Cherry Cobbler Ink and die cut with a Layering Circle Die and Scalloped Circle Die in the same set.

The ribbon is the Cherry Cobbler Diagonal Stripe Ribbon (no longer available). The greeting is then popped up over the ribbon using Stampin’ Dimensionals.

This is a relatively easy card to make except for the coloring taking a little bit of time. But coloring is relaxing and therapeutic!

Have fun finishing up your Christmas cards, if you are still working on them!

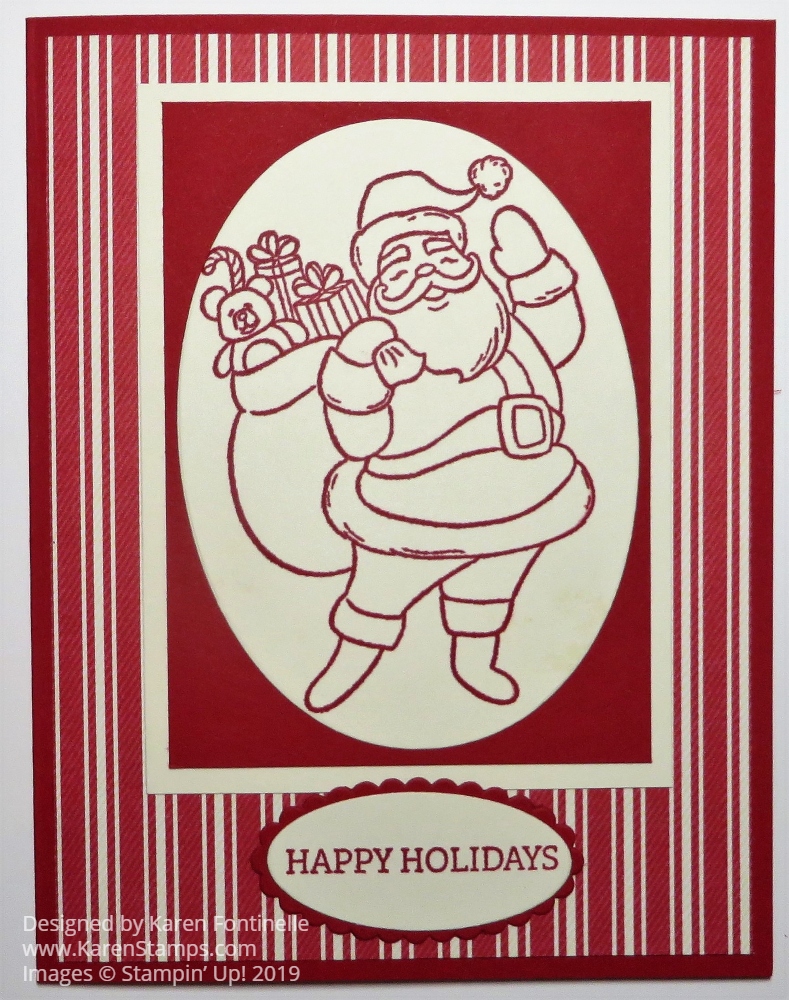
Monochromatic Real Red Holly Jolly Santa Christmas Card

Monochromatic Real Red Holly Jolly Santa Christmas Card

If you love this Santa, but don’t want to color him in, monochromatic is the way to go for this card, the Monochromatic Real Red Holly Jolly Santa Christmas Card. After making several other Christmas cards with this Santa and taking time to stamp in black and then color in all the areas with Stampin’ Blends, I would say, even though I LOVE coloring with my Stampin’ Blends, that it can take a fairly long time to color the Santa. So if you want to make a lot of cards in a hurry, just stamp Santa in Real Red Ink and call it a day!

This is a really simple card. The card base is Real Red and the designer paper layered on the base is the red stripe pattern in the Toile Tidings Designer Series Paper in the Holiday Catalog.

The Santa is from the Holly Jolly Christmas Stamp Set. He is just stamped in Real Red on Very Vanilla Cardstock. I have made several cards with this Santa and coloring him in with Stampin’ Blends and as much as I like coloring, it takes a while to do several Santas for several cards! This is super easy, just stamping him in red ink and die-cutting with a Layering Ovals Die. He is layered on a piece of Real Red Cardstock. I was going to stop there but I thought having a layer of Very Vanilla underneath made it stand out just a bit more.

The greeting is stamped in Real Red ink on Very Vanilla from the Itty Bitty Christmas Stamp Set. I keep turning to all these “Itty Bitty” stamp sets for greetings since they have so many choices and don’t take up much room on a card if you don’t have much room for a greeting! The greeting is then die-cut with a small Layering Ovals Die and layered on a scalloped oval die in the same set. You could also have the greeting be just a straight strip of paper too.

I suppose you could even add some rhinestones or sequins to this card, but I liked it just the simple, basic way it turned out. I didn’t even pop anything up on Dimensionals but you could. If you weren’t making a bunch of these cards, you could also stamp the Santa in Memento ink and color in with Stampin’ Blends or whatever color medium you liked. This is just a time-saving method that still delivers a very nice card! Here is a card I previously stamped and colored the Santa. I loved this card, too, and looked forward to making several more to send out, and I did, but it took time.

It’s not too late to get this stamp set or Bundle with the dies and whatever paper you need for Christmas cards! Just go shop at Stampin’ Up! and find what you need!

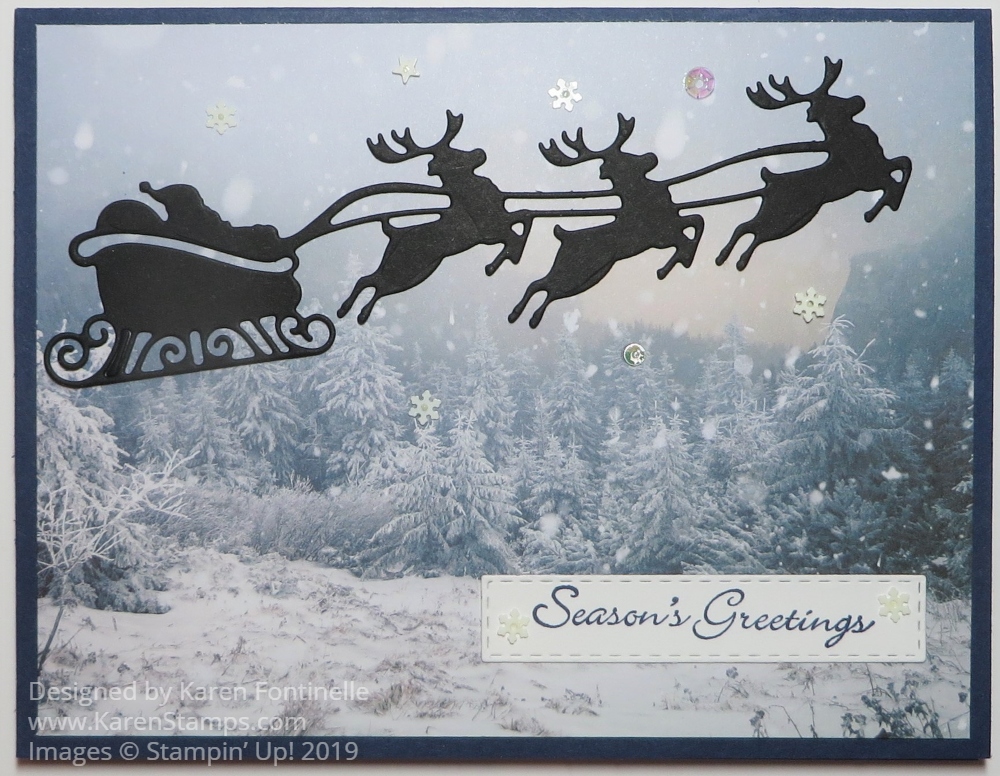
Feels Like Frost Santa’s Sleigh Card

Feels Like Frost Santa's Sleigh Card

As I paged through the papers of the Feels Like Frost 6″ x 6″ Designer Series Paper, I saw this wintry scene jumped out at me. It looked like a scene out in the middle of nowhere and I just pictured Santa traveling all over the world, delivering gifts to children everywhere, no matter how remote, distant, or wintry! I thought the die-cut sleigh with Santa would be perfect up in the sky over this scene.

As I began working on this blog post, I found out that the Feels Like Frost DSP is sold out! At first, I thought I should scrap this post since I didn’t want to advertise something you couldn’t order if you wanted it. But then I realized that if you loved this paper when you saw it in the Holiday Catalog, you probably already ordered it and maybe would like to see another idea for using it. Obviously there is not enough time for Stampin’ Up! to order more paper for the holidays at this late date.

I wanted this card to look like very late at night, out in the distant woods, wherever it is, so I used a card base of Night of Navy Cardstock. Since this cardstock is so dark, you will have to put a layer of Whisper White or a light color inside the card so you can stamp a greeting or write a personal note. Or you can use heat embossing with white or metallic embossing powder on the dark cardstock.

The designer paper is just adhered to the Night of Navy Cardstock. Santa and his sleigh are a die-cut from the Jolly Season Dies in the Holiday Catalog. I used Basic Black Cardstock but you could also use Night of Navy I think. The dies are part of the Night Before Christmas Suite, which is one I absolutely love!

I tried various greetings and finally settled on this one from the Itty Bitty Christmas Stamp Set. I die-cut it with the Stitched Rectangle Dies and also die-cut a Silver Foil rectangle to layer under the greeting. However, in the end, I liked just the greeting by itself.

For a little bit of bling, I added some Snowflake Sequins to the background and also two on the greeting. A really handy thing to have when you are working with sequins is the Take Your Pick tool. You can use the putty end to pick up the sequins and place them and you can use the pointy end for transferring things like rhinestones and jewels from the package to the project.

Overall, this is a very simple Christmas card so if you already own the Feels Like Frost Designer Paper and the Jolly Season Dies with the sleigh. If you don’t have the paper, you could stamp your own background with a night sky and trees below. Mainly I like the story of Santa’s sleigh going everywhere all over the world!

SHOP STAMPIN’ UP! ONLINE HERE!

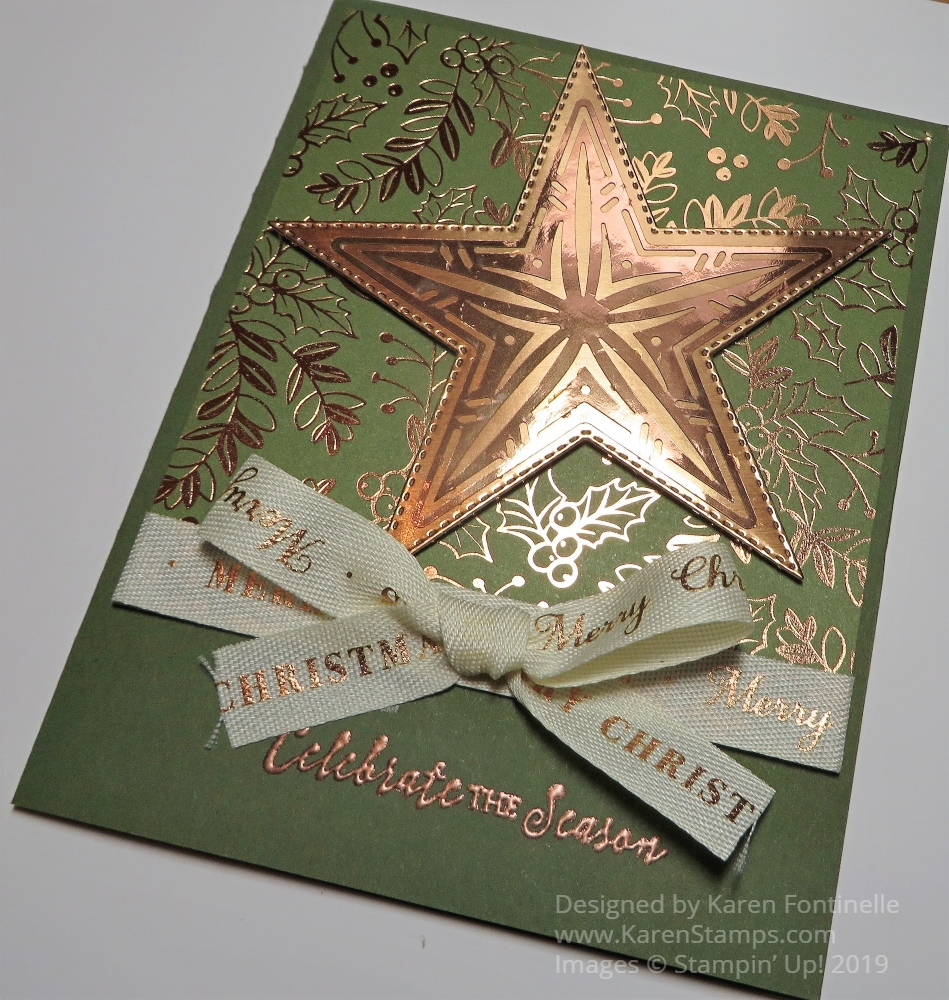
Brightly Gleaming Stitched Star Christmas Card

Brightly Gleaming Stitched Star Christmas Card

This Brightly Gleaming Stitched Star Christmas Card was very difficult to photograph without a giant glare of the Copper Foil, but I think I got it pretty well now on an angle! I’m feeling like I haven’t had enough time to play with all my Christmas stamp sets and accessories and time is getting short! Panic is setting in! And a sore throat that slowed me down this past week!

However, I did fit in some stamping time and here is one example! It seemed like a lot of samples I was seeing used the Night of Navy designer paper in the Brightly Gleaming Specialty Designer Series Paper. I thought I would change things up a bit and use the Mossy Meadow color.

The card base is Mossy Meadow and the Mossy Meadow patterned designer paper just comes down partway on the card base. Be sure to adhere some of the Very Vanilla/Copper 1/2″ Classic Weave Ribbon around the bottom of the designer paper before adhering the designer paper to the card base! And before you do any of that, if you want to emboss a greeting at the bottom of the card, do it before you have ribbon hanging in the way with the potential to ruin the card! I got lucky and could have covered it up with an embossed greeting on a different paper. But it’s better if you plan your card and space first and stamp or emboss before you get everything adhered to the cad!

The star is die cut with the largest star in the Stitched Stars Dies. I just love that we have star dies again because I think stars are SO useful in designing cards and projects. Just think about how many things you can use stars for besides Christmas! Birthdays, congratulations, babies, retirement, everything! These stars are beautiful dies and certainly not just for the holidays.

The star is cut from Copper Foil. Then that Copper Foil star is overlaid with the large star in the Brightly Gleaming Foil Elements. I used the Multipurpose Liquid Glue in teeny tiny dots on the back of the foil element to adhere to the die-cut star. I got lucky and didn’t make a mess with the glue so it worked fine. On this card, I popped up the foil star with Stampin’ Dimensionals, but you can also adhere it flat on the card.

The ribbon is really beautiful. I need to learn how to tie a bow with the words all going in the same direction if that’s possible! I passed it up on one of my first Holiday Catalog orders, but then added it later because it is something different!

For the greeting on the card front, I chose one from the Itty Bitty Christmas Stamp Set because I knew I needed something small. I stamped it with Versamark and heat embossed with Copper Stampin’ Emboss Powder and my Heat Tool. Heat embossing is magical, if you haven’t tried it yet!

For the inside of the card, I added a Very Vanilla layer of cardstock, stamped with a greeting in Mossy Meadow Ink and with a strip of the same Brightly Gleaming DSP along the inside edge of the Vanilla layer. The greeting used inside the card says “Hoping all your Christmas wishes come true.” in the So Many Stars Stamp Set. Save 10% by purchasing the So Many Stars Stamp Set and Stitched Stars Dies in a Bundle.

Thanksgiving is coming up so make those cards first if you are mailing a few cards to friends and family. But then it’s really time to get serious about Christmas cards!! You’ve probably paged through the Holiday Catalog a bunch of times, but maybe you need another few run-throughs before it gets too close to the holidays!

SHOP STAMPIN’ UP! ONLINE HERE!

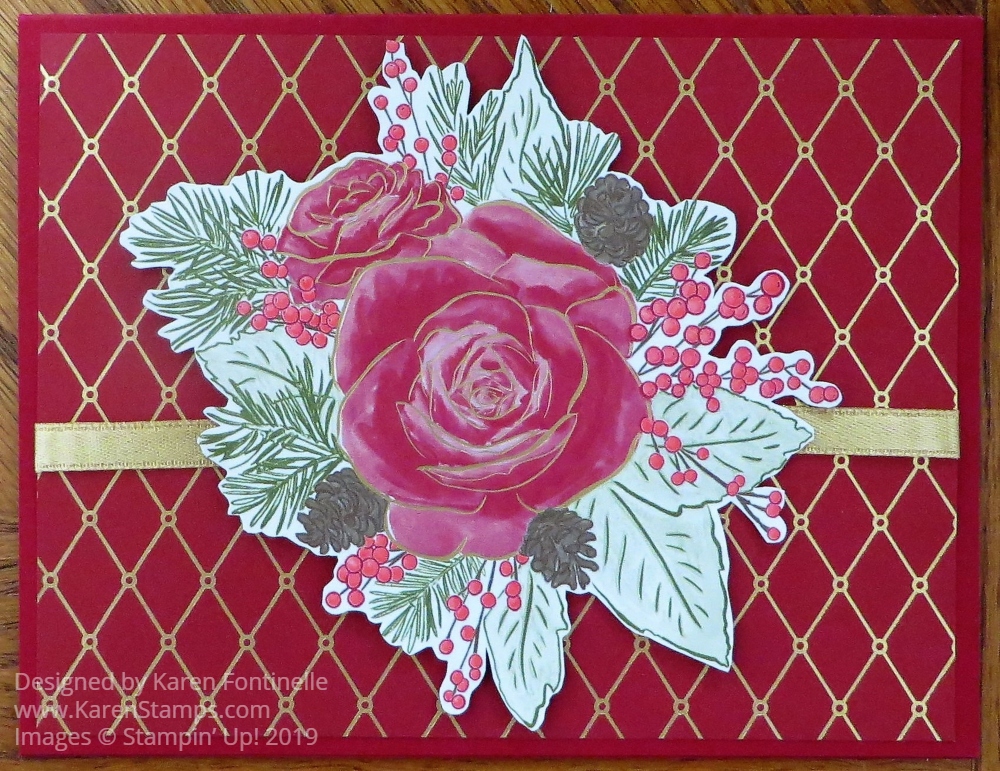
Christmastime Is Here Rose Card

Christmastime Is Here Rose Card

If you purchase the Christmastime Is Here Suite or at least some of the products, you will see how easy it is to make pretty cards like this Christmastime Is Here Rose Card. I wanted to post this yesterday but something was wrong with my blog and I couldn’t post any photos. SO frustrating when something goes wrong with our technology, right?! Today I finally got on a Live Chat and the guy fixed it! I am so relieved!

I confess I haven’t purchased the entire suite (not yet, anyway) but that is the great thing that you can pick and choose and don’t have to buy it all to have some of what you want! I chose to get the designer paper, ribbon, and glitter dots. However, the stamp set is beautiful and the die cuts make cutting out this big rose pattern in the designer paper and the stamped image a lot easier. But even Demonstrators can’t have EVERYTHING!

The Christmastime Is Here Specialty Designer Series Paper I have to say is gorgeous! The floral prints are beautiful and CAN be cut out by hand if you don’t hate cutting with Paper Snips. You don’t have to follow every single image accurately, just cut somewhat around them leaving a slight margin. This method makes it so you don’t have to be perfect and makes it look die-cut!

The floral images have gold foil accents which you can figure out in my photo but the shine doesn’t come through. The gold foil really makes the paper look festive and rich for your cards.

This card uses a base of Cherry Cobbler, one of the coordinating colors. I love this Cherry Cobbler cross-hatched designer pattern with the gold foil for a background. I wrapped a piece of the Elegant Gold Shimmer Craft Ribbon around it. After cutting out the floral piece, I popped that up with Stampin’ Dimensionals®. I did not add a greeting since I don’t have that Christmas Rose Stamp Set although I will use another greeting later on.

You will find that the Christmas Rose Stamp Set comes with one Cling stamp (the large floral image) and then the rest are Photopolymer stamps to add depth and richness. Those stamps are the Distinktive stamps that Stampin’ Up! developed to make stamping look photorealistic. I do love the sentiments in the stamp set and the font style. If you purchase the stamp set and dies together in the Christmas Rose Bundle, you will save 10%.

If you are really interested in some or all of the products in this Suite, I would not delay in purchasing. You know how some popular items go like hotcakes at Stampin’ Up! There are many holiday stamp sets and accessories to choose from, but if this slightly different look appeals to you, go for it because it is really beautiful!

SHOP STAMPIN’ UP! ONLINE HERE!

Snowman Stamped Christmas Card

Snowman Stamped Christmas Card

On this Snowman Stamped Christmas Card, I made my own snowman designer paper! This stamp set is so fun to play with and will make many wonderful Christmas cards for you to send to family and friends.

I love that I am finally using Real Red again on Christmas cards after Real Red got demoted to the Regals color family! I liked it better in the Brights family where it had always been. LOL! But nobody asked me! Anyway, the card base is Real Red Cardstock and instead of designer paper layered on the card, I made my own designer paper! I simply stamped the snowman throwing snowballs up in the air from the Snowman Season Stamp Set in black ink randomly on a layer of Whisper White Cardstock. I think it gives the card a subtle fun feeling!

Next, another snowman is stamped with Memento Ink and then die-cut with one of the Layering Circles Dies and layered on a larger scalloped circle die in the same set. That snowman piece I colored in with Stampin’ Blends Markers. For some embellishment, I used the Multipurpose Liquid Glue and sprinkled on some Ice Stampin’ Glitter. You could also use the Dazzling Diamonds Glitter. This snowman centerpiece is popped up on Stampin’ Dimensionals.

The greeting is stamped on a Real Red banner with a “Merry Christmas” from the Snowman Season Stamp Set also. This card is one that just makes me happy! Sometimes you make a card that gives you that feeling. And, I have to say, it is always a good feeling to repeatedly stamp an image randomly on cardstock. There is something about holding that block and stamp in your hand and stamping over and over! I always like it when I do it!

You CAN stamp a greeting on the inside of the card in black ink and have it show up on the Real Red, but you might want to consider adding a Whisper White inside layer with a greeting stamped and maybe another little coordinating image. For this card, I stamped the other greeting in the Snowman Season set, “Hoping this season builds heartwarming memories” and then stamped the same snowman tossing snowballs in the air down in the corner. I just colored in the orange carrot nose and added a tiny bit of blue as shading on the snowman. The inside of the card looks almost as creative as the outside of the card! You can also stamp the envelope before you send the card with one of the snowmen. How cute would that be?!

Remember to try this technique of stamping an image randomly on a piece of cardstock to make your own designer paper as I did on this Snowman Stamped Christmas Card.

SHOP STAMPIN’ UP! ONLINE!