Tag Archives: Christmas gift tags

Make Christmas Tags With Paper Pumpkin!

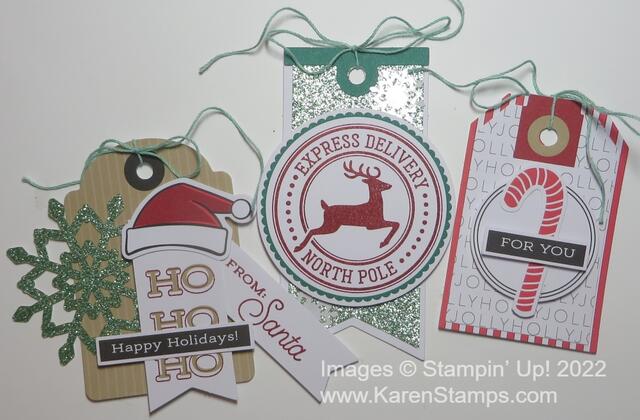
I don’t know what went wrong, but the post office seemed to deliver my November Paper Pumpkin Kit in a normal amount of time! Usually, it seems to sit in one place for a few days or it goes on a little trip to some other city first! But this time, I got it right away! And since Saturday was a very rainy, cold, chilly, dreary day, it was the perfect day to stay inside and work on my November Paper Pumpkin Kit, “From the North Pole”. In this kit were supplies to make three different kinds of Christmas gift tags, four of each design. I always like to start a Paper Pumpkin Kit by making what is designed so I made the three Christmas gift tags in the photo above!

This kit was extra-special because it had Mint Macaron glimmer paper! We’ve never known that to exist before! But there it was, in the Paper Pumpkin kit, sparkling away! It is very pretty.

These three tag designs were all very easy to make. Of course, visual directions are included plus a video you can watch on YouTube. I like to watch the video and see how they suggest making the project.

After I made the tags as designed, I made two things on my own, just to play. You can use the supplies any way you like! They are yours, so if you don’t need tags, just make cards. Or make the tags, but adhere them to cards. Of decorate a notebook and put the tag on the front of the notebook. Whatever you like.

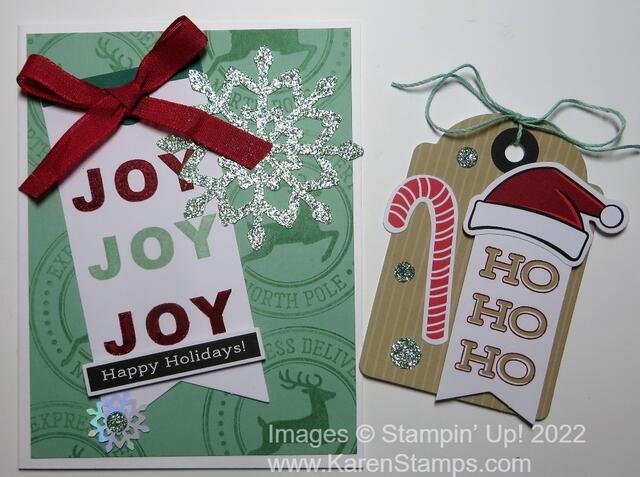
I made these two alternative ideas, as they say:

I really liked how the Mint Macaron card turned out, even though it wasn’t looking too great in the beginning. I stamped the “Joy” in Cherry Cobbler and in Mint Macaron on one of the tags and added the greeting plus snowflakes and ribbon. The background of the card is stamped with the largest stamp in the set, the big round stamp with a reindeer That really made the card come alive.

The other little tag I made was almost the same, but I’d used the big snowflake on that card so I was short one. Instead, I used some Mint Macaron glimmer paper dots from the holes in the banner for one of the other tags to be an embellishment. I ran out of those so I just punched my own with a retired punch.

But in the end, I decided I really did like making those Christmas tags with my Paper Pumpkin Kit so I went back and made the rest. Of course, I was missing a few pieces since I’d made the two extra projects, but I just worked around it.

That’s the fun of Paper Pumpkin Kits that come in the mail each month! It’s so fun opening up the box to see what supplies are inside and think about what you can make with them. Paper Pumpkin projects just keep getting better and better over time!

If you would like to get your own Paper Pumpkin Kit, subscribe now so you don’t forget by December 10th!

JOIN PAPER PUMPKIN!

Quick & Easy Snowman Season Gift Tags

Snowman_Season_Gift_Tags

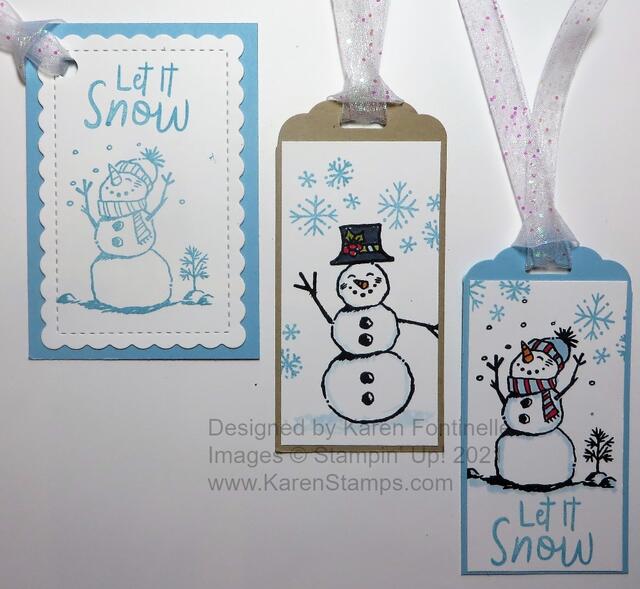
Here are some Quick & Easy Snowman Season Gift Tags that you can make here at the last minute if you run out of gift tags (as we often do!). I suddenly realized I hadn’t made anything with a snowman this season and this Snowman Season Stamp Set is so cute! It’s been around a little bit so I thought I better use it before it retires, although I hope it stays a little longer! And perhaps you already have this in your inventory so it would be easy for you to copy. You’ll find it in the Stampin’ Up! Annual Catalog on page 93. And notice the round tag on page 92, which, without seeing this page first, I was thinking of making a round tag like that one but I ran out of time to make one more!

The tag punch I used is retired but is very similar to the two tag punches Stampin’ Up! does carry right now, the Delightful Tag Topper Punch and the Fancy Tag Topper Punch. This type of punch is so handy to have so I recommend you have one kind or another in your supplies.

I just layered a piece of Basic White cardstock on the Balmy Blue and the Crumb Cake tag bases. The snowmen fit perfectly on this narrow piece. If you stamp with Memento Ink you can color in with Stampin’ Blends alcohol markers. Or you can stamp with Stazon and color in with Stampin’ Write Markers or some other coloring product, like Watercolor pencils or ink.

The first tag in the photo was the last tag I made. That’s where I was going to make the circle gift tag with dies but I already had this scalloped rectangle in the bag with Basic White cardstock so I just grabbed it and stamped on that piece, then layered it on Balmy Blue cardstock. Also, since I was short on time, I didn’t have any more time for coloring so I stamped the snowman and greeting in Balmy Blue ink and let it be monochromatic! Easy enough and looks just as good! I just punched a hole in the corner and tied on the ribbon.

The beautiful ribbon I used and went well with the snowmen I thought is the White 3/8″ Glittered Organdy Ribbon. It is a white sheer ribbon with a little glitter and glimmer in it! Really pretty!

Now that it is officially winter, I think the snowman gift tags are just perfect. For more ideas, check out the Snowman Season tags I made last year HERE.

Just a few more days until Christmas so make a few of these Quick & Easy Snowman Season Gift Tags just in case you need a few more gift tags at the last minute!

3″x 3″ Gift Tags

3" x 3" Gift Tags

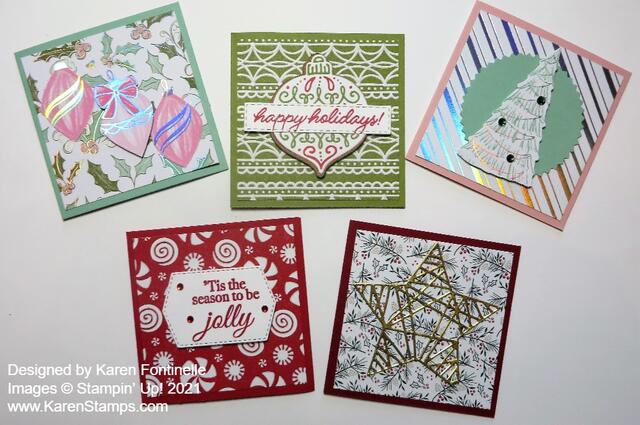
If you are wrapping gifts right about now and you don’t have much time to stamp, for lots of fun I suggest making these 3″ x 3″ Gift Tags! On some presents, the hanging tags aren’t quite right or you’d like to write a little note, so make some of the gift tags or gift cards to enclose with your gift. You may even already have some 3″ x 3″ envelopes to put them in.

These are simply made with a 3″ x 6″ piece of any cardstock, scored at 3″ in the middle and folded to make the 3″ x 3″ card. Then embellish to your heart’s desire! I barely had to go to any work on these because I had some scraps, some greetings, some die cuts that I had made but hadn’t used just sitting on my table. All I had to do was make the card base and add some scraps of 2 3/4″ square designer paper or maybe just a strip, pieces from other designer paper that had already been cut out by hand or die-cut, and maybe a greeting or two! Add a few jewels if you like for some sparkle!

No need to go into the exact details of how I decorated these! I’m sure you also have scraps and pieces you can use or you can quickly stamp or cut some out! For sure these are super fun to make! I think you could make a ton of them in just half an hour or so!! If you want just a tag, just cut a 3″ x 3″ square of cardstock and write the “To: and From:” on the back of that. Punch a hole in the corner of these cards and put some ribbon or twine through to tie on your package unless you are using an envelope. Bet you can’t make just one!!

Make Snowman Gift Tags

Snowman Christmas Gift Tags

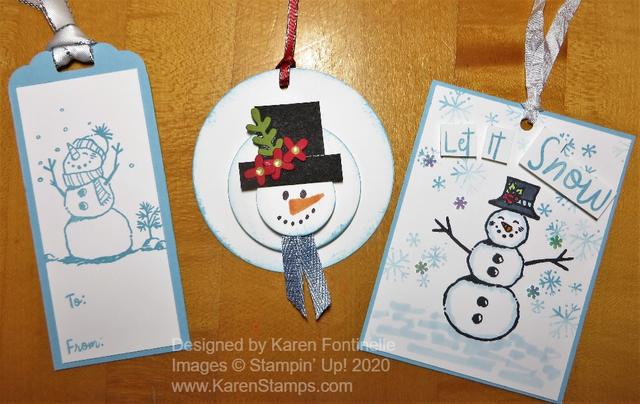
How about making some Snowman Gift Tags for your presents you may be furiously wrapping at the last minute?! Here are three ideas you can use! Everyone loves snowmen!

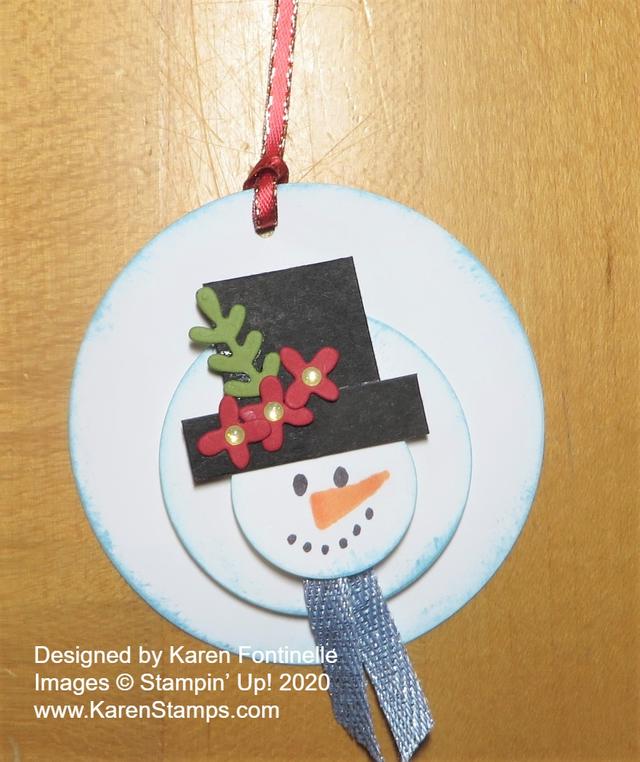
As I was wrapping my gifts, I came across the center Layered Snowman Gift Tag that I had made several years ago. Sometimes we save the tags from packages we open and I put them away until the next year. Then we can reuse them as long as we check the “To:” and “From:” on the tags so there are no mixups! I decided to update my snowman tag.

Layered Snowman Gift Tag

This is a fun tag to put on a package! Much better than those plain To & From tags you buy, 1000 in a package and have to tape on!

To make this tag, I die cut the largest circle in the Layering Circle Dies and then chose two smaller dies (about every other size) for the body and head. I sponged the edges with Balmy Blue Ink just a little and popped them up on Dimensionals. Just make a hat out of a piece of Basic Black and the brim with a piece from the Classic Label Punch with the ends cut off.

To decorate the hat I just cut a sprig from a Forever Flourishing Die and the three little Real Red flowers from a die in the Budding Blooms Dies. There are certainly a whole lot of other leaf shapes and flowers, whether die-cut, punched, or cut out by hand that you could use! I added the tiniest Gold Glitter Enamel Dots to the flower centers.

The snowman face I just drew on with markers. The ribbon is Seaside Spray Metallic Ribbon to represent the snowman’s scarf. Punch a hole in the top if you want to tie on a ribbon for a tag or even just use the snowman as a decoration on a package!

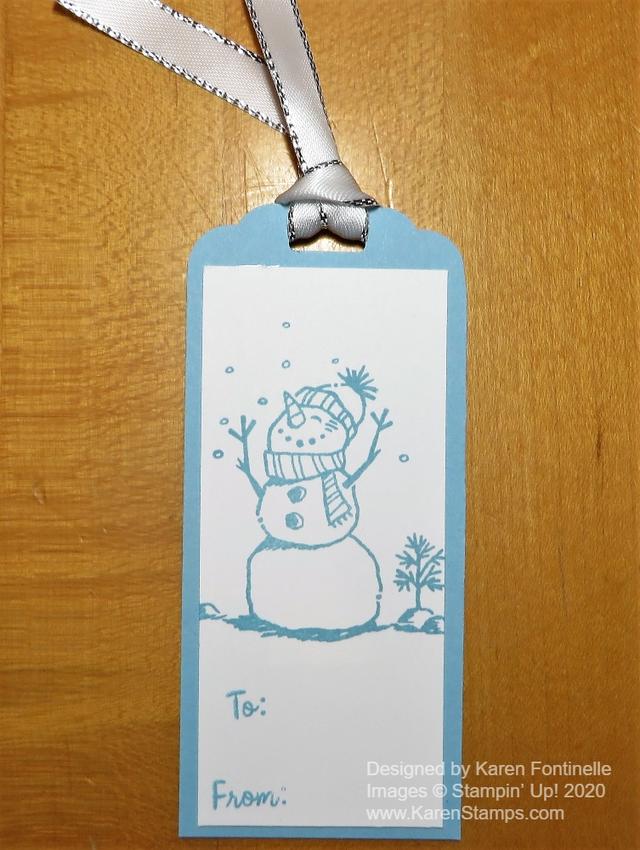
Monochromatic Snowman Gift Tag

This Snowman Season tag is really easy since it just uses one ink color, Balmy Blue. First I made a tag out of Balmy Blue Cardstock with the Scalloped Tag Topper Punch and then added a layer of Whisper White. I stamped the one snowman from Snowman Season in Balmy Blue and added the “To: From:” at the bottom. I used the Silver 3/8″ Metallic Edge Ribbon for the tie (one of my all-time favorite ribbons!).

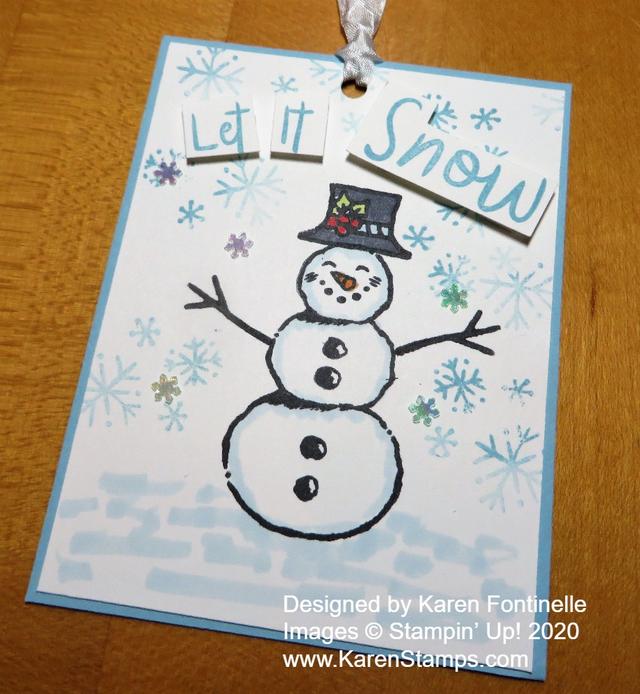
Large Snowman Season Gift Tag

This tag I made a little fancier since the other two were pretty simple. But this one is still simple! I just cut a 3″ x 4″ rectangle of Balmy Blue Cardstock and layered with a piece of Whisper White. The snowman from Snowman Season is stamped with Memento Ink and I did the little bit of coloring with various colors of Stampin’ Blends, even a tiny bit of Balmy Blue around the sides of the snowman for shading and to look a little cool and icy. I also just scribbled some Balmy Blue under the snowman to look like snow. Some glitter would have been nice, too! The snowflakes are stamped from the set and the greeting is from the set. I cut the words out separately after stamping so I could arrange them on the tag. Then I added some Adhesive-Backed Snowflakes (which may be sold out now but you can use other gems and jewels!) for a little more bling!

Once you get started making tags, you might not be able to stop because you will come up with more and more ideas and they don’t have to be fancy! If your packages are wrapped already, you might consider having fun stamping and making tags for next year AFTER Christmas when you maybe have some free time! These Snowman Gift Tags are fun and easy to make and the gift recipient will likely enjoy them!

SHOP STAMPIN’ UP! ONLINE!