Tag Archives: Countryside Inn Designer Series Paper

Countryside Inn Thinking of You Card

Countryside Inn Thinking of You Card

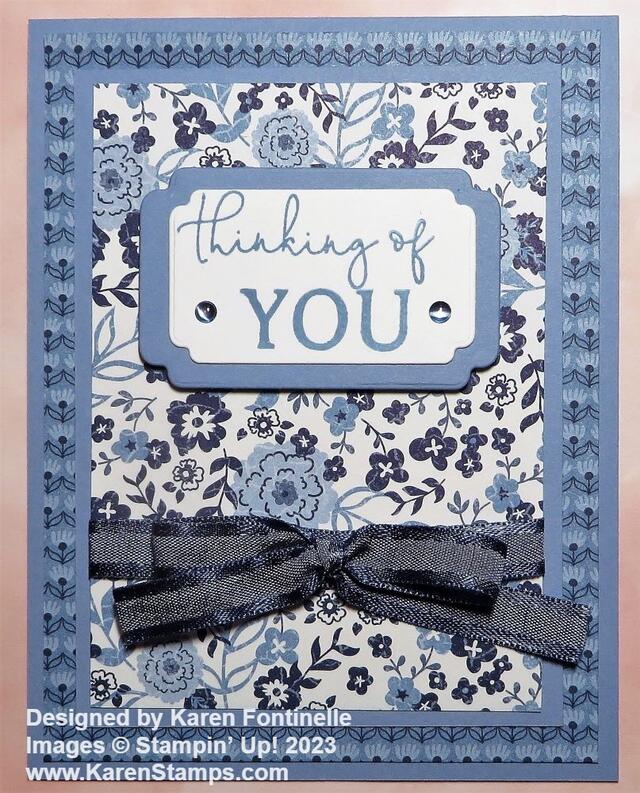
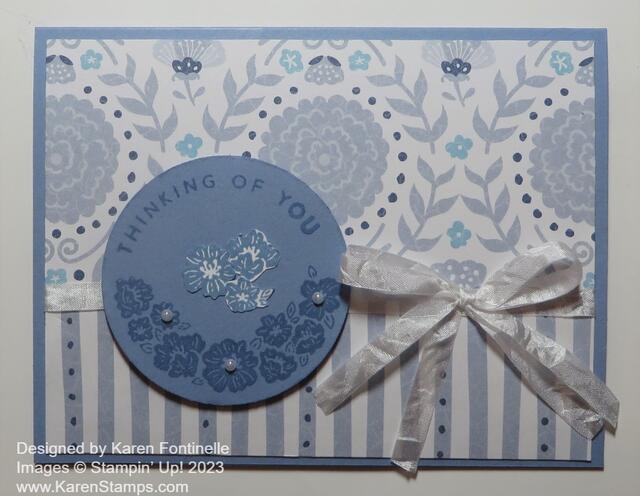
This Countryside Inn Thinking of You Card is an easy one and a pretty one for you to make! This designer series paper on this card is one of the fourteen designer papers on sale during August at Stampin’ Up! If you like blues and if you don’t have this paper yet, now is the time to get it at 15% off!

I chose Balmy Clue cardstock for the base of this card. It’s one of the colors that coordinates with this paper. I especially love this particular pattern in the Countryside Inn Designer Series Paper because it is soft and pretty. In the previous Stampin’ Up! Annual Catalog there was a Countryside Blossoms Embossing Folder that matched the design on this paper. If you already purchased that last year you can use it with this paper. I wanted to keep this card simple and let the paper show off its pretty design. I even managed to cut this scrap piece of designer paper that I had so that the two big flowers are centered on the card. I just had to trim thin strips off the sides of the card until I had it like I wanted.

If you would like to see the card I made with this Countryside Inn paper that I also embossed, click HERE.

The greeting is in the Sentimental Park Stamp Set. It’s two separate stamps because you can make different combinations of words to express your sentiment. My greeting is stamped in Balmy Blue ink on Basic White. I used two layering dies in the Something Fancy Dies. The layer underneath is Balmy Blue. I used Stampin’ Dimensionals to pop up the greeting. I also added two Rainbow Adhesive-Backed Rainbow Dots in Balmy Blue to each side of the greeting. The ribbon wrapped around the lower portion of the card is the white ribbon in the Petal Pink and White Diagonal Trim Ribbon Combo Pack. It’s a pretty ribbon and thin enough to be the perfect size when you don’t want the ribbon to be too dominant. I tied the bow separately and adhered it with Mini Glue Dots.

Be sure to check out the Stampin’ Up! Designer Series Paper Sale and save 15%! Some papers are 12″ x 12″ and a few are 6″ x 6″ so you have lots of choices. Use your Bonus Day coupon codes if you have them!

SHOP STAMPIN’ UP! ONLINE HERE!

Heartfelt Hexagon For You Card

Hearfelt Hexagon For You Card

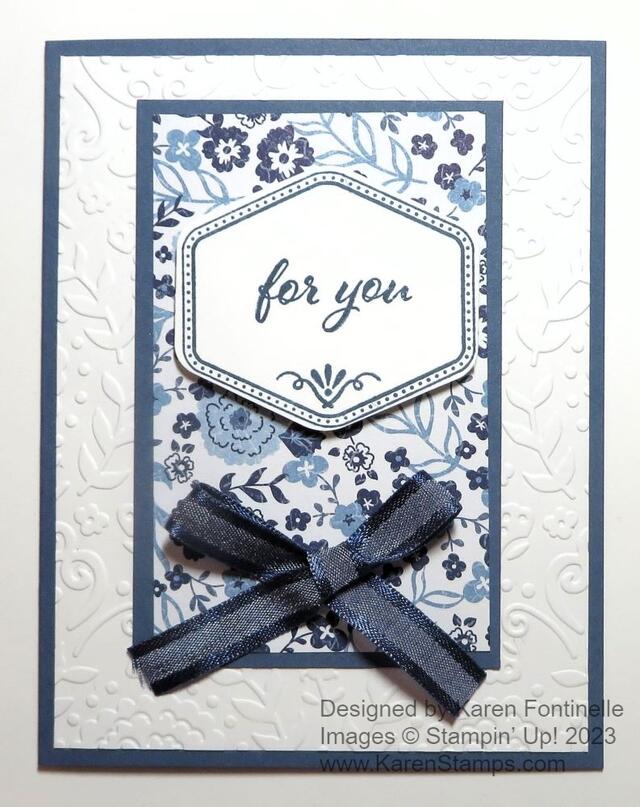
The idea for this Heartfelt Hexagon For You Card came from copying my own card from a while back! I was looking through my stash of cards and found this one I’d made before and thought I’d just copy it using a new punch!

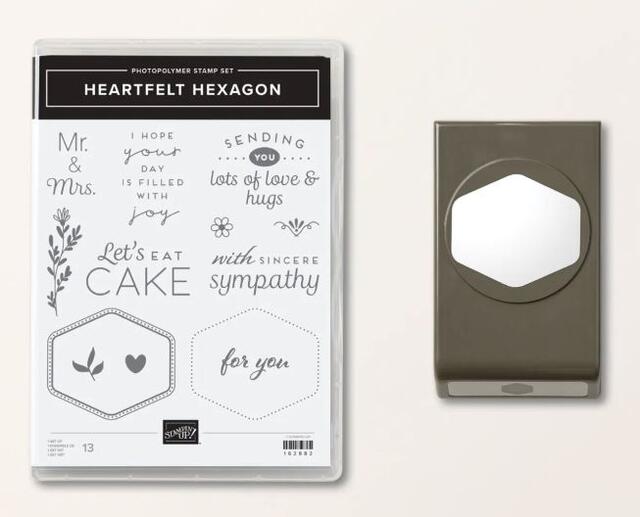
The punch came from the fairly new Bundle, the Heartfelt Hexagon Bundle.

Heartfelt Hexagon Bundle

Stampin’ Up! released this Bundle ahead of World Card Making Day last weekend. It was one of the sets they used during the virtual event to make a card. My order didn’t come in time for that so this is the first time I’ve played with the stamp set and punch.

It looks like a great stamp set to use with a punch you can use a lot! The punch can be used without the stamp set in many ways. You can punch out other images, words, or just paper shapes. Choose from a simple dotted border or one with a little more fancier border. Here is my first tip – when stamping the simple dotted border, just use a light touch. Stamp it and get out! Don’t keep pressing on the stamp because you will automatically wobble it and the dots will be blurry! When I looked closely at my stamped image the first time I realized my little dots were not perfectly shaped anymore. Then I remember hearing another Demonstrator give that tip…or maybe it was on the virtual event.

The next tip is to be cautious when you pull the hexagon outline off the case or off the stamping block. You don’t want it to get out of shape. If it does, you can lay it stamping image down on the table, let it settle for a moment, and then place the block on it to pick it up. That way it will be in its natural shape. My stamp really played games with my eyes or my brain! If I laid it down on the table not in the same position as the punch, it looked all wonky to me and I thought I’d stretched it completely out of shape. It was the weirdest thing! All I had to do was turn it a bit and it was correct!

The card base is Midnight Muse with a layer of Basic White. I embossed the Basic White with the Countryside Blossoms Embossing Folder. Most of the design doesn’t show but I like the little leaves along the side plus just a peak at the rest of the folder’s design.

The center layer is Midnight Muse measuring 2 3/4″ x 4 1/4″ I used the Countryside Inn Designer Series Paper for the layer. It measures 2 1/2″ x 4″. All of that is adhered flat on the card.

I stamped the fancier border on Basic White with Misty Moonlight ink and punched it with the Heartfelt Hexagon Punch. It is stamped with a greeting in the same stamp set along with the little design. Just that little design adds so much, I think! I popped up the hexagon with Stampin’ Dimensionals.

For a finishing touch, I tied a bow with the Night of Navy 3/8″ Bordered Ribbon and adhered it on the card with Mini Glue Dots. If I made the same card again, I might move the ribbon up to the bottom of the hexagon, but it’s okay as is. This is really a pretty basic card without frills but still looks nice. You could add some jewels or gems or sequins if you wanted to. Certainly you can change the greeting for other occasions.

Just search for Heartfelt Hexagon Bundle or the Item number 162889 and it will come up. Or just search for hexagon. I think it is just listed under Products, no special category. This is a Bundle that I think you want. The stamp set is versatile and useful and so is the punch so you will get a lot of use out of both!

SHOP STAMPIN’ UP! HERE!

Embossed Countryside Inn Thank You Card

Embossed Countryside Inn Thank You Card

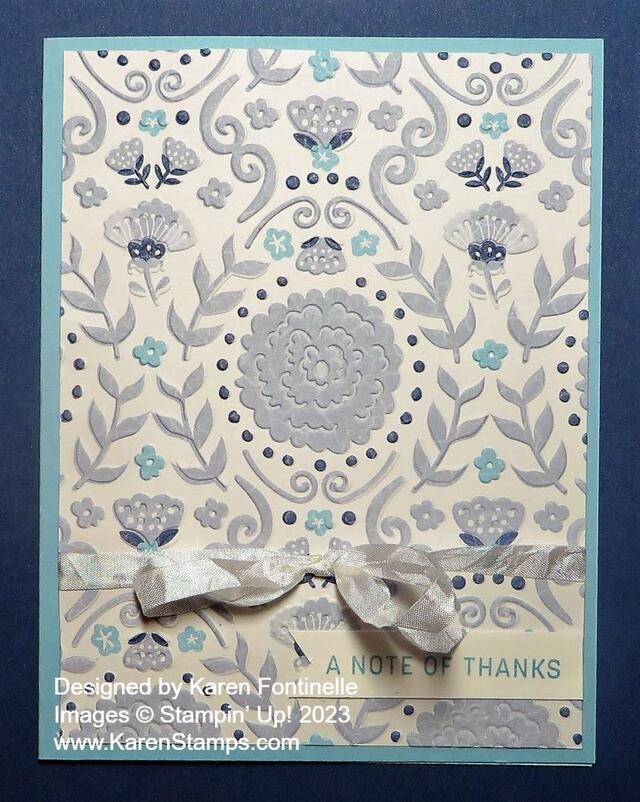
This Embossed Countryside Inn Thank You Card is an easy one to make! Just let the beautiful pattern of the designer series paper do all the work! Just add a greeting and maybe a bit of ribbon. But there was something extra-special that I don’t think I knew before! The embossing folder matches the paper so you can easily emboss the whole card front!

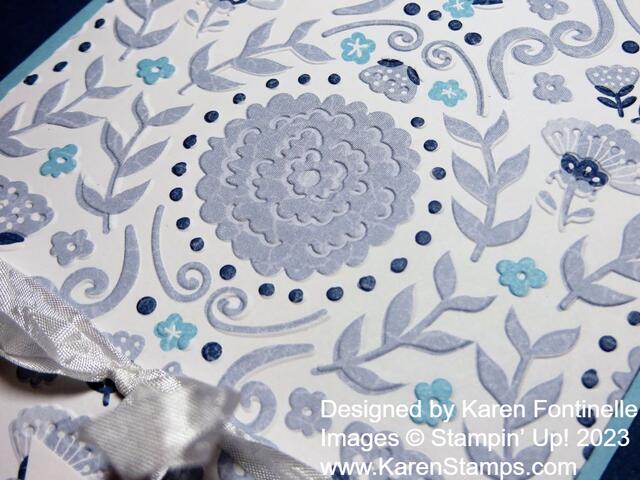
The card base is Balmy Blue and then there is a layer of this pattern in the Countryside Inn Designer Series Paper. I didn’t know I would like this paper as much as I do! I have used it a lot! If you have the Countryside Blossoms Embossing Folder, which embosses a beautiful design on any cardstock, use this one designer paper in the embossing folder because it matches up!! I had the paper upside down at first and nearly had it matched up but not quite! But I finally got it when I realized I had to turn it the other way! You have to kind of play around with cutting out the piece of designer paper that you want to emboss so that you get the piece that matches and that fit in the folder. But it’s not too difficult. If you look closely at the photo below you may be able to see the embossing of the flowers and little leaves.

Embossed Countryside Inn Thank You Card Closeup

The Countryside Blossoms folder adds a nice texture to the front of the card when you use it with this designer paper. The paper is pretty enough on its own, of course, but if you want a little extra something, emboss it!

Before adhering the paper to the card base, tie a piece of ribbon around it in a bow, if you want. My best choice was this retired 1/4″ Whisper White Crinkled Seam Binding Ribbon because I wanted something to embellish the card but not be really conspicuous.

For the greeting, I stamped this one from the Sending Smiles Stamp Set in Balmy Blue ink. I wanted something small and narrow to fit at the bottom of the card front so using this stamp set and greeting was perfect. Overall, I wanted the designer paper to be the whole focus of the card.

Here is another card using this same pattern of the Countryside Inn Designer Series Paper. You can make so many lovely cards with this pretty paper!

SHOP STAMPIN’ UP! ONLINE HERE!

Countryside Inn Boho Blue Thinking of You Card

Countryside Inn Boho Blue Thinking of You Card

I hadn’t used this beautiful designer series paper in a while, so I looked through the papers, and out came this Countryside Inn Boho Blue Thinking of You Card. You never know what will happen when you go to make a card.

This card uses two different patterns in the Countryside Inn Designer Series Paper. I used one for a background layer and the brighter floral for the front of the card. I used Boho Blue cardstock, one of the newest current In Colors 2023-2025 for the card base and the layer under the floral paper and under the greeting.

This card base is cut at 4 1/4″ x 11″ and scored at 5 1/2″ with a fold at the top instead of the side. You can make it however you like. The designer paper directly on the card base is 5 1/4″ x 4″. The floral paper on the front is cut at 3 1/4″ x 4 1/2″ with the Boho Blue layer underneath cut at 3 1/2″ x 4 3/4″.

Before adhering the floral layer, tie a piece of ribbon around the designer paper and then adhere a separate bow with a Mini Glue Dot. I used the Night of Navy 3/8″ Bordered Ribbon. I could have used my Boho Blue 3/8″ Textured Ribbon to match the other Boho Blue I used on the card, but I thought the Night of Navy ribbon stood out a little better and matched the Night of Navy flowers on the paper. You could pop up this whole layer if you wanted to. I adhered mine flat on the card front but I considered using Stampin’ Dimensionals to pop it up.

The greeting is from the Sentimental Park Stamp Set and stamped in Boho Blue ink. I considered several choices for diecutting the greeting but chose the Something Fancy Dies. I could use one cut out in Boho Blue to layer under the Basic White diecut greeting. We don’t always have something to layer underneath a greeting to help it stand out, but with these dies I did! To finish the card, I added two Boho Blue 2023-2025 In Color Dots to the greeting.

You could make this same card using different designer paper so give this Countryside Inn Boho Blue Thinking of You Card a try!

SHOP STAMPIN’ UP! ONLINE HERE!

Countryside Inn Blue Floral Card

Countryside Inn Blue Floral Card

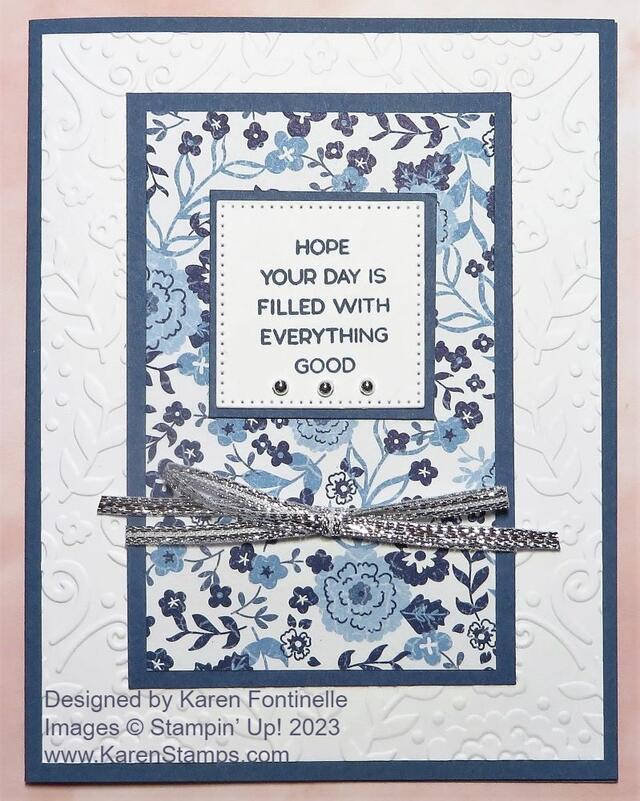
Here’s a card that is simple enough yet has that elegant look to it, I believe. This Countryside Inn Blue Floral Card could be used for almost any occasion, even with the greeting that is stamped on it, but could have a different greeting such as for sympathy or even a wedding.

You can use any of four blue colors for this card that coordinate with the Countryside Inn Designer Series Paper. The colors are Balmy Blue, Boho Blue, Misty Moonlight, and Night of Navy. You could choose any of them for this card. The card base I used is Misty Moonlight cardstock.

The layer on the card is Basic White and embossed with the Countryside Blossoms Embossing Folder. This is such a pretty embossing folder, and even though most of the embossing is covered up on my card with the center panel, you still see enough of it to enhance the card. It just adds some richness and texture to the card.

The Countryside Inn Designer Series Paper is on the center panel, of course, layered on top of another piece of Misty Moonlight cardstock. You can cut these layers any size you like. Mine is approximately 3″ x 4 1/4″ for the Misty Moonlight layer and then 2 3/4″ x 4″ for the designer paper layer. Before adhering that piece to the embossed layer and the card, I wrapped around some Silver Trim ribbon and added a bow around that center panel. After that it was glued to the front of the card or you could pop it up with Stampin’ Dimensionals.

The greeting is stamped on Basic White cardstock which is diecut with the stitched square in the Stylish Shapes Dies and then layered on just a cutout rectangle of Misty Moonlight to fit.

For some bling, I added three Festive Pearls in silver to the greeting on the card. I think those are just the right touch!

Remember, this Countryside Inn Designer Series Paper is on sale for just a couple of days at Stampin’ Up! Besides the florals, this designer series paper almost has surprises in its paper designs. Check it out for 15% off by June 30th!

SHOP STAMPIN’ UP! ONLINE HERE!

Countryside Inn Z-Fold Card

Countryside Inn Z-Fold Card

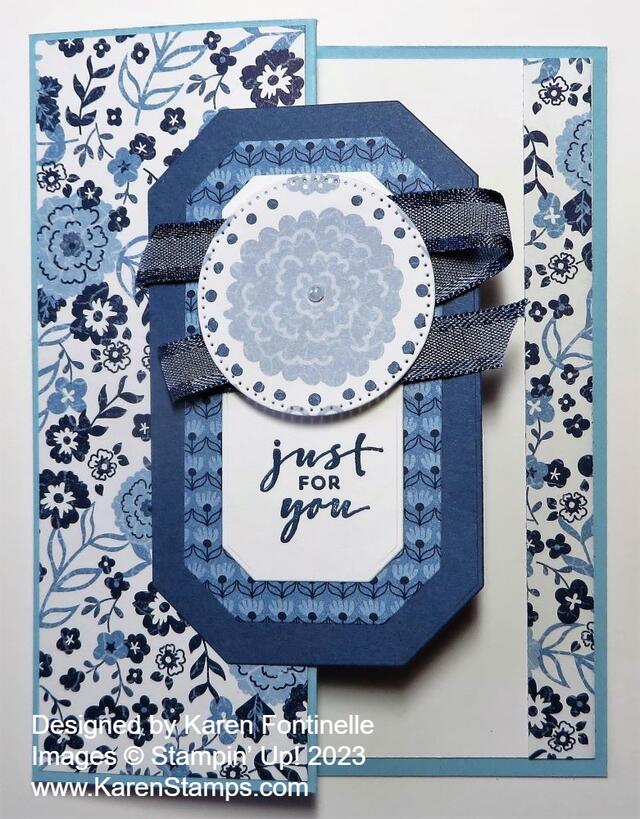
This Countryside Inn Z-Fold Card uses both the paper and the dies in the Countryside Inn Suite Collection, and the Z-Fold design just kicks it up a notch! I like to make Z-Fold cards because they are so easy and look like you really make something extra special!

The Countryside Inn Designer Series Paper has four colors of blue and white. For this card base, I chose Balmy Blue cardstock. To make the z-fold, make the card base as usual so that the front measures 5 1/2″ x 4 1/4″. On the front of the card, you will score down the center at 2 1/8″. Then fold the right edge of the card front back on itself. If you look down from the top, you will see the card base is in the shape of a Z. So basically, fold the front half of the card, back on itself.

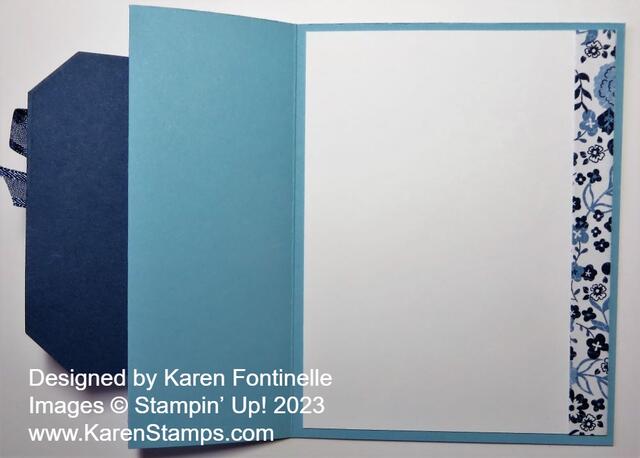
To add designer paper (or a stamped design) to that folded back left side of the card front, cut the paper at 2″ x 5 3/8″. That gives that narrow margin. If you want the usual margin, cut the designer paper at 1 7/8″ x 5 1/4″. The inside is Basic White with a strip of the same designer paper along the edge.

To decorate the card, I used the Countryside Corners Dies. I cut the larger piece out of Misty Moonlight cardstock, but you could use Night of Navy or Boho Blue. The next layer is cut out of a different pattern of the same designer paper. For the center, I diecut a piece of Basic White.

For the center piece, the trick was to find a greeting that would fit a vertical piece like I had. However, I could have also stamped a greeting that would just go horizontally across the white center. The greeting is in the Charming Sentiments Stamp Set and is stamped in Misty Moonlight ink.

To decorate the top, I used a die in the Stylish Shapes Dies to cut out the big flower in another pattern of the Countryside Inn DSP. To jazz it up a little, I added the Night of Navy 3/8″ Bordered Ribbon back and forth behind it and popped it up on Stampin’ Dimensionals. I also added a tiny little pearl.

To adhere this center piece to the card, remember to only put adhesive on the left half that will be glued to the Z-Fold. Try to center it as much as possible. Then if you want to stamp a greeting on the inside of the card, try to hide it behind this piece.

Here is what the inside of the card looks like.

Countryside Inn Z-Fold Card Inside

The Countryside Inn Designer Paper and all the papers on pages 130-132 in the new Annual Catalog are discounted by 15% during the month of June! Don’t let that sale slip by! You can search online under “Specials” on the top greenish bar.

SHOP STAMPIN’ UP! ONLINE HERE!

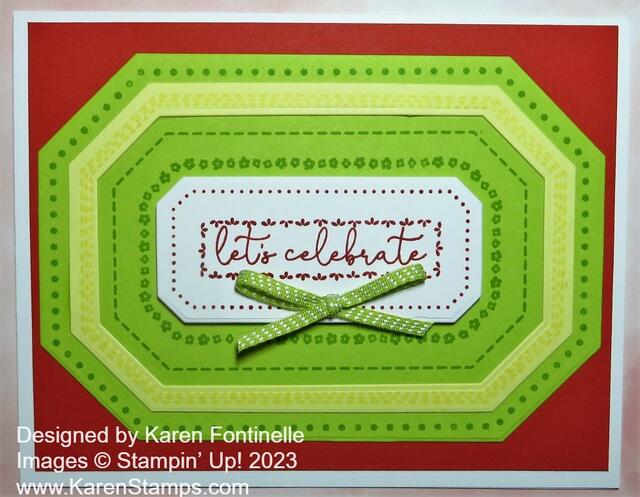
Countryside Corners Multicolor Card

Countryside Corners Multicolor Card

When you think outside the blue box, you might come up with a Countryside Corners Multicolor Card like this one! If you are familiar with the new Countryside Inn Suite Collection, the Countryside Corners Bundle, or the Countryside Inn Designer Series Paper, you know the main colors are blue and white. There are four different colors of blue in this paper! As much as we like blue, sometimes it takes a shift in thinking to realize, “Oh, I could use some other colors besides blue to make cards with this set!”

With summer on the way, I thought I would look at some Stampin’ Up! color suggestions, and I chose to use Poppy Parade, Lemon Lolly, and Lemon Lime Twist, plus Basic White. Nice bright colors instead of blue….not that there is anything wrong with blue!

The card base is Basic White with a layer of Poppy Parade. Even though I have had the Countryside Corners Stamp Set all this time, I hadn’t used it yet! Actually, it is not a stamp set, it is one stamp! You might think that each design would be a separate ring in the stamp design, but it isn’t, which is a little perplexing at first. You can ink the stamp all in one color or you can use Stampin’ Write Markers to color each ring or border with a different color.

What you can do for these layers is stamp the whole stamp on different pieces of cardstock and then you can die cut each color in whatever way you like. For this card, I stamped the whole stamp with Lemon Lime Twist ink on Lemon Lime Twist cardstock. I also stamped with Lemon Lolly ink on a piece of Lemon Lolly cardstock. I used two dies to cut out just that single design of the Lemon Lolly cardstock, which is then adhered onto the Lemon Lime Twist large, whole stamped piece. I tried out a couple of things for the center but decided on stamping Poppy Parade ink on Basic White and die-cutting that centerpiece. Then I chose a greeting from the Sentimental Park Stamp Set and stamped it in the center in Poppy Parade ink. That center piece is popped up on Stampin’ Dimensionals.

For a finishing touch, I added a Lemon Lime Twist ribbon, found in the Ribbon Duo Combo Pack. I tied a small bow and attached it with a Mini Glue Dot. I think maybe some bling in the form of gems, rhinestones, or sequins might be fun on this card, but I was undecided! Sometimes you have to know when to stop when you are creating something!

If you have this Countryside Corners Bundle (stamp set and dies), try out some different color combinations and see what you can create!

SHOP STAMPIN’ UP! ONLINE HERE!

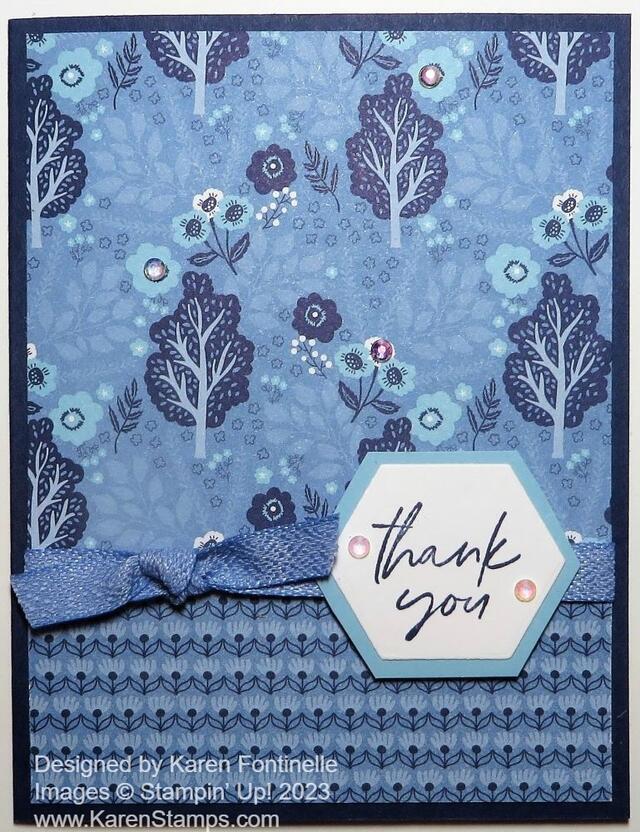
Countryside Inn Thank You Card

Countryside Inn Thank You Card

On this Countryside Inn Thank You Card, I used two sides of the same paper in the Countryside Inn Designer Series Paper. I really liked this paper with the trees and then I saw the other side was cute, too, with the small little lines of flowers. There are lots of interesting designs in this package of paper once you look at them! At first, you just think it’s only about little blue and white flowers! But there is even bunny paper in there, which I used on this card.

To make this card, I just used one of the simplest designs! I cut the card layer out of the designer paper, then cut a piece 4″ x 1 3/4″ of the same paper, but turned it over and used the “other side” for the bottom portion of the card. I usually like to hide the seam where two papers meet, so I covered it with a piece of Boho Blue 3/8″ Textured Ribbon. I just tied a knot rather than a bow. I think that was just enough.

The greeting is stamped from the Something Fancy Stamp Set in Night of Navy ink. Then I diecut the greeting with the hexagon die in the Something Fancy Dies. To make the Balmy Blue layer, I just cut it by hand! Stampin’ Up! should have asked me if they should make a hexagon layer die to layer with this die! I would have said “Yes!” I popped up the greeting over the ribbon with Stampin’ Dimensionals.

The card base is Night of Navy, but I could have used one of the other coordinating blues.

Of course, for a little bling, I added some Iridescent Rhinestone Basic Jewels, both to the greeting and on a few of the flowers on the designer paper.

This is always an easy and good way to design a card! You can use any designer papers you like, colors, greetings, and embellishments.

SHOP STAMPIN’ UP! ONLINE HERE!

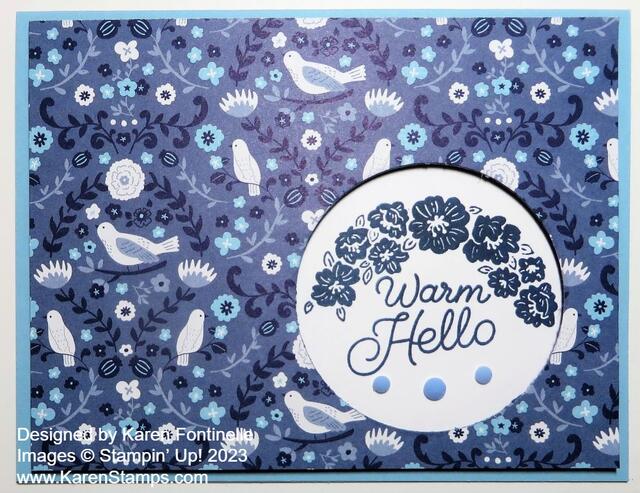
Circle Sayings Countryside Inn Hello Card

Circle Sayings Countryside Inn Hello Card

As I was paging through the Countryside Inn Designer Papers, I had forgotten there was this pattern with little birds, plus a cute one with little foxes! I put it together with the Circle Sayings Bundle to make this Circle Sayings Countryside Inn Hello Card.

It is not apparent from the photo, but the card front is popped up and there is a layer underneath that is the stamped greeting. Then those two parts are adhered to the card base.

The card base is Balmy Blue Cardstock. The Countryside Inn designer paper is cut at the usual 4″ x 5 1/4″. The Basic White cardstock underneath is cut at basically the same size but just a “smidge” less, maybe 1/16″ less, just enough so it won’t stick out if the papers are cut microscopically differently at the same size.

I used the 2 3/8″ Circle Punch to make the circle on the designer paper. Then I placed it on the Basic White and very lightly marked a few spots on the white cardstock with a pencil to show where the opening was. I took off the designer paper and stamped the flowers and greeting in the Circle Sayings Stamp Set on the Basic White inside the marked circle.

I had planned to just adhere the designer paper and the Basic White cardstock together and then adhere that piece to the card base. But I didn’t think the design stood out enough, so I decided to pop up the designer paper over the Basic White. I was concerned the designer paper wasn’t strong enough so I cut a piece of Misty Moonlight to adhere underneath the designer paper to give it some strength, but that meant I had to punch out a circle in the exact same place so the greeting would show through the hole. I used a bunch of Stampin’ Dimensionals to pop up that piece.

If I would have thought ahead, I could have tied a ribbon around the left side of the card through the punched hole, but when I thought of it, there were too many Dimensionals in the way! For a little embellishment, I used three of the Adhesive-Backed Solid Gems in Boho Blue in the greeting circle.

So that’s an easy idea for you to try! It’s something a little different! Try this Circle Sayings Countryside Inn Hello Card for yourself!

SHOP STAMPIN’ UP!

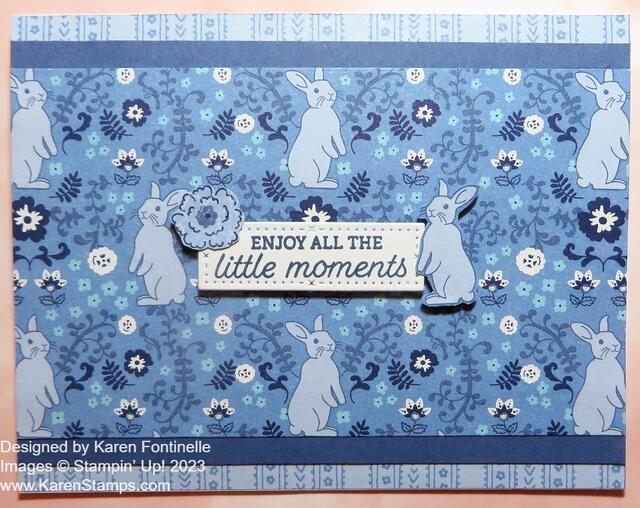
Countryside Inn Little Bunny Card

Countryside Inn Little Bunny Card

When I first saw this particular paper in the Countryside Inn Designer Series Paper with the little bunnies, I immediately thought it would make a cute baby card! I’m not saying this card, the Countryside Inn Little Bunny Card, is necessarily a baby card, but I think it could be. I think the greeting “could” be for a baby card because when do you “Enjoy All the Little Moments” more than when you have a baby and watch that baby grow up?

I don’t usually do it this way, but for this card, I used Basic White cardstock for the card base, but instead of leaving a margin showing, I completely covered the front of the card with designer paper. I began with the paper that had the little bunnies on it. I ended up cutting the bunny DSP at 5 1/2″ x 3 1/4″ because I wanted to save as many bunnies as I could. I wanted the bunnies to be the focal point of the card so I wanted as much of the full bunnies to show. At first, I cut the paper at 3 1/2″ wide, but obviously, that didn’t leave much room on the top and bottom of the card. So I trimmed off the tiniest bit off the top and bottom so the tiniest bit of the bunnies’ feet were cut off on the bottom and the tiniest bit of one ear on the top. If you want to do it differently, you can vary your measurements.

Next, I chose Misty Moonlight cardstock for the narrow strip at the top and bottom of the bunny pattern. It just helps set off the bunny paper. It is one of the coordinating colors with this Countryside Inn Designer Paper. The other colors that would work are Boho Blue and Night of Navy. I didn’t care for Balmy Blue for this card, but it is listed as one of the coordinating colors. These two strips are cut at 5 1/2″ x 3/4″ and I used my Grid Paper to try to line up the paper as well as I could with 1/4″ showing at the top and bottom of the bunny paper. You could make it narrower. Honestly, I can’t stamp without my Grid Paper! Once you get used to it, you can’t do without it. There are two other choices for Grid Paper in the Online Store but I love the original with the measurements printed along the bottom and up the side. I have some other “prettier” grid paper but I write in my own measurements because that’s partly why I am using Grid Paper!!

If you flip the bunny paper over to the other side, the pattern I used at the top and bottom of the card is what is on the other side. I decided to just go with that pattern since it obviously went with the bunny paper if it was printed on the opposite side. You can cut strips of this DSP to 5 1/2″ x 1″ (or less) so that a little shows above and below the main panel.

To assemble, I first adhered the striped pattern to the top and bottom of the Basic White card base. I adhered the Misty Moonlight cardstock to the top and bottom of the bunny paper, then adhered that panel to the card base. I used the Multipurpose Liquid Glue on this card to give me that “wiggle room” to get the edges all lined up. With a card like this, sometimes one or more of the papers hang over the edge of the card base, but just use Paper Snips or a paper cutter to slice off that tiny bit along the edge.

For the greeting, I used this one in the Easter Bunny Stamp Set. This could be a baby card even without a specific baby greeting. So don’t worry if you don’t have the exactly greeting you want, there is always something else you can use if you look through your stamp sets! I stamped the greeting in Misty Moonlight ink and die-cut it with a die in the Timeless Arrangements Dies. There are other die choices you could make depending on your greeting. I wanted something small to not hide the bunnies! I also cut out an extra little bunny by hand that I popped up on some trimmed Stampin’ Dimensionals and adhered him right over one of the printed bunnies next to the greeting as well as a flower from another sheet of the paper.

It might seem like a lot of steps to this card, but it isn’t really. It took me a little while to design it and do the “math” to get everything the size I wanted, but you can just copy and not figure anything out!

If you like blue, you will really enjoy this Countryside Inn Designer Series Paper in the new Stampin’ Up! Annual Catalog! Maybe even if blue isn’t your favorite color, you will come to appreciate the different colors of blue and the cute patterns in all the papers in this pack! Go check it out in the Online Store HERE.

Countryside Inn Thinking of You Card

Countryside Inn Thinking of You Card

What a treat to get my pre-order of the new Stampin’ Up! Catalog products! And this Countryside Inn Thinking of You Card is the first time using any of the new products. Demonstrators could order just certain products from the new catalog so we could begin getting acquainted with some of the new things and especially new colors in this catalog, coming May 2! Get ready!

I’ve spent a lot of time this weekend getting some things ready for myself to be prepared with the new colors and getting some things ready to send to my customers who should be getting catalogs hopefully this week! So this card is the first thing I have actually made with anything new that I just got!

I chose just a simple design for this Countryside Inn Thinking of You Card – card base, two patterns of designer paper on the front, a greeting, and a couple of embellishments. The card base is the new In Color, Boho Blue cardstock. Then I cut one sheet of the new Countryside Inn Designer Series Paper to fit on the card. I chose one in the back of the package that you probably haven’t seen as much. This paper coordinates with four colors of blues! Those are Boho Blue, Balmy Blue, Misty Moonlight, and Night of Navy. I cut a 4″ wide piece of designer paper, but I played with it a little bit to have one of the flowers sort of centered on the card front and the other two mostly showing on the sides. I liked the balance! Otherwise, I might have had two flowers and one cut off or something! The striped pattern on the bottom is on the opposite side of the top paper! I wanted those stripes going vertically, so I had to cut the paper a little more to get them going in the right direction! The flowery piece is 4″ x 5 1/4″ as usual and the striped piece is 1 1/2″ x 5 1/4″.

I used the White 1/4″ Crinkled Seam Binding Ribbon (retired) because I don’t have any of the new ribbons yet and really, I think this ribbon looks good on this card! I may have more ribbon hiding under my piles of stuff, but this is the best I could do. I tied the bow separately and used two pieces of ribbon to make it a little fuller. I really like the long tails that I left, too!

For the greeting, I jumped over to the new Circle Sayings Bundle. This Bundle comes with the new 2 3/8″ Circle Punch and a stamp set of greetings and images that you can use a lot and will fit on that 2 3/8″ circle! At first, I thought I would use the Boho Blue punched circle as a layer and stamp on a Basic White piece of cardstock and punch out with a smaller circle punch. But when I saw how the Boho Blue ink looked on the cardstock, I liked it even with no layer. For some added interest, I stamped the flowers again on Basic White and cut out three to decorate the center of that circle. Then I also added some Iridescent Pearl Basic Jewels to some of the flower centers. The whole circle is popped up on Stampin’ Dimensionals.

The paper designs in this Countryside Inn pack are really pretty and my favorite is probably the one with a little bunny on it! What cute baby cards we can make with that design or even cards for children!

There’s so much to take in with a new Stampin’ Up! catalog, new products delivered to your door, and a Color Refresh to get straight in your mind! But it’s all fun, and we all know there’s nothing better than a new Stampin’ Up! catalog…..unless it’s the box of new products that are IN the catalog!

Don’t forget to shop the Last Chance List of the outgoing Annual Catalog and the Spring Mini!

SHOP STAMPIN’ UP! ONLINE!