Tag Archives: fall leaves

Layering Leaves October Fall Card

Layering Leaves October Fall Card

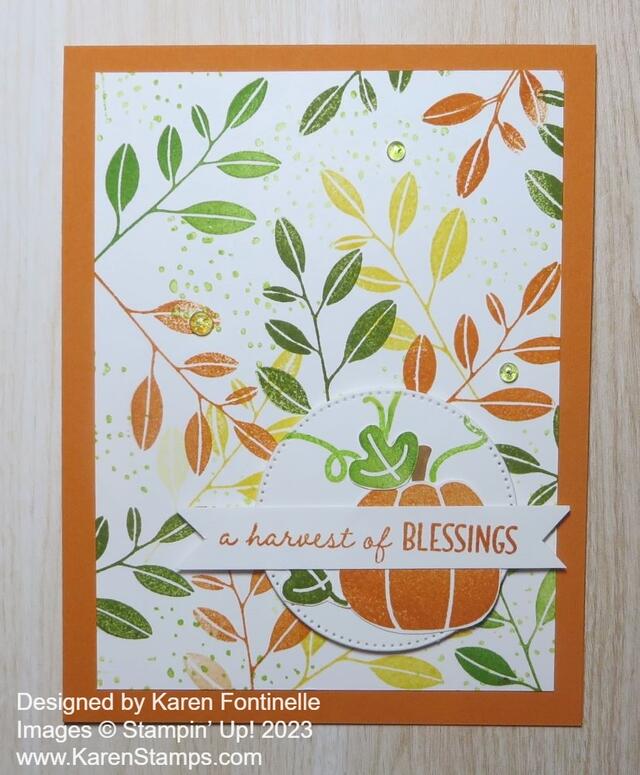
Happy October!! Now that it is officially October, it feels much more like the fall season, even if it still doesn’t feel like fall here in Houston! This Layering Leaves October Fall Card commemorates the beginning of October which really makes us think of fall, colored leaves, and all the upcoming holidays and seasons! Once the fall and Halloween decorations go up in my house and my regular home decor is put away, it won’t get pulled out again until January! Halloween decorations are starting to go up in the neighborhood. While I absolutely love all my Halloween decorations, I’m not quite ready for full-blown Halloween decorating quite yet. Maybe in another week or two for sure!

This card base is Pumpkin Pie and is cut at 11″ x 4 1/4″, scored at 5 1/2″ and the fold is at the top. I could have put the fold on the left and the card would be in a landscape position rather than our usual cards at 5 1/2″ x 8 1/2″.

I made my own designer paper, so to speak, by stamping the leaves from the Layering Leaves Stamp Set. I used these inks: Pumpkin Pie, Daffodil Delight, Granny Apple Green, and a little bit of Old Olive. I love to do this random stamping all over the paper! To fill in the empty spaces I used a stamp in the set with just little dots. Those kinds of stamps just add a little something lots of times! Those dots are stamped with Lemon Lime Twist.

Next, I used the Pick of the Patch Stamp Set to stamp and cut out a pumpkin, some leaves, and a stem. I also stamped some vines on the die-cut circle on which I adhered the pumpkin and leaves. It is from the Stylish Shapes Dies. This circle is popped up on Stampin’ Dimensionals.

The greeting is also from the Pick of the Patch Stamp Set and is stamped in Pumpkin Pie. I always have a bunch of narrow strips of Basic White so it makes it easy when you want to stamp a narrow greeting. I just stamped the greeting on the scrap strip and then flagged the ends to make it look like a banner.

For a finishing touch, I added a few Lemon Lime Twist gems from the Tinsel Gems Four-Pack. Sometimes it is hard to stop at adding only three gems! I would have liked more by the pumpkin and/or the greeting…..but sometimes you have to know when to stop!

Get out your fall colors and do some fall stamping!

SHOP STAMPIN’ UP! ONLINE HERE!

Hello First Day of Fall Card

Hello First Day of Fall Card

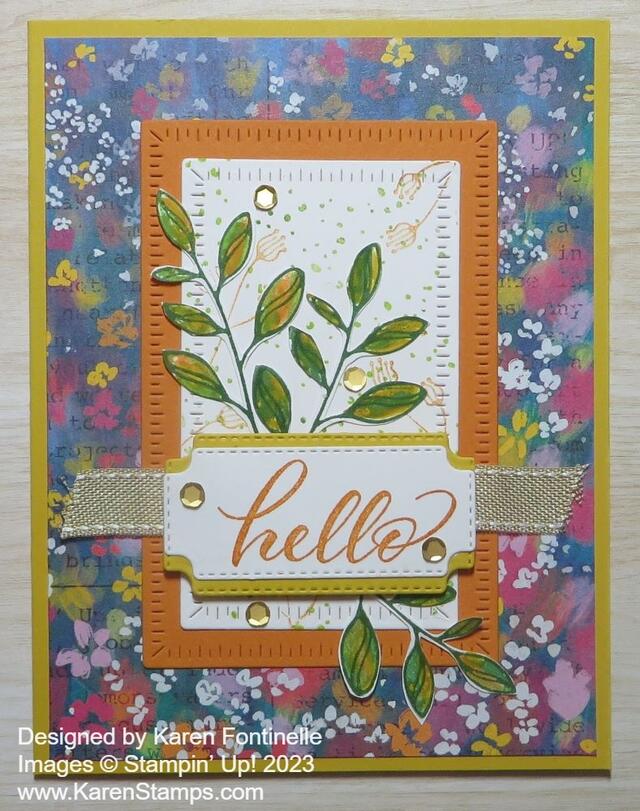
Today, September 23, is the first day of fall! Thank goodness!! We had such a hot, hot, hot summer here in Houston and most of Texas I think that we are SO ready for a break in this heat! I’m hoping this Hello First Day of Fall Card will help usher in more comfortable weather! It will be a while before the heat goes away, though.

In thinking about fall, I naturally thought about the Layering Leaves Stamp Set. In kind of looking for ideas online, I saw someone had made a card using the Masterfully Made Designer Series Paper. That made me look through my package to see if an idea popped into my head using one of the paper patterns. This one that I used seemed to have some fall colors in the flowers so I chose it! It’s a different look for a fall leaves card, I admit, but this whole package of paper is a little daring so it’s okay to do something a little different with it!

In the Layering Leaves Stamp Set, there are two stamps you can use for two-step stamping. I stamped the outline stamp of the leafy stem with Garden Green. Then I colored on the stamp that was just the fill-in leaves using two or three different colors of Stampin’ Write Markers. I wanted each leaf to have several colors on it as if it were turning colors for fall. I used Crushed Curry, Garden Green, Pumpkin Pie, and Granny Apple Green. Just play and see what you come up with! Everyone will be different. On a few leaves, I added a little marker color to fill in some empty spaces. Then I cut out each stem with my Paper Snips. The Bough Punch has been out of stock for a while but you can order it now, earlier than expected!

The card base is Crushed Curry. I used the Radiating Stitches Dies to diecut a piece of Pumpkin Pie for a layer for the focal point of the card, and the next smaller piece of Basic White. To fill in the white background a little bit, I stamped lightly with the dotted stamp using Granny Apple Green and Lemon Lime Twist. Not one to leave well enough alone, I also stamped the little flower image in Pumpkin Pie.

The greeting is in the Layering Leaves Stamp Set. I thought “Hello” was appropriate for saying “Hello” to the first day of fall! I love the font of the greetings in this stamp set. I stamped it in Pumpkin Pie ink and die cut it with a label die in the Cheerful Daisies Dies. I also cut a piece of Crushed Curry with the same die and cut it in half horizontally to make a layer under the greeting. I just adhered one half of the Crushed Curry to peek out from the top of the greeting and the other half for the bottom. Just line the two pieces up evenly and they look like a full layer underneath the greeting!

Before adhering the greeting, see where you want the leaves placed and glue those down. I decided to add a piece of ribbon underneath the popped-up greeting. It is the Burlap Ribbon in the Combo Pack with Real Red Ribbon. I also added some gold Pastel Adhesive-Backed Sequins around on the card.

You can make a similar card to this one with the Layering Leaves Stamp Set. You can change the background designer paper and change the colors of paper and ink that I used. The best part of the Layering Leaves set, I believe, is the beautiful fonts and words you can use a lot.

Fall and fall decorating is just around the corner now! It is fall and it is almost October! Make a few cards to send to celebrate fall!

SHOP STAMPIN’ UP! HERE!

Layering Leaves Fall Card

Layering Leaves Fall Card

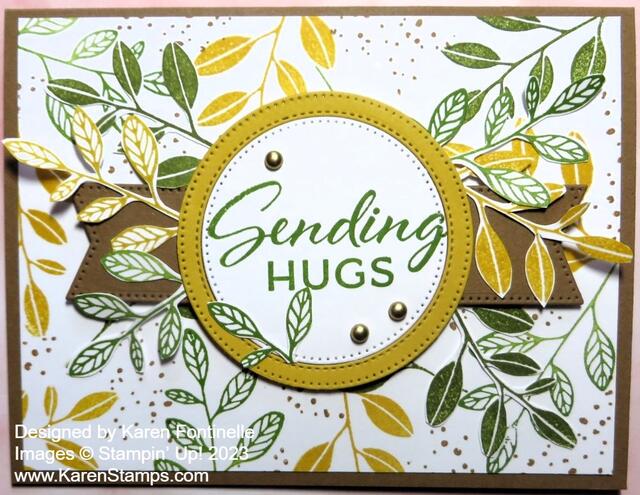
It’s September so it’s time for a fall card like this Layering Leaves Fall Card. Except it’s not really fall yet, certainly not where I live! It’s still very much summer, but at least September sounds better than August. September “sounds” like fall, cool weather, and colored leaves.

This card is made with the Layering Leaves Stamp Set in the Stampin’ Up! Annual Catalog. I did one of my favorite things with this card. I stamped the leaves randomly around on the card and used that for my card front. It feels so good to just stamp multiple images on a piece of cardstock instead of just stamping one thing. The ink colors I used are Old Olive, Granny Apple Green, Crushed Curry, and Pecan Pie for the little dots.

The stamp with the little dots was good for filling in some empty space in between the leaves. If I wanted to do it properly, I would have made masks for the two different kinds of leaves so I could place the mask over a leaf and not stamp over it with the dots. But without going to that trouble, I was able to fit the dots in between the leaves pretty well!

When you are doing random stamping like this, make sure to turn your stamp in different directions so they all aren’t pointing the same way. Also, be sure to partially stamp along the edges and in the corners. You can stamp without having the entire stamp on the page. Just have scrap paper underneath the edges.

The card base is Pecan Pie cardstock. The greeting is in the Layering Leaves Stamp Set and is stamped in Granny Apple Green ink on Basic White. I used circle dies in the Stylish Shapes Dies to cut out the greeting and to add the Crushed Curry stitched circle for the border around the greeting.

I thought the card front needed something else for a contrast, so I die cut a banner with Pecan Pie cardstock from the same set of dies. Then I cut that banner in half so I could extend it a little longer out to each side under the greeting. The banner and the greeting are popped up on Stampin’ Dimensionals.

Next, I stamped and cut out some leaves to stick underneath the greeting. There is a Bough Punch that will be back in stock the week of October 2. Since I didn’t have the punch, I just used my Paper Snips to cut the leaves by hand. I could have left off the leaves and the card would be much simpler, but sometimes I don’t know when to stop! It’s not that unpleasant to cut out images by hand so I don’t mind doing it. At least the Paper Snips make it fairly easy to do.

Finally, I added some Brushed Metallic Adhesive-Backed Dots to the greeting for a little embellishment.

You can make this card using other colors for the leaves, making it look more “fallish”, or more summery. This stamp set will be good for almost any season. And the greetings and font in the set are really nice and useful!

SHOP STAMPIN’ UP! HERE!

Gather Together Fall Colored Leaves Card

Gather Together Fall Colored Leaves Card

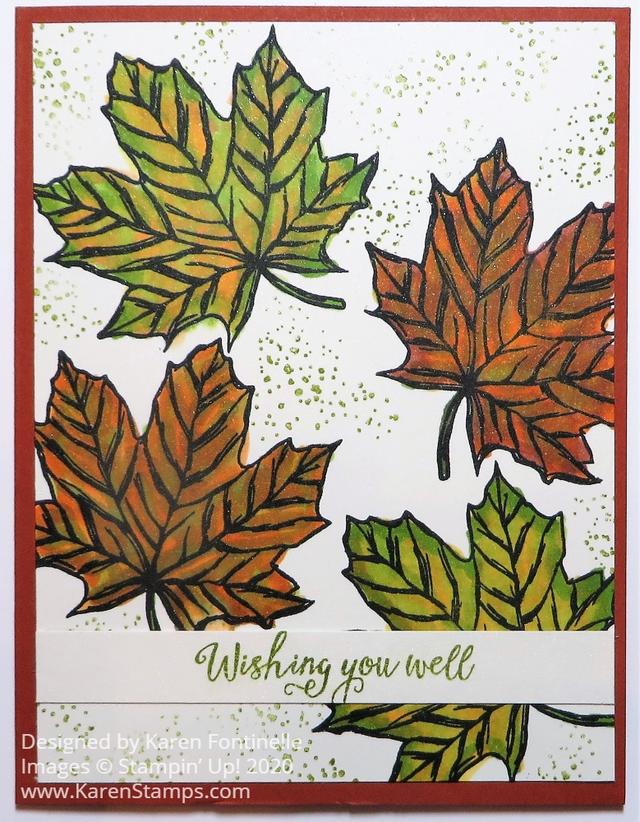
I might have seen a tree with a few yellowish leaves at the top the other day when we were out for a walk so I was inspired to hope for fall and make this Gather Together Fall Colored Leaves Card. The weather has even been a little cooler lately (in part thanks to Tropical Storm Beta). In fact, the night before last I almost a felt a little cool on my legs wearing shorts. Yes, in Houston, Texas we are still wearing shorts, complaining about the heat, and running the air-conditioner. It kills me to see pictures way up north of trees with beautiful fall colored leaves. But fall leaves will get here, too….just not until December!

I just wanted to make a simple fall card and this is it! The card base is Cajun Craze and the layer is Shimmery White Cardstock. I love Shimmery White Cardstock, as I have said many times before. It is the tiniest bit off-white and has a very subtle shimmer. It’s also good for watercoloring if you don’t have watercolor paper.

The stamps are in the Gather Together Stamp Set. They are just inked up with Memento Ink, stamped randomly on the card, and colored in with Stampin’ Blends. Just choose a variety of fall colors and color the leaves with whatever combinations you want. I think I used the Light and Dark of Daffodil Delight, Mango Melody, Old Olive, Granny Apple Green, Pumpkin Pie and a few others like Cajun Craze.

The little texture stamp is also in the Gather Together Stamp Set. I inked it up with Old Olive but stamped off first on my Grid Paper so it would stamp lighter. The greeting is also in the same stamp set and I just stamped that in Old Olive Ink on a scrap strip. For some reason I decided to just let the strip extend completely across the bottom of the card. I liked it.

I hope you are beginning to see signs of fall where you live. A few houses in our neighborhood have some Halloween decorations up. I think it’s a little early but I love to put up Halloween decorations, inside and out. Maybe this year I will go a little lighter since no one will be coming in to see them. But of course making myself happy with my favorite Halloween and fall decorations is just as important!

Here is another card I made with the leaves in the Gather Together Stamp Set you can check out for another idea.

If you don’t own the Stampin’ Blends alcohol markers, you could color these leaves with a sponge or Sponge Daubers or pick up ink and color in. There are lots of coloring techniques. Try your hand at making some fall leaf cards soon like this Gather Together Fall Colored Leaves Card.

Shop Stampin’ Up! Online!

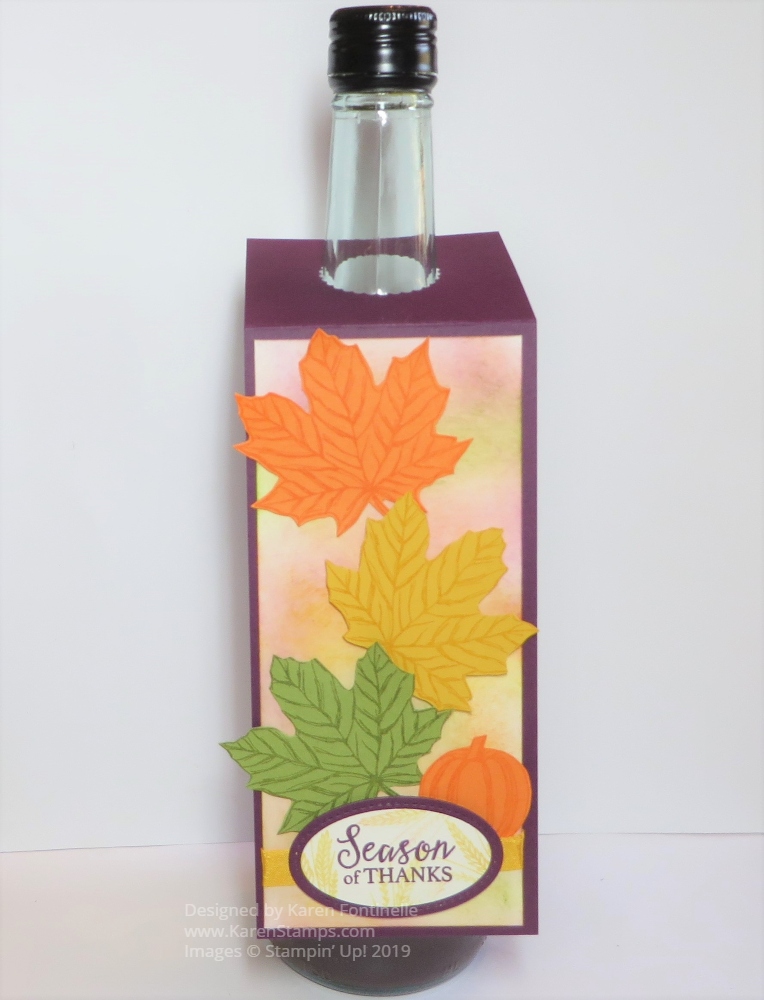
Make a Gather Together Fall Wine Bottle Tag

Gather Together Fall Wine Bottle Tag Display

Thanksgiving will be here soon, although this idea can be used at any time of the year, and perhaps if you are going to someone else’s home, you might like to take a hostess gift such as a bottle of wine or other beverage. Rather than just take an ordinary bottle of wine, decorate it with your personal touch by making a Gather Together Fall Wine Bottle Tag such as this one. You can make it as easy and simple or as fancy as you like!

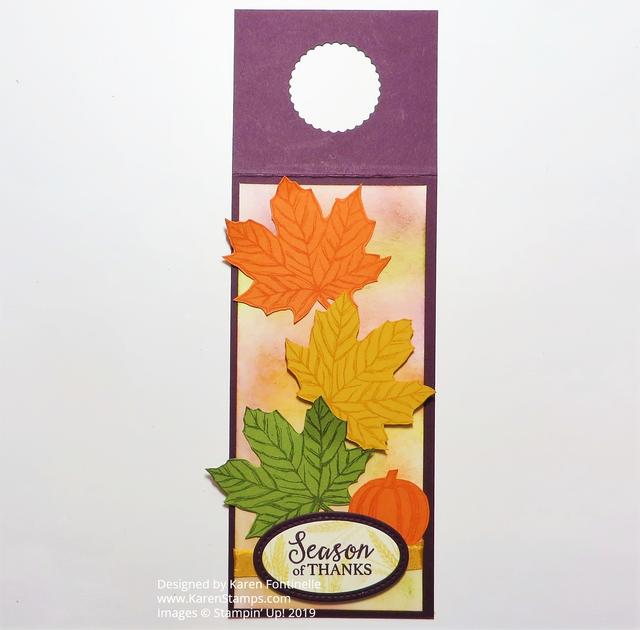
The basic idea is a piece of cardstock to hang down the partial length of the bottle with a score line at the top with a punched hole to make the hanger. Without the score line, the tag would just hang and stick out. You may need to alter these measurements to fit your bottle, but the project is easy enough to understand and you can make adjustments for your individual project.

For this exact project, I began with a piece of Blackberry Bliss Cardstock 9″ x 3″. It is scored at 2 1/2″ down from the top. You can either eyeball the center or measure accurately to find the center of this top portion in order to punch a hole to go over the wine bottle. I used a 1 3/8″ Scallop Circle Punch to make the hole. You could also use a circle die.

Next, I cut a piece of Very Vanilla Cardstock to layer on the Blackberry Bliss Cardstock at 6 1/4″ x 2 3/4″. I stamped three leaves with the Gather Together Stamp Set in the same color ink as the cardstock in Pumpkin Pie, Crushed Curry, and Old Olive. If you have the Gathered Leaves Dies, you can die cut the leaves, or if not, just use Paper Snips to cut out by hand (as I did!). The pumpkin is also stamped and cut out.

The greeting is stamped from the Gather Together Stamp Set in Blackberry Bliss Ink and lightly stamped in Crushed Curry with the little wheat stamp for a little interest. It is die-cut with the Layering Ovals Dies and layered on a Stitched Shapes oval die. I put a piece of underneath the popped up greeting.

As I laid out the design of the tag, I decided to add some color to the Very Vanilla layer on the Blackberry Bliss. I simply took a sponge and sponged on some Pumpkin Pie Ink, Crushed Curry Ink, Old Olive Ink, and Blackberry Bliss Ink very lightly. It just adds a little more of a fall look.

I sponged on these colors, then adhered the Crushed Curry 3/8″ Crinkled Seam Binding Ribbon under the popped up greeting at the bottom of the tag. Next, I placed the leaves with the top and bottom leaves being adhered straight on to the tag and the middle one popped up on Stampin’ Dimensionals. I also tucked in the little stamped pumpkin by the greeting and leaf.

Here are another bottle tag I made in the past and another to give you other ideas and see how easy they are to make! And like I said, they could be designed for a birthday celebration or other occasion.

Here is a photo of the entire tag not hanging on the wine bottle to see how the top is made.

Gather Together Fall Wine Bottle Tag

If you wanted to take an extra little hostess gift, you could also make an assortment of cards that matched the colored leaves and design on the tag. Give this little project a try and then keep it in mind when you are going somewhere and want to take a gift!

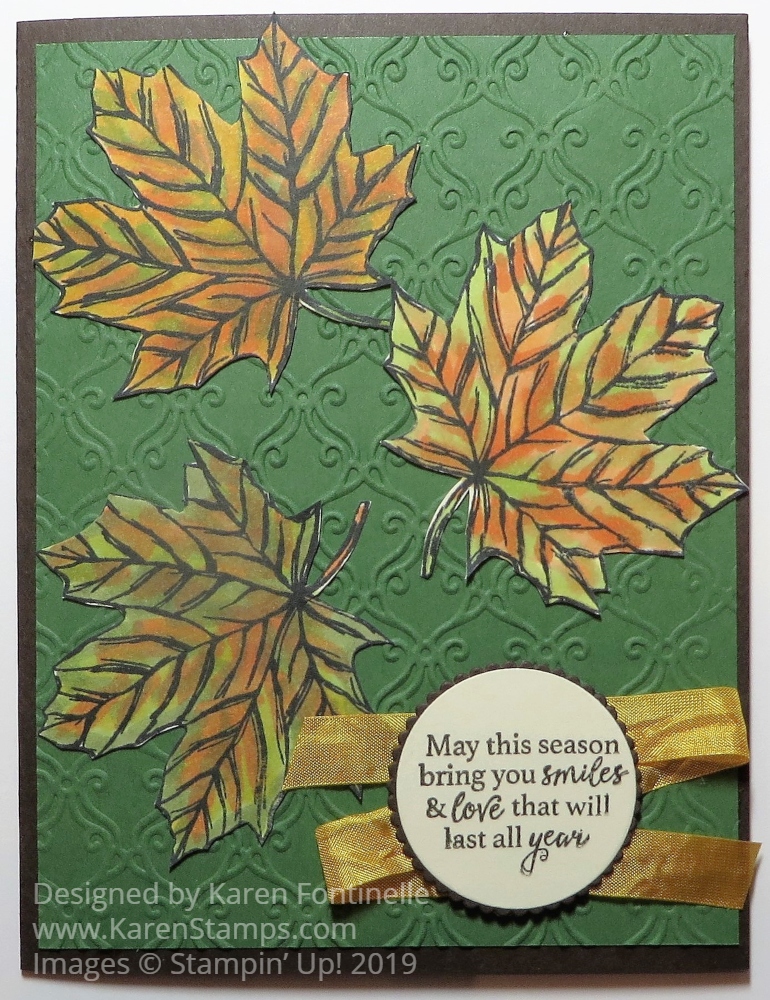
Gather Together Fall Leaves Card

Gather Together Fall Leaves Card

This Gather Together Fall Leaves Card is a fairly easy one to make to show off the beautiful colors of autumn. I’m pretty sure I got this idea from another Demonstrator but I think I changed it up a little bit. I don’t remember where I saw the idea, but of course, the internet is full of ideas if you don’t have your own!

Fall is such a great season with all the beautiful colors and symbols such as colored leaves, pumpkins, scarecrows, fall flowers, etc. For this card, I made colored leaves by stamping with Stazon Ink in Black and then coloring in with various colors of Stampin’ Write Markers. I believe I used a little bit of yellow, a couple of greens, and some orange. If you start with the lightest color then you can color over with increasingly darker colors without picking up dark ink on a light marker.

The leaves are stamped with the Gather Together Stamp Set. I don’t own the Gathered Leaves Dies so I just cut out the leaves by hand. The greeting is also in the stamp set. It is stamped in Early Espresso Ink and layered on a scalloped circle of Early Espresso. The Crushed Curry Crinkled Seam Binding ribbon is placed in a fun way. Just go back and forth behind the greeting and hold it down either with Snail Adhesive or put Stampin’ Dimensionals on the back.

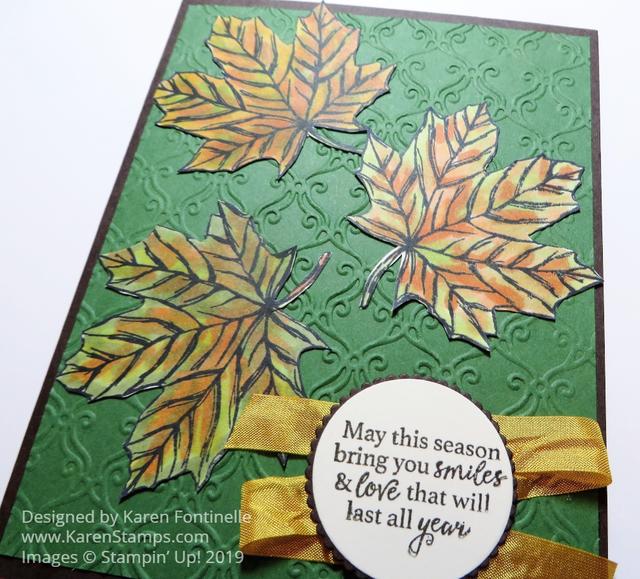
The card base is Early Espresso and the cardstock layer is (I think, cuz I already mailed it!) Garden Green. You could use any green that you like. It is embossed with the very pretty Stylish Scroll Embossing Folder. This folder can provide a beautiful background for many cards.

On the inside of the card, you may need to put a Whisper White or Very Vanilla layer so you can stamp a greeting or especially write a personal note with the dark cardstock. Stamp a leaf or something from the stamp set inside or add a matching strip of cardstock to decorate the inside a little bit.

Here is a closeup of the card so you can see the nice embossing design.

Gather Together Fall Leaves Card Closeup


Have fun coloring some fall leaves and decorating your cards or projects with them. If you want to use Stampin’ Blends for coloring, stamp with Memento Ink. We are in the thick of autumn right now so you can make cards like this Gather Together Fall Leaves Card for birthdays or even the upcoming Thanksgiving holiday. Just change the greeting for whatever occasion you need.

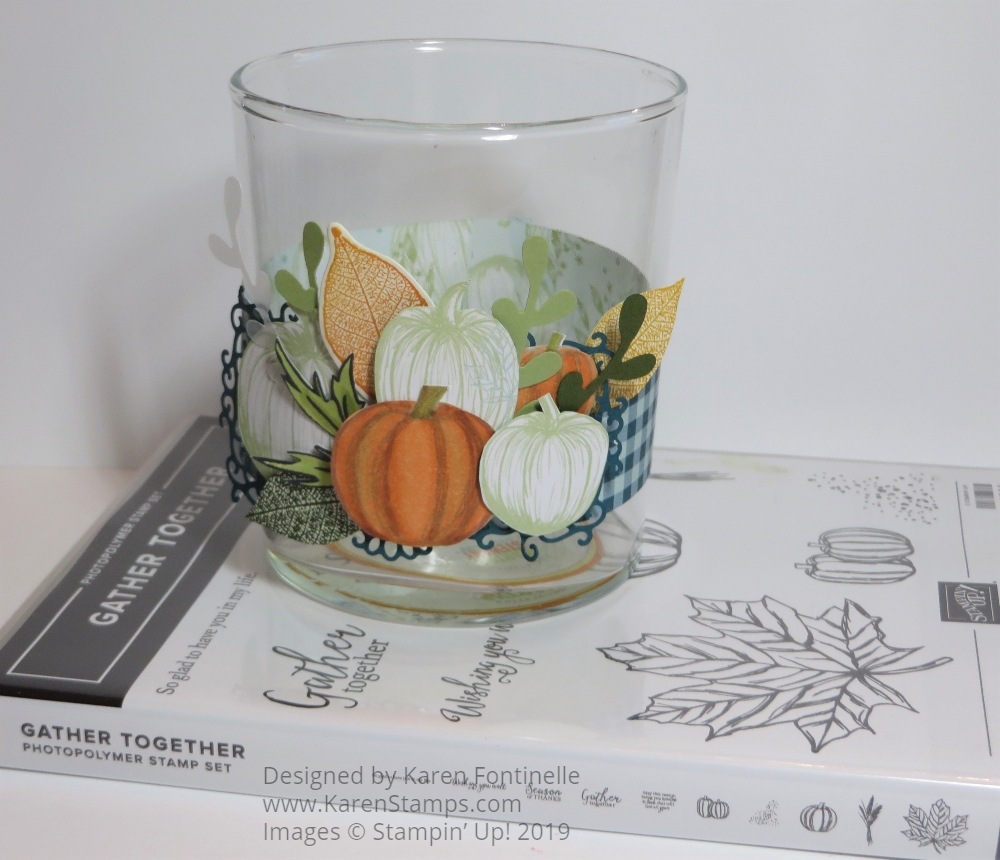
Gather Together Fall Votive Holder

Gather Together Fall Votive Holder

We can do so many things with all our Stampin’ Up! products and supplies and papercrafting skills, like making a piece of home decor such as this Gather Together Fall Votive Holder. I think the colors and items of fall just inspire us so much, like pumpkins, leaves, gourds, mums, scarecrows, and more. That’s what makes it so fun, especially getting relief from the heat of summer!

You can easily make something like this, probably with something you already have in your house, or you can make it for a gift for someone. All you have to do is add a candle inside or one of the flameless ones to be extra safe. If you are using a real candle, make sure the paper is nowhere near the top of the votive holder.

It’s funny how I can start a project with one idea in mind and then come up with something totally unplanned. I almost don’t need to tell you how to make this exactly because I’m sure you have something very similar in your stash and can use what you have.

I started with a checked strip of the Come To Gather Designer Series Paper. When you are using glass, it would be nice if you can to use something that also looks good on the inside since it will be able to be seen. Although unplanned, this strip happens to have the same pumpkins on the opposite side which you can see through the inside of the glass that I used on the decoration.

I started out thinking I was just going to do something with colored leaves but it’s hard to resist the siren call of the beautiful Come To Gather Designer Series Paper. I cut out some of the pumpkins from the paper and I also found some stamped pumpkins from the Gather Together Stamp Set in my stash that I had already colored with Stampin’ Blends. I thought they still fit in with the other pumpkins even though they are more colorful. Next, I stuck in some stamped and die-cut or punched leaves I had just done or already had in my stash. The larger leaves are from the Rooted In Nature Stamp Set.

Once I decided my pumpkins and leaves needed a little background, I die cut a piece from the Ornate Frames Dies. You should really check out these dies because they are pictured in the Halloween section but they CERTAINLY can be used for other things. There is nothing “Halloween” about them. I think they will be very useful well past Halloween. I die cut a large one out of Pretty Peacock Cardstock, even though it is barely visible.

Play around with your elements before adhering and see what layout you like the best. Some of the pumpkins are popped up with Stampin’ Dimensionals® and some are flat. Then I stuck in the leaves and sprigs of greenery wherever I thought they would look good.

Votive holders like this one are fun to decorate for any holiday or occasion so stock up a few at the dollar store or wherever you find them! Here is a Christmas one I made a few years ago. You could also decorate all the way around the holder. So many possibilities!

Shop Stampin’ Up! Online For the Best in Papercrafting Products!