

Here is a technique I tried this past weekend that I have seen on the internet for a little while. It’s called the Blackout Technique or maybe Blackout Embossing. No matter the term, it is fun and easy and results in a stunning card. This Layered Florals Blackout Technique Birthday Card is my first attempt and I also made another one in different colors. This Layered Florals 3D Embossing Folder is a perfect one to use for this technique!

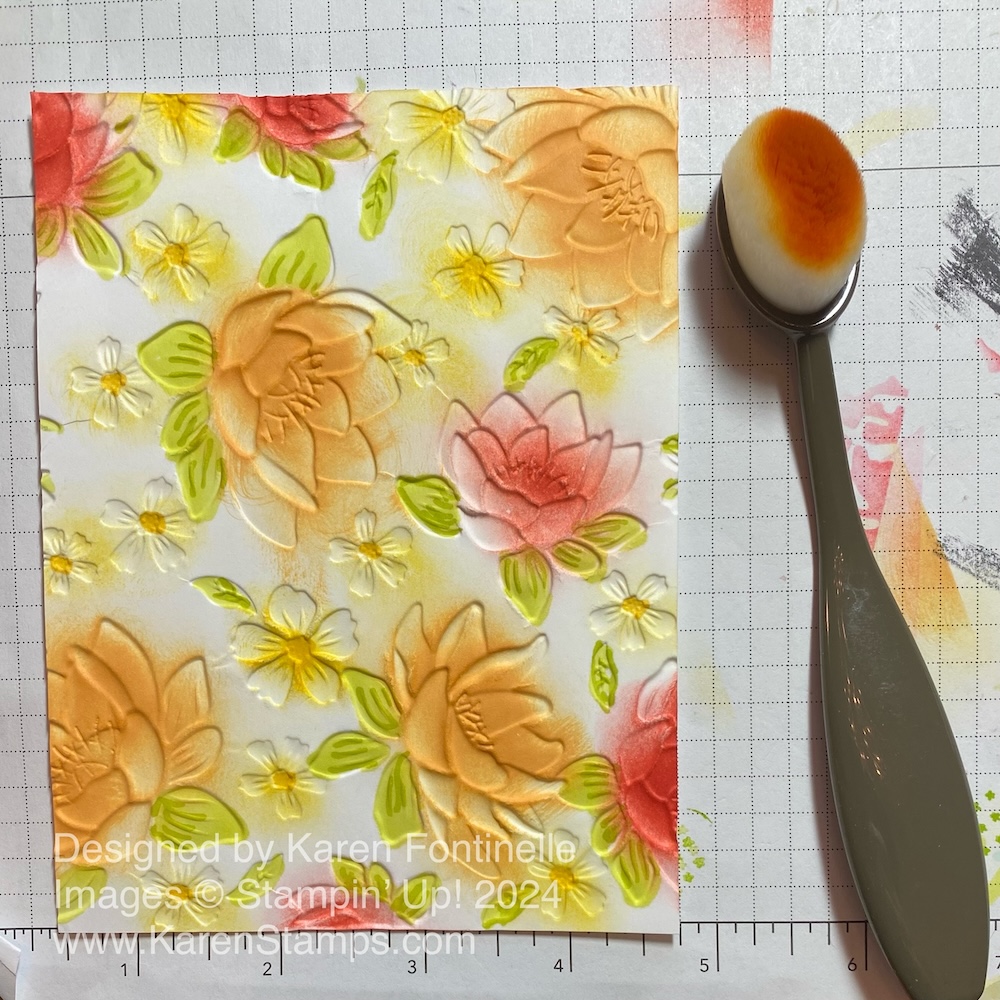
To make this style of card start with embossing a piece of Basic White with the Layered Florals Embossing Folder and the Stampin’ Up! Cut & Emboss Machine. The cardstock can be larger than will be used on the card front, it can be trimmed down later. Turn the embossed cardstock over to the “debossed” side, not the usual “pretty” side. You will see the indentations of the flowers. Color on this debossed side of the cardstock. For this card, I used Stampin’ Blends….many colors! You can choose what you like or use just one main color. I was using bright colors, such as Melon Mambo, Peach Pie, Summer Splash, Granny Apple Green, Lemon Lime Twist, Pretty in Pink, and more.
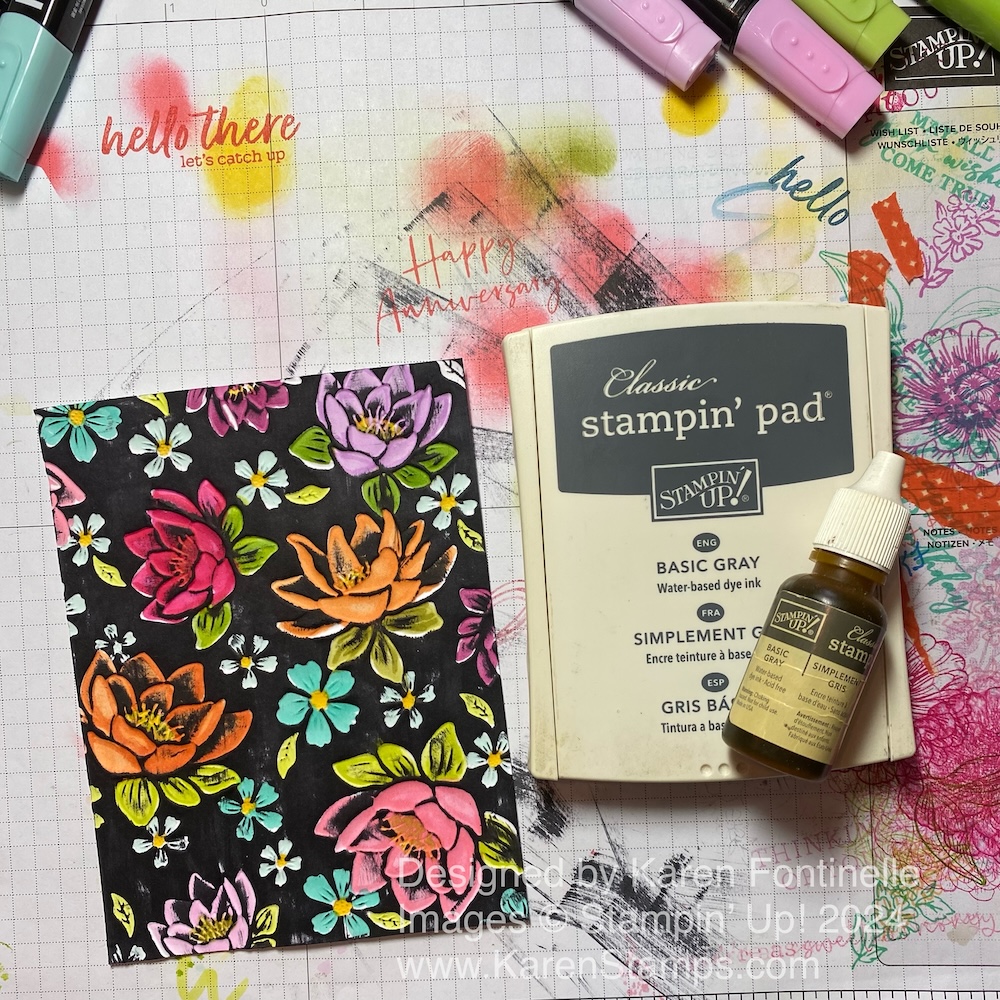
Once you have all the coloring done that you want to do, you will swipe a dark ink pad over the whole piece of embossed cardstock, colored side up. You won’t ruin it!

You can use a Memento ink pad or a Stampin’ Up! ink pad. I used Basic Gray which is dark and looks like black. Don’t swipe the ink pad completely flat on the card but rather hold the edge of the pad at a slight angle as you swipe over the card. You do need a juicy ink pad as this uses a lot of ink! You probably will need to go over it in several swipes to get every area covered in the dark ink. You might use a tissue to hold the cardstock down so you don’t get ink all over your fingers, but it is a messy technique!
Now you can trim down your embossed and inked piece for whatever size you want for the card. My card base is Basic White with a layer of Melon Mambo so my inked piece is trimmed down to 3 3/4″ x 5″. The greeting is stamped with a stamp in the Textured Florals Stamp Set in Melon Mambo ink. It was then diecut with one of the Unbounded Love Dies.
Another way to color is to use Blending Brushes or Sponge Daubers. For this embossed piece, I wanted Peach Pie flowers for the large ones and I used Daffodil Delights for the small flowers. You can use a light touch with the Blending Brush while adding the color. The leaves were colored with Stampin’ Blends.
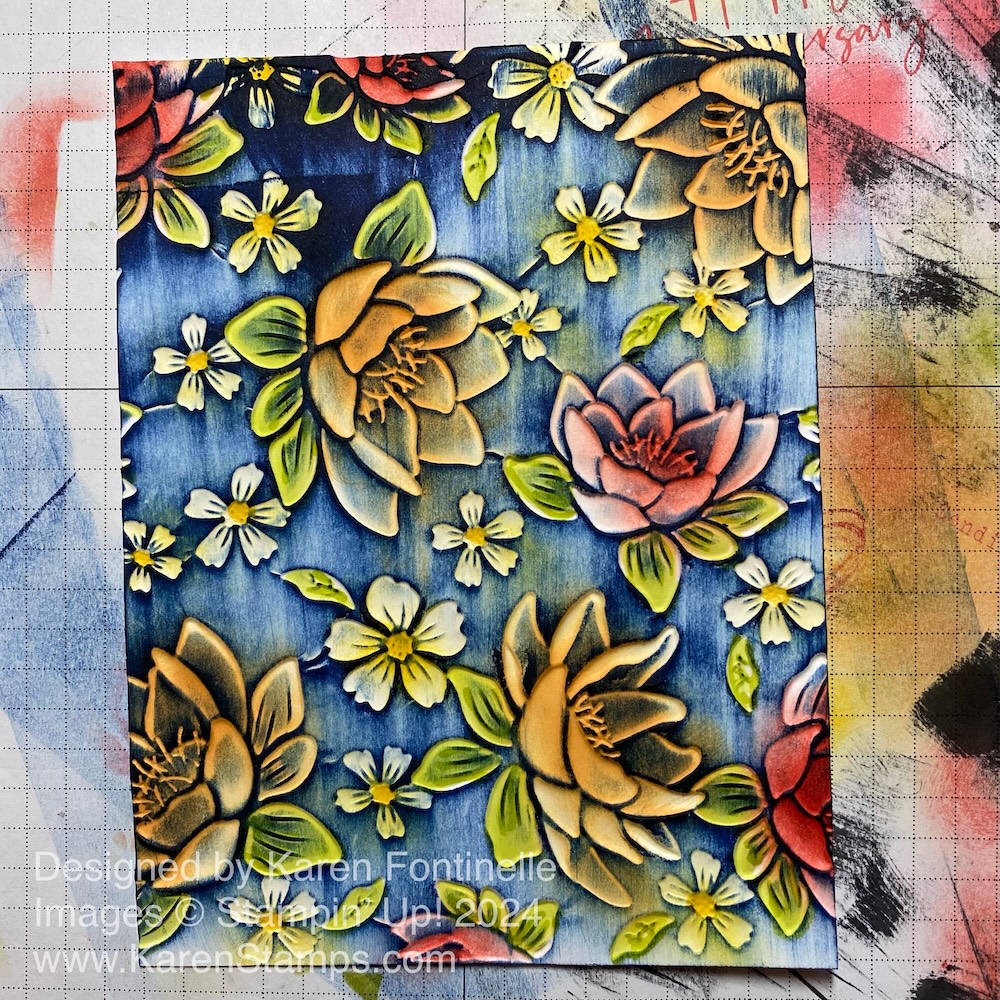
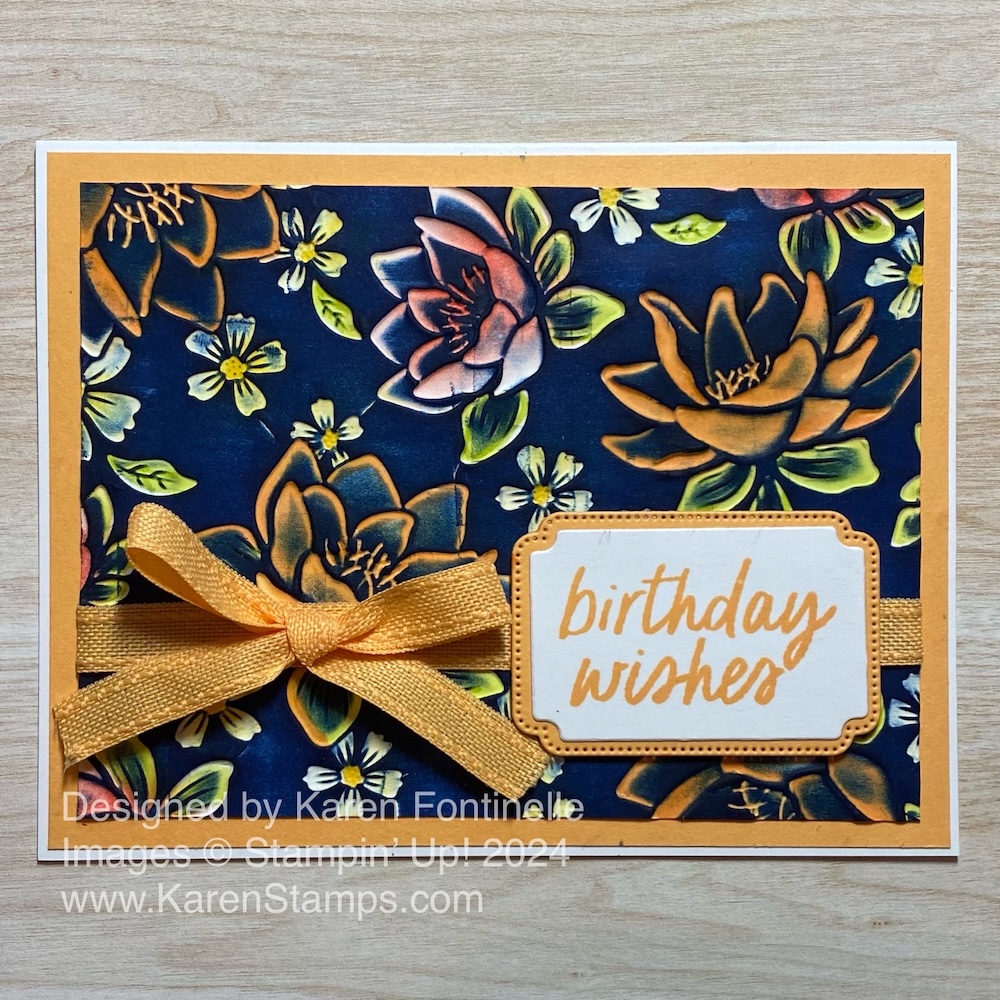
For this card, I used Blueberry Bushel ink to swipe on the embossed piece. I thought the dark blue would look good with the Peach Pie flowers. It is very dark, almost black. This card is Basic White with a layer of Peach Pie cardstock. I embellished it with the Peach Pie 3/8″ Bordered Ribbon and added a separate bow. The greeting is from the Simply Said Stamp Set stamped in Peach Pie ink on Basic White and then diecut using the Unbounded Love Dies again.
This is what it looked like as I began swiping with the Blueberry Bushel ink, which even at that stage, I thought it looked interesting and pretty! So I suppose you could stop with a few swipes of ink if you liked it that way! But I did cover it completely with ink.
Here is the finished card.
I know you will want to try this technique! If you don’t have this exact embossing folder, see what you do have or just try any one you have and see what you can do with it! If you don’t have large images like these flowers, maybe using Blending Brushes or Sponge Daubers to apply the color. Remember to do it on the debossed side of the embossed cardstock.
It’s fun and easy and a surprise to see how the card will turn out!
Remember, FREE SHIPPING is Tuesday, May 21, one day only, with an order of $75 or more!