Tag Archives: Friends For Life Bundle

A Colorful Card For Father’s Day

Colorful Card For Father's Day

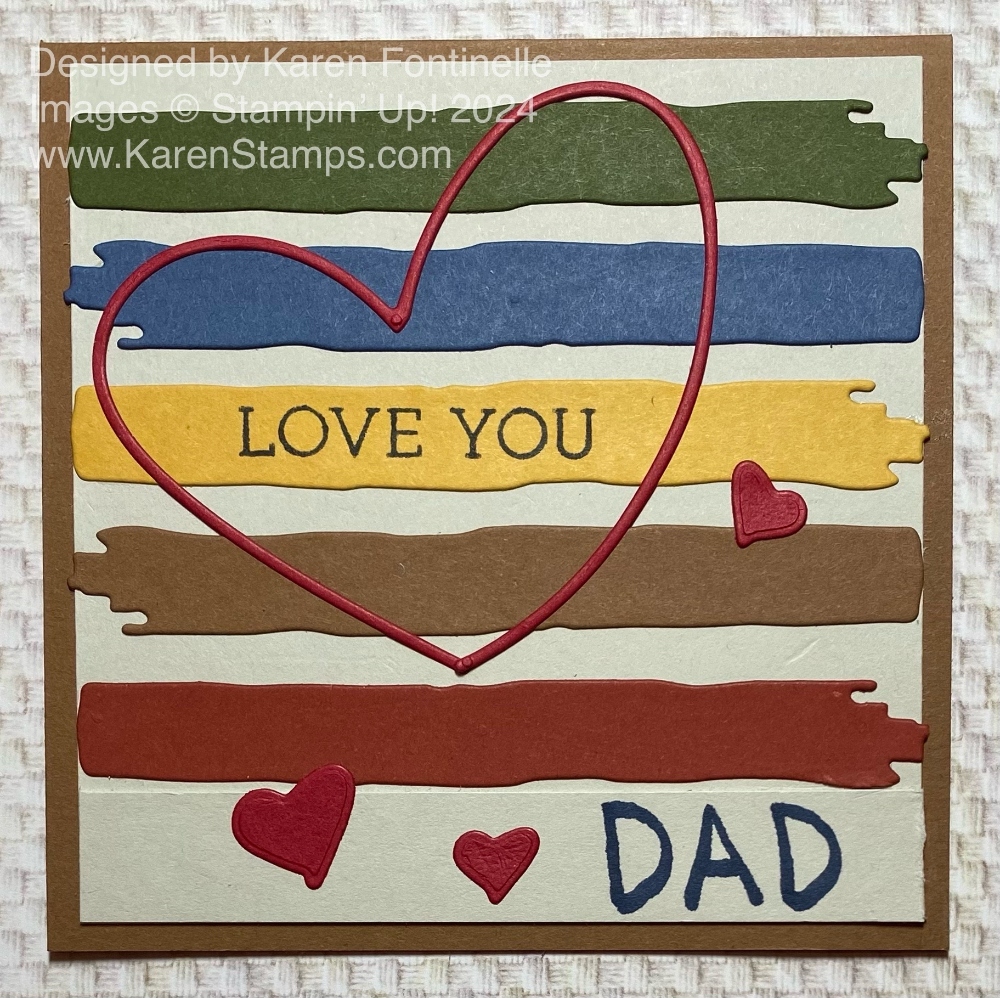
Tomorrow is Father’s Day and if you are still looking for a card idea, I have one more for you! This Colorful Card For Father’s Day is made with the Friends For Life Dies. I watched a video probably on Instagram of someone just watercoloring stripes of different colors across the card front and then just writing the greeting on the card front on the colored stripes or in between the stripes. Such an easy idea and so creative! I remembered that we have this one die in the Friends For Life Dies that kind of looks like a painted stripe!

To make this card after I had the idea, I chose some colors of cardstock in the Neutrals Family. It would have been fine, but I wanted something a little more colorful yet still be a masculine card. I decided on Mossy Meadow, Misty Moonlight, Pecan Pie and then for a pop of color, Crazy Cajun and Crushed Curry. I die cut a strip in each of those colors.

A regular size card seemed too large, so I decided on a 4 1/4″ x 4 1/4″ square card. The Pecan Pie card base is 4 1/4″ x 8 1/2″ folded in half. The card layer is the new color Basic Beige. Then I just adhered each colored stripe on the Basic Beige. Because that heart outline die existed in the set, I decided a heart on a Father’s Day card would be fine. I cut it out of Cherry Cobbler because I didn’t want a bright Real Red. I remembered to use an Adhesive Sheet on the back of the cardstock before I cut out the heart so I wouldn’t have to try to add glue to the back of this very thin heart.

For a greeting, I liked the “Love You” in the Friends For Life Stamp Set. It was risky, but I stamped it on the Crushed Curry stripe in Memento Ink even though I had already glued down that piece. Luckily, I didn’t mess it up! I adhered the heart and couldn’t resist added a few little diecut hearts that also had the Adhesive Sheet on the back of them so they were like stickers also.

To keep it easy, I just used a Moonlight Mist Stampin’ Write Marker, the brush tip, to write “Dad” in the space at the bottom. If you had a small alphabet set or small alphabet dies, you could easily do something with those on your card, especially if you made a regular size card with more space.

Lots of possible ways to make a card similar to this just by changing the colors, running the stripes vertically, writing a different greeting, adding more embellishments. Of course you can put on any kind of greeting to make a card for another occasion.

Remember, the Bundle Sale is going on this month at Stampin’ Up! so if you would like the Friends For Life Stamp Set and the Friends For Life Dies, this month is a good time to buy the Friends For Life Bundle and save an extra 10%! Check out all the other Bundles HERE, too!

SHOP STAMPIN’ UP!

Full of Life Friend Card

Full of Life Friend Card

If you love bright and pretty colors you will love the paper I made this Full of Life Friend Card with! This designer paper has watercolor designs colored by in-house Stampin’ Up! artists. I’d love to see the behind-the-scenes of how they created all the designs. One of my friends would call this a “happy” card because of its colors and design. How could anyone not feel happy to receive this card?!

This colorful paper is the Full of Life 6″ x 6″ Design Series Paper. Besides the colorful graphic designs on one side of the papers, the other sides don’t have designs but still have beautiful colors in a plainer style. You can use those for backgrounds. But if you want something bold, use the squares, circles, and color wheels for your project.

This card base is Melon Mambo, but as you can imagine I could have chosen from any number of colors. I love this pattern on the designer paper. It makes a great layer on this card.

I was trying to keep the card simple but I wanted to use the cut-out word “friend” on the front of the card. It is diecut from Melon Mambo cardstock using the Friends For Life Dies. If you would like the stamp set and the dies, you can purchase the Friends For Life Bundle. If you can wait until June 5th, you can save an extra 10% on all Bundles (which are already discounted 10%) and even 10% off the Cut & Emboss Machine. This will be the special at Stampin’ Up! from June 5 – 30.

Before cutting out the word “friend” I added Adhesive Sheets to the cardstock. After the word is diecut, then it is like a sticker and you don’t have to try to put glue on the back of the skinny word! The trick is to remember to use the Adhesive Sheets before you do the diecutting! I usually don’t think of it! But it’s very handy to do!

I diecut a Basic White piece with the Everyday Details Dies so the word would show up better against the background. I also added a rectangle of Melon Mambo cardstock underneath the diecut piece. I just cut it with my Paper Trimmer. I like how it shows through the holes around the border of the Basic White diecut to make it more colorful. In the die set were two different sizes of small hearts so I cut those out also to use up more of the Adhesive Sheet space. Instead of putting a dot over the i in “friend” I put one of the hearts instead.

To make the colorful card even more festive, I thought, I added several (more than 3) Iridescent Adhesive-Backed Discs in various colors. I love these because they are shiny but flat so they aren’t a problem when you mail the card.

Check out the Full of Life Designer Paper in the new Stampin’ Up! Annual Catalog on page 43 in the Suites section. It’s really something different and I love the colors!

SHOP STAMPIN’ UP! ONLINE HERE!