Tag Archives: gift wrap

How to Decorate a Gift Box

Decorated Gift Box

The other day while searching for some tins I ordered many years ago for candy, I found these Stampin’ Up! White Gift Boxes (142000) in my retired stash. I had to change my design idea from candy in a tin to candy in a box for a few gifts. Whether or not you have these official White Gift Boxes in your stash, you can use this idea of any plain box. It would even cover up company printing on the box and the size of the box doesn’t matter. You can use this same principle.

Each side of this box is 3″ x 3″. I cut out five pieces of cardstock at 2 3/4″ x 2 3/4″, then five pieces of designer series paper at 2 5/8″ x 2 5/8″ (or you could do 2 1/2″ x 2 1/2″). Just adhere the designer paper to the cardstock and then on to the box. I like to use Multipurpose Liquid Glue because it gives you “wiggle room” to get the paper on straight on the box. On this box, I used the A Little Bit Festive Specialty Designer Series Paper and Misty Moonlight Cardstock.

The snowman on the top of the box is punched out of the Snowy Scenes Designer Series Paper with a Circle Punch and then layered on a punched circle of Daffodil Delight to match his scarf. You could use whatever you like.

For a final touch (before adding candy inside!), I wrapped around some ribbon that I had handy, which happened to be some retired Pretty Peacock ribbon, but I thought it matched okay. Use Mini Glue Dots to hold the ribbon in place at least in the back and maybe the sides, then tie a bow on the front.

Even if you had a small Amazon or other shipping box, you could use this same idea to cut out pieces of cardstock and/or designer paper to cover the sides of the box and personalize it! Just have fun with it! Time to wrap those gifts!!

Kits Collection Festive Tags Kit

Kits Collection Festive Tags Kit Contents

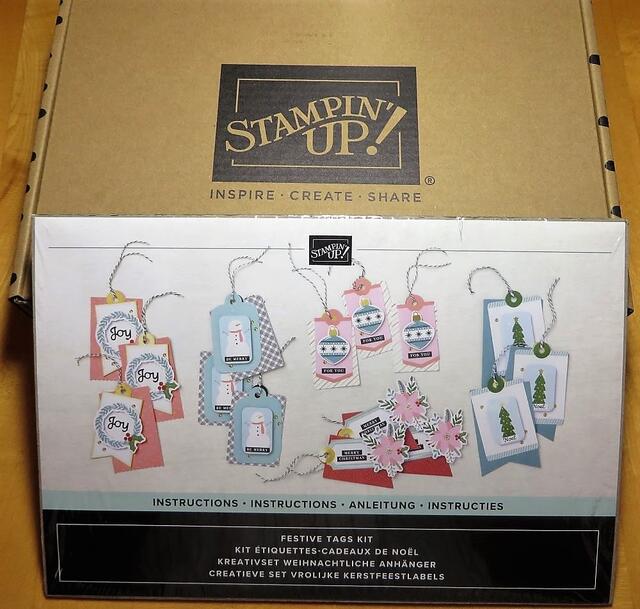
A great kit to purchase on the Stampin’ Up! Kits Collection Sale during August is this Festive Tags Kit! It is an easy kit to make, no stamping, only takes about an hour total, and you will be using the tags for sure for holiday gifts! It’s a win win!

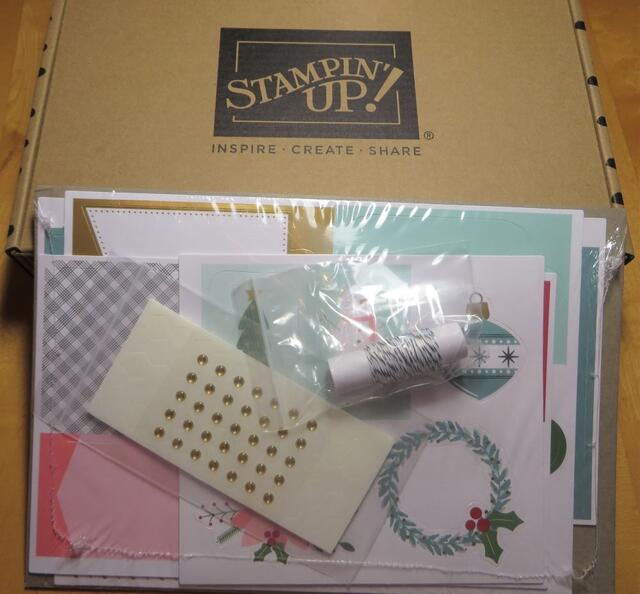
Inside the box, you get all the supplies you need to make the project, all wrapped up with the easy directions.

Kits Collection Festive Tags Kit Contents2

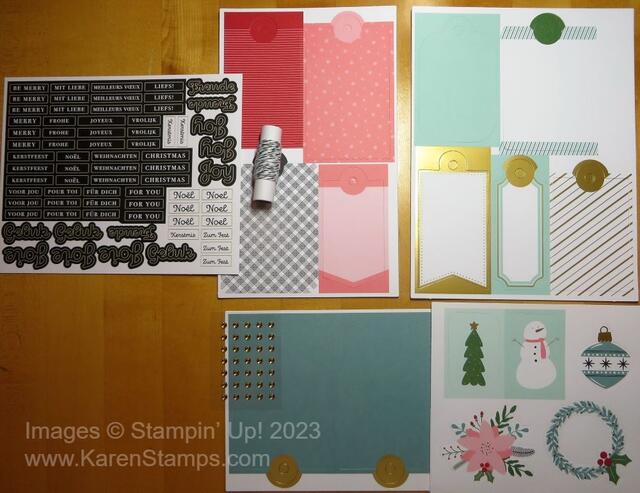
It’s so fun to open up the package of supplies and see what goodies you got in there! Besides the basic pieces to make the tags, you get some goldish jewels and a roll of twine, plus Dimensionals, which are the only adhesive you need.

Kits Collection Festive Tags Kit Pieces

Here’s a tip that usually works! As you punch out the pieces of any kit, if you keep the stack of the same pieces lined up and together, you can usually punch out all three pieces in the stack at the same time. You don’t necessarily have to do each one on each sheet. Just stack them up perfectly and punch them out! Once you have all the pieces and embellishments laid out on the table, you are in good shape to start assembling the project!

Kits Collection Festive Tags Kit Tags

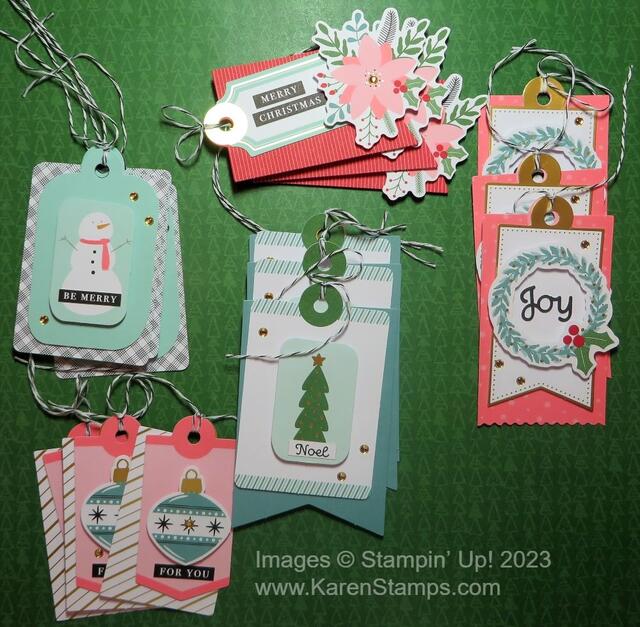
This Festive Tags Kit makes 15 tags for your holiday gifts! Three each of five designs! That really gives you a good variety! And just stick on the greeting (in another language, if you choose!) instead of stamping! Tied the decorated tag onto a backing tag and you have a cute tag with space to write on the back who the gift is to and from. Once you add those gold-colored self-adhesive jewels, it really makes those cute tags pop!

Watch Sara’s video below and see how she puts the tags together!

You’ll save a little bit of money if you purchase this kit before August 31 while this Kits Collection Sale is on! I would recommend buying more than one kit, maybe even two extra kits! You will enjoy putting the tags together and knowing that you have plenty when you go to gift wrap your packages. Or add the tag you made to the front of a card, perhaps with an extra layer or something to make up the card, and you’ll have an easy card ready to go!

Check out the other holiday tag kits from past years as well!

Shop the Kits Collection Sale HERE!

Wrap Gifts With Designer Paper

Wrap Gifts With Designer Paper

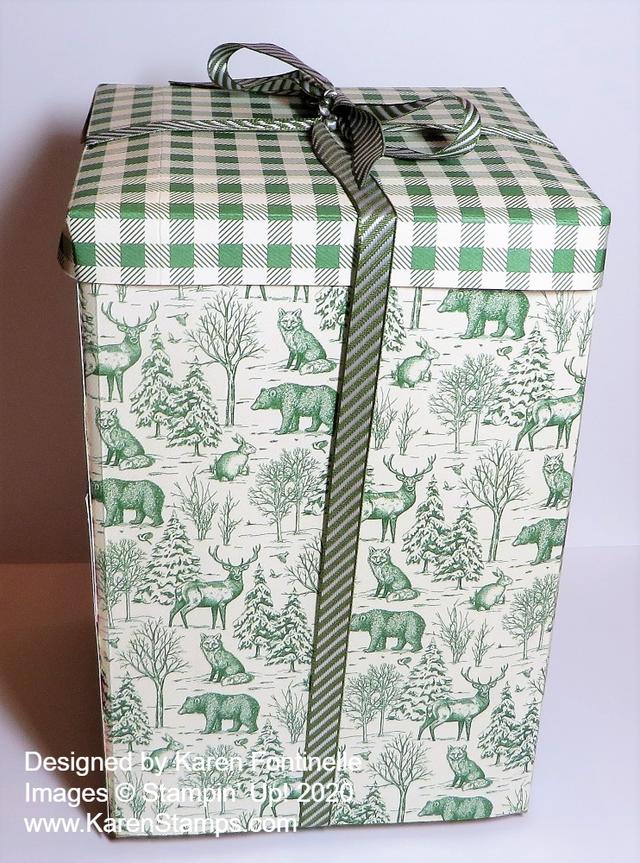
If you happen to run out of wrapping paper as you wrap your Christmas gifts, or gifts any time of year, consider this idea: Wrap Gifts With Designer Paper!

This is a gift for my son and this particular pattern of paper in the Toile Tidings Designer Series Paper I thought would be a fun one for him since he sees some of these animals when he is out hiking where he lives. This paper was in the Holiday Mini Catalog LAST year but surprisingly was carried over to this year. Right now it is discounted on the Year-End Closeout by Stampin’ Up! so it really is a good deal. There is even some “official” Toile Tidings wrapping paper discounted over 50% off on the Clearance Rack right now.

I did not make a box, I just adhered this paper on to the box the gift is packed in. He’s going to have to rip the paper off to get inside the box! I only had one full sheet of this animal paper and another partial sheet so I had to piece it together somewhat. The top is not really a lid, it is another sheet of paper with the checked design folded over the top and that is also just adhered to the box, not really a lift-off lid. I used the Stampin’ Seal+ adhesive for a good strong bond.

The reason I am posting this gift-wrapping idea is to give you a reason to use up your designer paper (maybe especially retired paper that we all hoard!), maybe look for some paper that makes the gift more personalized, and keep you from rushing out to the store for more wrapping paper! You can use some of your old ribbon (or new!) as well.

Now yesterday at the same time I was getting ready to wrap this package, Sara Douglass, Stampin’ Up! CEO was going live on Facebook showing an easy way to make designer paper gift boxes with NO CUTTING! I felt like we were both a little bit on the same wavelength! I just sort of tried her method when I made the lid of my box, although, as I said, it’s not a lid that lifts off, it is glued down. But I did the corners as she did!

Here is the link to Sara’s video on Facebook (if it works!). Don’t forget other gift-wrapping ideas you can use rather than spending a lot of money on wrapping paper or rather than running out to the store.

  • Use designer paper or cardstock to make small gift bags.
  • Use designer paper or cardstock to make small gift boxes.
  • Use gift bags you already have from shopping and decorate the front right over the store printing.
  • Stamp on plain white computer paper or cardstock to make your own designer paper to wrap a gift.
  • Decorate kraft or white lunch sacks you may have in your pantry to hold a gift.
  • Stamp on or use brown packing paper you might receive in shipped gifts and then embellish the package with Stampin’ Up! ribbon and embellishments.
  • Make your own gift tags with kits, punches, or die-cut squares, rectangles or circles.

Those are just a few ideas I hope you will find helpful as we all get pressed for time! I think we all have designer paper that we can spare for wrapping gifts that will make a high quality gift presentation! Keep that idea in mind of wrapping gifts with designer paper whether for Christmas now or future occasions!