Tag Archives: Halloween card

Best Witches Portrait Witch Halloween Card

Best Witches Portrait Witch Halloween Card

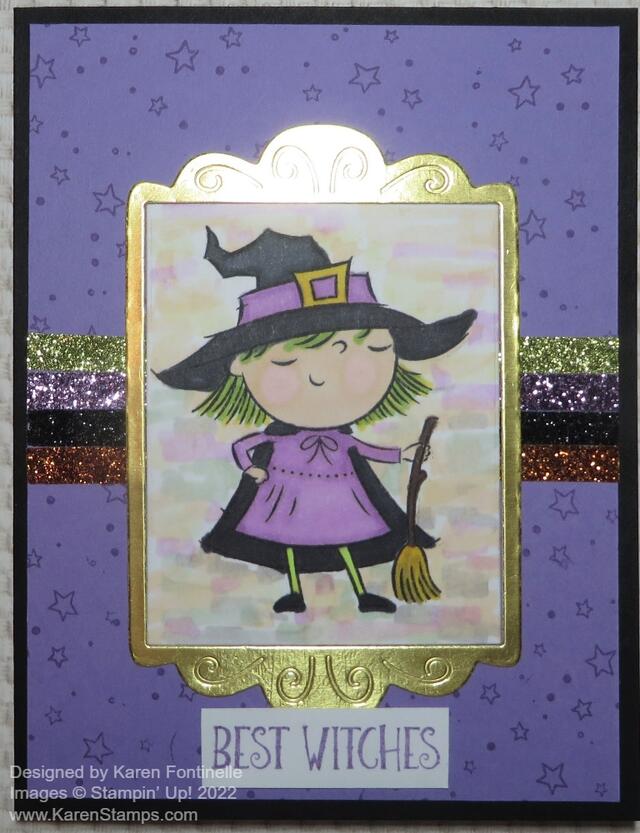
Here’s a fun Halloween card to make, the Best Witches Portrait Witch Halloween Card. This little witch must have had her portrait painted and framed! I also wanted to use the new Glitter Washi Tape and figured out a way to use it on this card! I’ll explain how I made the very artistic background around the witch!

The card base is Basic Black with a layer of Highland Heather stamped with the stars in the Best Witches Stamp Set. You have to stamp very lightly with these small stamps so as not to catch an inky edge of the rubber. Luckily some of mine got covered up with the witch!

The witch is stamped on Basic White cardstock. I diecut the frame in the Fabulous Frames Dies out of Basic White and then used the center piece for the witch. Then I diecut the frame again out of Gold Foil to get the actual frame I was going to use.

I stamped the witch (one of two in the stamp set) in Memento Ink and colored in with various colors of Stampin’ Blends. Just play with whatever colors you like or even combinations of colors. For the background around the witch, I simply chose many light colors of Blends and just put little marks or scribbles all around. Then I took the Color Lifter and colored over all the marks in hopes of blending them a little bit. I was afraid I might be messing up my witch piece but I think it turned out to be an interesting background! You never know! Just play!

I applied strips of the Glitter Washi Tape across the middle of the card. After putting down the full length of the first color, I realized the tape would mostly be covered up and I didn’t want to waste it so I just put small pieces on each edge of the card, not all the way across. You can trim the ends off on the sides if you haven’t glued down the Highland Heather layer. After gluing down the gold foil frame, I adhered the witch portrait inside the frame.

The greeting is stamped in Highland Heather ink on a scrap strip of Basic White and adhered at the bottom of the card. I thought about cutting the words apart, but the greeting seemed to look okay as is.

If you like Halloween, check out the Best Witches Stamp Set and the others in the Holiday Mini Catalog! Maybe you will even earn FREE Sale-A-Bration products with a $50 or more purchase at Stampin’ Up!

Scary Cute Halloween Card

Scary Cute Halloween Card

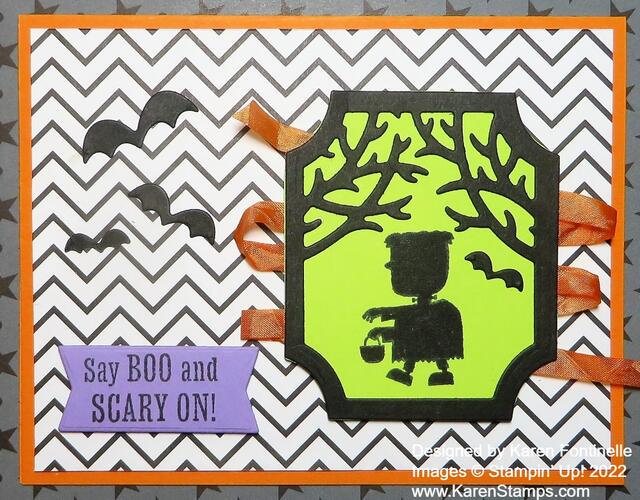
It’s time to start thinking about Halloween! This is my first card using a new bundle in the Holiday Mini, my Scary Cute Halloween Card! This card is somewhat of a copy of a sample in the Holiday Mini on page 56. It looks like it was made into a shaker but I think maybe it’s a box or something with ribbon wrapped around it. My copy is actually a card but not a shaker.

The card base is Pumpkin Pie cardstock with a layer of the Black & White Designs Designer Series Paper. This paper is perfect for making Halloween cards but you don’t have to be restricted to that at all! I used the Scary Cute Bundle to make the images on the card. The spooky image of the tree branches in the frame is a die in the Bundle that I cut out of Basic Black, and I cut another Parakeet Party cardstock piece to be the spooky background piece. I added a little bit of ink with a Blending Brush but it doesn’t really show up. I should have used a darker green if I wanted to do that. The little boy trick-or-treating is stamped in Memento Black ink on the Parakeet Party cardstock.

To match the orange ribbon wrapping around the sample in the catalog, I colored the White 1/4″ Crinkled Seam Binding Ribbon with the Dark Pumpkin Pie Stampin’ Blend marker. Just put a piece of scrap paper underneath as you color the ribbon with your marker. Then I applied some Stampin’ Seal to the back of the framed piece and adhered the now Pumpkin Pie ribbon going back and forth, back and forth. Finally I popped up the piece on Stampin’ Dimensionals which would also help keep the ribbon adhered to the back.

The greeting is included in the stamp set so I stamped that on a piece of Highland Heather cardstock and diecut it with the banner shape in the Scary Cute Bundle. It is also popped up on Stampin’ Dimensionals.

Finally, there are cute little bat dies of three different sizes so I had already cut those out with the black frame. Then I just chose three and adhered them to the card. I might go back and add some sparkle with something.

This Scary Cute Bundle has lots of fun possibilities for Halloween cards, treats, and projects. Just play with it and discover lots of creative ideas!

Best Witches Haunt It Halloween Card

Best Witches Haunt It Halloween Card

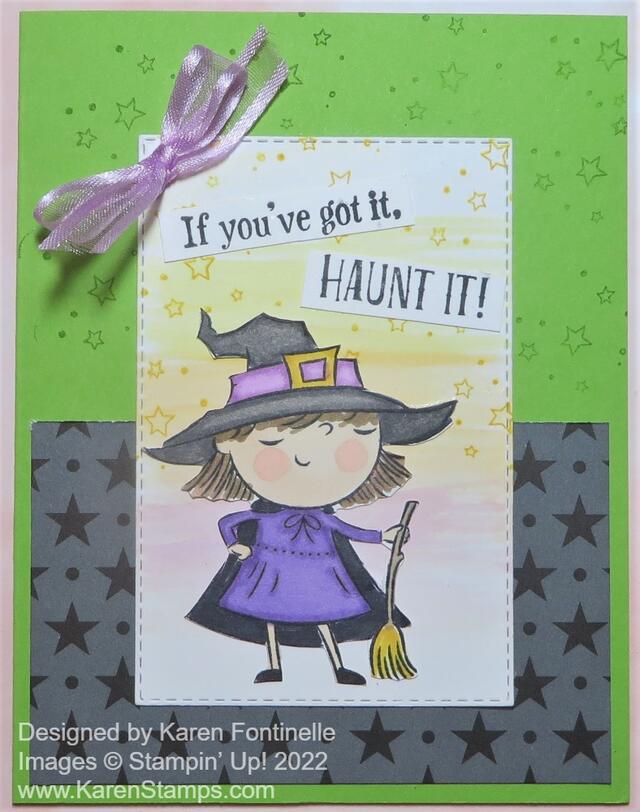
This Best Witches Haunt It Halloween Card is the first Halloween card of the season! It’s a little early, considering it is over 100 degrees these days here in Houston! I have to say some Halloweens here haven’t been all that much cooler either by October 31st! But weather aside, I wanted to try in my new Halloween stamp set, Best Witches and I was in the mood to color!

You’ll find the Best Witches Stamp Set in the July-December 2022 Mini Catalog or Holiday Catalog, as I like to call it (and type it!) on page 55. The stamp set has two cute witches, a toad, some stars, and some cute sayings! It’s just my kind of Halloween set!

To make this card, I used Granny Apple Green cardstock for the card base. Then I added a piece of Black & White Designs Designer Series Paper to the bottom half of the card. These will be fun papers to use for Halloween or any time. You can leave them black and white or you could color the white parts of the papers.

I stamped the witch in Memento Black and colored her in with Stampin’ Blends. I just chose whatever colors I wanted with no planning so just play and choose whatever colors you are in the mood for. I think I used Smoky Slate and Gray Granite on the witch’s hat, Daffodil Delight for the gold buckle, Fresh Freesia for the hat band, but Highland Heather for her dress. Her face is Ivory with a little pink blush on her cheeks, Petal Pink. Then I cut out the witch by hand with Paper Snips You wouldn’t have to but that was my original idea when I wasn’t quite sure what the background was going to be.

Stampin’ Up! says July is Watercolor Month so I thought I would do a little watercolor background on which to layer the witch. Since I was using Basic White which can’t handle very much water at all, I watercolored VERY lightly. I used the wide Water Painter to pick up just a little bit of ink in the lid of the ink pad with minimal water and just brushed across the paper very lightly. I used Daffodil Delight, Pumpkin Pie, and Gorgeous Grape. You can barely see it but, as I said, I didn’t want much water on the paper which could make the paper pill and look messy. Then I stamped with the small stars stamp in the Best Witches Stamp Set, in Daffodil Delight, on the background. I had also stamped at the top half of the Granny Apple Green with Granny Apple Green ink so that it would just be very light in the background to add a little interest and match the stars on the designer paper.

The Basic White paper was die cut with one of the Stitched Rectangle Dies. The witch is adhered flat on the paper although you could use Stampin’ Dimensionals to pop her up if you wanted to. The greeting is stamped in Memento Black and then cut apart just for fun. I think this would be a fun card to send to a girlfriend for Halloween! I love it! And for a finishing touch, I couldn’t resist adding a bow of Fresh Freesia ribbon in the corner. My other thought was to use Iridescent Rhinestone Jewels for a little sparkle but I did the ribbon for something different.

I love Halloween and I had so much fun making this card! It may barely be the middle of summer but you know time flies so if you enjoy Halloween, don’t hesitate to get an early start on fall. If you are having summer heat like we are, maybe making a fall or holiday card will cool you off! Certainly staying inside in the air-conditioning and stamping will keep you cool! I hope this Best Witches Haunt It Halloween Card will inspire you to think ahead a little bit to the fun days coming up!

SHOP THE HOLIDAY CATALOG ONLINE HERE!

Cutest Ghosts Halloween Trick-or-Treat Card

Cutest Ghosts Halloween Trick-or-Treat Card

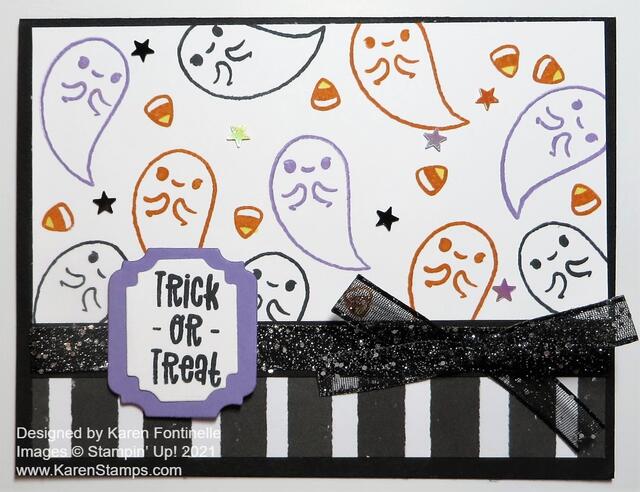
The ghosts are really flocking around to get ready for Halloween on this Cutest Ghosts Halloween Trick-or-Treat Card! They look pretty friendly to me, though! I just love this stamp set, especially the cute little ghosts and the stamped eyes and arms! It’s really fun to play with making Halloween cards and projects.

I’ve done some random stamping before using only the black Memento ink, but on this card, I thought I would try using different colors. These cute ghosts and other Halloween images are in the Cutest Halloween Stamp Set. I still used Memento black ink, but I also used Pumpkin Pie and Highland Heather. I just stamped on Basic White, a smaller piece 5 1/4″ x 3″. At the bottom of the card front is a black and white striped pattern in the Cute Halloween 6″ x 6″ Designer Series Paper cut at about 5 1/4″ x 1 1/2″. I overlapped the stamped ghost piece over the striped piece. To cover the seam and help the ribbon show up better, I cut a Basic Black cardstock strip 1/2″ x 5 1/4″. Using my Grid Paper (which I can’t stamp without!), I lined up the papers so the two papers together would only measure 4 1/4″ and adhered those together carefully. Then I adhered the black strip over the seam. And then I added the Black 3/8″ Glittered Organdy Ribbon. Love this ribbon! It’s so pretty! I might not have added the bow, but as it happened, I had it tied already from another occasion when I didn’t use it and it just happened to be with the spool of ribbon. So I went ahead and used it! I adhered the bow with two Mini Glue Dots.

The greeting is a stamp in the Cutest Halloween Stamp Set. I stamped it on Basic White and die cut with a small die in the Ornate Frames Dies. The Highland Heather layer is a great matching layering die in the set. It’s always nice when there are dies you can layer in the same set!

For a little bling, I added the colored stars in the Cute Stars Adhesive-Backed Sequins. Almost forgot, I had also stamped the individual candy corn stamp in between the ghosts! I colored in the bottom tip with a Daffodil Delight Stampin’ Blend Marker. Maybe it should have been the top portion! Isn’t that a controversy about which end is which color on candy corn?? Anyway, that little candy corn was a fun thing to fill in the space in between the ghosts.

Here is another card where I stamped the ghosts only in black ink. I love this card, too, though!

Halloween is in less than a week! If you are mailing cards, get them in the mail today or tomorrow for sure! If you need other Halloween ideas, select the Halloween category on my blog in the right sidebar under Categories.

SHOP STAMPIN’ UP! ONLINE HERE!

Rainbow Glimmer Halloween Card

Rainbow Glimmer Halloween Card

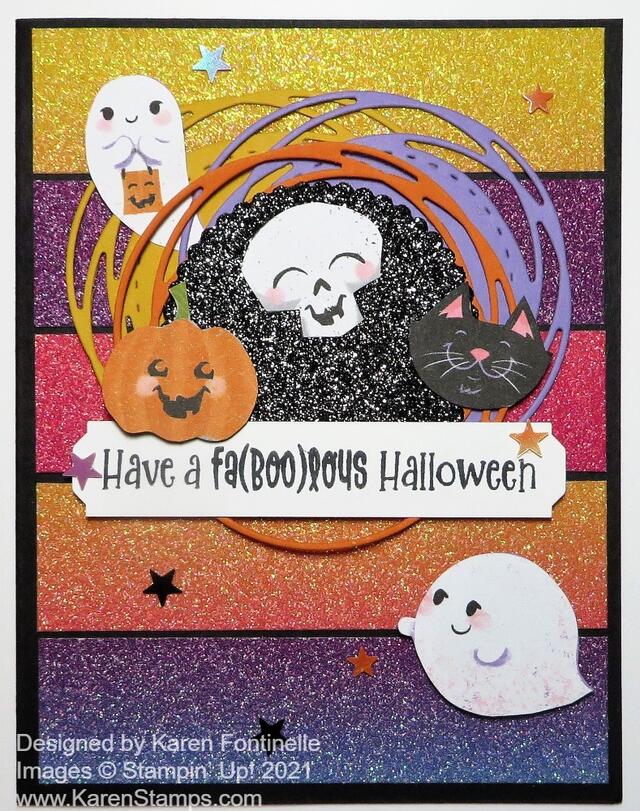
I can easily promise you I had no idea this Rainbow Glimmer Halloween Card would be what I would create. I don’t even remember what I thought I was going to make! I even had a Christmas stamp set out too! But I had seen a card made with strips of this beautiful Rainbow Glimmer Paper that was a birthday card and that’s where the original idea came from to use these strips. I thought they might be perfect for a Halloween card! Other than that, I had no ideas for exactly what to do with the card! Sometimes you just have to work with colors, die cuts, maybe walk away and come back, and eventually, something will come together for you.

The card has a Basic Black card base. The strips of Rainbow Glimmer Paper are cut 1″ x 4″ with just a tiny space in between each strip. You could also have them all touching with no space. I actually cut them not just in consecutive strips or the colors might be nearly the same, which is okay if that is what you want. So I had to cut into the areas of the paper that had the colors of strips that I wanted. It might kill you to cut into a lot of different parts of the paper rather than conserve it, but hey, it’s just paper and we can buy more! Use it!!

I wanted to use the Black Glitter Paper as the center with the Halloween characters adhered to it, but I played around with the background layer and different colors. I settled on the Pumpkin Pie cardstock die cut with the circle die in the Painted Labels Dies. This looked fine, but as I worked with it, I thought it needed another layer or “something”….a little more pizzazz. I cut out another circle from Highland Heather cardstock and that looked good but of course was mostly covered up by the Pumpkin Pie circle! I tried staggering it underneath and that was good but I felt it needed another one to balance it out. So I tried Crushed Curry and once I got the three circles placed just right I was satisfied!

I cut out the ghosts, skeleton, black cat, and pumpkin from the Cute Halloween 6″ x 6″ Designer Series Paper. I love those little characters! I could have stamped them as well with the Cutest Halloween Stamp Set and used the coordinating punch, the Halloween Punch (which is currently unavailable as I write this).

The greeting is from the Cutest Halloween Stamp Set. I stamped it in Memento Ink and trimmed the ends with the Lovely Labels Pick a Punch. I was considering putting it down lower on the card, but then thought it might work better going across those circles. I liked that and then adhered the Halloween characters around where I liked them. And for a little more bling, I had to add some Cute Stars Adhesive Backed Sequins.

The card may be a little crazy, but it’s for Halloween so that’s good! If you don’t have the Rainbow Glimmer Paper, you can just use different colors of cardstock strips. Just play and you will come up with some great ideas. Use this Rainbow Glimmer Halloween Card for inspiration!

SHOP STAMPIN’ UP! ONLINE HERE!

Halloween Ghosts Boo Card

Halloween Ghosts Boo Card

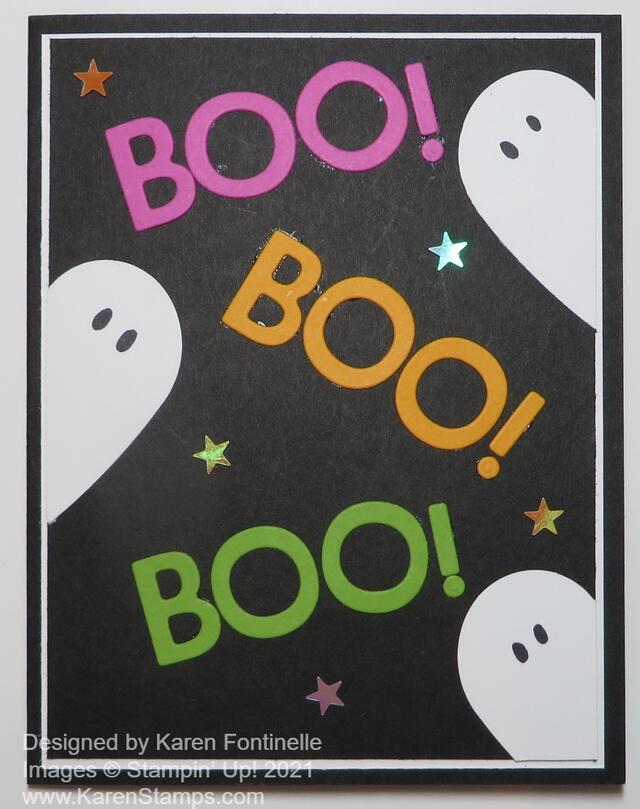
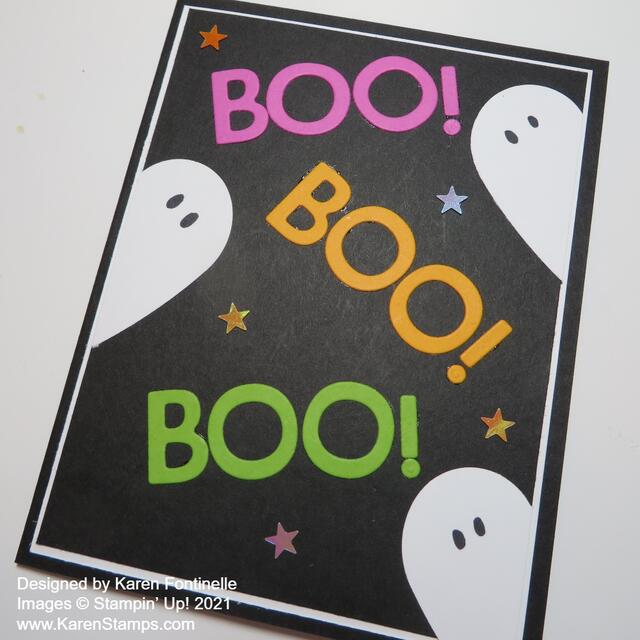
It’s time to make some fun Halloween cards like this Halloween Ghosts Boo Card! While I can’t believe it is October already, the time is here to enjoy the preparations for all the upcoming holidays, including fall and Halloween! Several houses have their Halloween decorations up already which I enjoy going for our walks around the neighborhood every day. I love the fun part of Halloween and hope to get more Halloween cards and treats made soon! Remember, if you are mailing Halloween cards to anyone, better send them extra early since the mail has been “slowed”.

This card has a Basic Black base with a layer of Basic White with just a thin margin. The front of the card is Basic Black so that my colorful words and ghosts would stand out. I’m not sure where I got the inspiration for this card, maybe from myself when I made THIS CARD. I loved how the “BOO” turned out on that card and maybe that’s what made me think of the idea for this card!

The words are spelled out with the cute letters die cut with the Playful Alphabet Dies. This is a die set I haven’t used very much but I should! It’s really very useful and different to use on cards and projects. The font of the letters is just fun, I think. I used some bright colors to stand out against the black, like Granny Apple Green, Mango Melody, and Magenta Madness. There are other colors you can use that work just as well. Just experiment and see which colors you like the best! There is an exclamation point in that die set as well and I think it goes well with these words.

The ghosts have a little story, which you may have heard before and will likely hear again! Just before I signed up to be a Demonstrator, I was visiting my friend in St. Louis and went with her to her team meeting. There were lots of displays of cards, of course, and one had ghosts like on this card. Do you know how I made them? They are hearts cut in half! I used the plain heart punch in the Heart Punch Pack but you could use any punches or heart dies that you have. Then just cut the heart in half from the bottom point up! When I saw that at this meeting, I was completely taken by that creative idea! Then you can adhere them to the sides of the card as if they are peeking in! I just drew on the black eyes with a black marker. You could punch tiny circles or use googlie eyes! So fun!

As a finishing touch, I added some Cute Stars Adhesive-Backed Sequins. I wish they were in more colors, but these worked okay. I love it when these embellishments come with adhesive on the back rather than using a tiny drop of glue!

Halloween Ghosts Boo Card angle

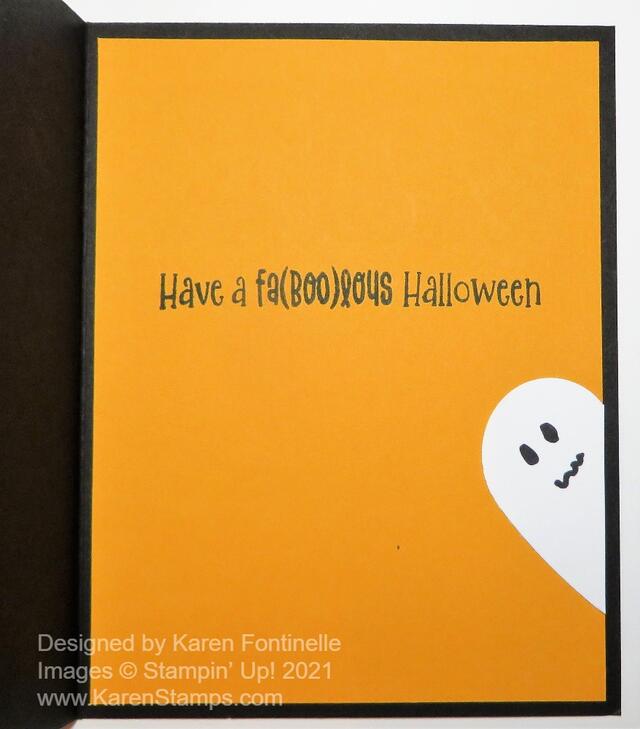
Since the card base is Basic Black, unless you are going to use white embossing for a message inside or a white gel pen, you need to add a layer of a light color, usually Basic White, to the inside of the card. This time I thought I would use a different color since it’s a Halloween card after all. I used the same Mango Melody I used for one of the words. The greeting is stamped from the Cutest Halloween Stamp Set. And since I had an extra half of a heart, I made a ghost peeking around the corner on the inside of the card as well!

Halloween Ghosts Boo Card Inside

This is one of those cards I REALLY enjoyed making and REALLY like how it turned out if I do say so myself! LOL! Actually, you could make this as just a card front and maybe put it in a little frame and use it for a home decoration! Those tiered trays are all the rage on Instagram with people putting an abundance of small decorations on them for each holiday! You could make your own decoration with a card like this! I might try that myself now that I thought of it!

This is the best time of year with fall weather, fall decorations, and anticipation of all the upcoming holidays! Get your supplies out and start stamping! If you need some supplies, just go shopping at my Stampin’ Up! Online Store HERE! And TOMORROW, October 6, new items will be added to the Stampin’ Up! Clearance Rack!! The early bird gets the worm!

Cute Halloween Happy Haunting Card

Cute Halloween Happy Haunting Card

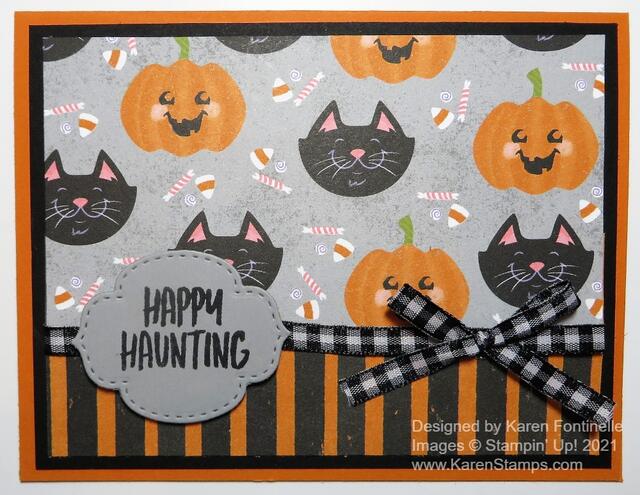
Make this easy Cute Halloween Happy Haunting Card and send to a spooky friend for Halloween! It’s a basic card design, but as usual, the designer paper makes it extra special! If you are a Halloween lover, be sure to get this paper and make some fun cards to send for Halloween!

This cute designer paper is the Cute Halloween 6″ x 6″ Designer Series Paper. I just love all the whimsical Halloween characters plus the more generic designs to pair with them. This Cute Halloween Paper is really CUTE! I could have used just the piece of paper with the black cats and pumpkins, but then the black and orange striped paper I knew would look so cute with it, too!

The card base is Pumpkin Pie with a layer of Basic Black under the designer paper. I cut the designer paper with the cats and pumpkins at 5″ x 3″ and the striped piece at 5″ x 2″. This way there was room for the two papers to overlap so I could glue them together before adding the ribbon. If you cut them exactly to the space, then you likely should glue the designer papers to another piece of cardstock the same total side so you can tie a ribbon around the seam.

Look at your designer paper with designs like this one carefully before you cut. Look at the images on the paper and see how you can maximize those and maybe not cut through too many of them. For example, instead of cutting off 1/4″ on one side and really cutting into an image you like, maybe you can cut 1/8″ off each side instead of 1/4″ of one side. That might help you preserve more of the images on the paper. Just look and see how you can place your cuts to get the best images on your paper where you want them! Maybe cut a piece off the top of the designer paper before you cut anything else to position the images on the paper.

I used the Black & White Gingham Ribbon to tie around the seam in between the two papers. I love this ribbon! I tied the bow separately and adhered it with Mini Glue Dots.

The greeting is found in the Banner Year Stamp Set. I looked at several greetings in a couple different sets and decided on this one for size and appropriateness. I stamped this in Memento Black ink on Smokey Slate Cardstock. It is die cut with one in the Stitched So Sweetly Dies. I tried layering this greeting on various colors but decided it was fine just by itself.

I love fun and whimsical Halloween things and this Cute Halloween Paper is perfect for me! Put it on your next order so you can make a few Halloween cards or projects in plenty of time!

SHOP STAMPIN’ UP! ONLINE HERE!

Cute Halloween Ghost Boo Card

Cute Halloween Ghost Boo Card

My first Halloween card of the season! I love this cute pack of 6″ x 6″ paper with Halloween designs! I love the cute and whimsical Halloween styles, not the scary, dark ones. I’m hoping we can have normal trick-or-treating this year because I love handing out candy to the little ones, especially. Last year I had to block off my front door and put out a sign saying “See you next year!”

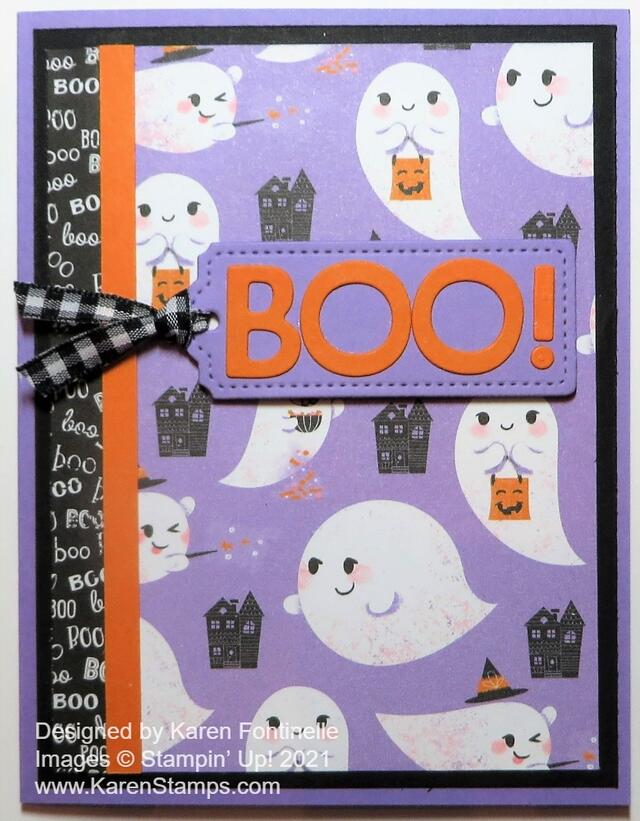
This card uses the Cute Halloween Designer Series Paper which is the 6″ x 6″ size. I just picked out the top sheet in the pack with these cute flying ghosts with their trick-or-treat bags! Isn’t that cute??!!! When I turned the paper over, I saw the design was the tiny printed “Boos”. I just had to use that on the front of the card along with the ghosts! That section started out being wider but I didn’t want to cover up much of the ghost paper.

The card base is Highland Heather with a layer of Basic Black. I played around with those two colors and Pumpkin Pie to see which ones I wanted to use and in which order. I think any other combination would also look good. I ended up with a very thin strip of the Boo paper on the left side of the card. To cover the seam and to add another color, I cut a very thin strip of Pumpkin Pie cardstock in between the two designs.

For a greeting, I got the idea to cut out the letters to spell “Boo” with the Playful Alphabet Dies. I haven’t used these dies much, but I love how they turned out on this card! I cut the letters and exclamation point out of Pumpkin Pie cardstock and layered them on one of the Tailor Made Tags Dies. You would think I shouldn’t use Highland Heather as a color for the tag because it blends into the background color of the designer paper too much, but I kind of liked that because it helped the letters stand out without detracting too much from the ghosts. I popped up the tag on Stampin’ Dimensionals® and tied on a piece of the Black & White 1/4″ Gingham Ribbon.

Sometimes you make a card and it’s just fine and you like it, and sometimes you make a card and LOVE how it turned out! That is how I feel about this Cute Halloween Ghost Boo Card and I hope it will inspire you to make some fun Halloween cards with this cute Cute Halloween paper!

SHOP STAMPIN’ UP! ONLINE HERE!

Trick or Treat Card For Halloween

Trick or Treat Card For Halloween

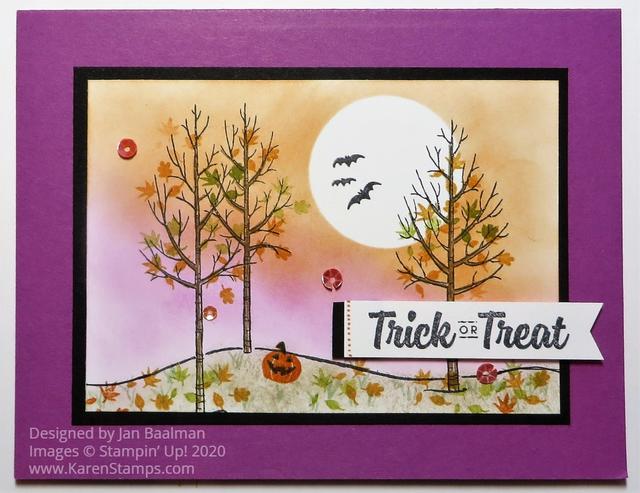
This Trick or Treat Card For Halloween, as I named it, from my friend I think is one of the prettiest Halloween cards I have ever gotten! I just love Halloween and making cards and projects so I really appreciate this one my friend made. She has such a great simple but lovely style in her cardmaking, even for Halloween as you can see!

I imagine she made a mask with a punched circle to cover up the background which would look like the moon in the sky after she lightly sponged on some color for the sky and ground and stamped the trees. After all that she could removed the circle which protected the Whisper White paper underneath. I usually use a sticky note so that it already has some temporary adhesive to hold it in place.

The trees are from the White Christmas Stamp Set (retired). The greeting is from the Spooky Cat Stamp Set (retired). You can see what a cute little scene she made that really could just be for fall, but with the greeting, the pumpkin, and the bats it looks like Halloween! And she added a few sequins for some bling! The thin layer of Basic Black behind the stamped piece really helps it stand out.

Halloween is only a day away so if you want to make anything else for someone today is the day to do it!

Remember the last day for the Stampin’ Up! Designer Series Paper Sale is Halloween, October 31! If you want your last shot at select papers on sale for 15% off, don’t get too caught up in Halloween and forget about the sale!

Coming Home Haunted House Halloween Card

Coming Home Haunted House Halloween Card

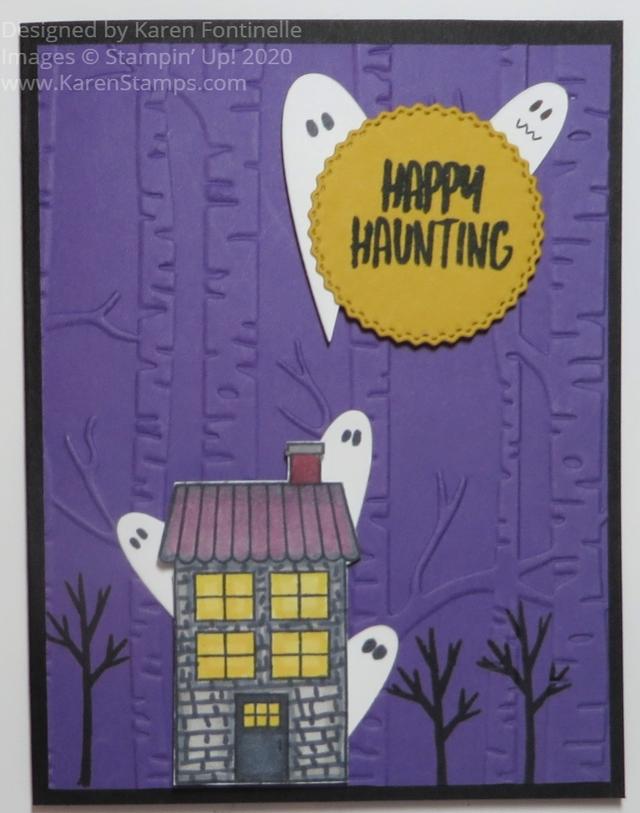
This Coming Home Haunted House Halloween Card was so fun to create! I didn’t know what it was going to be until I made it! I had seen the idea online of making Halloween houses out of what we are mostly using as Christmas houses and I thought that was so clever that I had to use that idea.

To get this card started I stamped one house in the Coming Home Stamp Set on Whisper White and then colored it in with various colors of Stampin’ Blends markers. You can use whatever colors you like. I wanted my house to look haunted so I chose some light and dark gray colors for the house with a couple different yellows for the windows. I wanted to roof to look a little spooky so I used a purple on it along with grays and black. The chimney is part Cherry Cobbler. Then to make it look even more run-down, I drew lines with the pointy end of the Basic Black Blends marker to resemble shingles or bricks on the house. That’s not what the stamp looks like.

The card base is Basic Black with a layer of Gorgeous Grape. As I looked through my embossing folders, I found this Woodland Embossing Folder and used that. Originally I thought just any kind of small background folder for some texture would be fine, but when I found this one with the trees, thought it was perfect for Halloween spookiness.

After I had stamped the haunted house, I cut it out with Paper Snips and originally thought I would adhere it to a die-cut circle or rectangle to be the focal point of the card, but then I decided I could just place it at the bottom of the card and it could look like it was out in the woods. I also carefully stamped some trees in Memento Black in the Coming Home Stamp Set in between the embossed trees. I got lucky that I didn’t mess up the embossing!

The greeting is from the Banner Year Stamp Set. I have gotten a lot of use out of this stamp set even though it is one you might overlook. I like the variety of greetings and small images. I stamped it on Crushed Curry Cardstock and then used a die-cut in the Tasteful Labels Dies. I love the look of that circle die with the fancy edge. I popped that up with Stampin’ Dimensionals® and placed some ghosts behind it.

To make all my ghosts, I die cut the smallest plain hearts in the Be Mine Stitched Dies and cut them in half. You can read about why I make ghosts like that HERE in this recent post. The haunted house had to have some ghosts, too! I colored on some eyes on the ghosts with a marker.

And that’s it for my Coming Home Haunted House Halloween Card which was so fun to make! Halloween is Saturday so time is running out to enjoy creating for this fun holiday!

Fun Halloween Projects From the Past!

Halloween Night Candy Bars

Halloween Decorated Candy Bars

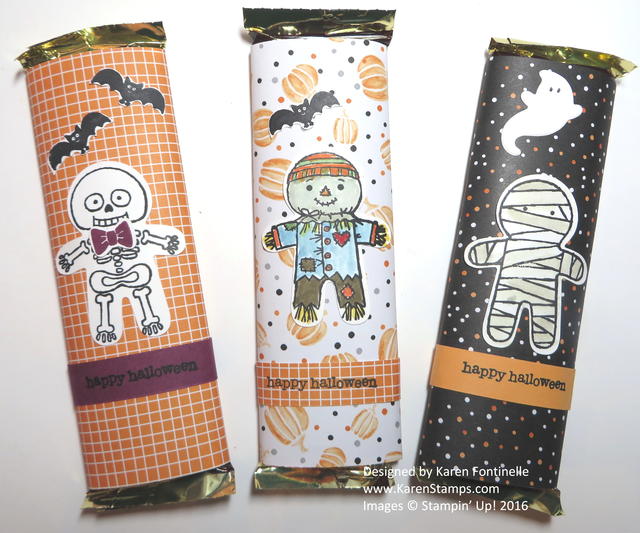
I think one fun treat project is to cover candy bars with designer paper or cardstock and then decorate. It doesn’t matter if you have Halloween paper or not, you probably have something that will work. If not, stamp some cardstock.

Mini Curvy Keepsake Halloween Boxes

Mini Curvy Keepsake Halloween Character Boxes

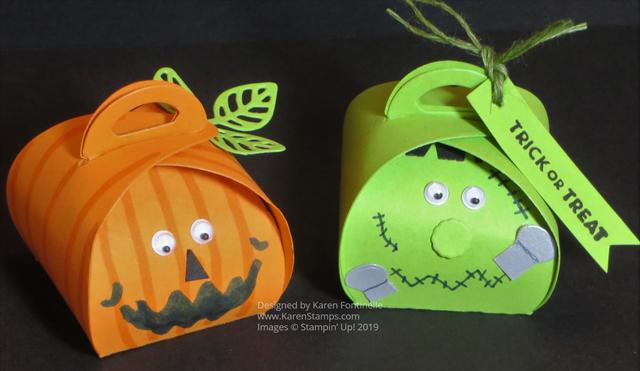
It’s so fun to use the Mini Curvy Keepsakes Box Die to make all kinds of treat box characters, like this Jack-o-Lantern and Frankenstein. You’ll find all kinds of examples on the internet for ideas!

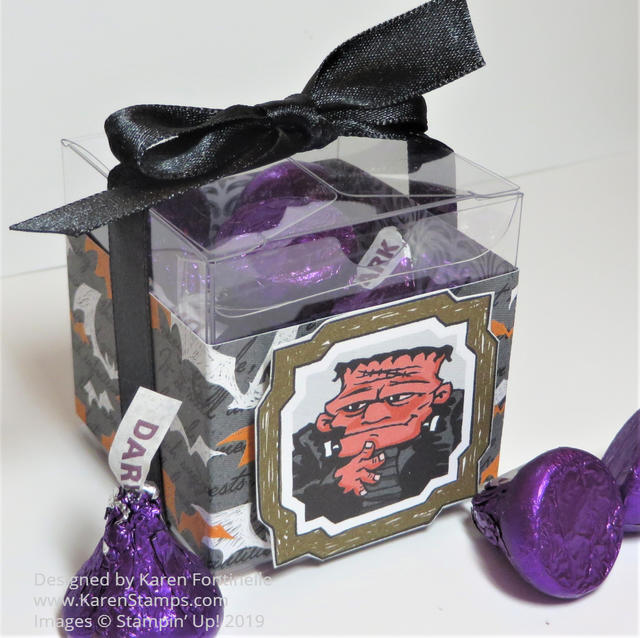
Monster Bash Halloween Clear Tiny Treat Box

Monster Bash Halloween Clear Tiny Treat Box

I continue to say having these Clear Tiny Treat Boxes on hand makes it so easy when you want to make a little treat, gift box, or party favor. Just decorate in any number of ways, with designer paper, ribbon, stamping, whatever you like for the occasion.

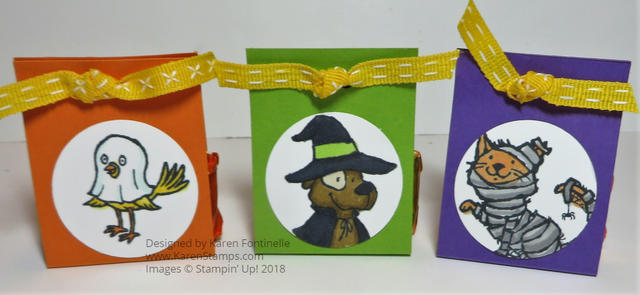
Easy Halloween Trick or Tweet Candy Treats

Easy Halloween Trick or Tweet Candy Treats

If you want to make a special, but easy, treat wrapper for Halloween, just cut a strip of cardstock and score for the bottom to fit the candy and decorate the front with a funny Halloween character or design!

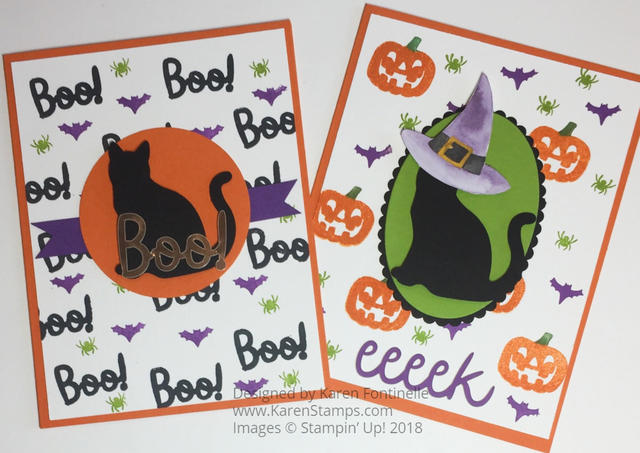
Black Cat Halloween Cards

Black Cat Halloween Cards

If you want to make Halloween cards but don’t have Halloween paper, make your own “designer paper” by stamping all over. Start with the largest stamp as you stamp randomly around on your paper, then progress through the smaller stamps you are using to fill in the space. It’s really fun! The Cat Punch makes this card so easy!

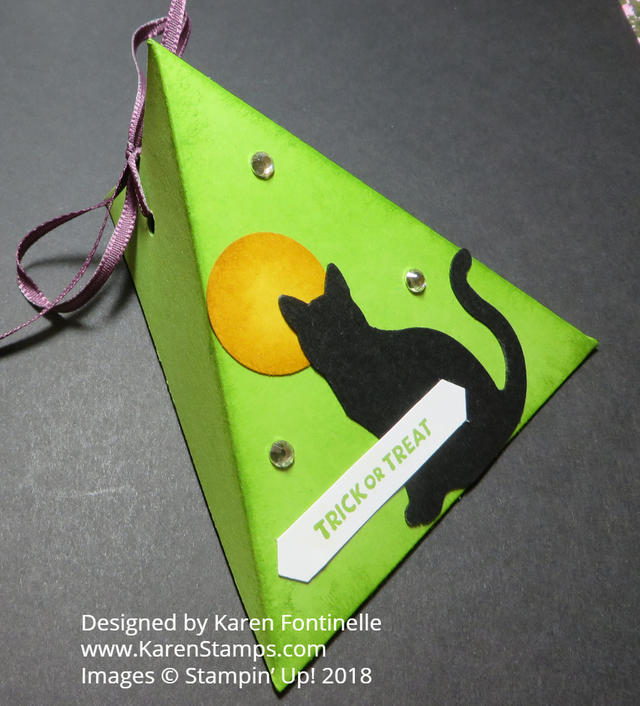
Triangle Treat Box For Halloween

Triangle Treat Box For Halloween

I’ve always thought these Triangle Treat Boxes were so easy to make and turn into a great treat box. You can vary the size easily. Just follow the directions in this post, linked in the title. Once you make one, you will have it down!

Halloween Card With Ghosts

A Quick and Easy Halloween Card With Ghosts

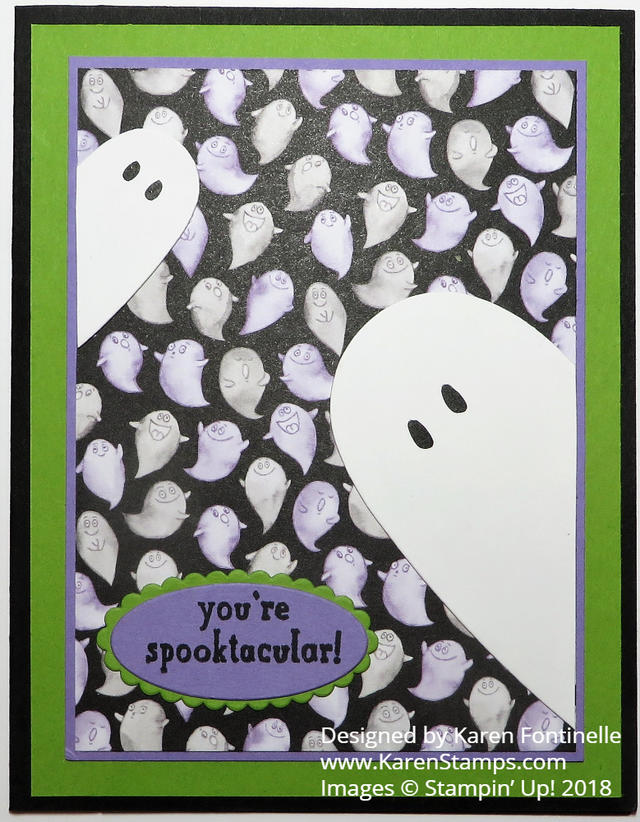
One of my favorite things of all in stamping is making ghosts out of hearts cut in half! You’ve got to try it!! Here’s an easy card with ghosts and some fun Halloween paper in the background. But you could also just use Basic Black maybe with a few “Boos” written in the background or embossed.

I hope these past Halloween ideas have gotten your creativity going if you are making some last-minute Halloween projects! I hate to see Halloween come to an end because it’s so much fun to make Halloween projects and cards!

Happy Halloween!

Paper Pumpkin Halloween Card & Tag

Paper Pumpkin Halloween Card & Tag

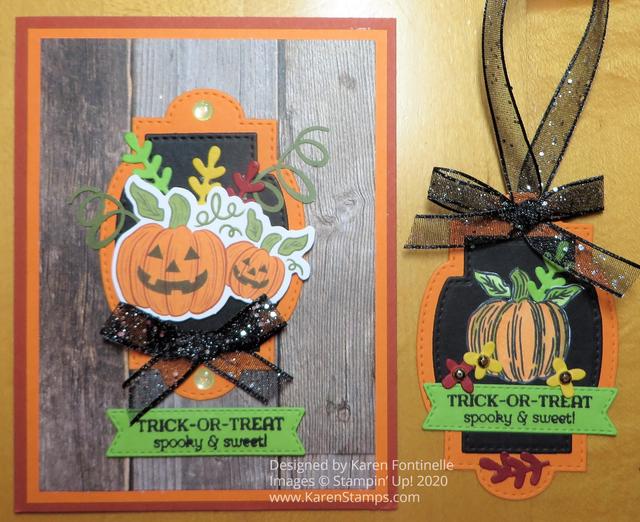
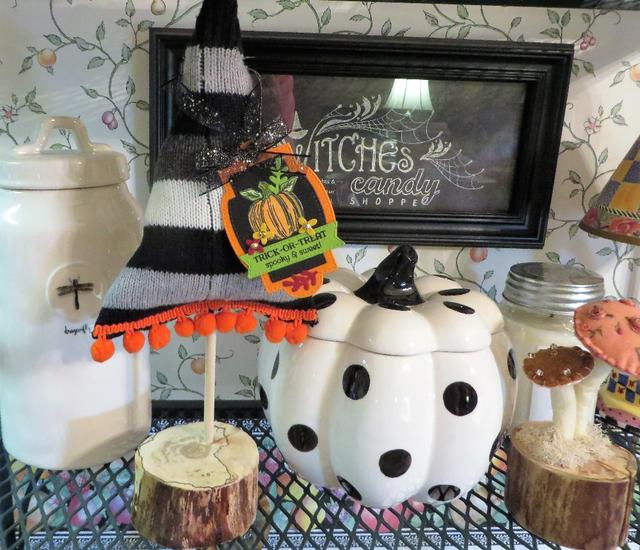
I still have pieces from my September Paper Pumpkin Kit so I used stamps and pieces to make this Paper Pumpkin Halloween Card & Tag. I actually started with the tag because I have this Halloween sweater tree I bought from someone on Instagram and I thought it would be fun to hang a tag on it for Halloween.

And after I made the tag, I thought I should copy myself and make a Halloween card as long as I had extra pieces I had die cut and everything still out on the table!

I used a lot of varied things! To start with, I used the Stitched So Sweetly Dies for the Pumpkin Pie and Basic Black pieces to make the tag and then the focal point on the card. The pumpkin on the tag is stamped with the stamp set in the Paper Pumpkin Kit and then colored with Stampin’ Blends. The greeting is from the Paper Pumpkin stamp set also and stamped on Granny Apple Green, then die cut with a die in the Tasteful Labels Dies. For some tiny little stems of leaves in various colors, I used the dies in the Forever Flourishing Dies. And I found some tiny little flowers in the Budding Blooms Dies. Sometimes you should just look through all your dies and see what you can use! It doesn’t always have to be in a coordinating set. I added a Gilded Gem on top of each flower on the tag. The ribbon on the tag is the beautiful Black 3/8″ Glittered Organdy Ribbon.

The Halloween card is very similar. The card base is Cajun Craze with a layer of Pumpkin Pie. To get the wood background, I used a pattern in the In Good Taste Designer Series Paper. This large pack of designer paper is on sale in the Stampin’ Up! Designer Series Paper Sale until October 31 so don’t miss it! Instead of the stamped pumpkin, I used one of the pumpkin diecuts in the September Paper Pumpkin Kit, as well as a couple swirly vines plus some colored stems I already die-cut like on the tag. For a couple of embellishments I used two of the Gold Glitter Enamel Dots and tied a bow with the Black Glittered Ribbon.

Here is a photo of what I did with the tag! I bought this sweater tree from @thelittlegreenbean on Instagram, also the two little embroidered mushrooms on the right. After Halloween, I could make a fall or Thanksgiving tag to hang on the tree. (If you recognize the Witches Candy Shoppe sign in the background, that was some designer paper from several years ago that was perfect for framing for home decor!

Halloween Tree With Tag

Hope you have fun stamping during the last week before Halloween and the last week of the Stampin’ Up! Designer Series Paper Sale!

Halloween Spooky Ghosts Card

Halloween Spooky Ghosts Card

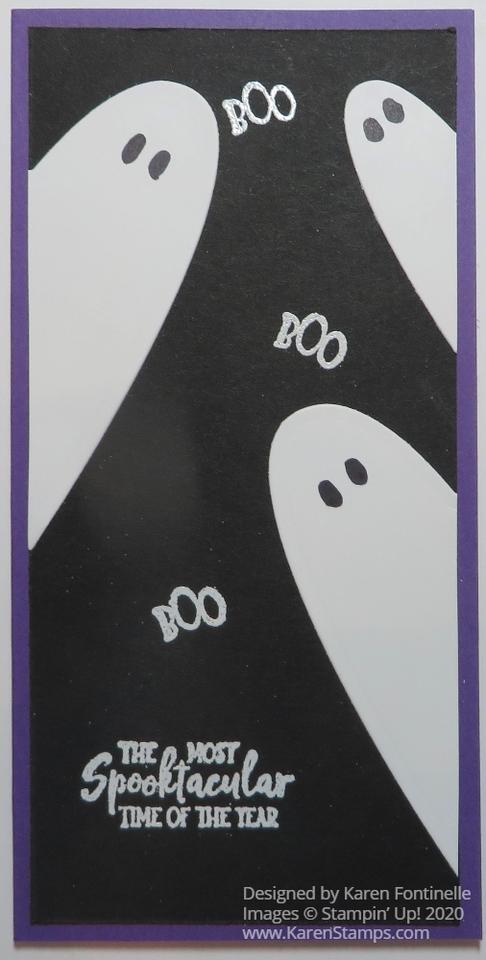
A Halloween card that I saw years ago much like this Halloween Spooky Ghosts Card is one of the things that inspired me to become a Stampin’ Up Demonstrator! I was visiting my friend who first introduced me to Stampin’ Up! and we went to what was a team meeting, I guess, or some kind of gathering. I was so taken with a creative Halloween card made like this one with a ghost on it that I fell in love with stamping and eventually signed up to be a Demonstrator.

Can you guess how I made these ghosts?? They are die-cut hearts, cut in half! Sometimes it doesn’t take too much to thrill me! That card from years ago will always be one of my favorites, maybe because I like Halloween so much, too!

In addition, I decided to make this one of those new-fangled Slim-Line cards everyone is talking about. I have made others HERE and HERE. They can be made in various sizes, so you can make one longer and/or wider than mine. Just make sure it is going to fit in an envelope!

To make this card, I started with a card base of Gorgeous Grape cut at 6″ x 6″. When you fold that square piece of cardstock in half, you have a card that is 3″ x 6″. It will fit into one of those regular, but small, envelopes you likely have at home. If you make it longer and wider, then it has to fit into one of those regular longer envelopes.

I made the layer Basic Black so the ghosts would show up really well in Whisper White! I die cut several small, medium and large heart shapes with the Be Mine Stitched Dies. You could use heart punches if you don’t have the dies or even just cut out hearts by hand. Then just cut each heart you are going to use in half with scissors, from the point at the bottom right up through the middle of the heart. Then just add some eyes with a black marker. Place the heart halves along the edge of the card as if they are peeking in.

As I was looking for a greeting, I wanted to use this one from the Ghoulish Goodies Stamp Set and decided to emboss it right on the black cardstock with white embossing powder. I also noticed the tiny little “Boo” in the stamp set and thought that would be perfect also embossed on the card. I used my retired Embossing Buddy to remove some of the static on the card before stamping with Versamark Ink. Then I dumped on White Stampin’ Embossing Powder, dumped it back off, and heated the powder with my Heat Tool. I did all the embossing before I adhered the ghosts to the edges of the card. Then I adhered the black layer on to the Gorgeous Grape card base.

So there you have one of my favorite cards for Halloween! It’s so easy and fun, even if you don’t do the heat embossing. You can stamp and adhere a greeting the regular way if you like.

Have fun making a card like this Halloween Spooky Ghosts Card!

Ghoulish Goodies Spooktacular Halloween Card

Ghoulish Goodies Spooktacular Halloween Card

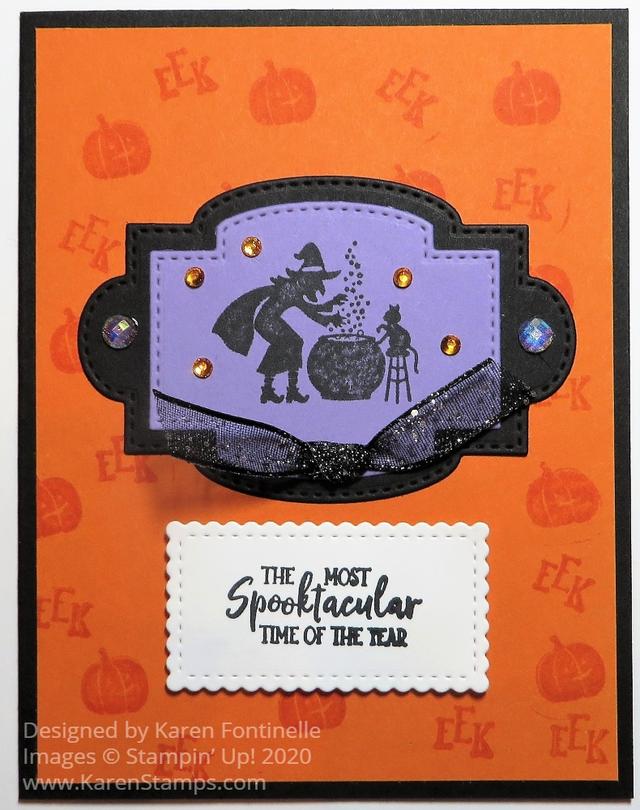
It’s October and that means it’s time to be making Halloween cards like this Ghoulish Goodies Spooktacular Halloween Card. This is one of those cards that just came about as I worked on it. Sometimes you have to know when to stop and sometimes you have to know when to keep going until you get the card you want!

The card base is Basic Black with a Pumpkin Pie Cardstock layer. I stamped the tiny little pumpkin in the Ghoulish Goodies Stamp Set randomly on the Pumpkin Pie layer with Versamark Ink. Later I also stamped the “EEK” in the stamp set to fill in some more of the spaces.

I stamped the image of the witch, the cauldron and the black cat on Highland Heather Cardstock and die cut it with a die in the Stitched So Sweetly Dies. Then I layered this piece on another die cut piece from the same die set. The greeting is also in the stamp set and the die in the same die set.

The card was coming together but still needed some jazzing up! I chose the Blue Adhesive-Backed Gems to put on each end of the black layer. Even though these say “blue” they are sparkly and iridescent so they kind of look purple and I thought went okay on this card. I also added some of the yellowish Holiday Rhinestone Basic Jewels around the witch and the black cat.

And for a final touch, I just tied a knot in a small piece of the Black Glittered Organdy Ribbon. Sometimes you just have to keep working on a card and this was one of those!

Here’s another project I made using the Ghoulish Goodies Stamp Set for a Halloween treat. It’s a fun stamp set to have for making Halloween cards but also Halloween goodies and treats.

Be sure to check out the Stampin’ Up! Designer Series Paper Sale going on during the month of October on select designer papers! Stock up or get the ones you missed before!

Ghoulish Goodies Halloween Night Card

Ghoulish Goodies Halloween Night Card

As I got ready to stamp, I decided maybe I wanted to make a Halloween card and this Ghoulish Goodies Halloween Night Card resulted! I had no idea or plan except I started out thinking I would look through my regular designer papers and see if there was something I could actually use for Halloween paper rather than “official” Halloween paper. I think sometimes we forget we can use papers that are themed in a designer paper package but really you can use that color or generic pattern for many other cards.

As I looked through my packages of designer paper, I thought maybe the Artistry Blooms Designer Series Paper, with its interesting patterns might have something. And sure enough, there were probably a couple different ones I could have used. I chose the last one I saw in the package with this multi-shaded green paper.

I chose these two images in the Ghoulish Goodies Stamp Set to stamp on Whisper White and then die cut with a large Stitched Shapes oval die. Then I colored in the background with various colors of Stampin’ Blends markers. It almost doesn’t matter what colors, just make it look spooky! I used greens, oranges, dark blue, and yellow. The only thing was I got it kind of dark around the man so I colored over him with a Black Stampin’ Blend to make him show up a little more.

For the background I die cut a frame from Mango Melody Cardstock from the Ornate Layers Dies. I had a scrap of Black Glitter Paper so I cut that to fit inside the frame for something sparkly. I also added a layer of Gorgeous Grape under the green designer paper.

For a greeting I needed something small and noticed the small little “Eek” in the stamp set so I used that and cut with the Classic Label Punch. Then I even shortened it with my Paper Snips to fit better and added two Gold Glitter Enamel Dots.

I think it turned out pretty spooky looking just with the combination of colors! It’s not too early to start working on Halloween cards! Have fun!