Tag Archives: Meadow Dies

Quick and Easy Awash in Beauty Card

Quick and Easy Awash in Beauty Card

When we talk about making an easy card, this Quick and Easy Awash in Beauty Card fills the bill! All you REALLY need is the designer paper and a card base!

The card base is Polished Pink although there are so many colors in the paper you could choose from many other colors. The Awash In Beauty Designer Series Paper is new in the Stampin’ Up! Annual 2022-2023 Catalog and is beautiful!

Awash in Beauty Designer Series Paper Package

As you can see, every paper is pretty enough to make a beautiful card! But one pattern, in particular, is interesting how Stampin’ Up! designed it. It is easy to cut up and make into cards.

Awash in Beauty Split paper

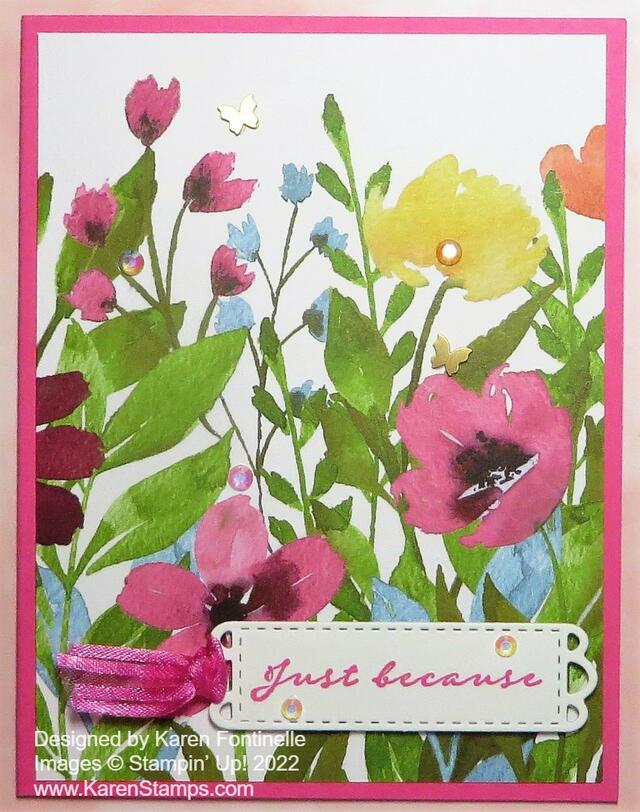
You could do lots of different things with this paper, depending on the size of the card you are making. I’ll describe how it works for this card. Since the paper is 12″ x 12″, you can cut it into three strips 4″ wide vertically to have the flowers on the top and bottom and white space in the middle. You can cut the strip in half at 6″ if you want but of course, that will be too long for a card. It needs to be cut at 5 1/4″ to fit on a card front. There you have a choice. If you want more white space at the top of your card then you can trim off a bit of the bottom of the flowers. If you want every bit of the floral part of the paper, then trim it 5 1/4″ from the bottom of the flower part. That’s what I did on this card so you can see how much white space you have at the top. If you wanted just a floral pattern on the left side of your card, you could cut it at whatever width lengthwise and could probably get two strips out of the one section. So you can play around with the paper to have differently designed cards!

Back to my card! I adhered the 5 1/4″ x 4″ piece of the Awash In Beauty DSP to the Polished Pink card base. For the greeting, I used a greeting in the True Beauty Stamp Set, part of the Awash In Beauty Suite. Then I cut it out with one of the Meadow Dies. I love this little label die! So pretty and almost the perfect size for a lot of greetings. I tied a piece of Polished Pink 3/8″ Open Weave Ribbon through the left side of the diecut. You could do both sides if your greeting isn’t so far to the right of the card. I popped it up on Stampin’ Dimensionals.

For a finishing touch, I added some Brushed Brass Butterflies flying among the flowers. For some sparkle, I added several Iridescent Rhinestones Basic Jewels on the greeting and the card. That’s all there is to it! That’s how you make the Quick and Easy Awash in Beauty Card with the pretty designer paper!

Using the Meadow Dies on Cards

Meadow Dies Cards

If you want an easy way to make cards that look like you put a lot of effort into, check out the Meadow Dies. The dies look like wildflowers with many different blossoms. You can use them many different ways, and the way I used them on these cards is probaby the easiest way.

These dies come in the Quiet Meadow Bundle, which includes the Quiet Meadow Stamp Set. If you look at both, you will see that while the stamp set is very pretty with very useful sentiments, the dies do not match any of the stamps.

Quiet Meadow Stamp Set

While I should be trying to convince you to buy both, if you have tons of things on your Wish List, you can do what I did and just buy the dies and use them in different ways. But if you think you might ever want the stamp set, you might as well buy them together in the Bundle and save 10%! If you get both, you can stamp on the card and add or overlay one or more of the dies for extra texture and interest.

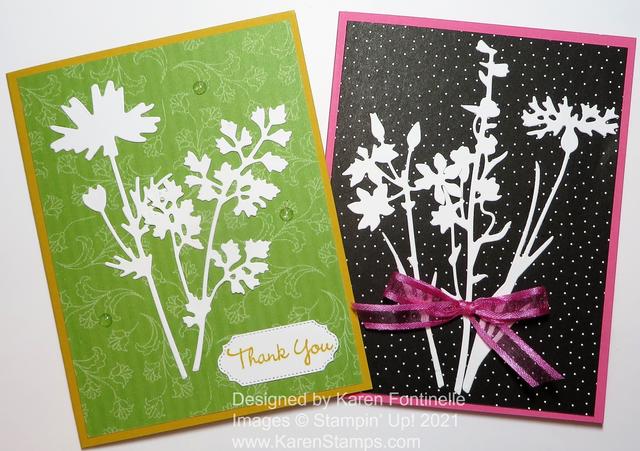
Both of my cards use the Pattern Party Designer Series Paper, available in the Stampin’ Up! Annual Catalog as a Stampin’ Reward with an order of $150 or more. I simply cut out all the wildflower die cuts out of Basic White Cardstock so I could play with all of them! After trying out several patterns of the designer paper because I needed the white wildflower silhouettes to show up well on the card front, I chose the Granny Apple Green pattern and also the black with tiny white dots pattern, just because I had to many wildflowers to use!

It would be good to remember to use the Adhesive Sheets as you cut out the wildflowers so that they already had adhesive on their skinny stems and leaves. I was able to use teeny tiny dots of Multipurpose Liquid Glue on the backs of the dies to adhere to the card, but this can get messy! Be sure to squeeze out some glue onto scrap paper to make sure you don’t get a big blob on your skinny die cut! These die-cuts would also be pretty popped up on Dimensionals if you could do it without them being on the back of the stems!

On the green card, I just used two die-cuts and added a greeting, die cut from the Ornate Frames Dies. It’s perfect. The greeting is in the Pansy Patch Stamp Set. I used Crushed Curry for the card base, a color I rarely use, but I like it on this card. For some embellishment, I used three of the Clear Epoxy Essentials which I loved because you can see through the clear and see the color underneath.

On the second card, I used Polished Pink for the card base. I used three of the wildflowers and also adhered a Polished Pink Open Weave Ribbon bow to the stems. I didn’t even add a greeting because I liked the card as it was.

I think the way you can use these dies provide a different look to our cards, using these die-cuts as silhouettes. You could also color the die-cuts and I will try that another time! Just remember or notice that the dies do not match the stamp set but you can use them together beautifully.

SHOP STAMPIN’ UP! ONLINE HERE!