Tag Archives: Pansy Petals Designer Series Paper

Pansy Petals Just a Note Card

Pansy Petals Just a Note Card

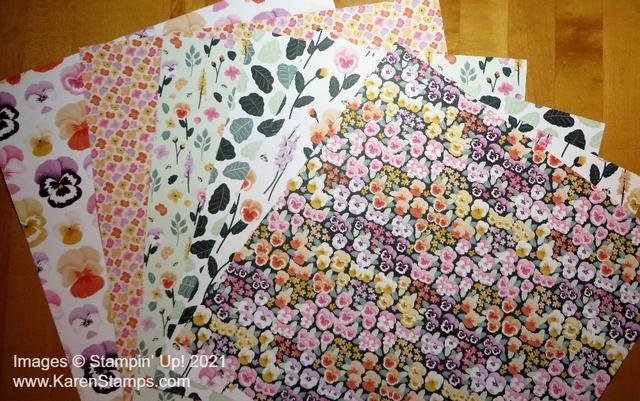
The Stampin’ Up! Designer Series Paper Sale has less than one week to go! This Pansy Petals Just a Note Card was made with the Pansy Petals Designer Series Paper, one of the nine select papers you can buy at a 15% discount, but only until August 2. Don’t miss out if you would like to stock up on some really pretty papers!

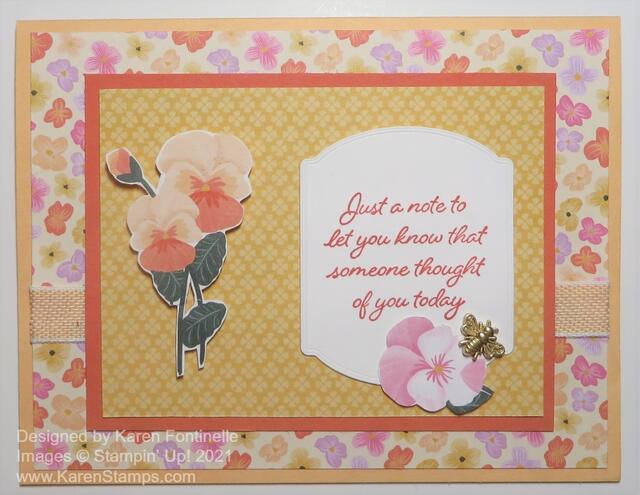
This card starts with a Pale Papaya Cardstock base with a layer of Pansy Petals Designer Series Paper. Really, in designing this card, I played around with some scraps I had in my package of paper. You don’t always have to stew over a card design before you start making a card. Just get out some designer paper, coordinating colors (I rewrite them on the back cardboard in black marker so I can read them instead of squinting to read the tiny print on the label!) and put different things together! Just play! Don’t be so serious and looking for perfection. Something will show up for you and it might surprise you! In fact, the center piece of designer paper, which I thought was mostly a scrap, turned out to be the inspiration for the card design! Before adhering this first layer of designer paper to the card base, I adhered a piece of the Pale Papaya & White 1/2″ Woven Ribbon around to the back.

For the center of the card, I had chosen this “scrap” piece of designer paper, the one with the dark background and a million tiny pansies all over. As I was about to put glue on the opposite side to adhere to the Calypso Coral Cardstock layer, I thought the Bumblebee-colored side would maybe be prettier on the front! So I just flipped over the idea I had and used the side that wasn’t going to show!

Next, I cut out a pretty pansy image on another piece of designer paper and popped it up on Stampin’ Dimensionals on the side of that center panel. The greeting is stamped from the Encircled in Friendship Stamp Set with Calypso Coral Ink and die cut with a Tasteful Labels Die. The card still needed a little something, so I found another small pansy and cut it out to adhere to the die cut greeting. And for a final touch, I added one of the Bumblebee Trinkets.

I think this card turned out well even being inspired by scraps! You never what you will come up with when you sit down to make a card, so just let the ideas flow even if it is a change you didn’t anticipate! That’s how this Pansy Petals Just a Note Card came about!

Pansy Petals Floral Hello Card

Pansy Petals Floral Hello Card

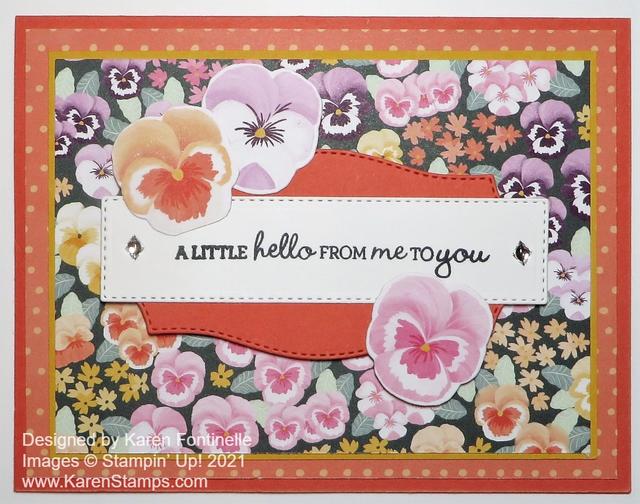
I think this Pansy Petals Floral Hello Card would count as a bright and happy card to send to someone! As I looked through the designer paper, trying to come up with an idea for a card, I couldn’t pass up this design with all the little pansies on it.

For the card base, I ultimately chose Calypso Coral Cardstock, after considering Bumblebee. For a layer, I added the “backside” of one of the pansy designs for the dotted design and then the tiny pansy floral cut even smaller than usual to show off the dotted designer paper. After a little consideration, I added a thin layer of Bumblebee under the pansies. This designer paper is called “Pansy Petals Designer Series Paper” and is in the new Stampin’ Up! Annual Catalog on page 132.

The greeting is in the Pansy Patch Stamp Set. I love a generic greeting like this one to put on a card to use for almost any reason or just to send a note. I cut it out with a die in the Ornate Layers set. I almost missed it because it’s a stitched rectangle, plain, but in the midst of all the fancy, “ornate” dies. Then it is layered across a Calypso Coral die in the ever-useful Tasteful Labels Dies. I popped that up on Stampin’ Dimensionals and then added some die-cut pansies from one of the designer papers that has a matching die. You could easily cut these pansies out by hand because they are small. I put a Dimensional under one side of them so they would be even with the greeting and a bit of adhesive on the other side that would be adhering to the greeting.

For a finishing touch, besides the cutout pansies, I added a Silver Epoxy Essential Embellishment to each end of the greeting. There are also clear ones in the same package so they are very useful for just a little touch of something when you need it!

So here is an easy card, just some layers of cardstock and designer paper, plus a greeting and some embellishments. The Pansy Petals Suite Collection has been a popular one if you want ALL the things with one ordering number or you can purchase items individually like normal. Here is a similar card I made with the same small pansies paper and also gingham for a background. You will make lots of pretty cards and projects with this collection!

SHOP STAMPIN’ UP! HERE!

Pansy Patch Card For a Special Day

Pansy Patch Card For a Special Day

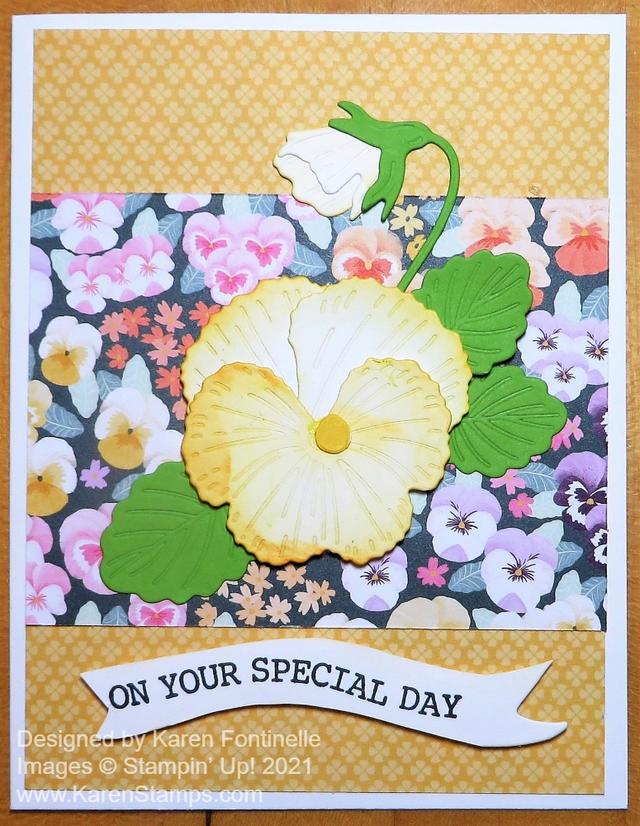
This card is an easy way to make pansies if you don’t want to bother with the smaller die-cut pieces, and this Pansy Patch Card For a Special Day is perfect for Mother’s Day! Add whatever greeting you like or need for the card and it will be perfect for almost any occasion.

To make the pansy, just use the Pansy Dies to cut out the one large and two smaller pansy petals in Basic White. You could also use light colors of cardstock and still do what I did also. I used the Blending Brush along the edges of the pansy petals to color just/mostly the edges and then assembled them. I happened to use Mango Melody, but it is very light so it almost matches the paper in the background that is another color. The leaves and flower stem for the bud are Granny Apple Green. Even the two pieces of the flower bud are Basic White with just a bit of ink blended on them. If you don’t have the new Blending Brushes (so soft!) use a piece of a Stamping Sponge that you probably already have or a Sponge Dauber.

Actually, I was undecided on how I wanted to use one of the pretty Pansy Petals Designer Paper on the card. The design I have just kind of accidentally happened! I used the Bumblebee pattern for the main layer on the card and was going to die-cut a rectangle piece out of some colored cardstock. But I also wondered about the opposite side of the paper which had all these small pansies. I laid a scrap of it down on the card just to place the die-cut pansy on top and see how it would look with it but not necessarily behind it and I liked the look as it was! The pansy still stood out well enough against the print, especially when I popped it up with Stampin’ Dimensionals.

The greeting is stamped with part of the stamp in the Hand-Drawn Blooms Stamp Set and then die-cut with just the middle portion of the Banner Blooms Die where the greeting would go. Then I just trimmed the stamped banner piece away from the rest of the bouquet die-cut and flagged the plain end.

This is actually a pretty easy card to make for Mother’s Day or to send on any day!

Don’t forget about the Paper Pumpkin special going on today and tomorrow only! Get the May Kit with a baseball theme for only $5 for new subscribers (shipping included!). A great gift to give a mother who is a baseball fan!! Be sure to use the promo code HOMERUN0521 to get the $5 price!

Go to my personalized link HERE and use Promo Code HOMERUN0521.

Pansy Petals Happiness Card

Pansy Petals Happiness Card

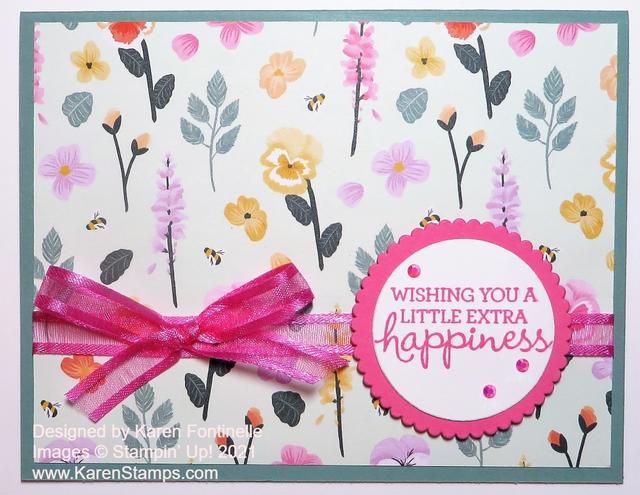
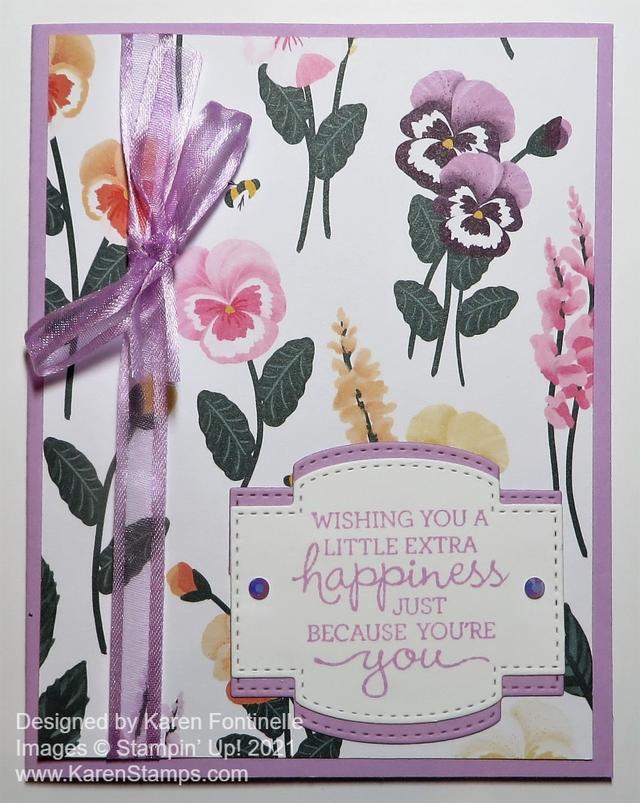
Sometimes you just want to make an easy card or just let the designer paper be the main focus as in this Pansy Petals Happiness Card. Just a card base, a layer of designer paper, a greeting and some embellishment and you’re done…yet you still made a pretty card!

The Pansy Petals Designer Series Paper has beautiful patterned paper, including some ginghams and other designs on the “back” of the florals. This particular pattern with the smaller floral images really caught my eye! The card base is Soft Succulent, one of the new In Colors. Here’s another card using a different pattern of pansies paper.

I used the Polished Pink 3/8″ Open Weave Ribbon to wrap around the front of the designer paper. The bow is tied separately and adhered with Mini Glue Dots. This ribbon is just gorgeous, I think, and comes in all the In Colors. I love it!

The greeting is stamped in Polished Pink. It is one of the greetings in the Pansy Patch Stamp Set but I omitted part of the greeting. This is when sticky notes come in handy! I carefully placed the notes over the part of the stamp I did not want to use and then stamped in the ink pad. Be sure to remove the sticky note before stamping on your cardstock! Luckily I did remember! This way I could stamp just the part of the stamp I wanted.

The greeting is die-cut with just one of the Layering Circle Dies and layered on one of the scalloped circle dies. It is popped up on Stampin’ Dimensionals over the ribbon. Of course, I had to add some Polished Pink In Color Jewels to the greeting. These are already so popular they are back-ordered! But you must get them as soon as they are back in stock!

Remember, you don’t always have to make a super-fancy card. Sometimes quick and easy cards like this Pansy Petals Happiness Card are just fine!

SHOP STAMPIN’ UP! ONLINE!

Trio of Pansy Patch Pansies Hello Card

Trio of Pansy Patch Pansies Hello Card

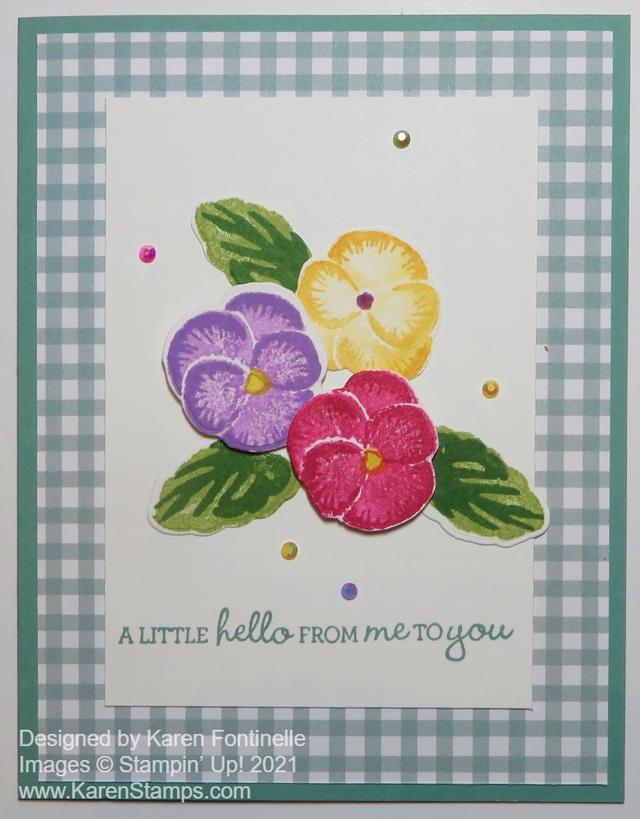
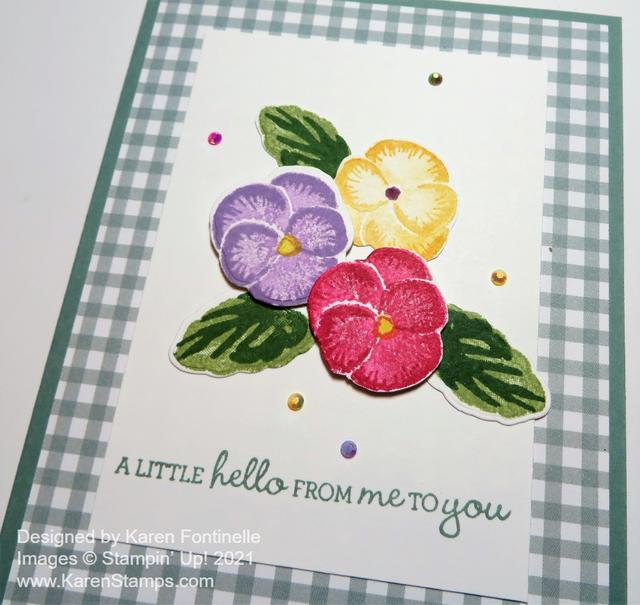
It’s a rainy day here in Houston (finally!) but this Trio of Pansy Patch Pansies Hello Card brightens up the day for sure! I will say, this whole Pansy Patch Bundle has a lot to offer and for me, a little bit of a learning curve. As I learn more tips about using the stamps and dies I will be passing them on to you. My first large stamped pansy turned out to not be so much of a pansy! I think I stamped one of the layers upside down….what should have been at the top was at the bottom! My pansy was twice as big as it was supposed to be! But these smaller ones are easier!

The card base is one of the new In Colors, Soft Succulent. It matches the gingham designer paper, which is one of the patterns in the Pansy Petals Designer Series Paper, the opposite side of the floral side. I really like these gingham patterns!

These small pansies are really just two-step stamping. There is a solid color stamp and an outline stamp. You can practice and decide on both the small and large pansy stamps which way is easier for you to stamp….to stamp the solid and then add the outline over it or vice versa. The three colors I used were Melon Mambo, Highland Heather, and Daffodil Delight. But when I stamped the solid image, I stamped off first to make it a little lighter, then stamped the outline image full-strength. The leaves are stamped with Pear Pizzazz and Garden Green. I also stamped some stems but didn’t end up using them.

After stamping the pansies, leaves, and stems I used the Pansy Dies to cut them out. I actually lost my stem die for a couple of minutes until I discovered it had slipped down between the roller and the machine platform, but fortunately I was able to pull it out and it hadn’t gotten bent or damaged! So if you can’t find a die and you think you heard a “jingle” sound as you die cut something else, be sure to check your machine before you go to much further!

This Bundle is great because you can stamp the individual pieces of the flowers and die cut those, then assemble into a flower, or you can do what I did and stamp the whole thing then use the outline die to cut out the whole stamped flower. Lots of options with this stamp set and dies! Not to mention the infinite number of color combinations you can make with your pansies.

To assemble my cards, I glued the yellow pansy directly onto the Basic White layer and popped up the other two flowers with Stampin’ Dimensionals. The leaves are glued right onto the Basic White. Since I had a lot of white space around the flowers, even after stamping the greeting from the Pansy Patch Stamp Set in Soft Succulent, I added some of the In Color Jewels, coming in the new catalog. I can’t stay out of that package making cards! I used the smallest jewels but there is an assortment of sizes in all the In Colors in the package.

I know a lot of people are looking forward to getting the Pansy Petals Suite when the new catalog goes live on May 4th! If you like pansies, or just any flowers, you will find a lot of creative opportunities with the Pansy Patch Stamp Set and Pansy Petals Designer Paper. The dies even cut out some of the designer paper images! I’d highly recommend getting all the In Color Open Weave Ribbons, too. They are beautiful!

Enjoy your New Stampin’ Up! Catalog Shopping List Weekend getting ready for Tuesday!

Gingham Pansy Petals Birthday Card

Gingham Pansy Petals Birthday Card

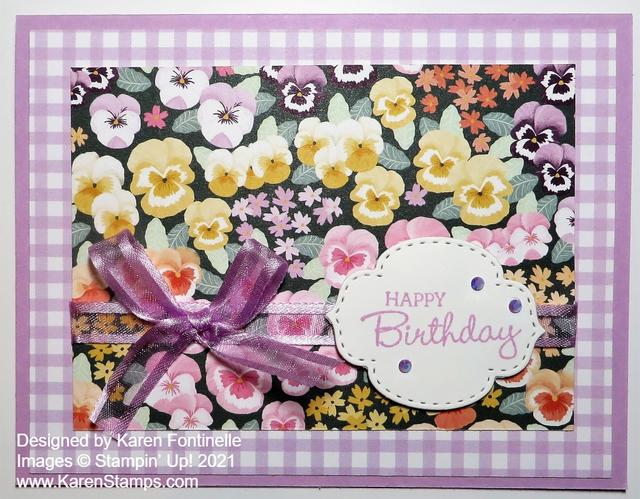
I got this Gingham Pansy Petals Birthday Card idea from a sample in the new Stampin’ Up! Catalog, coming May 4. I changed it up a little bit as often happens even when you think you are going to copy a card exactly! I’ve been seeing so many pansies around the neighborhood recently and I think of this beautiful new Pansy Petals Suite coming soon!

I love this Pansy Petals Designer Series Paper, not only for the pansies, but for the designs on the non-floral sides, like this gingham pattern. The sample in the catalog uses this pattern of the tiny pansies all close together and then uses the opposite yellow side for a layer underneath. I chose this Fresh Freesia gingham pattern on another sheet and layered it on a card base of Fresh Freesia. Fresh Freesia is one of the incoming In Colors 2021-23 so be sure to look for those!

I left a wide margin, about 1/2″ of the gingham showing, which them always makes the top layer look very small. In reality, it all fits just fine. I added a piece of the Fresh Freesia 3/8″ Open Weave Ribbon around the pansy paper and tied a bow separately and adhered it with a Mini Glue Dot.

The greeting is stamped with “Happy Birthday” in a pretty font in the Pansy Patch Stamp Set. I didn’t want too small of a die-cut but nothing too big and I think this one in the Stitched So Sweetly Dies is just right. These dies are in the current catalog and thankfully are carrying over to the new catalog! They’re very versatile.

I couldn’t resist adding some of the new In Color Jewels that are so pretty! Be sure you put a package or two of those on your first order! They are beautiful colors for a little embellishment.

The Pansy Petals Suite Collection comes with the Pansy Patch Bundle (stamp set and dies), the Pansy Petals Designer Series Paper, plus the cute little Bumblebee Trinkets. If you like this Gingham Pansy Petals Birthday Card, I hope you will take a look at the Pansy Petals Suite because it will make pretty cards for you!

SHOP STAMPIN’ UP! ONLINE HERE!

Easy Pansy Petals Designer Paper Card

Here’s an ideas for an Easy Pansy Petals Designer Paper Card, using the beautiful new paper coming in the next Stampin’ Up! Annual Catalog! You will love all the sheets of paper in the package, florals on one side and ginghams, stripes, and other designs on the other side! You can make a simple card because the paper is so pretty.

This card starts with a card base of Fresh Freesia Cardstock, one of the new In Colors in the catalog. It is lighter in person than in this photograph. This pansy print paper is in the Pansy Petals Designer Series Paper. Some of the sheets have pansies and leaves that can be die-cut right from the paper. No stamping required!

Before adhering the designer paper to the card base, I tied some of the Fresh Freesia 3/8″ Open Weave Ribbon around the paper and then tied on a bow. I like this Open Weave Ribbon in all the new In Colors so much!! It is very pretty and elegant!

The greeting is in the Pansy Patch Stamp Set. I stamped it in Fresh Freesia Ink on Basic White Cardstock and die-cut it with one of the Stitched So Sweetly Dies. In order to make a layer for the greeting without taking up more room on the card, hiding pansies, I die cut another one of these same shapes out of Fresh Freesia and then cut it in half horizontally so that I could have it layered under the greeting but showing a tiny bit at the top and bottom.

For a little bling, I added two of the Fresh Freesia In Color Jewels. These are so pretty! You will want a package or two of these to go with the new In Colors.

Here is the first card I made with this paper, using another one of the new In Colors, Evening Evergreen plus one of the little Bumblebee Trinkets!

All in all, this is an easy card. Just add the pretty Pansy Petals Designer Series Paper to the card base, add some ribbon, and a greeting! The new catalog and these new products go live on May 4th!

SHOP STAMPIN’ UP! ONLINE HERE!

Pansy Petals Thank You Card

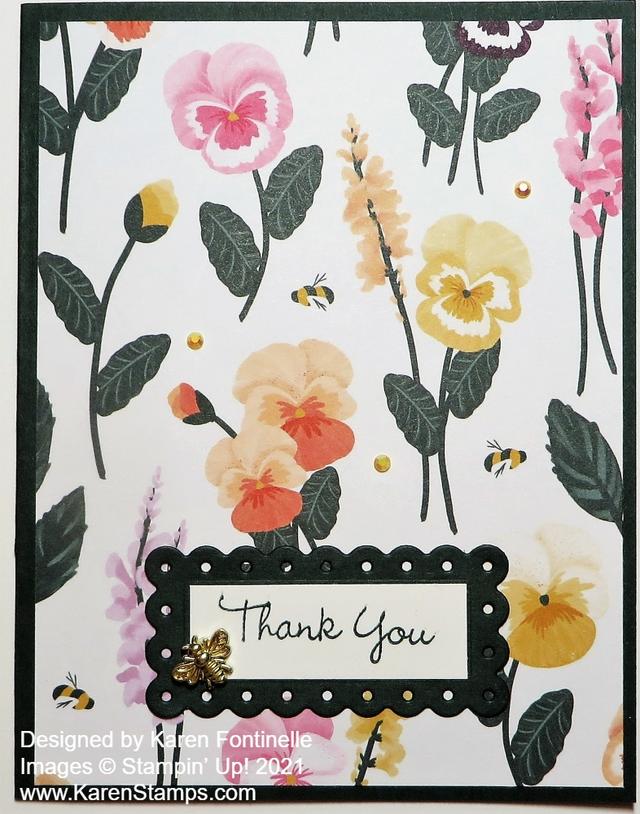
I couldn’t delay showing you this card any longer! This Pansy Petals Thank You Card is a simple card made with one of the designer papers coming soon in the new Stampin’ Up! Annual Catalog. I just wanted to make an easy card to showcase this beautiful designer paper. If you like pansies, this paper, and the whole Suite is for you!

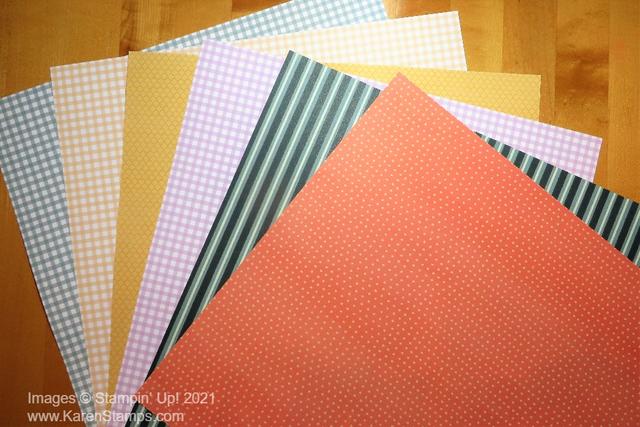
The card base is one of the new In Colors, Evening Evergreen. It’s a very dark green, different than anything we’ve had before through the years. The card front layer is from the Pansy Petals Designer Series Paper. Every paper is pretty in this package! At least one of the papers, you can use the coordinating dies to die-cut some of the printed pansies on the paper! The “other side” of the paper has gingham checks, dots, and stripes! Also, very pretty and easy to use for our cards and projects.

Pansy Petals Designer Series Paper other side

For the greeting on this card, I chose the “Thank You” in the Pansy Patch Stamp Set. It’s such a pretty font! This is stamped on Basic White Cardstock and then layered on a die-cut of Evening Evergreen Cardstock from the Scalloped Contours Dies. These are not the dies that coordinate with the Pansy Patch Stamp Set, but goes with a cute stamp set, Color & Contour.

For a little bling, I added some of the new 2021-2023 In Color Jewels in Pale Papaya scattered around on the card front. And for the finishing touch, I added a Bumblebee Trinket to the corner of the greeting! The bee trinket matches the little bees printed on the designer paper!

The new catalog begins May 4th, which will be here before we know it! In the meantime, check out the Last-Chance Product Sale and whatever is still available on the Clearance Rack, just refreshed yesterday!