Tag Archives: Poppy Moments Dies

Peaceful Poppies Gift Bag With Poppies

Peaceful Poppies Gift Bag With Poppies

As I was looking through what is left of my Peaceful Poppies Designer Series Paper, I had a full sheet of this poppy floral pattern and thought it looked so pretty and that it would make a lovely Peaceful Poppies Gift Bag With Poppies. You could use this gift bag for a small gift for Mother’s Day or a birthday or any special occasion. There will be graduations coming up even, perhaps, without graduation ceremonies this year. Making your own gift bag out of pretty Stampin’ Up! designer paper would make a very special gift presentation!

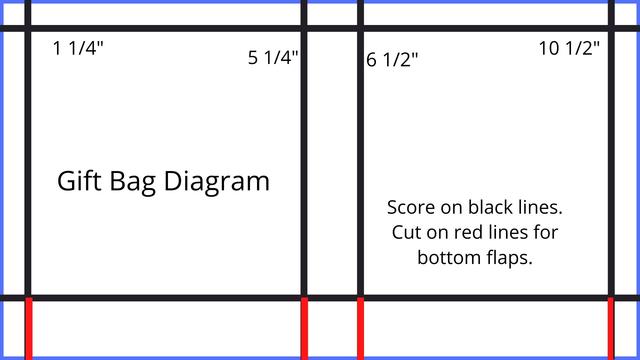
You can make this gift bag with just half a sheet of designer paper, whichever one you choose to use. I used the Peaceful Poppies Designer Series Paper to make the bag. Start with the paper cut to 6″ x 11 3/4″. Using the Paper Trimmer or the Simply Scored scoring tool, score along the long side at 1 1/4″, 5 1/4″ 6 1/2″ and 10 1/2″. Turn the paper so the short end is at the top of the board and score at 1/4″ on one side, then at 1 1/4″ on the other side. Pay attention to the pattern on the designer paper so the bag will have the design going the correct way. The narrow 1/4″ scored area will be the part you will fold over to make a smooth top edge. The other long scored 1 1/4″ area will be the flaps at the bottom of the bag.

Peaceful Poppies Gift Bag Diagram

Crease all the score lines and fold over the narrow 1/4″ piece at the top of the bag. If you prefer you could fold it to the outside if you’d like that side to show as a contrast. OR don’t score that 1/4″ line and have your bag be 1/4″ taller. Use some adhesive of choice to adhere that to the inside of the bag.

Use the Classic Label Punch to punch a handle at the top of the bag. You can squish the front and back sides together and try to center the punch to make the handle opening or you can do one side at a time.

Assemble the bag folding on all the scored lines and flaps. Then decorate for the occasion.
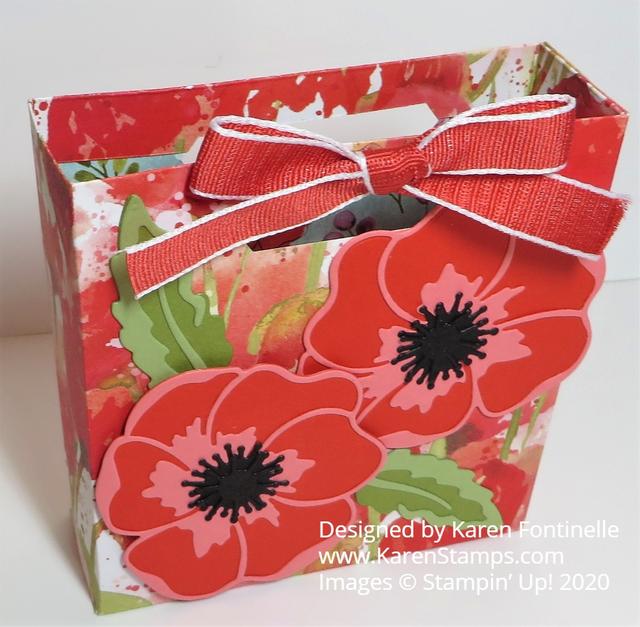
Peaceful Poppies Gift Bag Top View

To decorate my gift bag, I die cut two large poppies using Poppy Parade for the body of the flower and Flirty Flamingo for the outline, plus Basic Black for the center. The leaves are Old Olive and Pear Pizzazz. I tied a bow of Poppy Parade 1/2″ Textured Weave Ribbon separately (after trying to tie it onto the handle unsuccessfully!) and adhered it to the handle with Mini Glue Dots.

In this photo you can see the actual designer paper better from the back of the bag and how pretty it is:
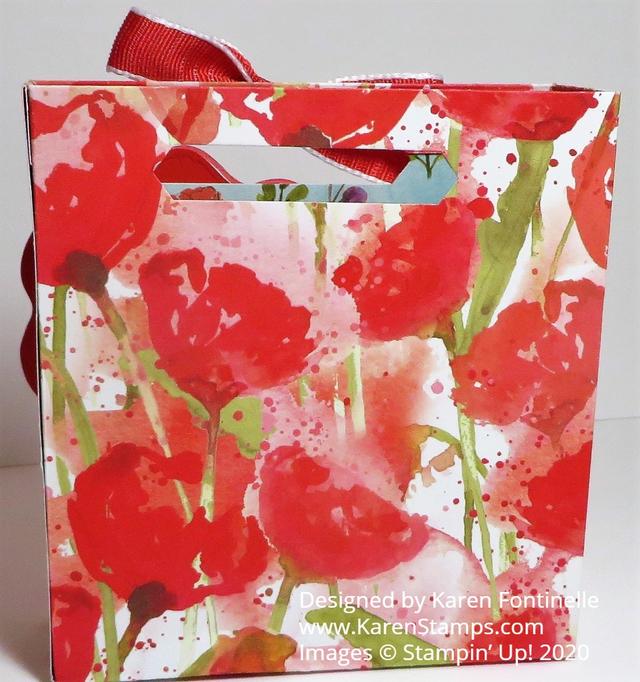
Peaceful Poppies Gift Bag Back View

While the Peaceful Poppies Designer Series Paper is going away (get it while it lasts in the Last-Chance List!), the two sets of dies that go with the Suite, the Poppy Moments Dies and Painted Labels Dies, will carry over to the new catalog!

Add some tissue paper and a gift inside, maybe make a matching gift card and you’ll have a charming gift to give someone special! Here’s a matching card idea you could even use to go with the bag! Just cut half a sheet of designer paper and make a gift bag with the basics of this Peaceful Poppies Gift Bag With Poppies.

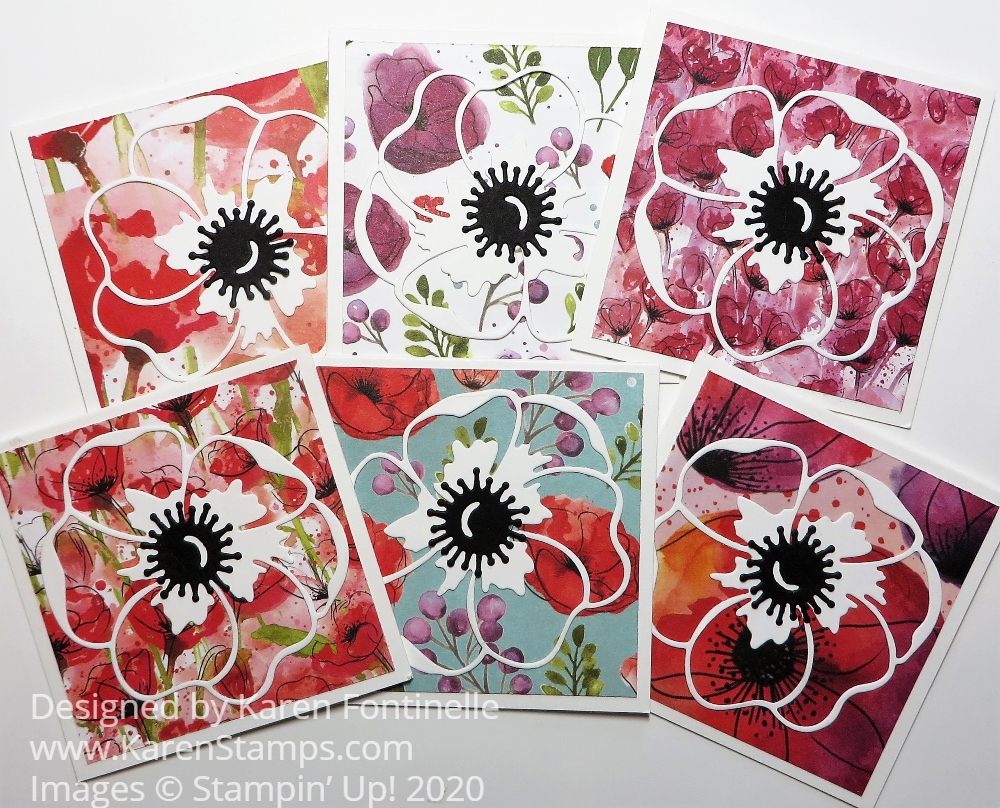
Peaceful Poppies Pizza Box 3 x 3 Notecards

Peaceful Poppies 3 x 3 Notecards

The other day I posted about decorating one of the Stampin’ Up! Mini Pizza Boxes and today I am showing you the Peaceful Poppies Pizza Box 3″ x 3″ Notecards I made to go with the box! There were really so many choices of how I could have decorated the notecards, but using a Whisper White poppy die-cut was what I ended up with.

You can make your own 3″ x 3″ cards (or you may have some old ones in your stash!) by cutting 6″ x 3″ cardstock, folded in half. You can purchase envelopes at Stampin’ Up! in the Online Store.

To make these little cards, I just cut different patterns of the Peaceful Poppies Designer Series Paper into layering pieces of 2 3/4″ x 2 3/4″. I wanted that pretty paper to show through, so I cut the large poppy die from the Poppy Moments Dies, plus the small black center die-cut for the flower. I just used tiny dots of Liquid Multipurpose Glue (I mean TINY!) to adhere the white poppies. You could even add some Peaceful Poppies Sequins if you wanted to.

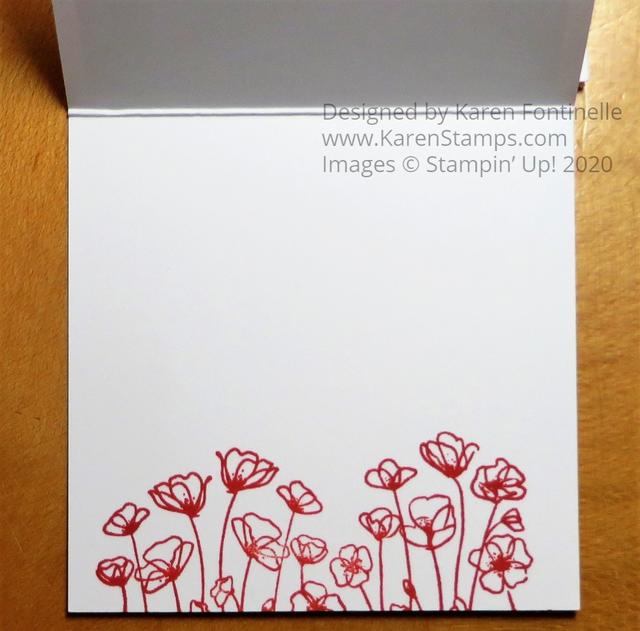
For fun, I also stamped the inside of the little notecards with a stamp in the Painted Poppies Stamp Set.

Peaceful Poppies Pizza Box Notecards Inside

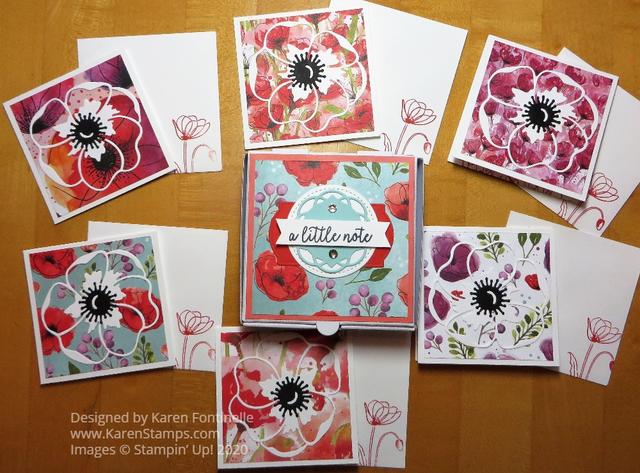
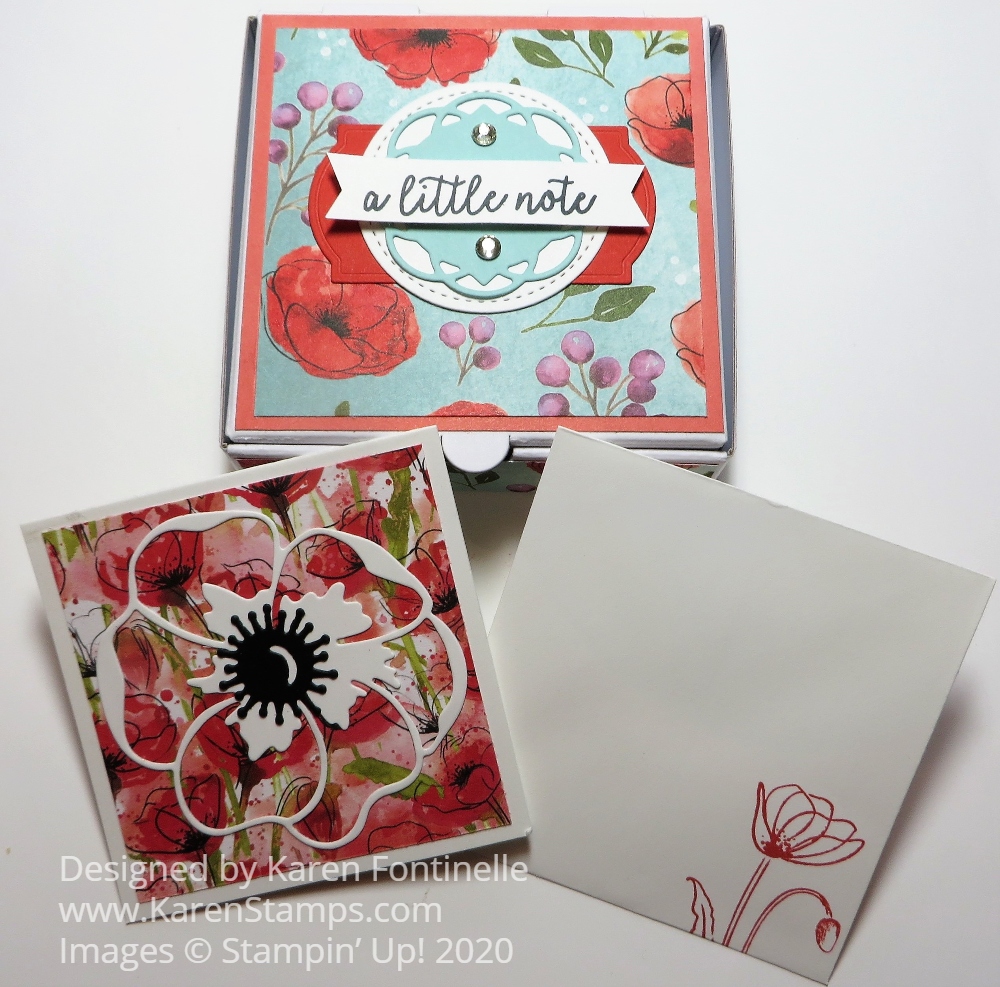
And of course the envelopes!

You could even make up a few sets of these Mini Pizza Boxes and notecards and have them on hand for gifts. Who wouldn’t love to receive this little gift?!

Peaceful Poppies Pizza Box and Notecard Set

If you want details on how I decorated the Mini Pizza Box, check out my blog post HERE from the other day. You can also purchase Gold Mini Pizza Boxes. Both kinds of boxes are food safe so you can even put a cookie or brownie or candy inside! These boxes are great to have on hand. They store flat so they don’t take up any space. All you have to do it pull one out and decorate it for whatever occasion and put something inside. Use this Peaceful Poppies Pizza Box 3 x 3 Notecards idea and use it for your inspiration!

Pressed Petals Journal With Poppies

Pressed Petals Journal With Poppies

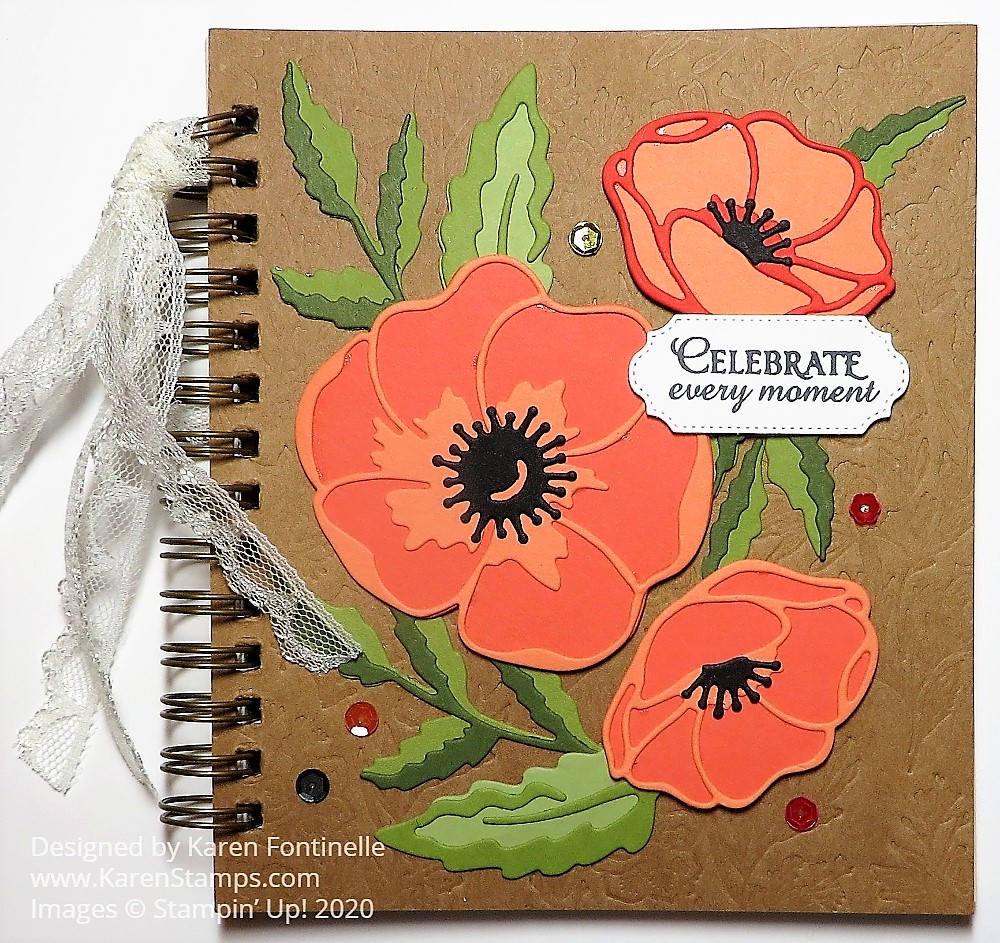
If you want a gift for someone, you might consider ordering a Pressed Petals Journal and then personalizing it by decorating the front cover, like this Pressed Petals Journal With Poppies.

If this journal looks familiar, it might be because you saw something almost like it in the Occasions Mini Catalog on page 27. I intentionally copied it as closely as I could because I really liked the look of it with the poppies. I even called Stampin’ Up! to see if I could find out what colors were used on the sample, but the lady helping me wasn’t sure and the supply list for the catalog samples listed the wrong thing. As soon as I got off the phone, I figured it out for myself.

I made the poppies with the Poppy Moments Dies. They cut out one solid background flower, then the detailed outline overlay to make it look like a poppy, and then the black flower center. The mystery color I had a difficult time trying to identify was Grapefruit Grove for the overlay, one of the In Colors! The flower color underneath is Calypso Coral (if I remember correctly). Of course, you can use any color combinations you like. The smaller flower is Grapefruit Grove for the base and a bright color for the overlay (maybe Poppy Parade). I’ve already sent this as a gift! All the leaf die-cuts used about three different shades of green.

For the sentiment, I needed something rather small. I decided on the words in the Honey Bee Stamp Set. The phrase is stamped on Whisper White and die cut with one of the Ornate Frames Dies. You’ll still find these dies under Holiday Favorites.

The catalog sample of this journal uses a different ribbon on the coils, but I used the Very Vanilla 3/8″ Scalloped Lace Trim. I used two or three strands of ribbon, held them together, and tied them on to the journal binding. I tied them on like you put ribbon through a hole on a tag, whatever that is called! And of course, for a little bling, I had to add a few Peaceful Poppies Sequins.

One extra-nice thing about these Pressed Petals Journals is that the pages are decorated inside and have some prompts if you would like to use them for writing. This post shows the first journal I decorated and gave to my daughter. I used an idea for a card that I saw in the Annual Catalog to decorate the cover. You can make it as simple or fancy as you like.

Add a couple Pressed Petals Journals to your order and keep them on hand for when you need a little gift for someone.

Shop Stampin’ Up! Online!