Tag Archives: Pretty Pumpkins Stamp Set

Harvest Meadow Pretty Pumpkins Card

Harvest Meadow Pretty Pumpkins

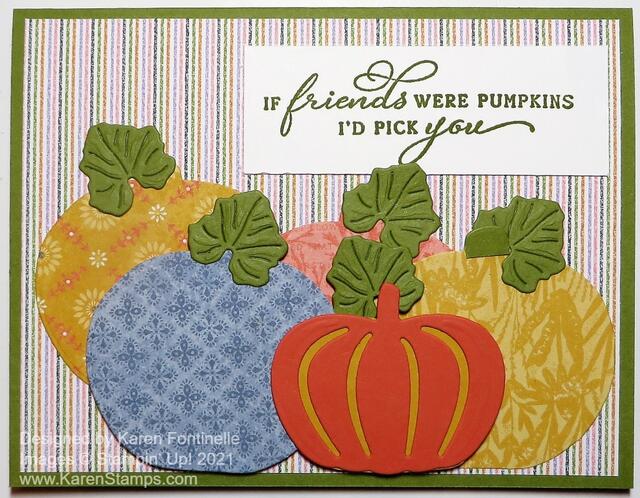
This year it seems to be trendy to have pumpkins of non-traditional colors so I thought I would try that with this Harvest Meadow Pretty Pumpkins Card. I’m not even sure how I came up with this particular idea but I pulled out the Harvest Meadow Designer Series Paper and played around with the various papers to see how these would work as pumpkins. I also was very interested in using the die in the Detailed Pumpkins Dies.

The card base is Old Olive mainly because I had already cut out the leaves in the Detailed Pumpkins Dies from an Old Olive scrap on the table while I was cutting out the pumpkins. I cut out the pumpkins and played around with their placement and combinations just on the table before I tried to put them on a card.

The background layer is the striped pattern in the Cute Halloween 6″ x 6″ Designer Series Paper. I just was looking through various papers to see if there was something I wanted to use for the background layer or if maybe I would use cardstock and emboss it in a folder to add some texture. At first, I didn’t think there would be anything in the Cute Halloween Paper but found this striped paper that was pretty subtle but had Old Olive in it, one of the colors I was already using. I think it provides some interest in the background without clashing with the prints on the pumpkins.

The pumpkins are cut out with the outline die in the Detailed Pumpkins Dies. I chose some patterns from the Harvest Meadow DSP that I thought could look okay as pumpkins, even the blue! The one pumpkin is die-cut from Calypso Coral Cardstock with the die with the slits. I wanted another color behind those slits, so I traced the die cut on a scrap of Bumblebee Cardstock and then cut it out with Paper Snips just inside the pencil lines so it wouldn’t stick out from the Calypso Coral cardstock. A couple of the pumpkins are popped up on Stampin’ Dimensionals® as are a couple of the leaves.

The greeting is in the Pretty Pumpkins Stamp Set. I stamped it in Old Olive ink on a scrap of Basic White Cardstock. I kept it simple by just leaving it as a rectangle. I didn’t want to take up too much more room on the card or take away from the pumpkins.

Here is another card on my blog that I made recently using non-traditional colors (but now trendy!) for the pumpkins. This was a fun card to make and I liked how it turned out with the different colors. When you make a fall card with pumpkins, take some artistic license and see what new colors you can use for the pumpkins! Just have fun with it! Experiment, like I did on this Harvest Meadow Pretty Pumpkins Card, until you are happy with your result!

SHOP STAMPIN’ UP! ONLINE HERE!

Pretty Pumpkins Thankful Pale Papaya Card

Pretty Pumpkins Thankful Pale Papaya Card

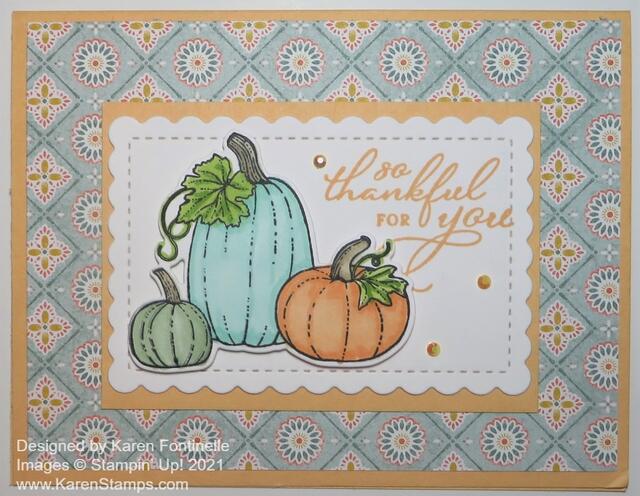
Many times you never exactly know what you are going to end up with when you begin stamping, as I didn’t with this Pretty Pumpkins Thankful Pale Payaya Card. I knew I wanted to stamp these Pretty Pumpkins and color them with these different colors. What I didn’t know was that I would end up using this designer paper as a background layer on the card and that I would love the way it looked. The colors might not be an exact match, but I just liked it regardless!

I love the Pretty Pumpkins Stamp Set and the Detailed Pumpkin Dies! You can purchase both together in the Pretty Pumpkins Bundle and save 10%! Just add another $5.00 to your order and you will earn a FREE Sale-A-Bration product with your $50.00 purchase! Sometimes I feel I don’t need the extra expense of the die set, but in this case, there are two dies, especially the one die, that will make for really fancy and pretty pumpkins that you can’t stamp!

This card has a Pale Papaya card base. The designer paper I found in the Harvest Meadow Designer Series Paper. I hadn’t opened that package yet, but I was surprised to find this particular design in there! When I tried it out on the card, I really liked the look!

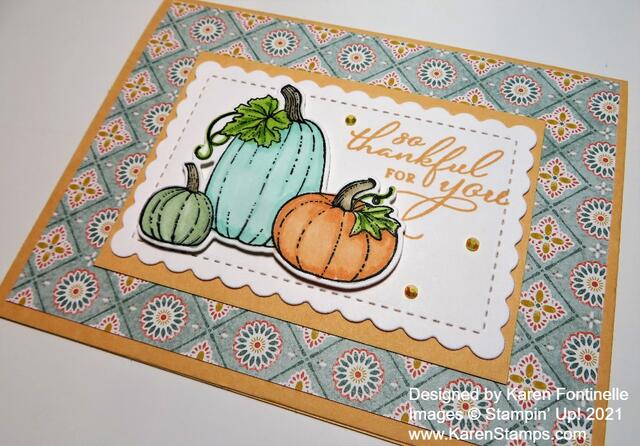
The pumpkins are stamped from the Pretty Pumpkins Stamp Set with Memento Ink and colored with Stampin’ Blends Markers. You have lots of choices of colors for your pumpkins these days, not just basic orange! I liked some of these pumpkin colors I was seeing online so I tried it out! My pumpkins are Mint Macaron, Pool Party, and Pale Papaya, using both the Light and Dark markers. The pumpkin leaves are colored with Granny Apple Green markers. Then I used the Detailed Pumpkins Die to cut out the trio.

For the background for the pumpkins, I used a scalloped rectangle die cut from the Scalloped Contours Dies. If you don’t have these dies, I highly recommend them! This die-cut is Basic White with the greeting stamped in Pale Papaya Ink It just fits on there with the pumpkins. You could stamp another color if you wanted to. This die-cut is layered on a rectangle of Pale Papaya. The pumpkins are popped up on Stampin’ Dimensionals®. For some bling, I added some In Color Jewels.

Check out THIS CARD I made previously with the Pretty Pumpkins Stamp Set and the fancy die I mentioned in the Detailed Pumpkin Dies.

This card today is actually a pretty basic card, but I think the color of the pumpkins and the designer paper in the background make it look much more than a basic designed card. This Pretty Pumpkins Bundle can be used now for fall, for Halloween, and for Thanksgiving cards and projects that you may want to make! I hope this Pretty Pumpkins Thankful Pale Payaya Card gives you some inspiration to use some different colors on a traditional card.

Pretty Pumpkins Thankful Pale Payaya Card Closeup

Pretty Pumpkins Gather Together Fall Card

Pretty Pumpkin Gather Together Fall Card

I just love the possibilities of this pumpkin stamp set and dies with my first attempt being this Pretty Pumpkins Gather Together Fall Card. On my first opportunity to order from the Stampin’ Up! Holiday Catalog I chose only holiday things and left fall and Halloween until later. I couldn’t wait to get my hands on this stamp set. As it is rightly named “Pretty Pumpkins” I think you will be able to make many pretty pumpkins on your fall cards and projects!

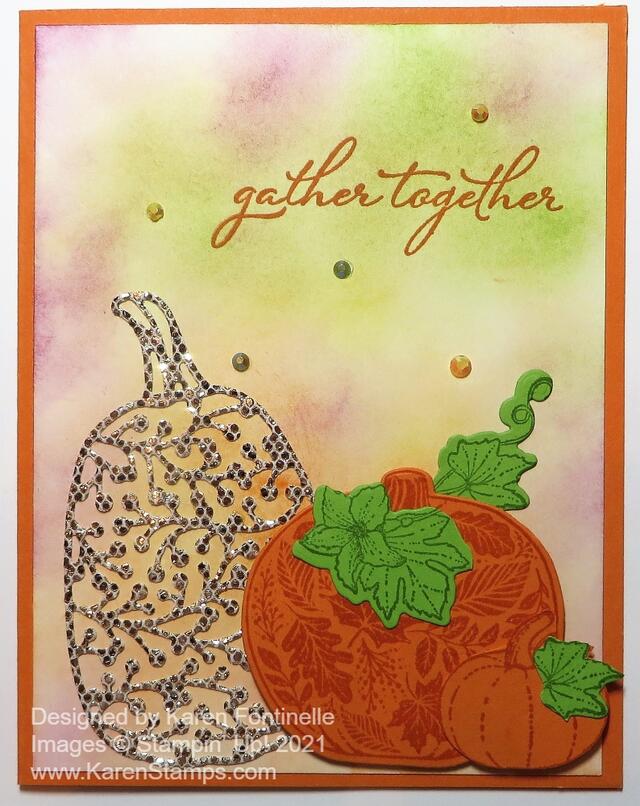
My card has a Pumpkin Pie card base and I started off planning to make it a horizontal card rather than this vertical. But I often change my mind as I go! I also started with a Basic White layer for the background. It definitely needed something and what I came up with was using my Blending Brushes to add color to the white paper! I got the idea from the bottom sample in the Holiday Catalog on page 48. The colors of ink I used were Pumpkin Pie, Crushed Curry, Granny Apple Green, and Rich Razzleberry. I only added the colors lightly, rather randomly around the white cardstock and I just LOVED those colors together! If you don’t have the Blending Brushes yet, you can use a sponge or Sponge Daubers.

As you may have guessed, the stamp set used on this card is the Pretty Pumpkins Stamp Set. If you want the Detailed Pumpkins Dies too (and yes, you do!), then purchase the Pretty Pumpkins Bundle and save 10% on the set. The sparkly pumpkin is die-cut out of the Sale-A-Bration Be Dazzling 6″ x 6″ Specialty Paper. You may think this paper looks sparkly in this photo, but I guarantee you, you will not believe how sparkly it is until you see it yourself! You can get it FREE with a $50 purchase during Sale-A-Bration through September, but don’t wait until the last minute in case they run out. Dazzling describes this paper well.

When you die-cut the Be Dazzling Paper, there is a note in the catalog that cutting glittered paper leads to dulling of the blades. I say take a chance and don’t worry too much about it. Maybe if you are going to cut the whole stack of paper with the same die, you might wear out your die. One thing I did with my pumpkin was tearing off the backing paper before die-cutting. That makes the glittered paper a little thinner and is a tip I learned a long time ago with specialty paper like this. It would also be wise to use the Adhesive Sheets on the back of the glittered paper so that the delicate design will already have adhesive on the back. Otherwise, just use teeny tiny drops of Multipurpose Liquid Glue on the back.

Now for the stamped pumpkins! I stamped the printed pumpkin with Pumpkin Pie Ink on Pumpkin Pie Cardstock. Then I used the die to cut it out. I also stamped the group of pumpkins on Pumpkin Pie but I cut them apart by hand and only used the small pumpkin. I also stamped two groups of leaves with Granny Apple Green Ink on Granny Apple Green Cardstock. After die-cutting them, I cut some of the leaves apart to make them fit how I wanted them. The greeting is stamped directly on the card in Pumpkin Pie Ink from the Pretty Pumpkins Stamp Set.

For a little bling, I also added a few 2021-23 In Color Jewels to fill in the space a little bit and add a little more sparkle! Your rhinestones and jewels don’t always have to match exactly as you can see. I doubt people pay attention to the exact color of the jewel as they do to the total look of the card with the sparkle. This Pretty Pumpkins Gather Together Fall Card has it all for fall!

SHOP STAMPIN’ UP! ONLINE HERE!