Tag Archives: Snowman Season Stamp Set

Quick & Easy Snowman Season Gift Tags

Snowman_Season_Gift_Tags

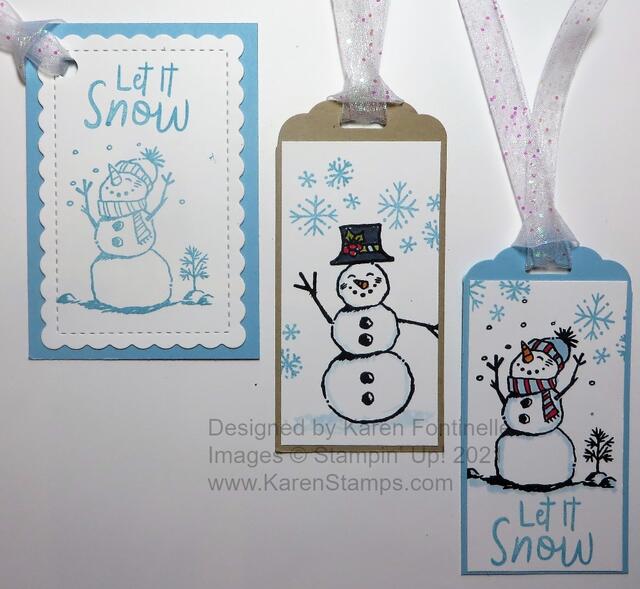
Here are some Quick & Easy Snowman Season Gift Tags that you can make here at the last minute if you run out of gift tags (as we often do!). I suddenly realized I hadn’t made anything with a snowman this season and this Snowman Season Stamp Set is so cute! It’s been around a little bit so I thought I better use it before it retires, although I hope it stays a little longer! And perhaps you already have this in your inventory so it would be easy for you to copy. You’ll find it in the Stampin’ Up! Annual Catalog on page 93. And notice the round tag on page 92, which, without seeing this page first, I was thinking of making a round tag like that one but I ran out of time to make one more!

The tag punch I used is retired but is very similar to the two tag punches Stampin’ Up! does carry right now, the Delightful Tag Topper Punch and the Fancy Tag Topper Punch. This type of punch is so handy to have so I recommend you have one kind or another in your supplies.

I just layered a piece of Basic White cardstock on the Balmy Blue and the Crumb Cake tag bases. The snowmen fit perfectly on this narrow piece. If you stamp with Memento Ink you can color in with Stampin’ Blends alcohol markers. Or you can stamp with Stazon and color in with Stampin’ Write Markers or some other coloring product, like Watercolor pencils or ink.

The first tag in the photo was the last tag I made. That’s where I was going to make the circle gift tag with dies but I already had this scalloped rectangle in the bag with Basic White cardstock so I just grabbed it and stamped on that piece, then layered it on Balmy Blue cardstock. Also, since I was short on time, I didn’t have any more time for coloring so I stamped the snowman and greeting in Balmy Blue ink and let it be monochromatic! Easy enough and looks just as good! I just punched a hole in the corner and tied on the ribbon.

The beautiful ribbon I used and went well with the snowmen I thought is the White 3/8″ Glittered Organdy Ribbon. It is a white sheer ribbon with a little glitter and glimmer in it! Really pretty!

Now that it is officially winter, I think the snowman gift tags are just perfect. For more ideas, check out the Snowman Season tags I made last year HERE.

Just a few more days until Christmas so make a few of these Quick & Easy Snowman Season Gift Tags just in case you need a few more gift tags at the last minute!

Make Snowman Gift Tags

Snowman Christmas Gift Tags

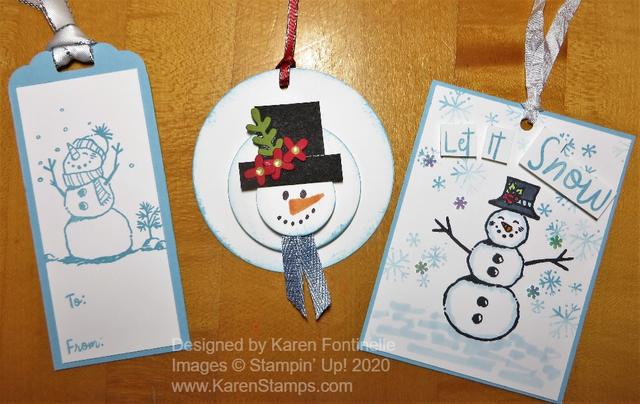
How about making some Snowman Gift Tags for your presents you may be furiously wrapping at the last minute?! Here are three ideas you can use! Everyone loves snowmen!

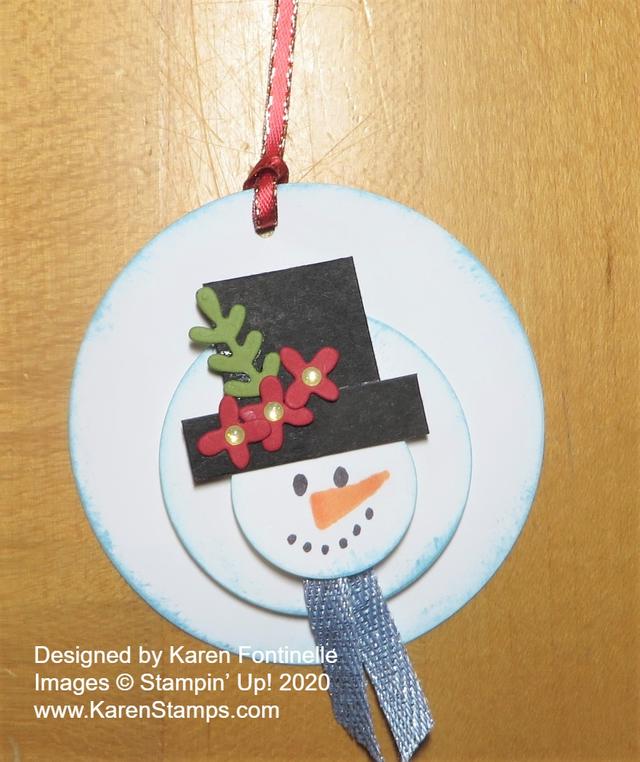
As I was wrapping my gifts, I came across the center Layered Snowman Gift Tag that I had made several years ago. Sometimes we save the tags from packages we open and I put them away until the next year. Then we can reuse them as long as we check the “To:” and “From:” on the tags so there are no mixups! I decided to update my snowman tag.

Layered Snowman Gift Tag

This is a fun tag to put on a package! Much better than those plain To & From tags you buy, 1000 in a package and have to tape on!

To make this tag, I die cut the largest circle in the Layering Circle Dies and then chose two smaller dies (about every other size) for the body and head. I sponged the edges with Balmy Blue Ink just a little and popped them up on Dimensionals. Just make a hat out of a piece of Basic Black and the brim with a piece from the Classic Label Punch with the ends cut off.

To decorate the hat I just cut a sprig from a Forever Flourishing Die and the three little Real Red flowers from a die in the Budding Blooms Dies. There are certainly a whole lot of other leaf shapes and flowers, whether die-cut, punched, or cut out by hand that you could use! I added the tiniest Gold Glitter Enamel Dots to the flower centers.

The snowman face I just drew on with markers. The ribbon is Seaside Spray Metallic Ribbon to represent the snowman’s scarf. Punch a hole in the top if you want to tie on a ribbon for a tag or even just use the snowman as a decoration on a package!

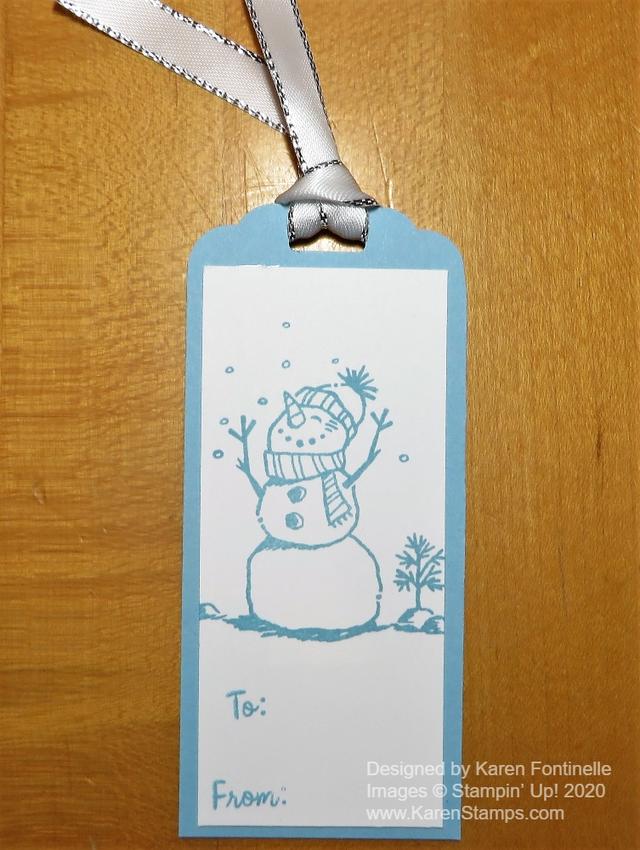
Monochromatic Snowman Gift Tag

This Snowman Season tag is really easy since it just uses one ink color, Balmy Blue. First I made a tag out of Balmy Blue Cardstock with the Scalloped Tag Topper Punch and then added a layer of Whisper White. I stamped the one snowman from Snowman Season in Balmy Blue and added the “To: From:” at the bottom. I used the Silver 3/8″ Metallic Edge Ribbon for the tie (one of my all-time favorite ribbons!).

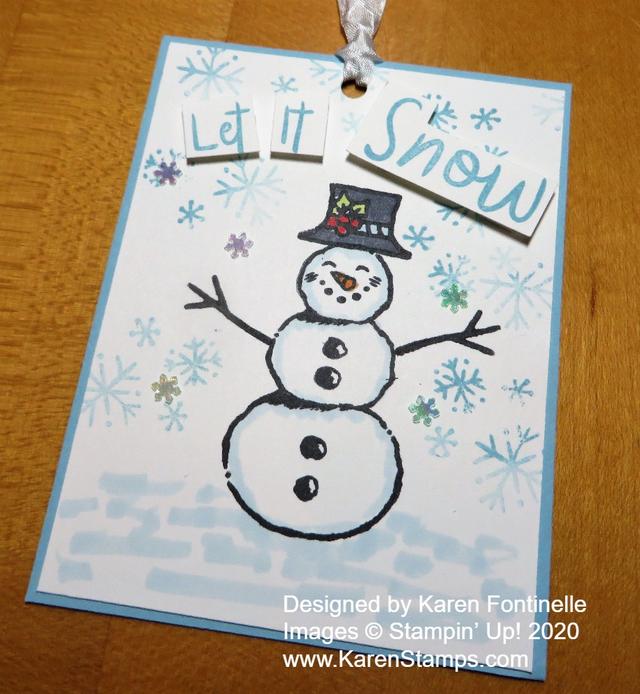
Large Snowman Season Gift Tag

This tag I made a little fancier since the other two were pretty simple. But this one is still simple! I just cut a 3″ x 4″ rectangle of Balmy Blue Cardstock and layered with a piece of Whisper White. The snowman from Snowman Season is stamped with Memento Ink and I did the little bit of coloring with various colors of Stampin’ Blends, even a tiny bit of Balmy Blue around the sides of the snowman for shading and to look a little cool and icy. I also just scribbled some Balmy Blue under the snowman to look like snow. Some glitter would have been nice, too! The snowflakes are stamped from the set and the greeting is from the set. I cut the words out separately after stamping so I could arrange them on the tag. Then I added some Adhesive-Backed Snowflakes (which may be sold out now but you can use other gems and jewels!) for a little more bling!

Once you get started making tags, you might not be able to stop because you will come up with more and more ideas and they don’t have to be fancy! If your packages are wrapped already, you might consider having fun stamping and making tags for next year AFTER Christmas when you maybe have some free time! These Snowman Gift Tags are fun and easy to make and the gift recipient will likely enjoy them!

SHOP STAMPIN’ UP! ONLINE!

Snowman Z-Fold Merry Christmas Card

Snowman Z-Fold Merry Christmas Card Open

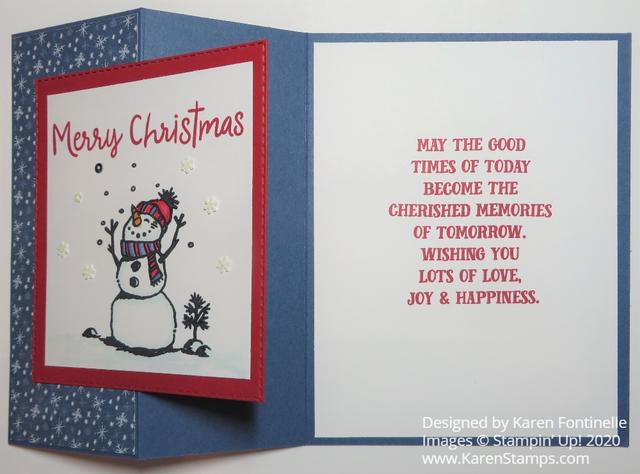
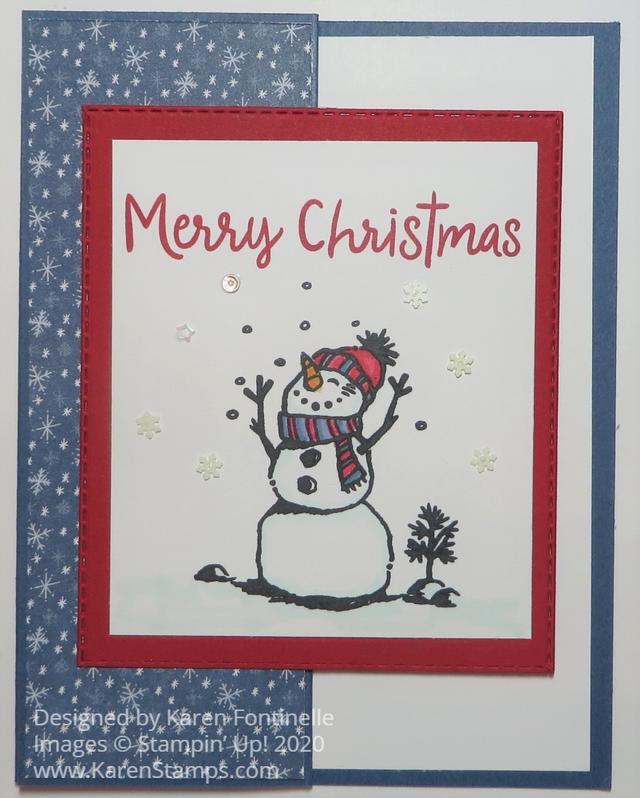
I was in a snowman mood when I made this Snowman Z-Fold Merry Christmas Card. I started off looking at the Trimming The Town Designer Series Paper and when I saw this snowflake print, I thought it would go well with one of the snowmen in the Snowman Season Stamp Set! Sometimes you get inspired with a card idea just by looking through your designer paper.

I decided to make a Z-Fold card. It’s something VERY easy and looks extra special. All you have to do is make a card base the usual way, then fold the front back on itself in half. So cut the cardstock like usual at 8 1/2″ x 5 1/2″. Score at 2 1/8″ and 4 1/4″. If the front of the card is 4 1/4″ wide, then you want to score that in half which would be 2 1/8″ to fold half of the front back to make that z-fold. It’s easy!

The card base is Misty Moonlight cardstock with a snowflake piece of Trimming the Town DSP. I cut it at 2″ x 5 3/8″. I could also have made it 1 7/8″ x 5 1/4″ for a slightly wider margin that would have matched the Whisper White inside layer.

The snowman is stamped in Black Memento Ink on Whisper White with the greeting, in the same stamp set, stamped in Real Red Ink. That piece is cut 3″ x 3 1/2″. It is layered on a piece of Real Red Cardstock die cut with a special technique using the Rectangle Stitched Dies. I cut out the rectangle, then moved the die so that it would make the rectangle shorter.

The snowman is colored the little bit it needs with Stampin’ Blends in Real Red, Misty Moonlight, and Pumpkin Pie with a tiny bit of Pool Party as shading on the snow. Then I adhered a few Snowflake Sequins around the snowman. The Take Your Pick tool is really handy for picking up and placing sequins on teeny tiny drops of Multipurpose Liquid Glue.

When adhering the snowman panel to the front of the z-fold, but sure to only put adhesive on the portion of the back of the snowman that will be adhered to the z-fold. You want to make sure that the panel you add to a z-fold card will cover any message inside so sometimes you have to play with positioning a little bit. The message I stamped inside this card is from the Tag Buffet Stamp Set.

Click HERE to see another z-fold card I made recently!

This really was an easy card and if you follow my design and directions, it will be even easier and faster for you to make a card like this Snowman Z-Fold Merry Christmas Card!

Snowman Z-Fold Merry Christmas Card

24-Hour Stamp Sale Going On Now!

24-Hour Stamp Sale

Stock up on stamp sets at a stellar price today! For one day only, you can purchase select cling and photopolymer stamp sets at a 15% discount. This short, stamp-tacular sale only happens once a year—you won’t want to miss out on these super savings!

For 24 hours on 23 September—from 12:00 AM to 11:59 PM (MT) online—a select number of cling and photopolymer stamp sets from the 2020–2021 Annual Catalog will be available for purchase at a 15% discount.

The Online Store will have a category entitled “Stamp Sale” that displays every stamp set on sale to ensure a quick and easy shopping experience.

SHOP THE STAMP SALE ONLINE TODAY!

Here are some cards I have made with a few of the stamp sets on sale today so you can see some ideas for using them!

Snowman Season Stamp Set

Snowman Season in Plaid Tidings

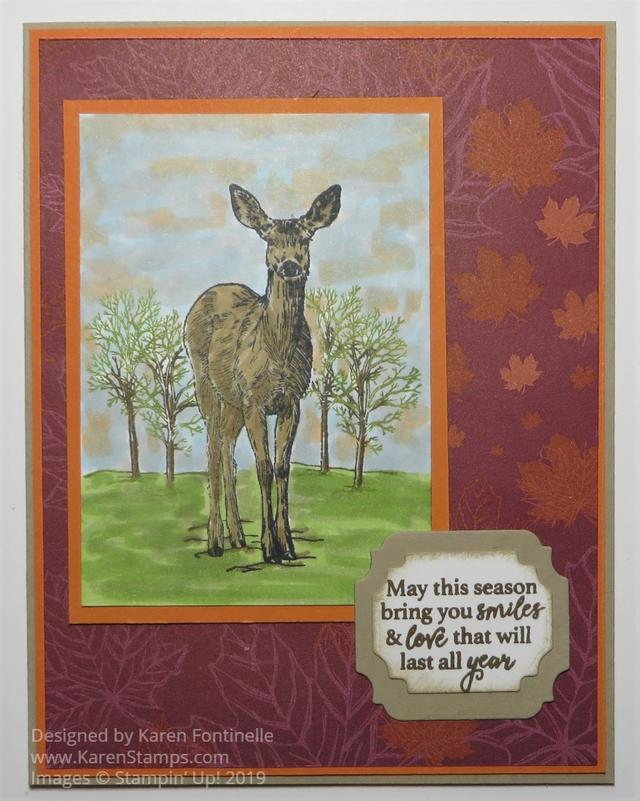
Nature’s Beauty Stamp Set

Nature's Beauty Deer in the Fall

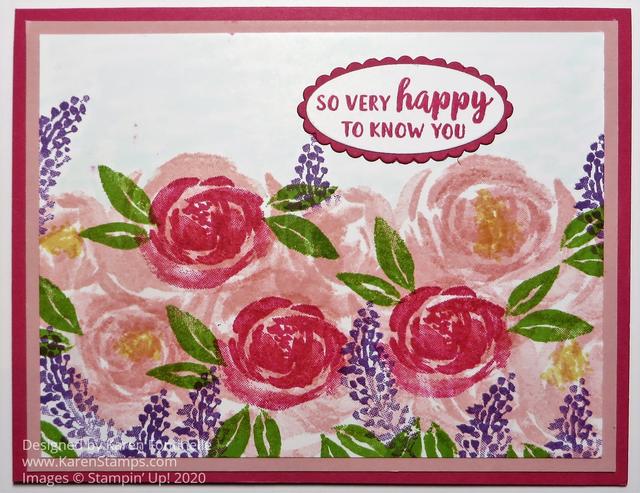
Beautiful Friendship Stamp Set

Beautiful Friendship Pink Flowers Card

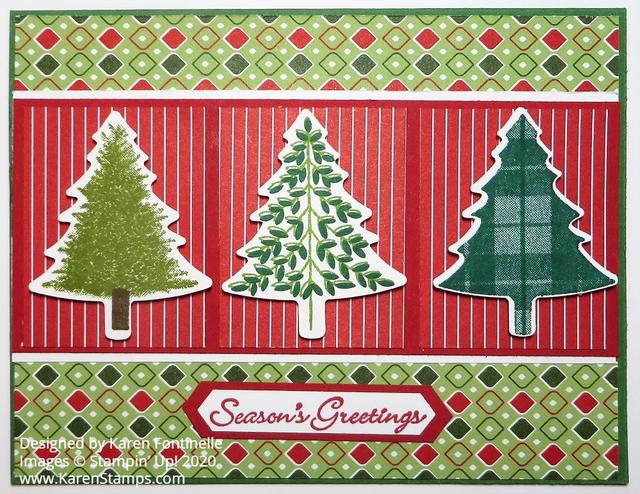
Perfectly Plaid Stamp Set

Perfectly Plaid Christmas Card With Trees

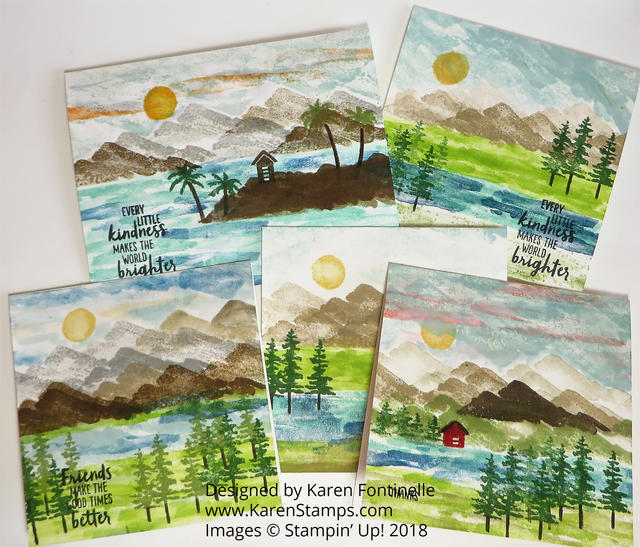
Waterfront Stamp Set

Waterfront Stamp Set Mountain and Island Scenery Cards

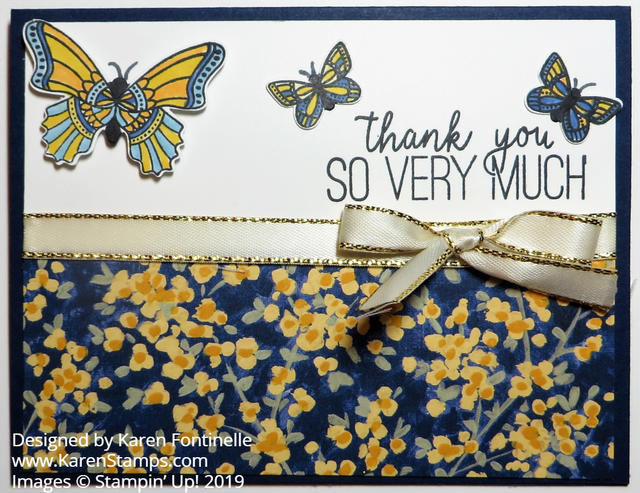
Butterfly Gala Stamp Set

Butterfly Gala Thank You Card With Floral Garden Impressions

Bloom & Grow Stamp Set

Bloom & Grow Bird Ballad Laser-Cut Card

Hope these sample cards give you some ideas for how to use some of the stamp sets on sale today! Click on each photo to go to my blog post for details!

Have fun shopping!

Snowman Season in Plaid Tidings Christmas Card

Snowman Season in Plaid Tidings

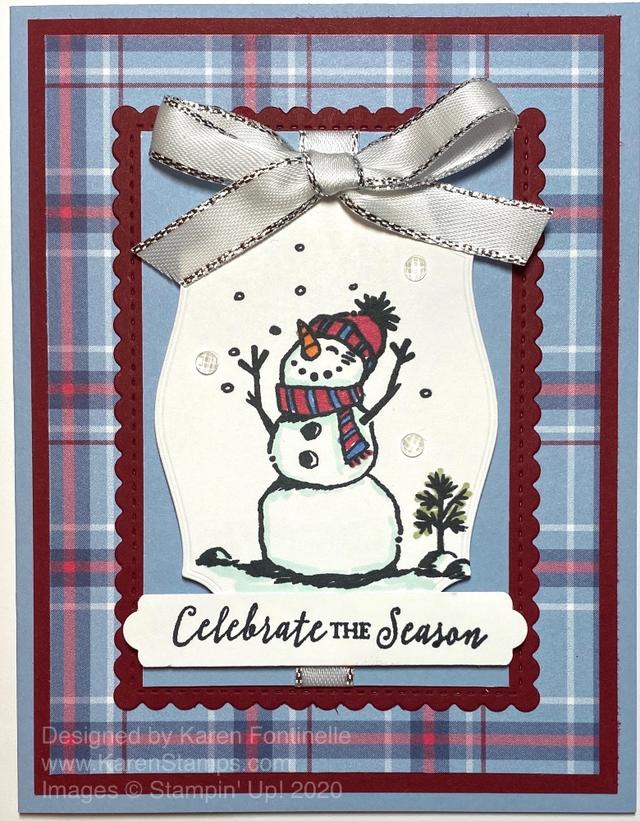
I had almost forgotten that this snowman stamp set from last year was still current this year, so when I came across the Snowman Season Stamp Set I knew I had to make this Snowman Season in Plaid Tidings Christmas Card.

You will find this Snowman Season Stamp Set in the Stampin’ Up! Annual Catalog. It was a favorite stamp set from last year – the cute snowmen and also the Snowman Builder Punch. You can’t but feel happy when you stamp with these snowmen in this set!

First I chose the plaid pattern I liked in the Plaid Tidings 6″ x 6″ Designer Series Paper. Then I chose the Seaside Spray Cardstock with a layer of Cherry Cobbler.

The snowman is stamped on a Tasteful Labels Die in Memento Ink. I colored with Stampin’ Blends but you could also use other coloring methods, like maybe Watercolor Pencils. I die-cut a stitched scalloped rectangle in the Stitched So Sweetly Dies out of Cherry Cobbler, but it seemed like too big an area behind the snowman. I decided to add a rectangle of Seaside Spray that would fit inside the stitched die and that solved the problem.

Before adhering the snowman pieces, I adhered a piece of Silver 3/8″ Metallic-Edge Ribbon from top to bottom of the Seaside Spray layer. Then the snowman die piece was popped up on Stampin’ Dimensionals®. I tied a separate bow and adhered it to the top with Mini Glue Dots.

The greetings in the Snowman Season Stamp Set were a little too big, so I used one from the Itty Bitty Christmas Stamp Set. I simply stamped it on a narrow scrap of Whisper White and used the new Lovely Labels Pick a Punch to punch each end of the greeting. It is popped up with Dimensionals on each end so that it is the same level as the snowman piece. For a little bling, I could have used Snowflake Sequins around the snowman, but instead, I used the Elegant Faceted Gems in three spots to resemble snowflakes.

It was fun to find this stamp set from the Holiday Catalog last year and make something updated with it this year! Here is a link to a card I made last year with the set and the Snowman Builder Punch. Choose stamp sets and papers that bring you joy for making your holiday and Christmas cards so it will be a fun endeavor! This Snowman Season in Plaid Tidings Christmas Card will make you happy all day long while you make multiples, perhaps, of this card!

SHOP STAMPIN’ UP! ONLINE HERE!

Remember to use your Bonus Coupons during August if you earned some in July!

Make Snowman Season Tic Tac Holder Stocking Stuffers

Snowman Season Tic Tac Holder Stocking Stuffers
Images copyright Stampin’ Up! 2019

Remember! Today is FREE SHIPPING with a $50 order at Stampin’ Up!

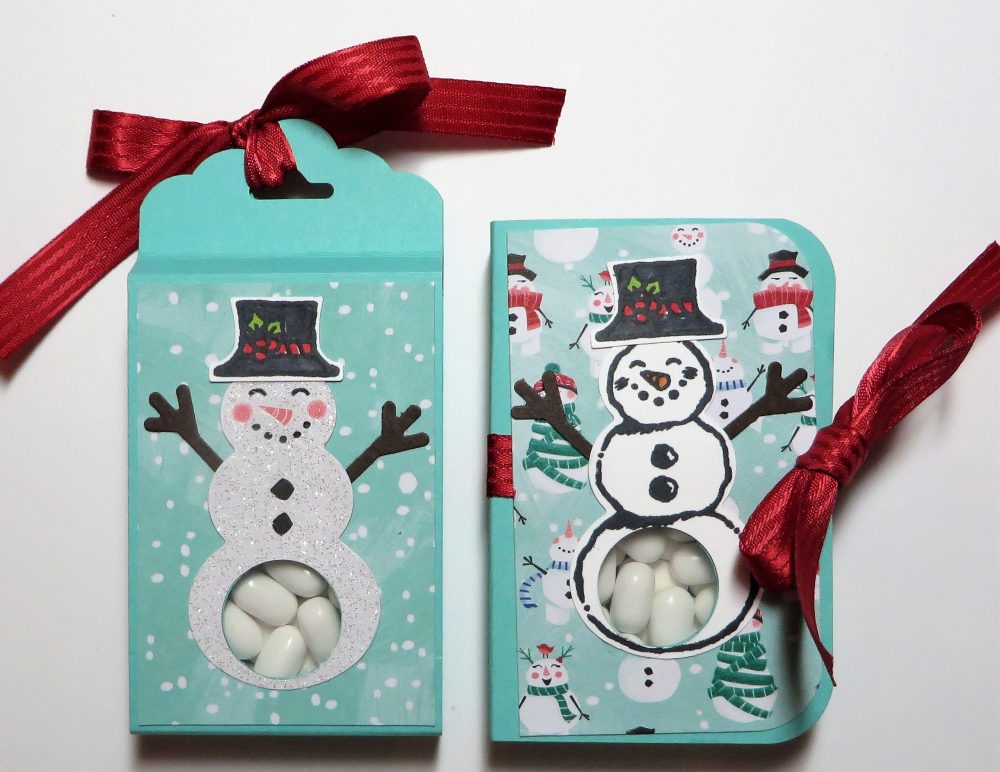
You may have seen these on my Facebook page last week when my website wasn’t working, but I thought I would go ahead and post these Snowman Season Tic Tac Holder Stocking Stuffers here on my blog so more people will see them. They are easy and fun to make and lots of us want some stocking stuffer or little extra gift ideas for people for Christmas.

I had fun making these Tic Tac holders with the Snowman Season stamp set and Let It Snow designer paper! Just punch a hole in his belly so you can see the Tic Tacs! Or don’t. I used the 3/4″ Circle Punch (retired) since the 1″ was a little too large for these snowmen. But if you are making another design and can use a 1″ Circle Punch, it’s good to show a bigger area of the mints inside!

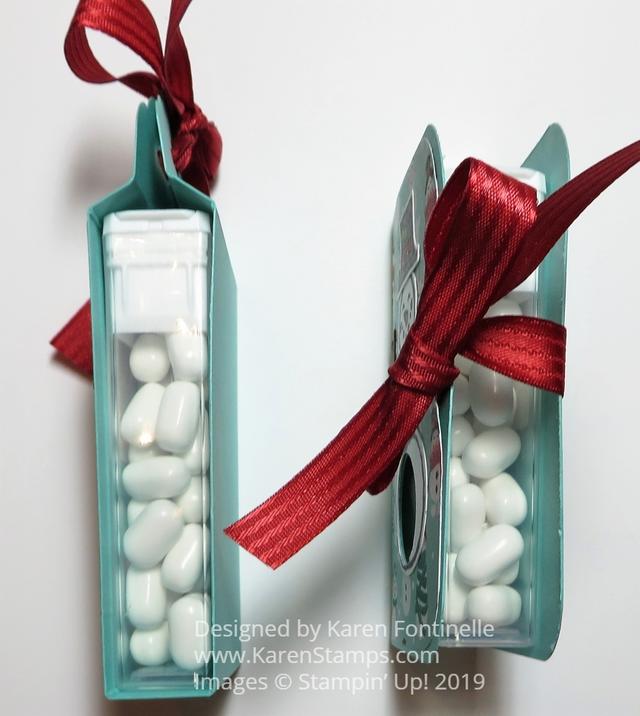
The first Snowman Season Tic Tac Holder is a strip of 2″ x 9″ cardstock, scored at 1″, 1 5/16″, and 4 3/16. Then turn and score from the other end with the same measurements. Punch each end with the Scalloped Tag Topper Punch or whatever you like. Or leave it squared off. Kind of pinch the top together along the score lines and then decorate. You have to punch the snowman (this one punched from the DSP with the Snowman Punch), then through the DSP, then through the cardstock if you want the Tic Tacs to show. Tie at the top. I used some retired Real Red ribbon.

This snowman is cut out from the Let It Snow Specialty Designer Series Paper. (It is no longer available but I know lots of you have it) Then I stamped, colored and punched out his hat and punched out his arms with the Snowman Punch.

The second one is kind of like a book just folded around the container. Cut cardstock at 3 1/4″ x 4 7/8″ Score at 2 1/8″ x 2 3/4″, round the corners if desired. Cut a piece of designer paper 3 1/8″ x 1 7/8″ to layer. Stamp and punch snowman. Use a 3/4″ Circle Punch for the belly. Be sure to wrap the ribbon around before adding layers to the front.

Have fun! Great stocking stuffer! There are different sizes of Tic Tac products so just modify your design to fit. This idea has been around a long time and is always fun to make!

Snowman Season Tic Tac Holders Side view
Free Shipping Banner Dec. 2019

Snowman Stamped Christmas Card

Snowman Stamped Christmas Card

On this Snowman Stamped Christmas Card, I made my own snowman designer paper! This stamp set is so fun to play with and will make many wonderful Christmas cards for you to send to family and friends.

I love that I am finally using Real Red again on Christmas cards after Real Red got demoted to the Regals color family! I liked it better in the Brights family where it had always been. LOL! But nobody asked me! Anyway, the card base is Real Red Cardstock and instead of designer paper layered on the card, I made my own designer paper! I simply stamped the snowman throwing snowballs up in the air from the Snowman Season Stamp Set in black ink randomly on a layer of Whisper White Cardstock. I think it gives the card a subtle fun feeling!

Next, another snowman is stamped with Memento Ink and then die-cut with one of the Layering Circles Dies and layered on a larger scalloped circle die in the same set. That snowman piece I colored in with Stampin’ Blends Markers. For some embellishment, I used the Multipurpose Liquid Glue and sprinkled on some Ice Stampin’ Glitter. You could also use the Dazzling Diamonds Glitter. This snowman centerpiece is popped up on Stampin’ Dimensionals.

The greeting is stamped on a Real Red banner with a “Merry Christmas” from the Snowman Season Stamp Set also. This card is one that just makes me happy! Sometimes you make a card that gives you that feeling. And, I have to say, it is always a good feeling to repeatedly stamp an image randomly on cardstock. There is something about holding that block and stamp in your hand and stamping over and over! I always like it when I do it!

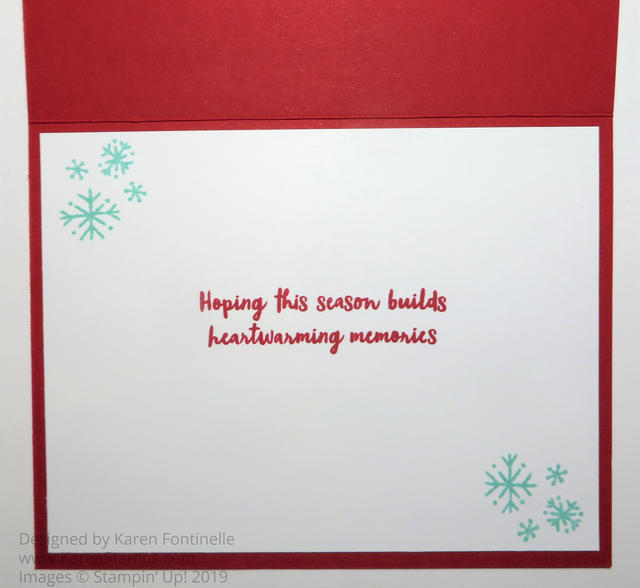
You CAN stamp a greeting on the inside of the card in black ink and have it show up on the Real Red, but you might want to consider adding a Whisper White inside layer with a greeting stamped and maybe another little coordinating image. For this card, I stamped the other greeting in the Snowman Season set, “Hoping this season builds heartwarming memories” and then stamped the same snowman tossing snowballs in the air down in the corner. I just colored in the orange carrot nose and added a tiny bit of blue as shading on the snowman. The inside of the card looks almost as creative as the outside of the card! You can also stamp the envelope before you send the card with one of the snowmen. How cute would that be?!

Remember to try this technique of stamping an image randomly on a piece of cardstock to make your own designer paper as I did on this Snowman Stamped Christmas Card.

SHOP STAMPIN’ UP! ONLINE!

Holiday Catalog Let It Snow Snowman Christmas Card

Holiday Catalog Let It Snow Snowman Christmas Card

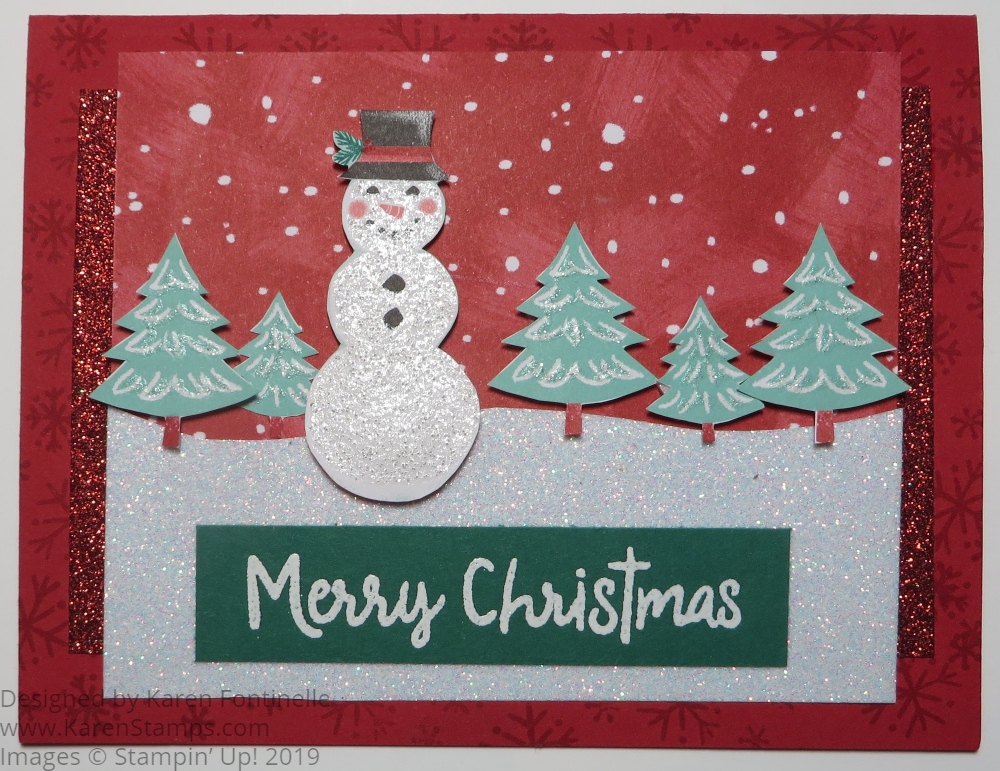
We always say if you need some inspiration, use the Stampin’ Up! catalogs, so that is what I have done with this Holiday Catalog Let It Snow Snowman Christmas Card. You will find a card on the cover of the Holiday catalog that I mostly copied except for the snow.

The Let It Snow Specialty Designer Series Paper is beautiful to use for Christmas cards and projects. This paper is 12″ x 12″ so you have plenty to use. One side has images with bits of glimmer and the other side has more generic images that you can use for non-Christmas projects or after Christmas (if you have any left after using the glimmery sides!).

This card has a Real Red base and is stamped with some Real Red snowflakes with the Snowman Season Stamp Set. Next, there is a piece of the non-glimmer side of the designer paper with the snowmen that I used for the background to look like snowflakes. On the bottom, instead of the way Stampin’ Up! did their card on the catalog cover, I cut a piece of Sparkle Glimmer Paper for the snow. Stampin’ Up! used the new Snowfall Accents Puff Paint on their card but I didn’t own that yet. (As I write this, the Puff Paint had been unorderable but it is back in stock right now so go order it while you can!) On the sides of this layer are strips of the Real Red Glimmer Paper to set off the layer.

The snowman is punched with the Snowman Builder Punch and the trees are all cut by hand with Paper Snips from the Let It Snow DSP. This is the kind of paper that you hate to cut into for any reason, even for making a great card! But it is made to be used so don’t hoard it! Except for one tree adhered directly to the layer, the rest and the snowman are all popped up with Stampin’ Dimensionals and Mini Stampin’ Dimensionals. The Minis save you from cutting the regular size Dimensionals into smaller pieces! (Did you know there are also Black Stampin’ Dimensionals Combo Packs which have both regular size and mini dimensionals in black, which for some projects “hides” them a little more on your project!)

The greeting is stamped with Versamark Ink and then heat embossed with White Stampin’ Embossing Powder. The greeting is also from the Snowman Season Stamp Set. The cardstock is Shaded Spruce. The Stampin’ Up! samples on the catalog cover also used some Red Rhinestones on the hat.

When you use dark cardstock for the card base, you may need to put a layer of Whisper White or Very Vanilla or some coordinating lighter color inside the card so that you can stamp a greeting or write a personal note. In addition, you can also add some decorative stamping. See the inside of this card below.

Holiday Catalog Let It Snow Snowman Christmas Card Inside

It’s time to get an early start making Christmas cards so we won’t be rushed when it gets down to the wire! If you need Christmas card ideas, be sure you are signed up for my Mailing List because I will be sending out Week 3 of my 12 Weeks of Christmas holiday emails. You still have time to get another few weeks of card ideas, then we move on to gift ideas and finally gift-wrapping ideas with tags, bags, etc. Of course, I will also have Christmas card ideas on my blog and Facebook page.

As I said, one of the many places you can get ideas and inspiration for holiday cards is to look in the Stampin’ Up! Catalogs. You can copy or you can just take part of the idea and add your own elements. Lots of times, just having some idea in front of you gives you your own idea as you begin working! Be sure to order your supplies early so something you want is not out of stock.

SHOP STAMPIN’ UP! ONLINE!

Let It Snow Designer Paper Christmas Card

Let It Snow Designer Paper Christmas Card

Someone said three months from today it will be Christmas so you might want to start thinking about what Christmas cards you want to make, like maybe this Let It Snow Designer Paper Christmas Card. I would add, besides being three months until Christmas Day, I would add that in three months from today, it will all be over with! The cards made and mailed (hopefully!), the presents bought, wrapped and possibly given, church services attended, Christmas cookies baked (usually not until after at my house!), parties attended, Christmas meals planned and eaten, except for Christmas Day dinner. SO….we have way less than 3 months to work on all our craft projects and cards to send and give!

To help you out a little bit, beginning next Wednesday, one week from today, we are going to start the “12 Weeks of Christmas” email campaign! Every week for 12 weeks I am going to be sending you a FREE holiday project that you can use to make your holidays easier and more festive! Please note, however, the only people who are going to receive these FREE projects are the people who are on my Mailing List. If you are NOT on my mailing list, you will not receive these special holiday emails.

To get on my email list, just fill in the red box in the upper right corner of my blog or you can sign up below:

Subscribe to My Mailing List! 

Exclusive Projects

Stampin’ Up! News & Updates

FREE Welcome Gift!

Name: 

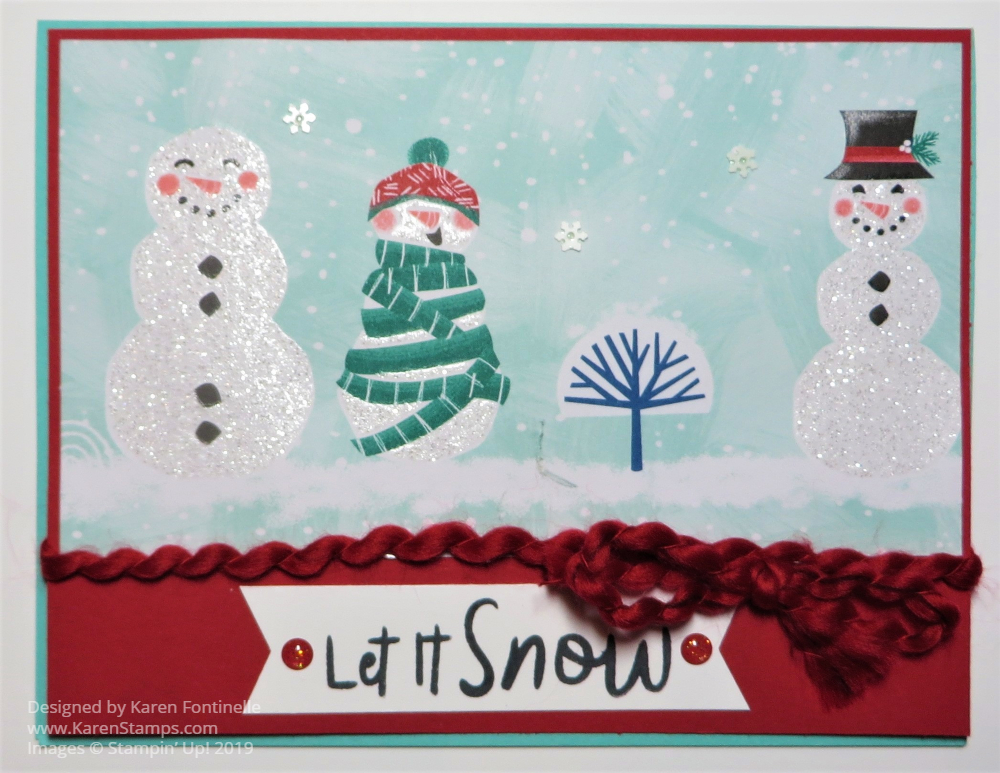
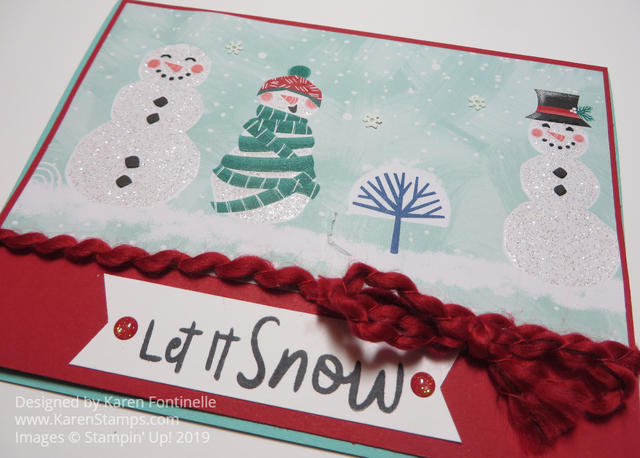
For this card, I used a card base of Pool Party with a layer of Real Red Cardstock. Laid over the top of the Real Red Cardstock, is a piece of the Let It Snow Specialty Designer Series Paper. It will almost kill you, but you can cut the designer paper sheet with the glittery snowman appropriately so that you get the snowmen that you choose on the paper. If this does kill you to whack your beautiful paper up this way, you might want to order extra!

The ribbon wrapped around the card (to hide the seam of the designer paper on the Real Red is the Real Red 1/8″ Curly Ribbon. It is fun to use on cards, of course, but you might like to order extra to use as real wrapping ribbon on your Christmas packages!

The greeting is one from the Snowman Season Stamp Set. It is stamped in Memento Black. The banner ends are punched with the Tag Punch. And finally, I added some red stick-on dots from the Toile Tidings Glitter Enamel Dots. And finally, I added only about three snowflake sequins from the Snowflake Sequins. When you get right down to it, this Let It Snow Designer Paper Christmas Card is pretty easy to make!

Remember to sign up for my regular mailing list in the top right of this blog, if you are not already on my mailing list, in order to receive these fun holiday emails starting next week! The holidays are coming fast!

Let It Snow Punched Snowman Christmas Card

Let It Snow Punched Snowman Christmas Card

This Let It Snow Die-Cut Snowman Christmas Card will be a fun card to send at Christmas time! It uses fun designer paper plus a cute snowman stamp set. There are so many possibilities with the Let It Snow Suite for making cards and projects for winter and Christmas! You will find it all, of course, in the Stampin’ Up! Holiday Catalog!

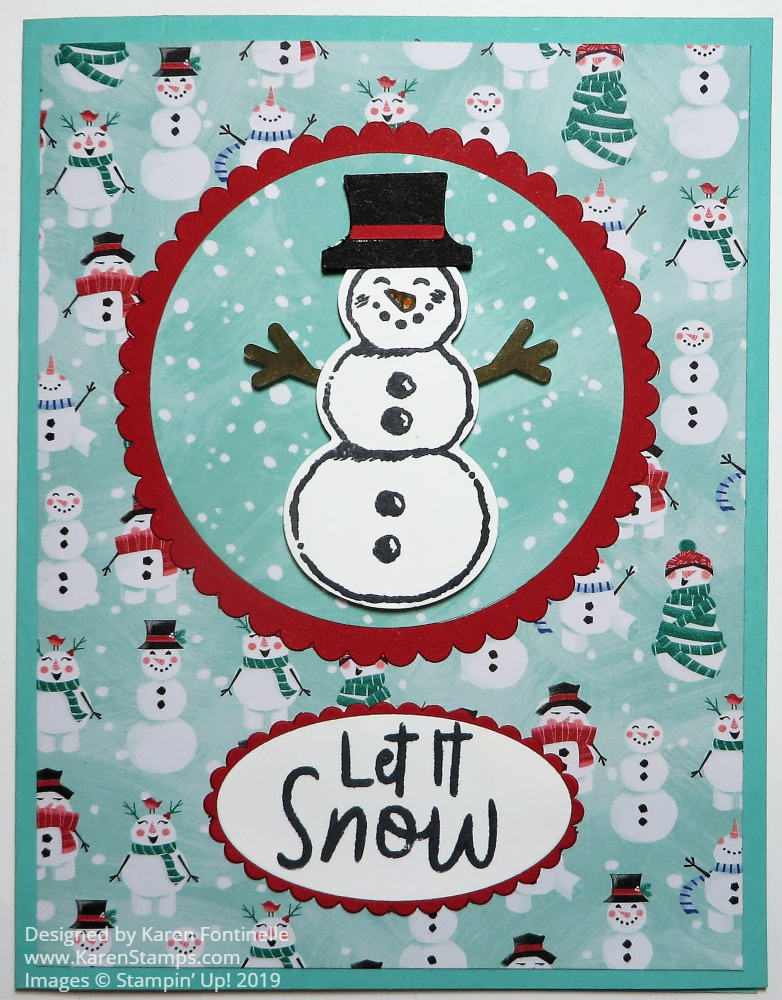
This card starts with a Coastal Cabana card base. The designer paper is the Let It Snow Specialty Designer Series Paper. This package of paper has glittery snowmen on some of the patterns. The paper used on this card doesn’t have the glitter, but it is a design of an assortment of mini snowmen! It makes a great background for a snowman card without taking away attention from the main snowman.

The main snowman is stamped with the Snowman Season Stamp Set and then punched with the Snowman Builder Punch. With this punch, you can make the snowman body, the arms, the hat, and the carrot nose! You can even purchase the Snowman Season Stamp Set and the Snowman Builder Punch together in the Snowman Season Bundle and save 10%! After building this snowman with the punch, I popped him up with Stampin’ Dimensionals. He is then layered on a flip side of designer paper and layered on a large scalloped circle die cut.

The greeting is stamped from the Snowman Season Stamp Set and layered on a scalloped oval die cut. You can see another card HERE that also uses the punched snowman.

That’s all there is to this card! Stamp a holiday greeting inside or write a personal note and the card is ready to go!

Also, don’t forget about the Designer Series Paper Sale going on now at Stampin’ Up!. Select papers – Buy 3, Get the 4th package FREE!

Shop the Holiday Catalog and the Let It Snow Suite Online HERE!

A Happy Snowman Christmas Card

Why is this snowman so happy and excited? It’s because the Stampin’ Up! Holiday Catalog is LIVE today! If you like snowmen, soon you will be making a card like this Happy Snowman Christmas Card with the Snowman Season Stamp Set and the Let It Snow Specialty Designer Series Paper!

You will find this darling snowman stamp set and really fun designer paper in the Holiday Catalog plus the teeny tiny snowflakes in the Snowflake Sequins package. They are really for the Snow Globe Shaker Domes, but I couldn’t resist using a few with my Happy Snowman Christmas Card! I used the teeny tiniest dot of Multipurpose Liquid Glue and used the Take Your Pick Tool to place the sequins. They are really tiny!

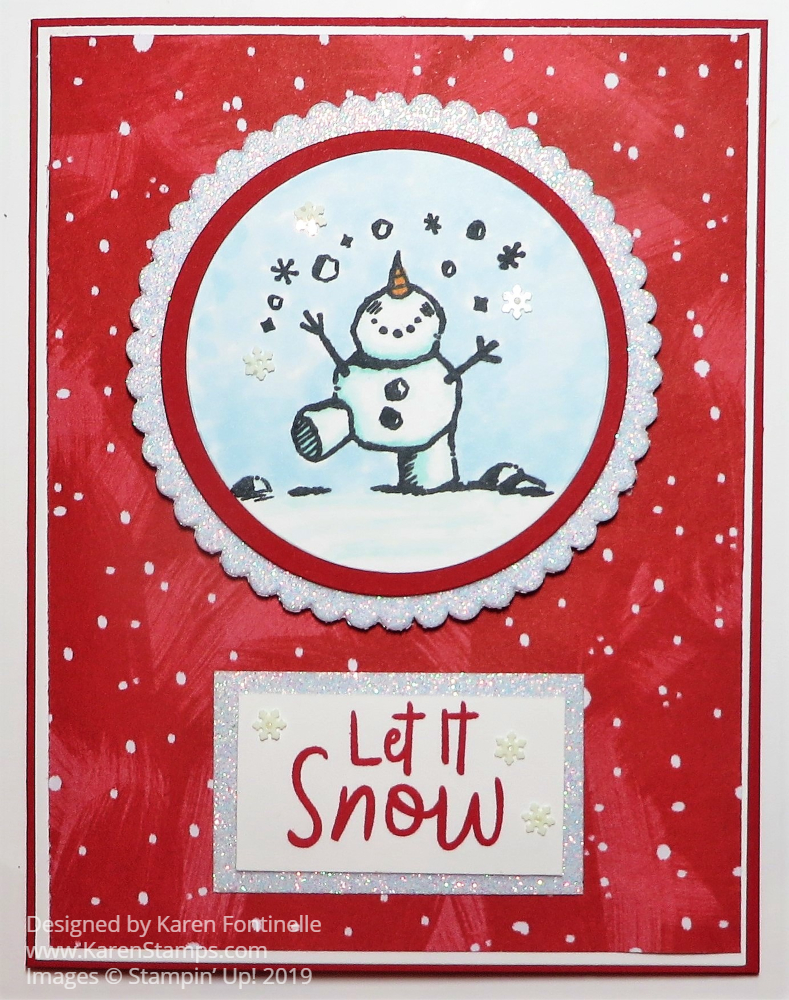
The card base is Real Red (which I am super happy to be using with these cards and the Let It Snow Paper) and has a layer of this red pattern of Let It Snow Designer Series Paper. I hate to tell you that on the other side are glimmery snowmen that I hated to cut through and put glue on!!! Oh my!! But it had to be done if I wanted to use this red paper with white snowflakes. Of course, you could use this pattern at any time because the white dots don’t have to be snowflakes! Just to help this red stand out, I put a layer of Whisper White underneath it. Now if you don’t tell anybody, you can die cut the circle that the snowman is stamped on out of the Whisper White before you assemble the card. No one will ever see it or know!

After I die cut that circle out of the Whisper White layer, I stamped a snowman from the Snowman Season Stamp Set on it in Memento Ink. Then I could add just a tiny bit of icy shadows on the snowman and snow with my Stampin’ Blends and lightly color in the winter sky. This circle is layered on a Real Red larger circle, die-cut with the Layering Circle Dies and that is layered on a scalloped circle from the same set out of Sparkle Glimmer Paper.

The greeting is in the snowman set and stamped in Real Red Ink. I also layered this on a piece of the Sparkle Glimmer Paper. Just for fun, I added three tiny snowflake sequins to the greeting, too.

That’s it. Pretty easy card to make once you have the idea and the Sparkle Glimmer Paper adds a little pizzazz! The inside of the card has another one of the greetings stamped in red, plus “Merry Christmas” as well as some snowflakes stamped at the top, all on a layer of Whisper White since the red card base would be a little difficult on which to stamp a sentiment or write a note. It’s easy to decorate a layer inside your card with some stamping or a piece or strip of designer paper! And don’t forget the outside of the envelope!

Just as this snowman is excited, I’m sure you are excited to start shopping with the Holiday Catalog! You can combine your Holiday Catalog order with the Designer Series Paper Sale! And don’t forget about the Clearance Rack if you want to pick up some bargains!

Holiday Catalog Cover 2019

SHOP THE HOLIDAY CATALOG!


Snowman Season Punched Snowman Square Christmas Card

Snowman Season Punched Snowman Square Christmas Card

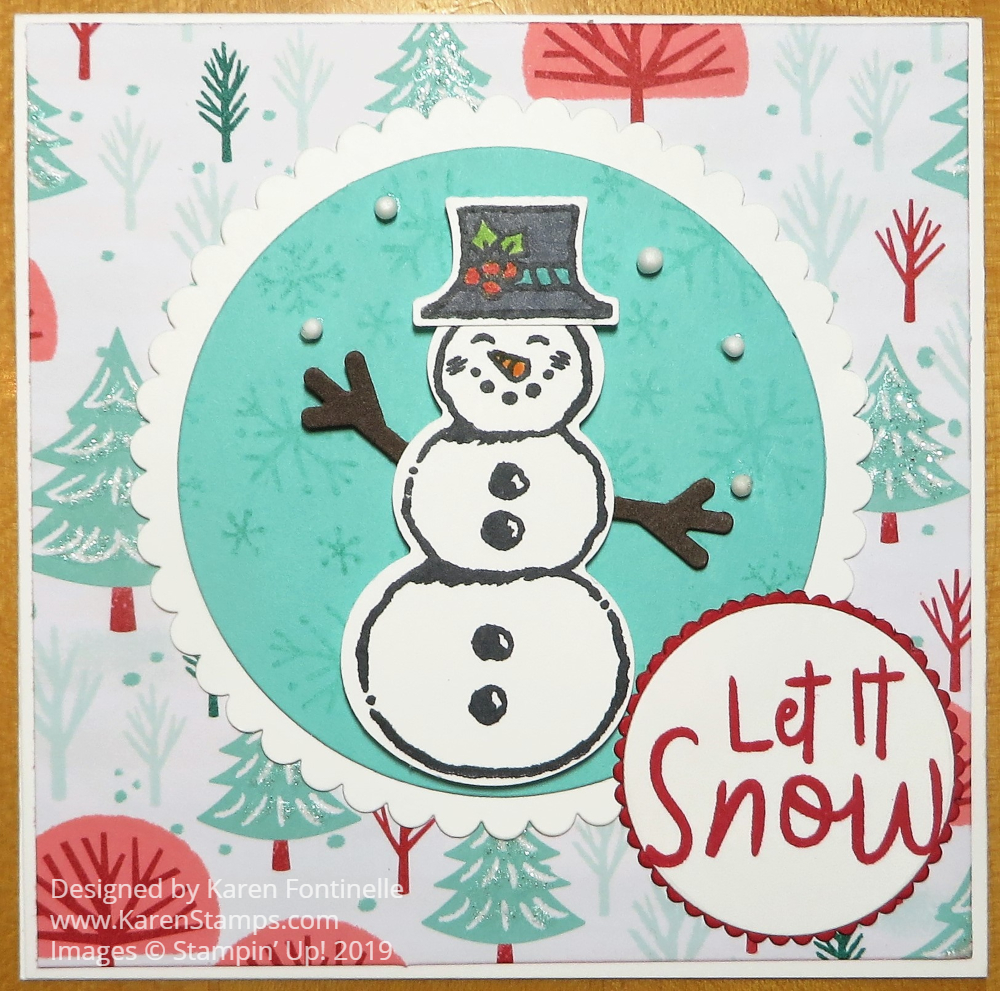
This Snowman Season Punched Snowman Square Christmas Card was made out of a 4″ x 4″ Whisper White card base that I already had. Sometimes it is fun to make a different size card and that’s how this card came about! The main thing was trying out the new Snowman Builder Punch in the Holiday Catalog along with the Snowman Season Stamp Set.

For the background layer on this card, I chose this pattern with trees in the Let It Snow Specialty Designer Series Paper. Some of the colors in this designer paper are Coastal Cabana and Real Red. Real Red has always been one of my favorite colors, probably THE favorite color, but after the recent color rearrangement with Real Red moving to the Regals family instead of Brights, it seemed that it didn’t get much use. So I am very happy to be using Real Red again when using this Let It Snow Paper!

The cute snowman is stamped on Whisper White from the Snowman Season Stamp Set and then punched out with the Snowman Builder Punch. You can use the Whisper White punched out arms and color them brown or black with a marker or you can use scrap cardstock in whatever color you like. I used Early Espresso. The hat was stamped and then punched out. I colored in the hatband, holly leaves, and berries with a marker. I also colored in the snowman nose with Pumpkin Pie. I glued on the hat and arms.

The snowman is adhered to a die-cut circle of Coastal Cabana with Stampin’ Dimensionals® which was first stamped with the snowflakes in the Snowman Season Stamp Set. I inked up the snowflakes, then stamped off once before stamping on the Coastal Cabana so they would be a light background. The Coastal Cabana circle was layered on a Whisper White scalloped circle. All circles are die-cut with the Layering Circles Dies.

There wasn’t much room for a greeting so I did it a little differently by placing it kind of in the corner, layered a little bit over the focal point with the snowman. I think it works okay!

Then for a little fun, I got into the Let It Snow Embellishment Kit, which I discussed in my blog post yesterday. It’s a really cute kit in an adorable box you can reuse that comes with lots of pieces you can use to dress up your snowmen! You’ll find it on page 19 in the Holiday Catalog. I took out five of the teeny tiny snowballs and adhered them to the card with teeny tiny drops of Multipurpose Liquid Glue. So far they are still stuck on! The Take Your Pick Tool is pretty handy to use with these tiny things! the snowman is having fun juggling some snowballs!

Even though this card is sized at 4″ x 4″, I will still mail it in a regular size envelope. Square envelopes cost extra postage and I don’t know if you would find the correct size envelope anyway. It will be fine in one of our beautiful Whisper White Medium Envelopes. These are the best envelopes! You can actually identify a Stampin’ Up! envelope in a batch of mail by feel if someone sends you a card in a Stampin’ Up! envelope!

There are lots of things to make with the Let It Snow Suite, Snowman Season Stamp Set, and Let It Snow Specialty DSP! It’s time to start thinking about Christmas cards like making something like this Snowman Season Punched Snowman Square Christmas Card.

Let It Snow Snowman Christmas Card

Let It Snow Snowman Christmas Card

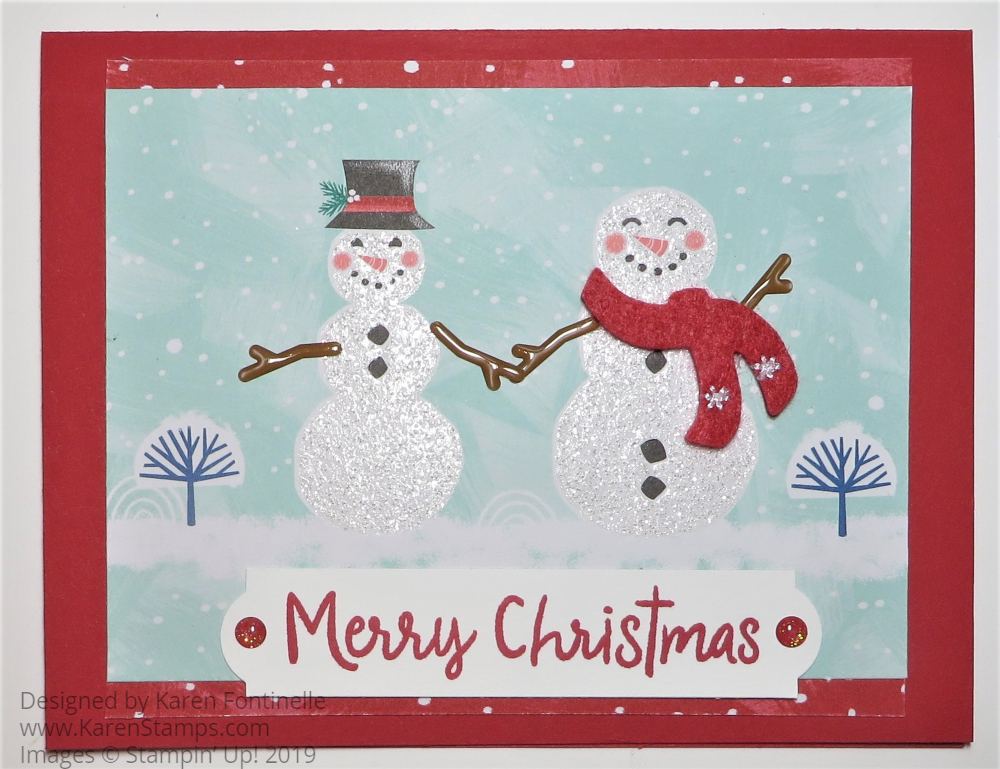
There are so many ways to play with the Let It Snow Suite in the Holiday Catalog that it was pretty easy to come up with this Let It Snow Snowman Christmas Card.

Let’s start with the Let It Snow Specialty Designer Series Paper! On my first preorder, I took it off my order because I had too much. As soon as I saw a sample of the paper in a card online, I was just sick that I hadn’t ordered it! I originally hadn’t realized that the paper has glittery images on it. Once I saw it in that card sample I had to have it as soon as I could order again! Remember, any time the paper name has the word “Specialty” in it, it means there is something special about that paper, like foil accents or in this case, glitter! The other side of the paper has generic designs you can use any time, so even if you don’t use up all the snow-themed paper, you can turn it over and still have occasions to use the paper!

I decided to choose the paper with the snowmen in rows, so I cut out just this pair. From the scrap, I turned the paper over and there was this cute red design with white dots. It can look like snow or just dotted paper. I cut just two strips from it to add to the top and bottom of the snowmen paper.

An interesting product in the Let It Snow Suite is the Let It Snow Embellishment Kit. If you want to stamp snowmen, you can use pieces in this kit (and cute box!) to finish off your snowman with stick arms and other facial features, plus felt scarves, caps, and mittens to add, plus tiny snowballs and washi tape. I added arms to my two snowmen and a scarf to the lady snowman.

The greeting is stamped in Real Red Ink from the Snowman Season Stamp Set. To get the fancy ends on the strip of Whisper White cardstock, I stuck each end of the strip into the side of the Everyday Label Punch. And for a little bling, I added two red Toile Tidings Glitter Enamel Dots (from the Toile Tidings Suite).

Be sure to add a layer inside any cards that have a dark card base or where you would like to stamp a greeting or write a personal note.

Let It Snow Snowman Christmas Card Inside

This was a pretty easy card because the Specialty Designer Series Paper does most of the work on this Let It Snow Snowman Christmas Card. Check out the whole suite when the catalog goes live September 4th!