Tag Archives: treat holder

Make a Double Treat Holder

Treat Holder Front

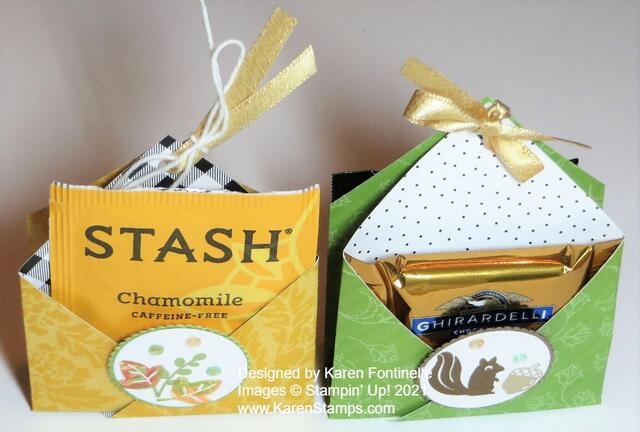
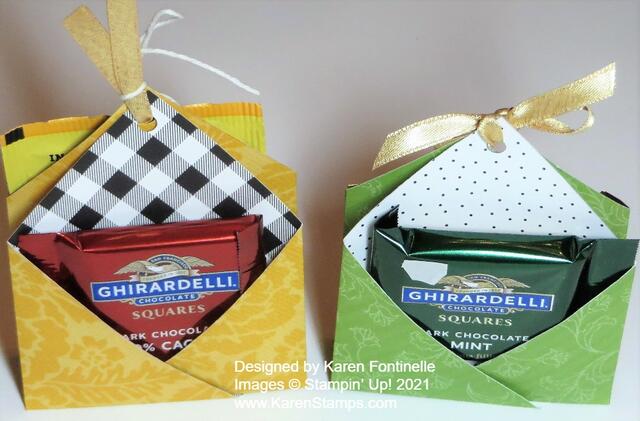
I was looking for some kind of treat holder that could serve as a little favor maybe at your Thanksgiving table and I came across this idea, a Double Treat Holder. I think I first saw this idea years ago at a Stampin’ Up! Convention I attended (in person, back in the day!) and I know I have made some since then. It’s really a cute idea! There is a pouch on each side front and back and if you want to, you can even add a cookie or something in between the two sides! What a great treat idea!!

Oh, I just found a post I made about this first treat holder I saw at a “Regional” Stampin’ Up! event…..shorter and smaller than Convention! The design is a little bit different than this one, but it is the same idea! Check it out HERE.

This design is easy and uses a 6″ x 6″ piece of designer paper, or you could use a piece of cardstock. You do need a Paper Trimmer to score the fold lines or the Simply Scored scoring board. It is best if you can find a designer paper that on both sides it doesn’t matter which way the pattern goes. However, the treat partially covers up the paper and the recipient probably isn’t going to care if the pattern goes at a diagonal when it is meant to go straight! Hopefully I can show photos and describe the directions well enough here but you can find lots of videos online, too.

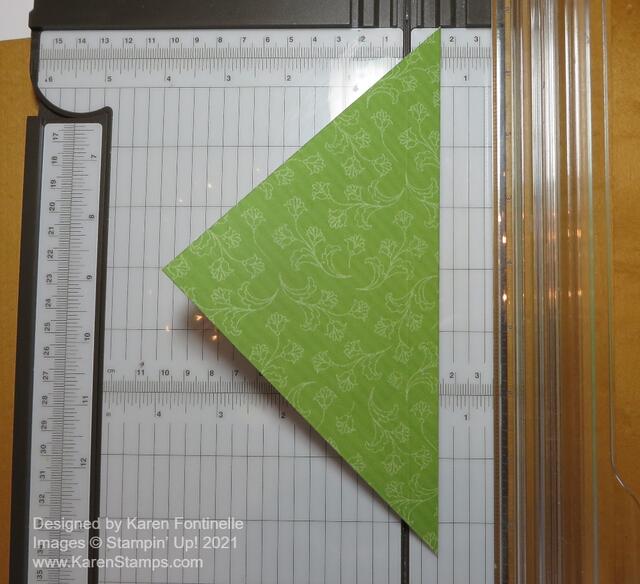
Fold the 6″ x 6″ designer paper in half as you see in the Paper Trimmer to form a triangle. After folding it into the triangle, you will score 1/2″ inside that fold. You can see the fold line is lined up at 1/2″ on the right side of the cutting track. Score and then turn the paper over to score at 1/2″ on the other side unless you can see the scoring well enough from just doing it on the front side. Just don’t tear your designer paper with too much pressure!

Treat Holder Folded Half

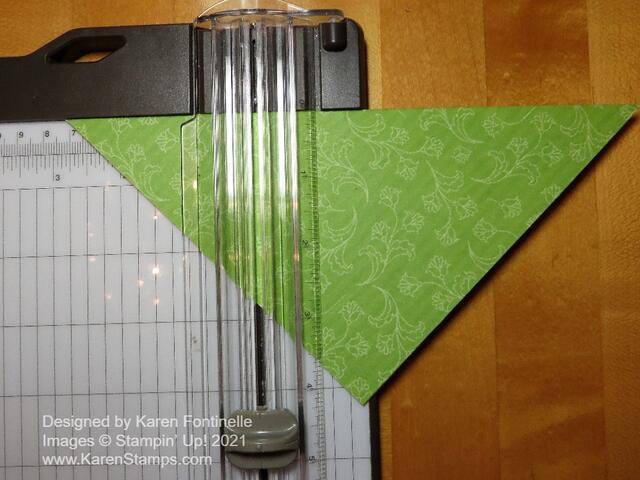
Now turn the paper so the fold line is at the top and score at 2 3/4″ on each end of the triangle and on each side of the paper if you need to.

Treat Holder Side Scoring

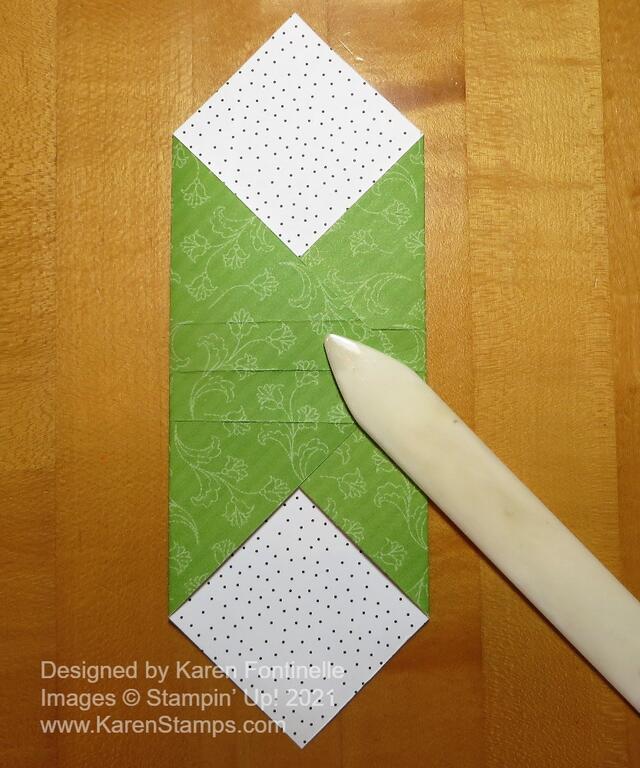
After creasing all the score lines, open up the paper and fold the side points in as you see below. You can also see three score lines in the middle. The middle one is actually the center fold line. I put my Bone Folder there just to hold it closed, but it is good to use a Bone Folder or whatever you have to get nice, good creases.

Treat Holder Sides Folded

Then just fold the top and bottom of that piece, with the pouches, backward to form the treat holder with the space in the middle. The center line is just flat in the middle and you fold on those outer score lines and match up the point at the top. Hold the top points together and use a hole punch to punch a hole for ribbon or staple or clip or whatever you want to do. No adhesive required until you decorate the front!

This is the backside of two treat holders using two different paper patterns. These were from the Pattern Party Host Designer Series Paper. A chocolate square or tea bag fit nicely in each pocket, front and back!

Treat Holder Back

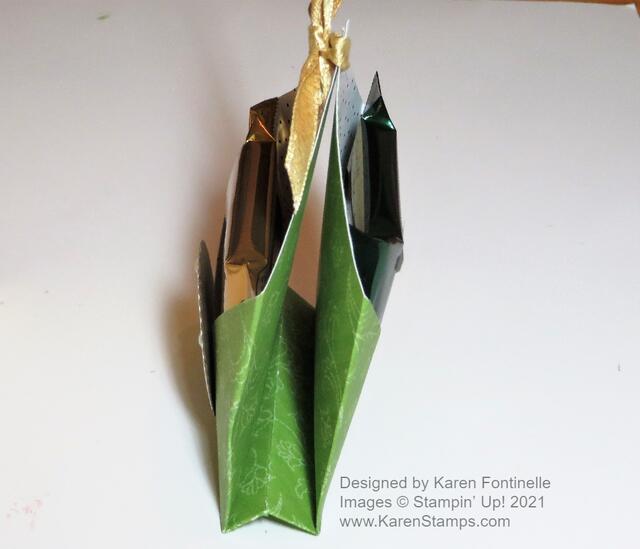
Here is the view from the side where you could package up a cookie or two in a cello bag and stick it in the middle of the treat holder!

Treat Holder Inside

And to decorate the front of my treat holder I used images from the Banner Year Stamp Set! Then I die cut a circle and scalloped circle for a layer from the Layering Circles Dies to fit right on the front with a couple of gems! That’s the only place you need adhesive and I used Stampin’ Dimensionals on the back.

So fun! Let me know if you try them! A good way to use up some 6″ x 6″ designer paper or cut up a 12″ x 12″!

Treat Holder Front

Easter Wood Crate Candy Holder With Chick

Easter Wood Crate Candy Holder With Chick

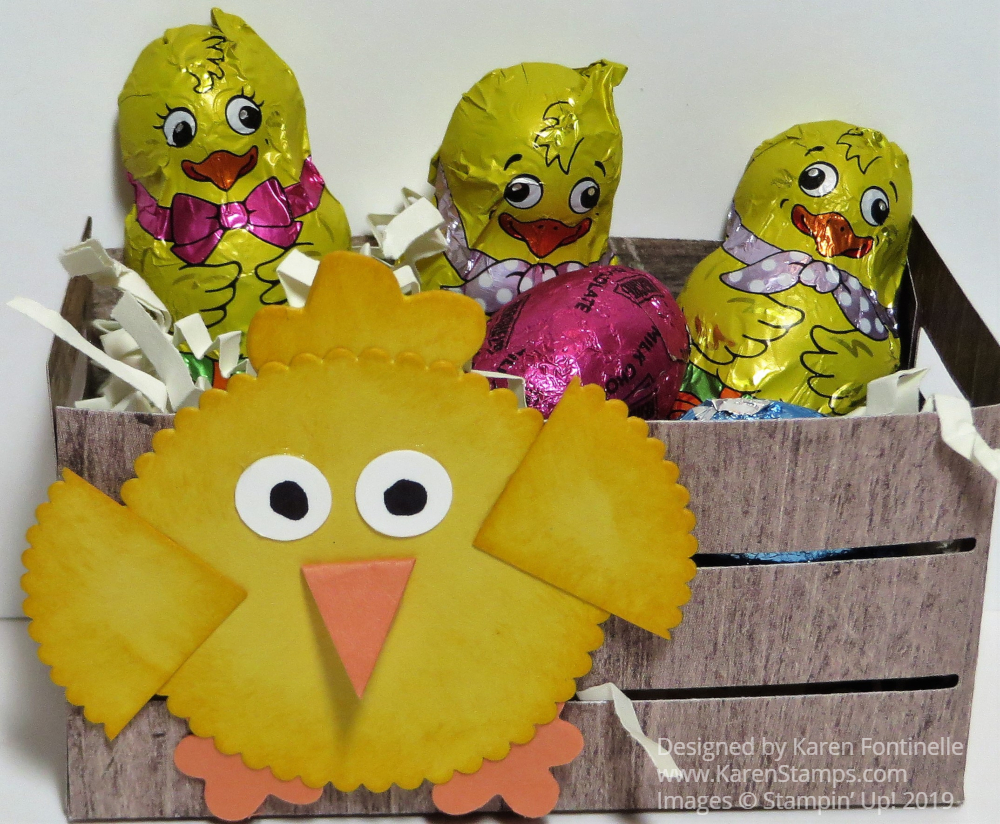
This Easter Wood Crate Candy Holder With Chick would be fun to make as a treat holder just using some dies and glue! Something a little bit different than a bunny! Make the paper crate, add some Easter grass or paper shred and put in some Easter candy! You have a little treat for someone or put it at each place setting on your Easter table for dinner.

To make the crate I used the Wood Crate Framelits Dies and the Wood Textures Designer Series Paper Stack. Just cut two pieces with the wood crate die. The die scores the paper as it cuts so all you have to do is crease and fold and assemble with some Multipurpose Glue. If you don’t own the Wood Crate Dies just make some other little basket or box by scoring and folding.

The chick is copied from one I made many years ago on THIS little Easter basket. Back then we had a Scalloped Circle Punch, but you can use the scalloped Circle Dies. For the wings, I just cut a scalloped circle into portions. I sponged all the pieces. For the little feathers on top of his head and for his feet, I just found some shapes on some dies that would work or maybe you could use the Blossom Builder Punch. Whatever you have with something resembling the shapes you need! The little beak is just cut by hand. The eyes are punched with the Cookie Cutter Builder Punch and just colored with a black marker. The chick is adhered to the wood crate with a couple of Stampin’ Dimensionals.

You can use whatever color card stock you like or other designer paper. Make the chick with whatever shapes you can punch or die cut. You can also add an Easter greeting on the front. It’s just a cute little treat idea for holding some Easter candy treats or for a little home decoration. Have fun making your own Easter treats to give to some family members, friends or neighbors!

An Easy Candy Basket For Easter With Candy Chicks

Candy Basket For Easter With Candy Chicks

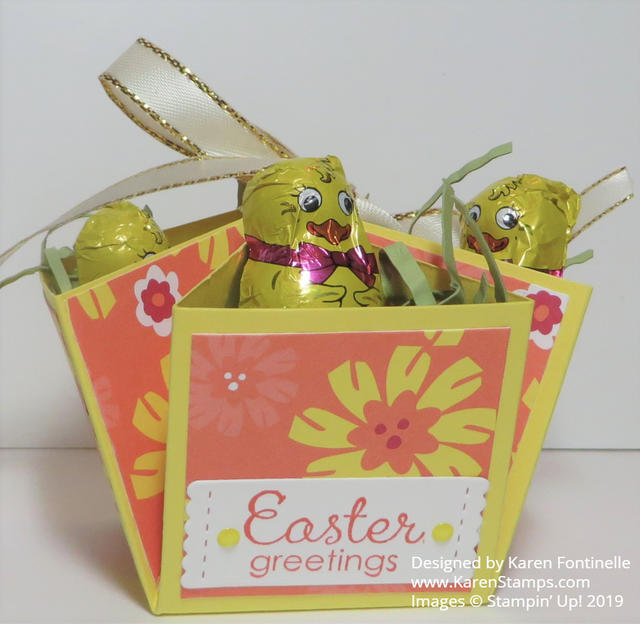
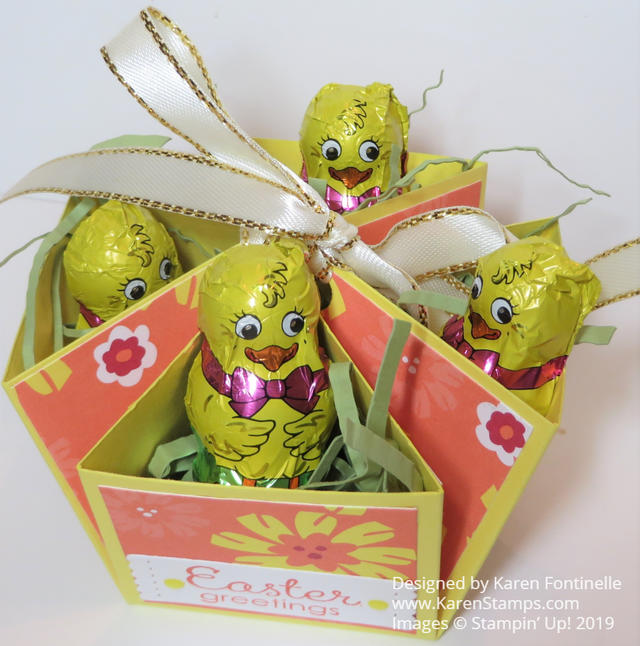
Here is a fun little Easy Candy Basket For Easter With Candy Chicks, one you may have made in the past to fill with candy. Easter is late this year, but it will still sneak up on us! Now is the time to start having fun making Easter cards to send and maybe some little projects for your Easter dinner or home decorations!

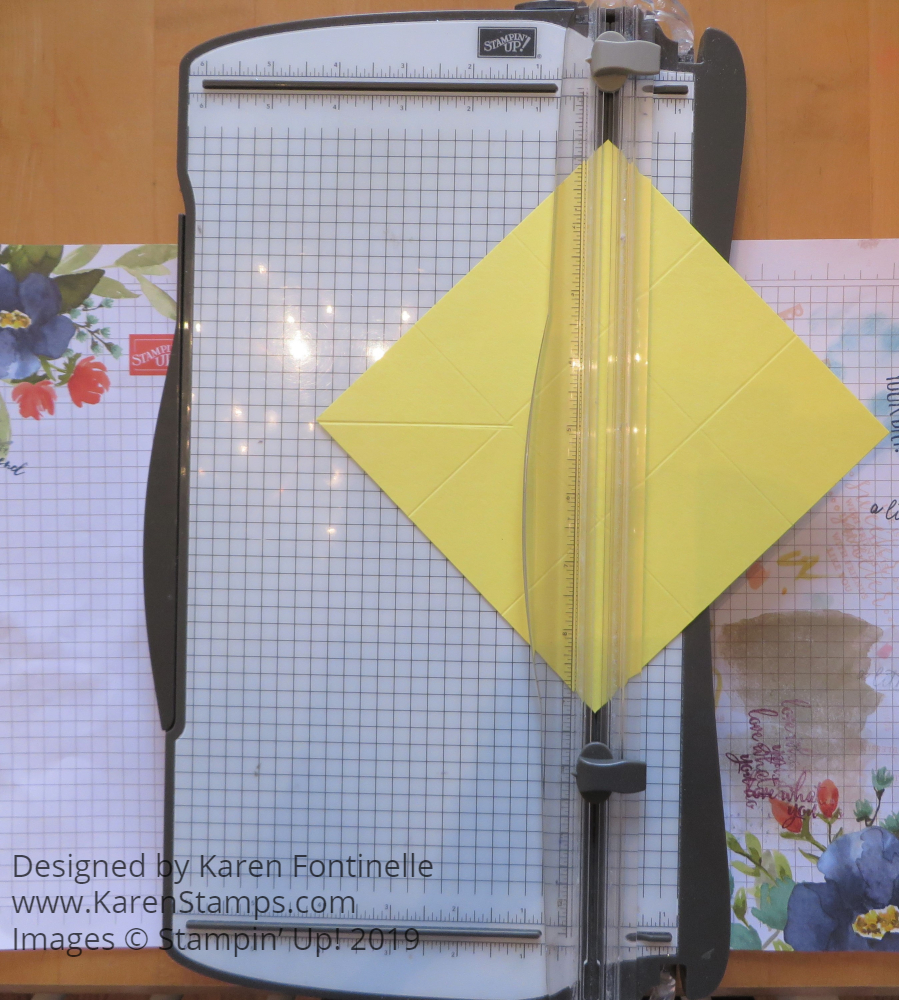
This small little basket is made with just a 6″ x 6″ piece of cardstock and pieces of designer paper. Score at 2″ and 4″ on each side so it ends up looking like a tic tac toe board with six sections. Then on each corner, score diagonally. You can do it easily with the Stampin’ Trimmer by lining up the top and bottom corners on the cutting track of the Trimmer. Don’t score all the way down the paper, just in that corner. That center piece will be the bottom of the basket. See photo below.

Candy Basket How to Score

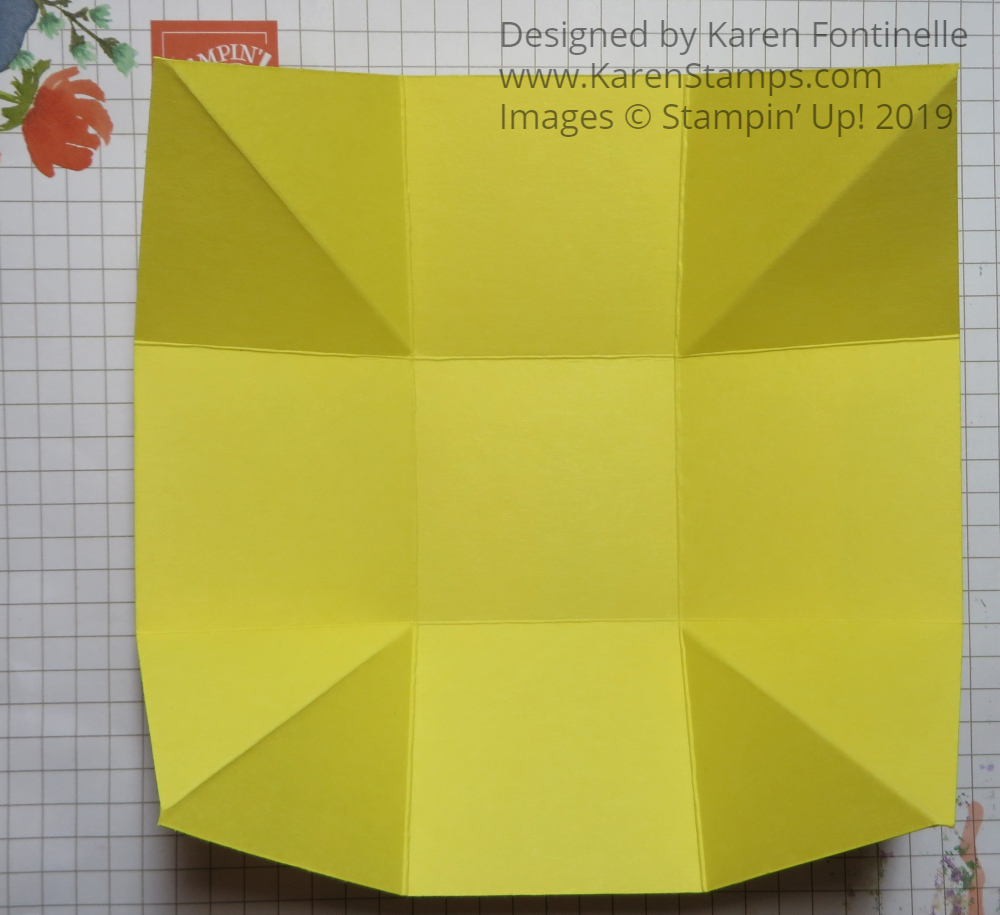
This is what your paper will look like when it is all scored and creased.

Candy Basket Scored Piece

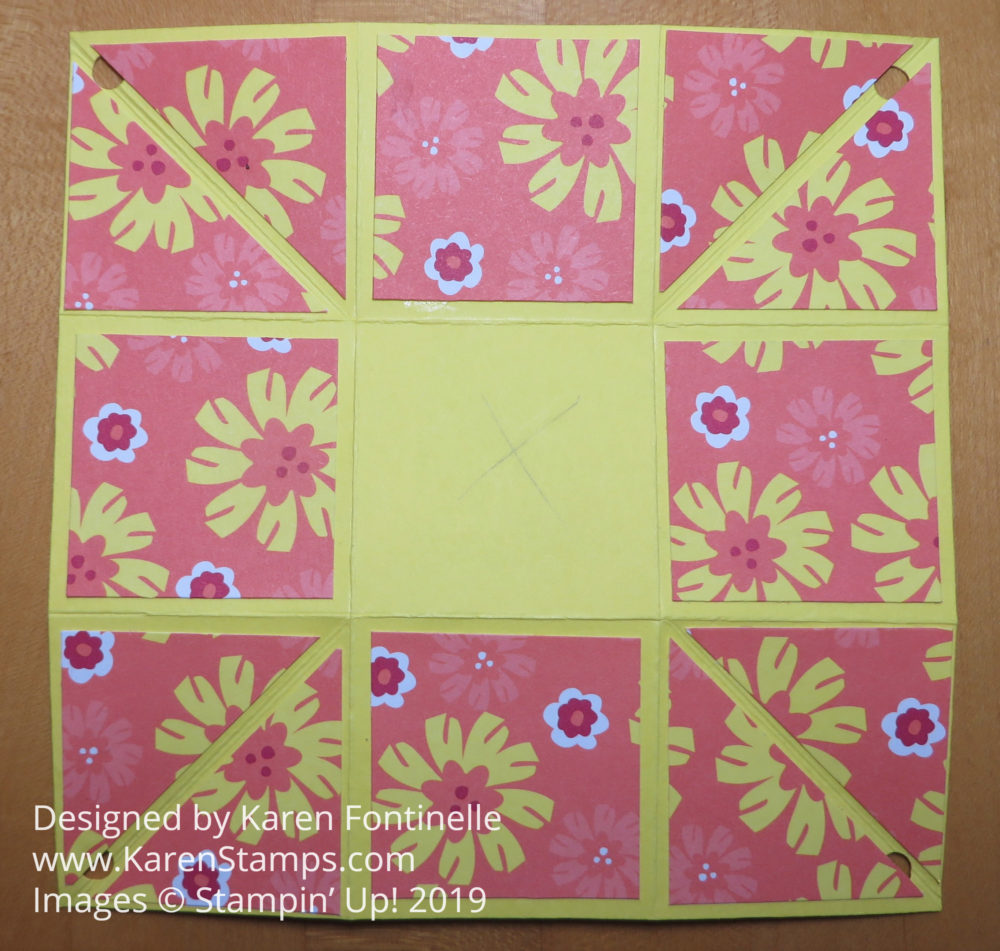
After the scoring is done, be sure to crease on all the score lines and just see how it is going to fold up into a basket when assembled. Note where the bottom is and put an X on the bottom with a pencil just so you know. Then cut and adhere pieces of designer series paper (or stamp on the cardstock) to each area. The squares will be 1 3/4″ x 1 3/4″. Note that for the four pieces that will go on the corners must be cut diagonally in half and adhered on each half of that scored corner. You do not need a piece of designer paper for the bottom of the basket, that you have already marked.

Candy Basket with Designer Paper

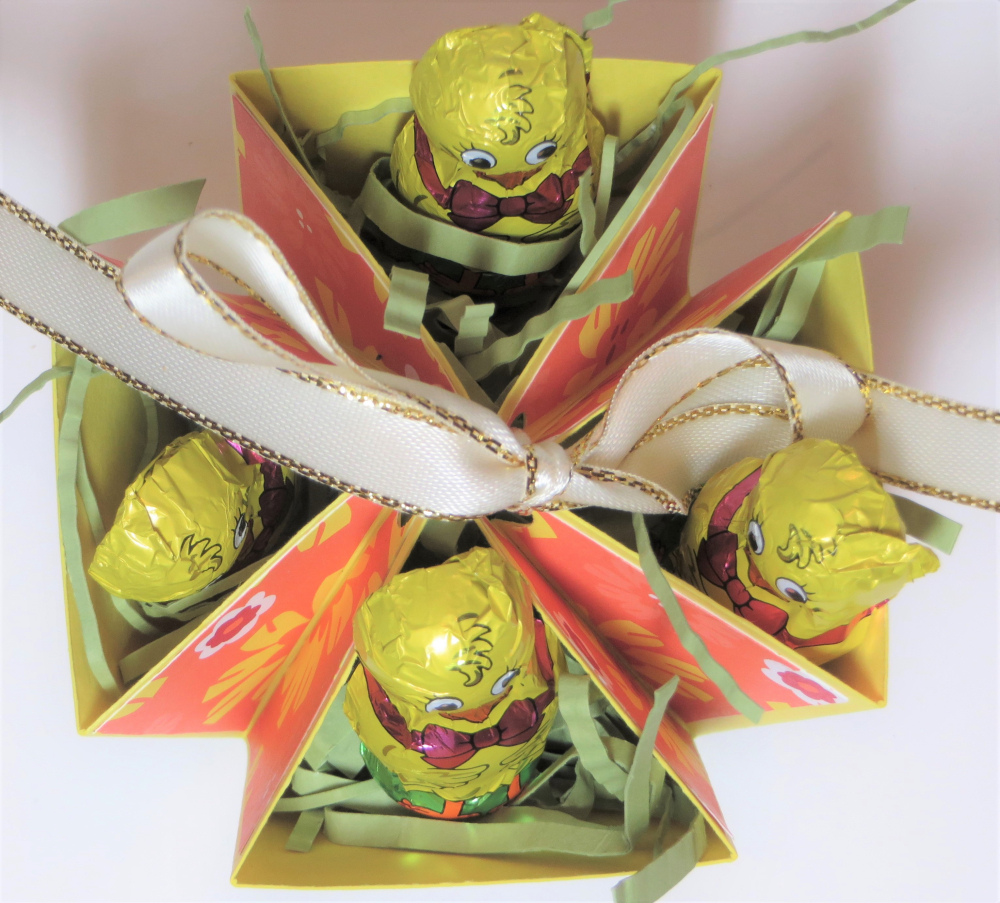
To assemble the basket just fold up into a container shape, folding those diagonal corners in. The way the basket will stay together is by tieing the four corners together in the center. In order to do that, you will need to punch a hole in each corner. It’s probably best to do this after you adhere the designer paper, but you can do it to the plain cardstock and then just re-punch if needed. You can see the punched holes in the corners in the photo above if you look closely. Run some ribbon around through the holes and then pull and gather the corners to the center and tie the ribbon into a bow.

Candy Basket Top View

Add some shred or make your own by cutting very narrow strips of cardstock and crinkle with your hands or with a paper crimper. Then add your treats, like these chocolate Easter chicks!

Chocolate Candy for Easter

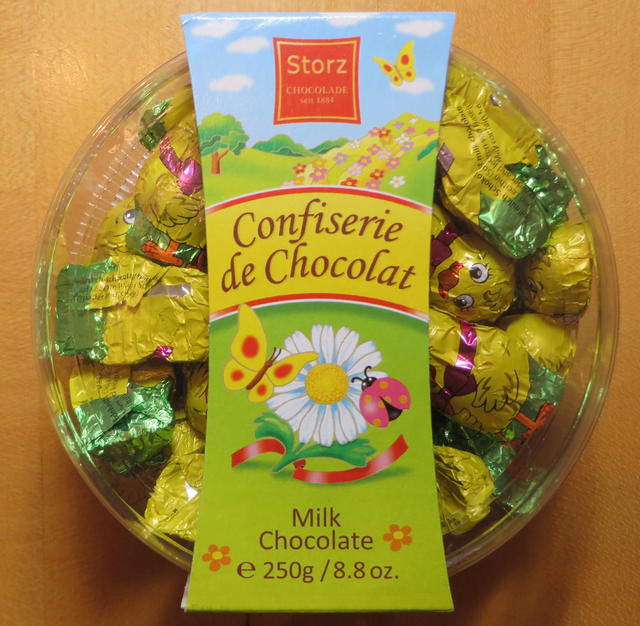
I spotted this candy at Home Goods and thought it would be perfect for Easter projects…..and it tastes good too!

My basket is made with Pineapple Punch Cardstock and Happiness Blooms Designer Series Paper. If you are using a paper with a certain pattern, make sure you have each piece going the way you want it to go on the finished basket. The ribbon is the Gold 3/8″ Metallic-Edge Ribbon. The Easter greeting is stamped from the Fable Friends Stamp Set and die-cut with a die in the Stitched Labels Framelits Dies. If you didn’t have this die set you could just cut a rectangle or an oval for the front of the basket.

Candy Basket Full View

That’s how you make this Easy Candy Basket For Easter With Candy Chicks and anyone can do it, even with a larger piece of cardstock. Make one for a little Easter treat or decoration at your house!

SHOP STAMPIN’ UP! ONLINE HERE! SALE-A-BRATION ENDS MARCH 31!

SALE-A-BRATION ENDS MARCH 31!