Category Archives: Thanksgiving

Using Blackberry Bliss and Color Me Autumn For a Fall Card

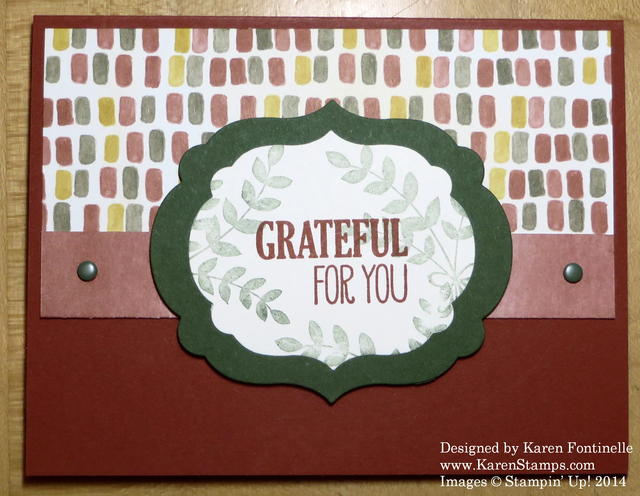
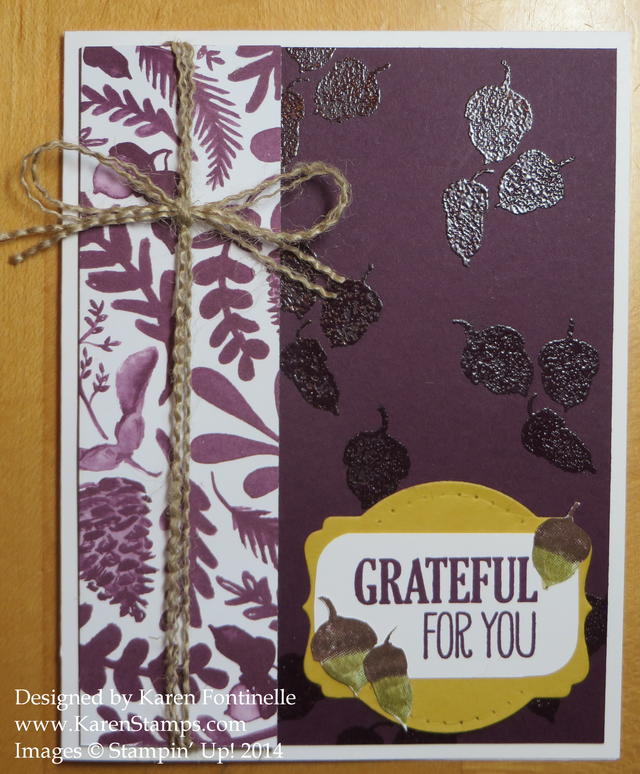
Blackberry Bliss and Color Me Autumn Fall Card

To get started on this fall card, I pulled out the package of Color Me Autumn Designer Series Paper because the colors and patterns on this paper are just so beautiful! I decided to use a strip of this piece with Blackberry Bliss art on it. After that I kind of lost my “mojo”! I stamped and stamped acorns using my Stampin’ Write Markers to color them, die cut them with various framelits, layered them on different colors of card stock – nothing was quite right! I also stamped several leaves and cut them out with my Paper Snips, but they didn’t seem to have a place on this card. I tried coloring just the word “Grateful” and stamping that on the banner stamp, but that didn’t do it. I tried different framelits and punched out the group of acorns with the 2″ Circle Punch.

Finally, I decided to cut out the three acorns and use them as accents on the greeting. The greeting was stamped on a rectangular piece of Whisper White card stock, but then I rounded the corners with the cute little Project Life Punch Corner. I used the Deco Labels Framelits Die to cut out a piece of Hello Honey card stock for the layer for the greeting. I even did a little paper piercing on the top and bottom curve. Then I adhered the little cut out acorns around the greeting.

For one more thing, I decided to emboss the acorns on the Blackberry Bliss layer with Clear Stampin’ Emboss Powder. It didn’t photograph too well, but it just gives a little dark shiny texture to the background. And then, one of my favorite things to do, I frayed a couple strands off the Burlap Ribbon to tie around the designer paper on the side.

It took me awhile with this card to get it to all come together!  Sometimes that happens and sometimes you can come up with a card in two minutes!  Just keep playing and you’ll know when you have it right!

For any of the supplies to make this card, please visit my Stampin’ Up! Online Store.

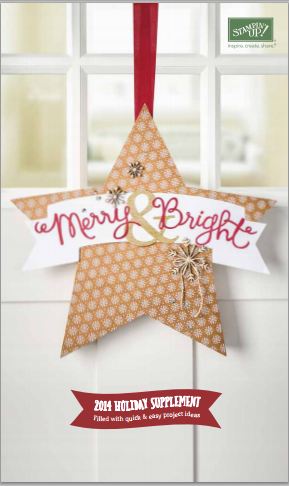
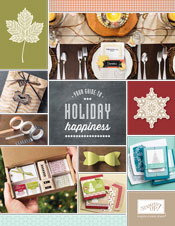
It’s Time For the Stampin’ Up! Holiday Catalog!

Stampin' Up! Holiday Catalog 2014

Did you wonder if this day would EVER get here?!  The day the Stampin’ Up! Holiday Catalog goes live?! Let the ordering begin so you can get on with your holiday cards and projects! Not just Christmas, but fall, Thanksgiving, Halloween and other fun things! Lots of kits for those who don’t have time or supplies! New products, such as a Gift Box Punch Board!

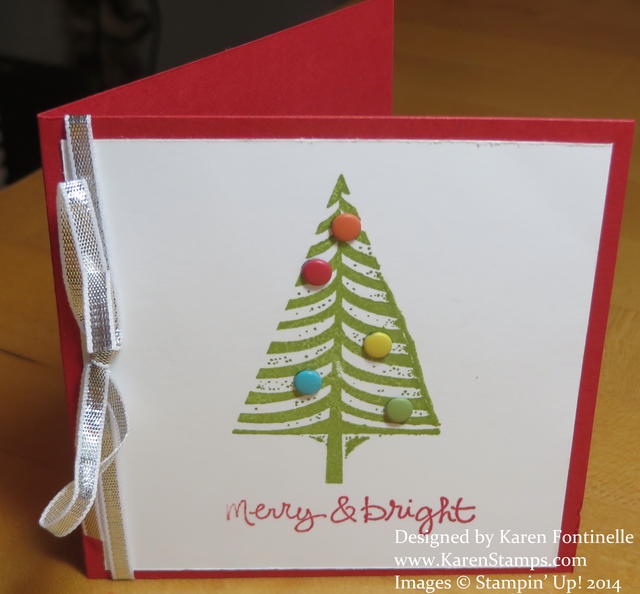
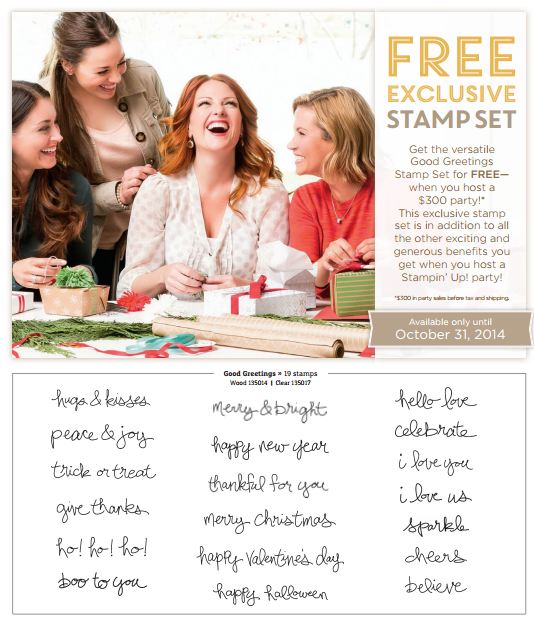
Here’s a little gift tag card I made in minutes with the Festival of Trees stamp set, some Brights Candy Dots, Silver 1/8″ Ribbon, and a greeting stamp called Good Greetings that you can earn FREE! Just host a $300 party or place your own $300 order!

Festival of Trees Tag Card

Don’t miss the Festival of Trees Bundle with the stamp set and NEW Tree Punch!

Good Greetings Free Stamp Set

Contact me if you want to have a Christmas card party or other fun night or day out with your friends! Now go enjoy the brand new Stampin’ Up! Holiday Catalog! If you are one of my regular customers and didn’t receive a catalog, please let me know.  And if you don’t have a demonstrator and are interested in Stampin’ Up! products, please contact me at Karen@KarenStamps.com.  I would be happy to get a catalog to you!

Today is the LAST DAY for the Short & Sweet Offer:  Become a Stampin’ Up! Demonstrator by purchasing the Starter Kit for $99 and choose an EXTRA $25 in product!  Get $150 in product of your choice for only $99 (regular offer $125 in product)! Click HERE for my link to get started!  It only takes minutes to purchase your Starter Kit online and become a Demonstrator. Then you will be emailed a password to get in to the Demo Site and begin your training and look around and see all the resources available to you to start your own business! Choose items from the Holiday Catalog for your Kit if you like!

Shop my Stampin’ Up! Online Store for all your stamping needs!

On Thanksgiving Day

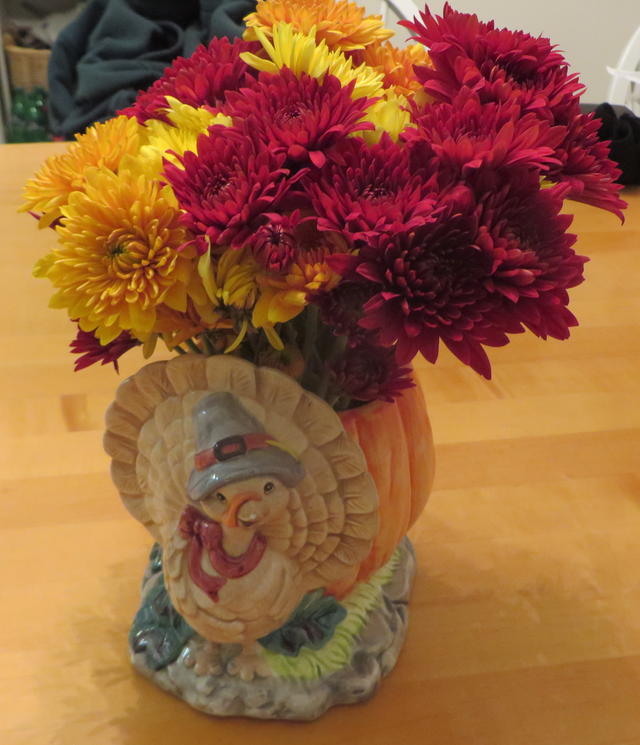
Ceramic Turkey Flower Holder

Years ago I bought a flower arrangement in this ceramic turkey for my Thanksgiving table. The next year I didn’t see one as cute, so I brought this one back and had them put fresh flowers in it. I’ve been doing that every year for our Thanksgiving centerpiece. Lately I’ve just been buying a bunch of flowers and putting them in the turkey myself, but as you can see, flower arranging is not one of my talents!!  But I still love my little Thanksgiving turkey with some pretty fresh flowers!

I’m sure your family has its special traditions for Thanksgiving.  I hope you are enjoying them today and building those memories!

Happy Thanksgiving to You!

No Mistakes in Stamping!

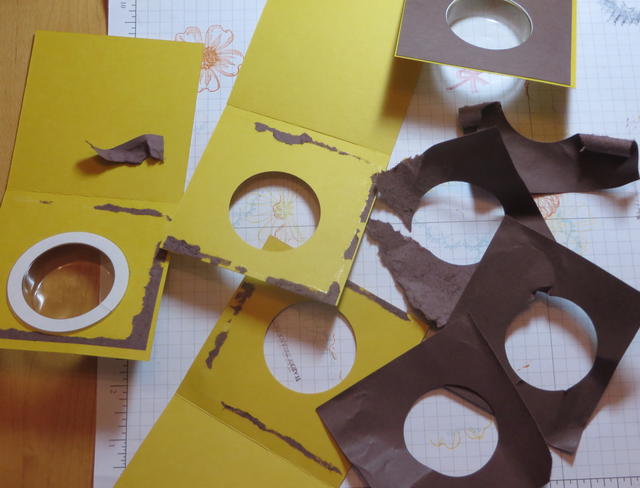
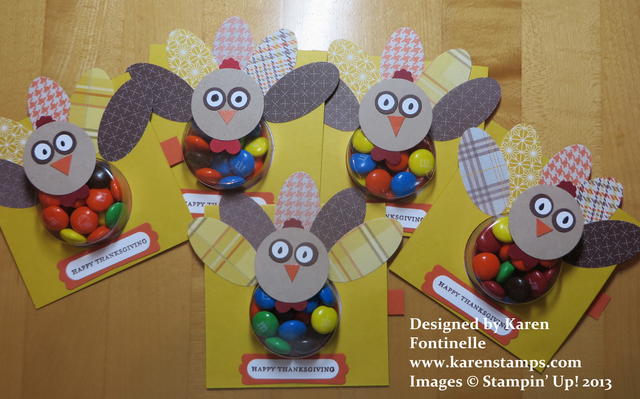
Turkey FavorsThere are no mistakes in stamping.  There are no mistakes in stamping.  Well, maybe not in stamping, but sometimes in pasting!!  This was my project with the Circle Treat Cups that I had to rip apart because I realized I hadn’t put the treat cups in the punched out circle yet!

But it all worked out!  Just cut out my Chocolate Chip paper and redid it! Do you like all my cute turkeys for my Thanksgiving table today?!

Turkey Favors for Thanksgiving

 Happy Thanksgiving!

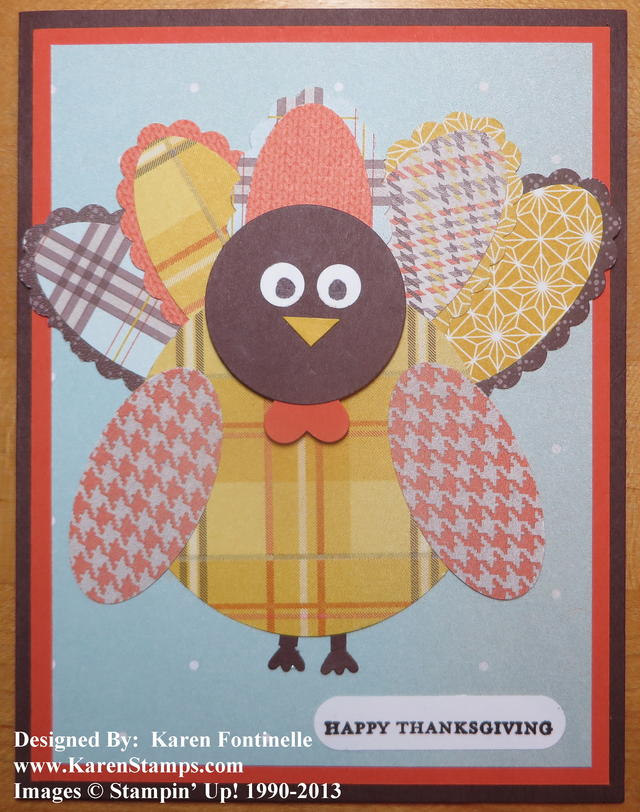
Punch Art Turkey Thanksgiving Card

Punch Art Turkey Thanksgiving Card

Punch art is the term given to using our Stampin’ Up! punches to make an image of some kind. This punch art turkey is easy to make with some ovals and circles and goes great on a Thanksgiving card.  You could also make a punch art turkey like this and use on place cards or decorations on your Thanksgiving table.

I’ve been cleaning out my craft room and going through all the pages I printed out of card ideas, etc. Some are so old and out of date, plus with ideas so prolific on the internet I seldom print things out any more.  But when I came across this cute turkey idea I’d printed many years ago I had to set it aside to make!

The Sweater  Weather Designer Series Paper is perfect to use for this card! The coordinating colors that go with the paper are Tangerine Tango and Chocolate Chip so I used those for the card base and layer and parts of the turkey. Then I just punched a body for the turkey with the 2 1/2″ Circle Punch, the head with the 1 3/8″ Circle Punch, the feathers with the Oval Punch and Scallop Oval Punch. Of course for the eyes and feet the Owl Punch came in handy! The waddle is the Small Heart Punch upside down. The Thanksgiving greeting is from one of my favorite stamp sets Teeny Tiny Wishes, punched out with the ever-popular Word Window Punch.

Supplies Used

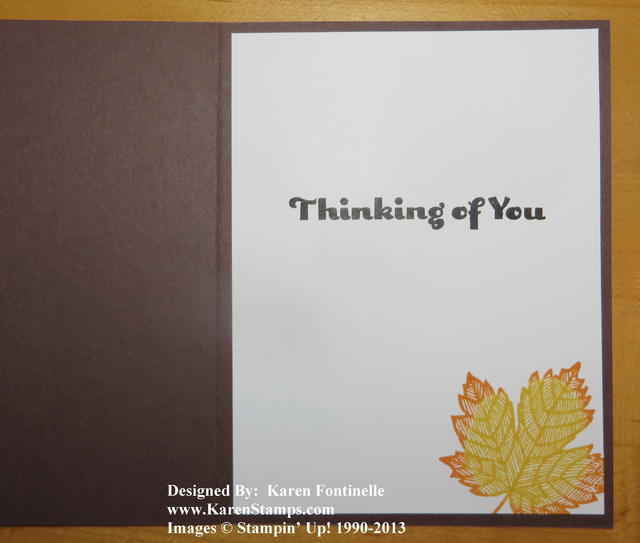
Here is the inside of the card.  I added a Whisper White layer since the card is too dark to write on. I inked up the Magnificent Maple stamp in Crushed Curry (the lighter color first) and then “rock ‘n rolled” the stamp on the edges in the Tangerine Tango to get the two-toned effect.  The greeting is from the Four You stamp set.

Thanksgiving Card Inside

Be sure to check out all the Holiday Sale items at my Stampin’ Up! Online Store as well as the Weekly Deals. You can use the categories on the left side of the store website to find all the products! You might also like the Festive Flurry Ornament Kit!  Mine is on the way!

Autumn Traditions Kit for My Digital Studio 50% Off to

Autumn Traditions Kit for My Digital Studio

Images copyright Stampin’ Up! 2013

Only today and tomorrow left of Stampin’ Up! Digital Scrapbooking Days! Today this beautiful Autumn Traditions Kit is available for 50% off the regular price, today only! If you think you might make a fall digital album or photobook or even if you just want to print off the paper or words yourself, this might be the set for you! Sometimes if I don’t have quite the right words or greeting I want in regular stamps, I can check on My Digital Studio and print my choice from there right onto my card stock. Also downloads, stamp set, and paper do not retire on My Digital Studio.

If you live where there are/were beautiful fall colored leaves or have taken photos on trips, like I have, this paper and images would be beautiful to design your pages and album. Or maybe you’d like just a simple “swatchbook”. Not that you are limited to scrapbooks with digital software because you absolutely are not!  You can make all sorts of projects with My Digital Studio!

For more information on My Digital Studio, please visit HERE.

Use Your Scraps for a Thanksgiving Sunburst Card

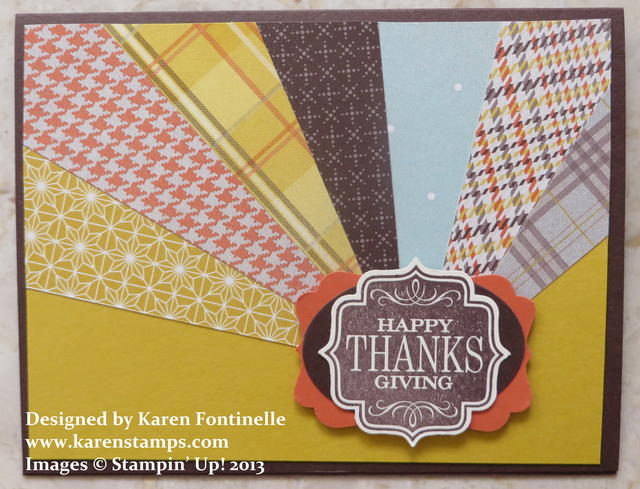
Thanksgiving Sunburst Card

The sunburst technique that I used on this card is easy to make with scraps of designer paper. Using the beautiful Sweater Weather Designer Series Paper with this technique makes a nice autumn or Thanksgiving card.

The card base is Chocolate Chip card stock and the layer is Crushed Curry.  I chose three papers from the Sweater Weather series and cut a 1 1/2″ x 4 1/2″ piece from each pattern. Then I used my Stampin’ Trimmer to cut each rectangle in half on a diagonal. Because I wanted seven “rays” of the sunburst, I cut one more half. You can use both sides of each piece or cut extra pieces.

Lay out the pattern you want and move the pieces around until you like it! Then adhere to the Crushed Curry, keeping in mind some edges of the papers will hang off the edge.  Just kind of judge where you need to put adhesive.  You can always go back and lift up edges to apply more adhesive if you need to.  The points of the papers will be covered by the focal point of the greeting or whatever you put there. Once you have the sunburst adhered the way you want it, just trim off the overhanging edges.  Use the Stampin’ Trimmer or Paper Snips.

For my greeting on the front, I stamped the Thanksgiving sentiment from the stamp set Tags 4 You and punched out with the Bracket Label Punch. And good news:  You can purchase that stamp set and the punch in a Bundle!  Save 15% when you buy them together!  

There are various things you can do with this greeting. You could trim off the border to make it smaller and then punch the same shape out of another piece of cardstock. You could use any of a variety of punches for a background for the greeting.  On this sample, I used the Large Oval Punch and the Decorative Label Punch.

Try this card and then get out some other designer paper and make another sunburst pattern card for a different look and occasion.  You could also use this technique in scrapbooking, just cut longer pieces!  Try it!

Magnificent Maple Card for Thanksgiving

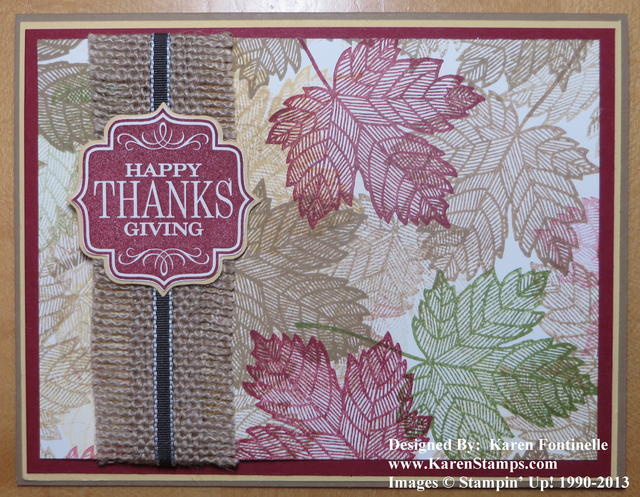
Magnificent Maple Leaf Thanksgiving Card

The Magnificent Maple stamp is great for you to use for fall cards and projects, and of course it is great to use for a Thanksgiving card. Here is another card you could make with the random stamping of the Magnificent Maple stamp all over your paper in different colors, sometimes known as a “one sheet wonder” because you stamp all over one sheet of card stock and then cut up the paper for individual projects.

I used the Stampin’ Up! 1 1/4″ Burlap Ribbon in the Holiday Catalog on this card with a piece of 1/8″ Early Espresso Taffeta Ribbon down the center.  The Burlap Ribbon is actually frayed on each side, which doesn’t show very well in the photograph. Just pull off the binding on the edge and then pull off several threads from each side. It’s very easy to do. Burlap is quite trendy right now!

The Thanksgiving greeting is from the stamp set Tags 4 You. You get five stamps for four occasions:  Thanksgiving, Halloween, Christmas and Valentine’s Day, plus a little to and from stamp if you are making labels. There is a matching punch, the Label Bracket Punch that fits these stamps perfectly!  In fact, you can save 15% by purchasing the Tags 4 You BundleThe stamp set is available in wood- or clear-mount.

Here is a punch tip: The Label Bracket Punch only comes in one size, of course, but if you want to layer it, as I did on this card, you can use your Paper Snips to cut around the stamped image to make it smaller and then layer it on top of the punch in another color. Cutting something like that is much easier with the small Paper Snips rather than a regular scissors.

*************************************************

If you are reading this blog post and haven’t ever signed up for my Mailing List, do it today! On Monday I will tell you about something special I will be doing ONLY for my mailing list subscribers! You won’t find the same thing on my blog posts or Facebook page, it only goes to my Mailing List Subscribers. It’s fun and I got lots of nice comments about it last year. This year I want YOU to be included!  SIGN UP  now!

It’s Stampin’ Up! Holiday Time!

It may be August, but it is none too early to start thinking about the upcoming holidays!  And just in time is the Stampin’ Up! Holiday Catalog, chock full of creative ideas and new products! Now is the time for us crafty stampers to start working on all these projects we intend to do before each holiday and season and often run out of time to do!  Get an early start now with the Stampin’ Up!  Holiday Catalog!

Stampin' Up! Holiday Catalog 2013

Click catalog image to shop!

Holiday Catalog Flipbook

Holiday Catalog PDF

Holiday Catalog Stampin’ Supplies

Holiday Catalog Spanish Flyer

If you have a copy of the catalog, don’t forget to try out the new feature with your smartphone: little videos!

If you don’t have a Stampin’ Up! Demonstrator and would like a copy of the Holiday Catalog mailed to you, please contact me at Karen@KarenStamps.com.

Yes, you can place an order today, August 1st from the new Stampin’ Up! Holiday Catalog!

And there are even more goodies available starting today!  Check back later!


Stampin’ Up! Convention Mini Class Projects

MDS Thanks Card Using Hexagon PunchMDS Thanks Card Using Hexagon Punch

I’ve said before I always get flustered doing Make & Takes at the Stampin’ Up! Convention and usually end up just bringing the packets home and doing them at my leisure at my kitchen table. This year they did still have Make & Takes but you had to fit them into your own schedule and there were too many things to choose from.  But there were two mini classes, each with a very quick and easy project.

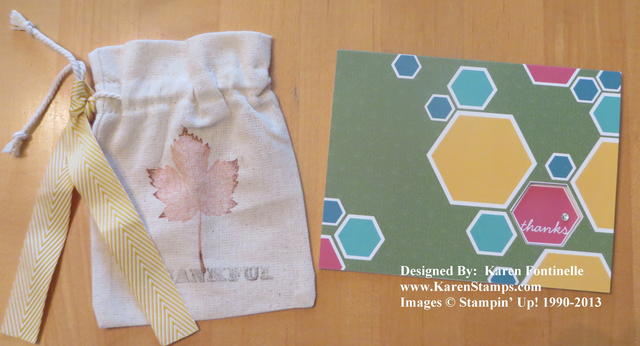
The first one I went to was called the Thankful Sack.  These are all new products coming in the Holiday Catalog August 1st.  We just stamped a maple leaf on a small muslin bag and added the word “Thankful”. We did the “rock and roll” technique with the leaf stamp, where you ink up the stamp in a light color and then roll just the edges of the stamp in a darker color to get a two-tone look.  My first one didn’t come out too well, but just like paper, a small muslin bag also has two sides and it doesn’t hurt to have a leaf on each side, does it??  The cutest part, I think, was tying the piece of Crushed Curry Chevron ribbon around the tie that already comes on the bag!

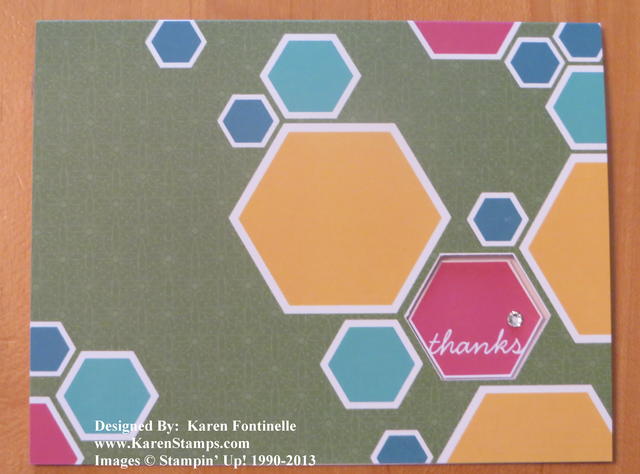
The second project was a My Digital Studio card.  The card was already made in MDS and printed. At first I didn’t know what we were going to be able to do with this card except put a rhinestone on it. But what we did was punch out the greeting with the Hexagon PunchSince it was then the exact same size as the hole, we trimmed the edges just a bit with Paper Snips and fit it back into the hole but adhered it to the inside of the card with a Stampin’ Dimensional. Then we added a Rhinestone Jewel as a finishing touch!

Here you can see the card close-up and hopefully see how we did the punch.  This makes an MDS card into a “hybrid” which is part digital and part traditional.

MDS Thanks Card

MDS Thanks Card

If you are interested in any Stampin’ Up! traditional products or the My Digital Studio digital papercrafting software, please visit my Stampin’ Up! Online Store right here!

A Paper & Ribbon Thanksgiving Turkey Ornament

Paper & Ribbon Thanksgiving Turkey Ornament
Happy Thanksgiving!

I want to wish all of you a Happy Thanksgiving Day and weekend! I appreciate all of my Stampin' Up! customers, subscribers, blog readers, and fellow stamping friends! This papercrafting hobby is so enjoyable because of all of you!

Here's a fun little turkey to make easily.  I was going to put him on a card but once I got the ribbon tail feathers on I thought he was cuter as a little Thanksgiving ornament….or you could use him for a tag. Hang him around the neck of a bottle of wine or tie onto a packaged up pie or whatever food you are taking today! (as in my post yesterday!) Stick him onto a piece of candy, like a Hershey's Nugget or Kiss for a table favor!

Use the Owl Punch for the body and trim off his ears. Punch out the white eyes and just color in the dots with black marker.  Cut the little beak out of a scrap. Punch the little gobble-thing with the Modern Label Punch and trim it to a point at the top.  You just need the little end of the punch….or punch the little heart in the Owl Punch and adhere off to the side a little. Cut some scraps of ribbon, fold over and adhere to the back with SNAIL and/or Glue Dots. That's it! I guess you could punch another owl to glue on the back to hide the adhered ribbon and write a message.

When dinner is over and you start thinking about shopping, don't forget the Stampin' Up! Online Extravaganza.  You can get these ribbon colors in a Bundle!

Hope you are having….will have…or have had…a wonderful Thanksgiving! I can't wait to eat my Cajun fried turkey!!

A Turkey Tag — It’s All in the Presentation (Almost!)!

Turkey Tag Pecan Pie Presentation

They say "It's all in the presentation" or "Presentation is everything!" but I do have to say "almost" because the pie inside this presentation is beautiful! Notice all the individual leaves on the crust around the edge (and the crust is my favorite part of any pie!). 

This year we are doing Thanksgiving a little differently. My friend Dixie and her friend Sherrie have a cooking/catering company so I ordered a Cajun fried turkey from them as well as some chicken and sausage gumbo, a pecan pie and some chocolate Whoopie Pies! No cooking a turkey for me!!!  Oh my gosh, when I saw how they had decorated the pecan pie package and whoopie pies with this cute turkey tag and ribbon I just went crazy!  See how such a simple thing can make such a great impression?!!  Paper, ink, and stamps!  Aren't we part of such an impressive craft?!

Turkey Tag Whoopie Pies Presentation

And a peek inside the foil covering the cajun fried turkey! I don't know how I restrained myself from taking just a little taste from this turkey!

Peek at Turkey

Are you hungry now? If you live in the southwest Houston/Richmond area, email me and I'll give you Dixie's contact information.

If you're taking a pie or some plate of food to someone's house for Thanksgiving, consider taking a few minutes to make some kind of cute little tag or card just for a little something special! I know it will be appreciated!  And make the food look even more inviting!

Stampin' Up! Online Extravaganza going on now until November 28th! Select products discounted 20% – 50%!  More Doorbusters the last day! Check the list right now!

Decorate Your Thanksgiving Table with My Digital Studio!

Unknown Blessings

Images copyright Stampin' Up! 2012

Special holidays call for special table settings and decorating your Thanksgiving table is probably one of the biggest ones!  Sara Brook, of the Stampin' Up! My Digital Studio Team, put together this lovely place setting made with the Unknown Blessings Ensemble. It comes with everything you need to make these table decorations and really sounds easy!  Just use the digital feathers, filling in with whatever color paper you want, print, cut out and snip to look like feathers.  We all made Indian headbands in school I'm sure…just print out the headband, size correctly and add some feathers. The napkin rings are made the same way, just smaller! There's even a pie box to print and make, frameable art, menu cards, place cards….and whatever else you can think up using this digital set!

Unknown Blessings Ensemble My Digital Studio

Images copyright Stampin' Up! 2012

Read more of Sara's post on the Stampin' Up! website for My Digital Studio HERE. She also has more photos how you can use all the elements of the Unknown Blessings Ensemble.

Even if you don't own My Digital Studio (you don't??!) I'm sure you can get some Thanksgiving table decorating ideas from this photo above!

Interested in My Digital Studio?  Well, there is the free 30-Day Trial….AND coming up, starting Monday, Nov. 19th during the Stampin' Up! Online Extravaganza, My Digital Studio is one of the discounted items!!!!!!

Check the Online Extravaganza list HERE….and find the My Digital Studio discounts at the very bottom of the last page!!  That's the 50% off list!!  You will be able to purchase the full MDS 2+ download, the MDS 2 version (less content), or the MDS 2 upgrade all for 50% off the regular price! I would absolutely recommend the MDS 2+ version even at full price but ESPECIALLY for half-price!  You will be amazed at all the downloads that are included in that version.  Treat yourself to an early Christmas gift!

Find all the My Digital Studio options HERE in my Online Store.

Day of Gratitude Thanksgiving Turkey Favor

Day of Gratitude Thanksgiving Favor Turkeys

The Day of Gratitude stamp set by Stampin' Up! can also make a great turkey favor for Thanksgiving! If you need a little something for your Thanksgiving table, class favors for the kids, or just some fun little decorations for Thanksgiving these will fill the bill. Of course there are many variations you could do after you get started.  I often think I am going to copy something exactly and end up with my own version.

Instead of the "Happy Thanksgiving" from the must-have stamp set Teeny Tiny Wishes (and I do recommend for these small stamps that you spend the extra money and get the wood-mount) you could write a person's name for a place card at the table. The body is punched with the 1 3/4" circle and the head with the 1/4" circle punch. You could stamp a little texture on the circles or run one or both through the Big Shot with an embossing folder like I did on the body.  I used the Lacy Brocade folder in the Stampin' Up! Holiday Catalog. The gobble-thing is half of the Modern Label Punch. The beak is just cut by hand. The thing on top of the head is from the Boho Blossom Punch. The tail feathers are the medallion in the Day of Gratitude stamp set. I tried to get them each multi-colored but I don't think the colors contrasted enough. You could also color each section with a different color of Stampin' Write Markers. The feathers are adhered with Stampin' Dimensionals on the back of the turkey.

I would probably use some candy like Hershey Nuggets for the back, but I don't have any (amazingly!) so I used some Hershey Kisses.  It worked just as well.  If I used a Nugget, I would cover it with a strip of designer paper first.

Day of Gratitude Thanksgiving Favor Turkeys Back

For the eyes, you can just punch out black and white circles, or since I had some Googly Eyes left over from Halloween, I used those.  You probably have some in your craft stash, too!

Just a fun little Thanksgiving treat!  Hope you enjoy!

Day of Gratitude Thanksgiving Autumn Card

Day of Gratitude Thanksgiving Autumn Card

It's November now so our thoughts turn to autumn and Thanksgiving.  The stamp set Day of Gratitude is a beautiful one for any season, but it seems to really stand out at this time of year. On this card, I took the idea from the Stampin' Up! Catalog, where only a portion of the card is shown on page 26. I don't know how Stampin' Up! made their card, but this is how I made mine! The colors used work beautifully together…Crumb Cake for the card base, Soft Suede for the medallion and Tangerine Tango, Lucky Limeade, and Midnight Muse. The Antique Brad really adds some elegance to this card.

To make this card, I tore off the front of the card base, leaving just that small margin you see. Then I took increasingly wider pieces of the colored card stock and tore those, adhering them to the back side of the front cover piece. Finally I took a new 4 1/4" x 5 1/2" piece of Crumb Cake card stock and glued it to the underside of that front flap with all the colors (stamp it first!). The leaves are hand cut, but that was pretty easy with my Stampin' Up! Paper Snips.

There are lots of beautiful cards, scrapbook pages and projects you can make with this Day of Gratitude Stamp Set. If you are putting in an order, I would also add the Antique Brads, Paper Snips….and DON'T FORGET:  we have a new paper trimmer…the Stampin' Trimmer!  It's been in the new catalog, but just became available this month. I think Stampin' Up! improved any and every feature anyone might have complained about on the old trimmer.  Click on the link for the trimmer and you will also see a video about the features of the new trimmer.

Start stamping your Thanksgiving cards and projects now so you won't be rushed!