Category Archives: Tools and Accessories

Stampin’ Up! Deals

Stampin' Up! Weekly Deal Sept 22 2015

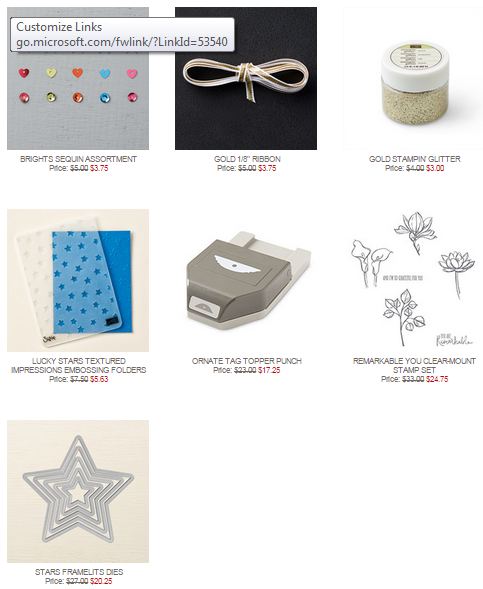
Here are the new Stampin’ Up! Weekly Deals for September 22 – 28, 2015. All great items on the deals this week, whether you want some embellishments or framelits (everybody needs stars in their arsenal!) or a flower stamp set. Sequins are “hot” now.  Be sure to order the new Fine-Tip Glue Pen for adhering the sequins easily.

Stamp Out Breast Cancer with Paper Pumpkin

Stampin’ Up! is supporting the fight against breast cancer by donating $1 for every Paper Pumpkin subscriber and $1 for every NEW Paper Pumpkin subscriber to the Breast Cancer Research Foundation if you subscribe by October 10th! Subscribers will receive their papercrafting kit in a limited-edition pink box!

  • Mini spoiler alert! The October project inside the pink box is just as awesome as always, but we should probably let you know that it is not a pink project. That’s all we’re saying. 😉

Paper Pumpkin is a papercrafting kit from Stampin’ Up! that comes to you  in the mail once a month! All stamps, ink, and supplies are included except possibly adhesive and scissors.  You will be excited for your kit to show up in your mailbox each month and see what project is inside!  No risk, no obligation – you can “pause” or cancel your subscription at any time, just do it before the 10th of any month before the kits ship out.  You will not be billed until your kit ships.  And then you get a cute email from Paper Pumpkin telling you your kit is on its way!

JOIN Paper Pumpkin HERE, especially now, to help people while you have fun stamping!

Sign up before October 10th! The cost of each kit is $19.95 which INCLUDES shipping!  And once you are a subscriber, you can purchase any available full kits or refills from the past.

Paper Pumpkin is FUN!  Just sign up and try it out!  Give yourself a treat!  You deserve it!

Witching Decor Project Kit Witch Hat

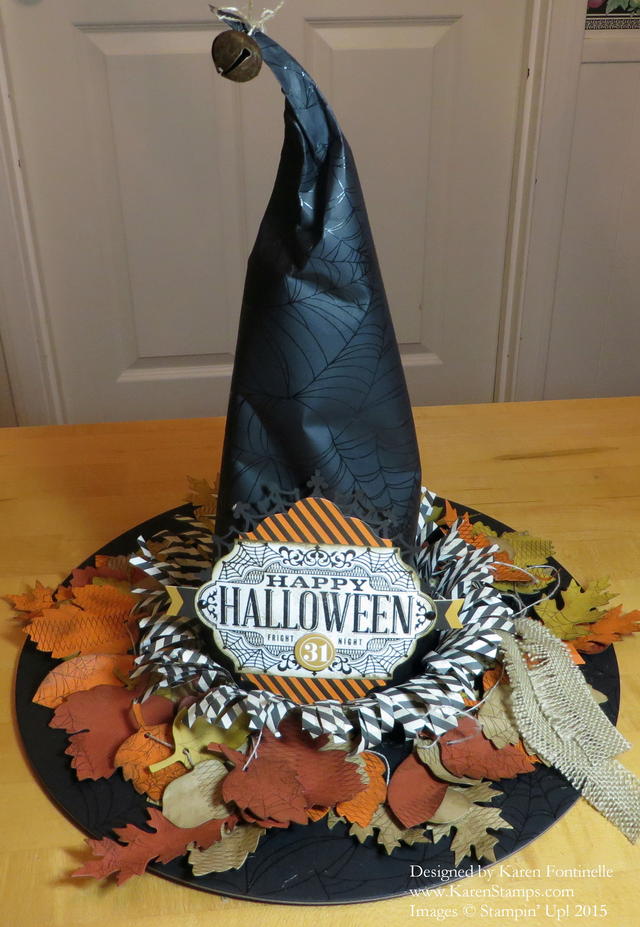
If you are interested in this Witching Decor Project Kit, order it right away! Stampin’ Up! says demand is growing the closer we get to fall and Halloween and once they run out there will not be time to order more.  I LOVE this kit and made my witch’s hat in probably about two hours, if that.  It is not difficult.  The most time-consuming part is punching out the die-cut leaves, stamping a little texture (nothing exact) on them, crumpling and stringing. You will also need the Witches’ Night Stamp Set if you want to stamp the Halloween label on the front. But if you want, you can make up something with whatever stamps you have.  But I do love that label as is!

If you like Halloween like I do, you DO want this kit!  But I strongly suggest you order it as soon as possible so you can get one!  I think it is one of the best kits Stampin’ Up! has done.

Shop Stampin’ UP! Online HERE!

Stampin’ Up! Weekly Deals and Paper Pumpkin Breast Cancer Support

Stampin' Up! Weekly Deal Sept 15 2015

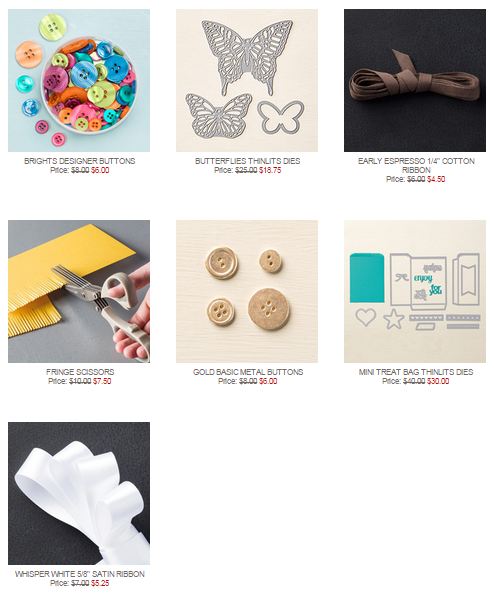
Here are the new Stampin’ Up! Weekly Deals for September 15-21, 2015. In my opinion, there are a couple of GREAT deals on here:  the Mini Treat Bag Thinlits Dies (one of my favorites!) and the beautiful Butterflies Thinlits Dies. If you don’t own these already, I really think you will like them and get a lot of use out of them. You can use the Mini Treat Bag Thinlits for Halloween coming up for treats, even for Christmas for candy treats, small gifts or gift cards. The sizes of the treat bags can even be varied.  Also, you get so many other pieces to use with the basic treat bag die. And of course I’m sure you’ve seen beautiful cards and projects made with the die cut butterflies. The other items are the buttons, ribbons and Fringe Scissors, all things you can use to enhance the look of your creations! Get the discount while it is available!

Don’t forget to check the Clearance Rack, too, for more bargains!

SHOP STAMPIN’ UP!

Stamp Out Breast Cancer with Paper Pumpkin

To show our support for Breast Cancer Awareness Month, we’re going PINK . . . or at least our October boxes are! And because we know our subscribers want to share the love too, we will be making a donation on their behalf to the Breast Cancer Research Foundation (BCRF).

To find out about Paper Pumpkin, the Stampin’ Up! papercrafting monthly kit that comes in the mail, click HERE.

Stampin’ Up! will donate:
$1 for every active Paper Pumpkin subscriber.
Plus, an additional $1 for every new subscriber.

Together, we will make a difference!

Here’s how you can help:

Subscribe! If you’re new to Paper Pumpkin, click here to get started. Your first kit will arrive in a limited-edition pink box that you’ll want to hold onto forever-and we’ll donate $2 because you’re new!
Stay active if you’re a subscriber so we can donate $1 for you. Only those who receive the October shipment will be counted for the donation.
Spread the word! Help us get as many new subscribers as possible. Every current subscriber adds $1 and for new subscribers it’s doubled, so let’s get the word out and raise as much as possible.
Remember, those who get the October kit will not only be donating to a good cause, but they will also get a one-time only, pretty pink Paper Pumpkin box! No one will want to miss it. Promise.

More About BCRF

The Breast Cancer Research Foundation (BCRF) advances the world’s most promising research to eradicate breast cancer. Founded by Evelyn H. Lauder in 1993, BCRF has raised more than $550 million to fuel discoveries in tumor biology, genetics, prevention, treatment, survivorship and metastasis, making it one of the largest non-governmental funders of breast cancer research in the world. This year BCRF has invested $58.6 million in research, to support over 235 researchers at leading medical institutions across six continents, including $11.6 million to the international Evelyn H. Lauder Founder’s Fund focused on metastasis. By spending 91 cents of every dollar on research and public awareness programs, BCRF remains one of the nation’s most fiscally responsible nonprofits. BCRF is the only breast cancer organization with an “A+” from CharityWatch, and has been awarded Charity Navigator’s highest rating of four stars 13 times since 2002. For more information, please visit: www.bcrfcure.org.

Additional Details:

New subscribers are those who signed up between September 11 and October 10, 2015 and have not been a Paper Pumpkin subscriber at any time in the past.
All funds will be donated in US dollars.
Mini spoiler alert! The October project inside the pink box is just as awesome as always, but we should probably let you know that it is not a pink project. That’s all we’re saying. 😉
Funds will be donated based on number of subscribers instead of boxes shipped. But, if you want more than one pink box, you can always increase your subscription quantity by logging into your account at PaperPumpkin.com before October 10.

JOIN PAPER PUMPKIN TODAY AND HELP OTHERS!

A Way to Use Photopolymer Stamps

Photopolymer Stamping Tip

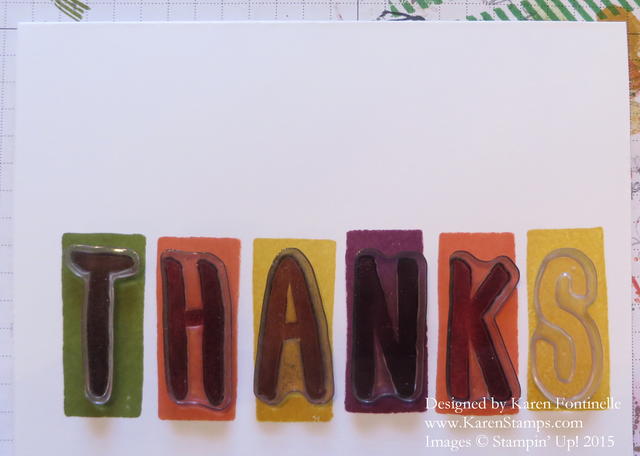
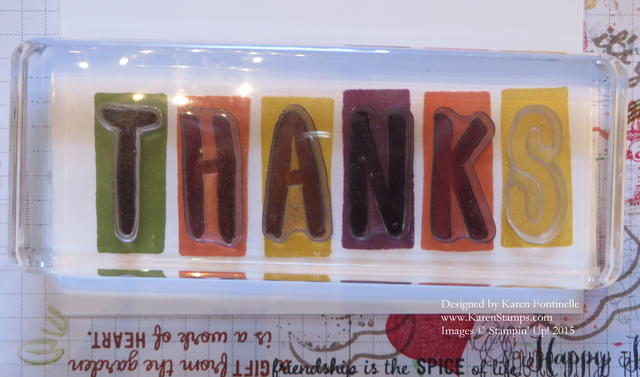
Here’s a way to use photopolymer stamps, certainly not my original idea, but one that I have heard yet never think about using! Put more than one photopolymer stamp on a block! Make your design with the stamp and then place the acrylic clear block on top. Your stamps will be placed exactly where you want them. Depending on your design, you might be able to stamp over and over with the combination of stamps on one block.

In the card above, I have stamped the colored blocks with the rectangle piece in the Layered Letters Alphabet Photopolymer Stamp Set. Next I laid out the letters I wanted to use exactly where I wanted them placed on the colored rectangles, stamping side down. (The stamps are stained, they don’t have ink on them yet!)

Photopolymer Stamping Tip with Block

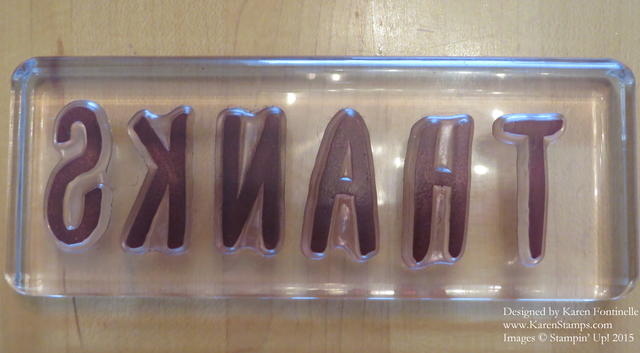
After you have your photopolymer stamps laid out how you want them, place the correct size acrylic block right over them to attach to the block for stamping.

Photopolymer Stamping Tip with Stamps on Block

Now with the card I was making with the colored areas I was stamping on, since those area would be differently placed on each card I handstamped, I couldn’t use this same “thanks” stamp set up over and over again.  But if I wanted to stamp just the word “Thanks” over and over, I could place all the letters on the block and stamp over and over for the same look.

Don’t forget, tomorrow, Monday, September 14 is the last day for the current Weekly Deals! Be sure to check them out and see if you want anything!

I hope this way to use photopolymer stamps will stick in your head so if you come upon a stamping situation where it would be handy, you will remember it (better than I do!).

Stampin’ Up! Online Store Open 24/7

Stampin’ Up! Deals

Stampin' Up! Weekly Deal Sept 8 2015

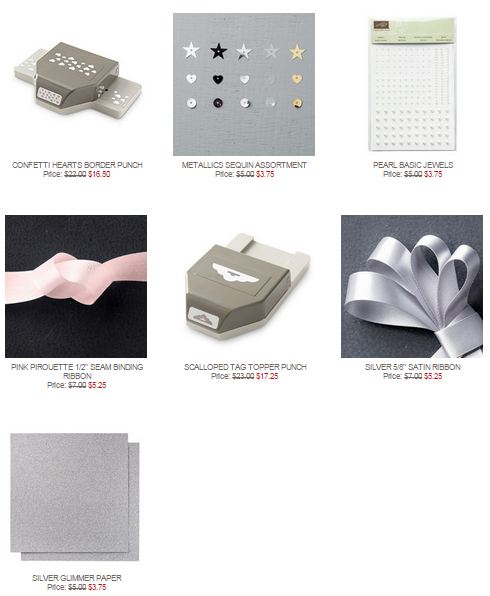
Here are the new Stampin’ Up! Weekly Deals for September 8 – 14. I would say the highlight is the Scalloped Tag Topper Punch!  If you don’t have that already, get it! It will help make cute Christmas tags and many other tags and projects! Of course I have always loved the Glimmer Paper and this week the Silver Glimmer Paper is discounted!  Perfect for the holidays coming up! The Confetti Hearts Border Punch is good for making teeny tiny hearts – maybe to put in shaker cards or for some confetti – or to simply punch a unique border on a card or project or scrapbook page. Then we have a couple ribbons, pearls and metallic sequins to embellish with, always great to have an assortment of things to add like that. Sequins are the “in” thing right now and a great adhesive to use with them is the new Fine-Tip Glue Pen in the Holiday Catalog.

Clearance Rack Banner 2015

Stampin’ Up! has announced new items on the Clearance Rack today!  Check it out before you finalize your order!

Paper Pumpkin Special Offer Aug 2015

Click to Join!

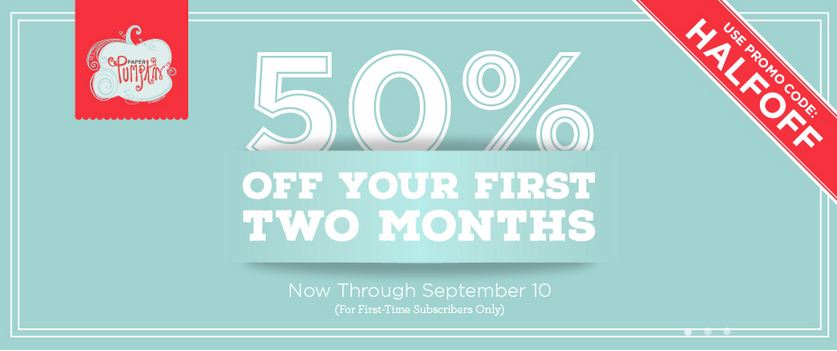
And just a couple days remaining to take advantage of the special 50% off first two months of Paper Pumpkin, the Stampin’ Up! kit that comes to you in the mail! Take a little time to relax and craft with a kit all ready for you!  You deserve it! Use Promo Code HALFOFF. Sign up by Sept. 10th to take advantage of this great deal! Let me know if you signed up so  can make sure you are on my list!

Now that we are past Labor Day, it’s time to really start thinking about the upcoming holidays! Get an early start and keep the holidays relaxed (yeah right!). If you need a Stampin’ Up! Holiday Catalog, please contact me. Or check out the PDF HERE at this link.

Before you finish your order, be sure to check out the Stampin’ Up! Weekly Deals and the Clearance Rack!

Jingle All the Way Bundle by Stampin’ Up!

Happy Labor Day!  If you are just relaxing at home today and perusing the internet catching up on ideas for the Stampin’ Up! Holiday Catalog, here is a Stampin’ Up! video about using the Jingle All the Way Bundle. I’m sure this will be a popular set as it is unique and fun! Watch the video for cute ways to use this Jingle All the Way Stamp Set and the Sleigh Ride Edgelits Dies. You will be able to make a stack of Christmas cards with just this Bundle (and of course a Big Shot!) The Bundle saves you 15% and also comes in wood-mount, of course. Be inspired for the upcoming holidays! Get an early start!

If you want a copy of the Stampin’ Up! Holiday Catalog mailed to you, just email me at Karen@KarenStamps.com.

If you love these ideas and want to shop for any of these great Stampin’ Up! products, please visit my Stampin’ Up! Online Store HERE. If you prefer, I can place an order for you.

New Stampin’ Up! Weekly Deals, Clearance Rack, & Holiday Catalog

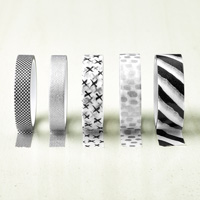
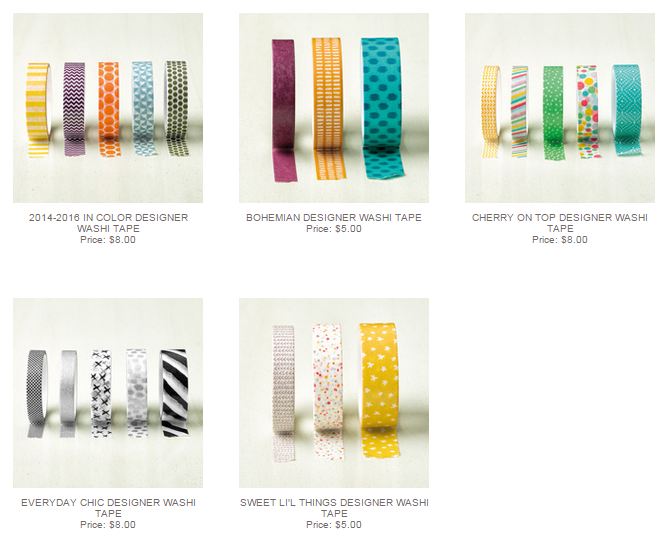
Here are the new Stampin’ Up! Weekly Deals, available while supplies last, until Monday September 7, 2015. Don’t miss out! Great embellishments for your cards and projects in the Candy Dots and Rhinestones, of course! Both are adhesive-backed so all you do is stick them on!  Any Washi Tape is fun to use, and the White Seam Binding Ribbon is always useful!


Clearance Rack Banner 2015

Be sure to check the Clearance Rack before you finalize any orders. You never know what you will find. Stampin’ Up! plans to add new items next week! But if you think ahead to the holidays, right now you can stock up on the pretty Cherry Cobbler Sheer Linen Ribbon (more than half off!), the Real Red Satin Ribbon, the Mossy Meadow Satin Stitched Ribbon for some green,  and the Extra Large Gift Boxes are handy to have on hand for gifts! And there are many more things, but those items jumped out at me as something you can use soon – and all the time, really!

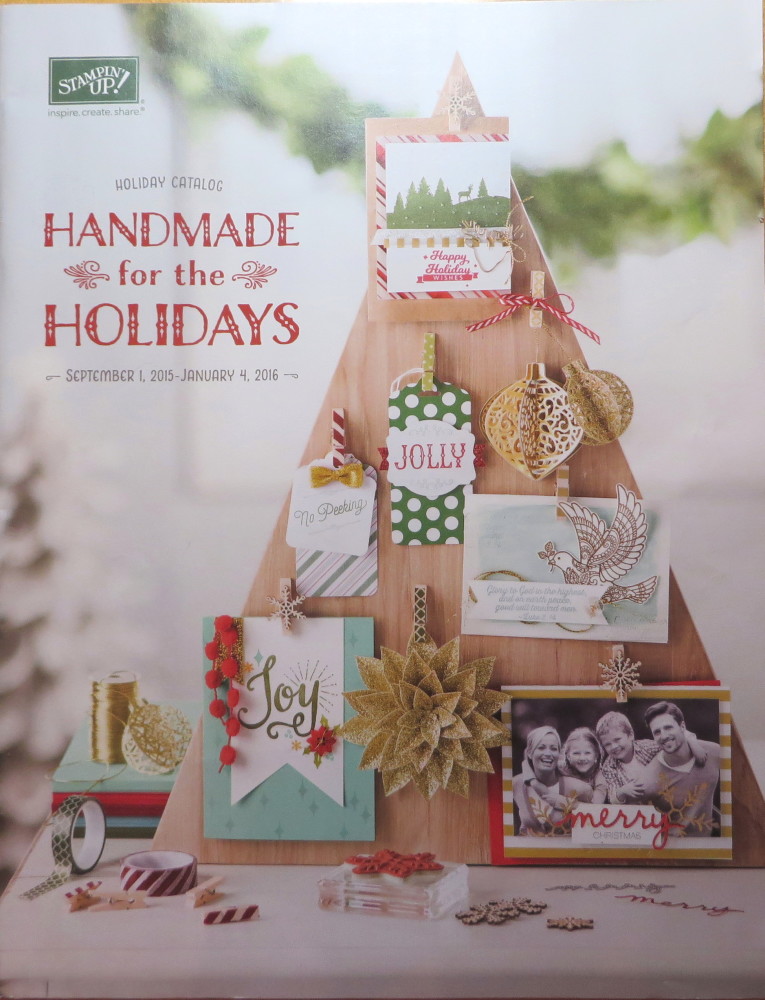
Stampin' Up! Holiday Catalog 2015

And of course, in case you missed it, the Stampin’ Up! Holiday Catalog went live yesterday!!  If you need a catalog (USA) please email your contact information to Karen@KarenStamps.com.

Check out all the fantastic Holiday Catalog products in my Stampin’ Up! Online Store! .

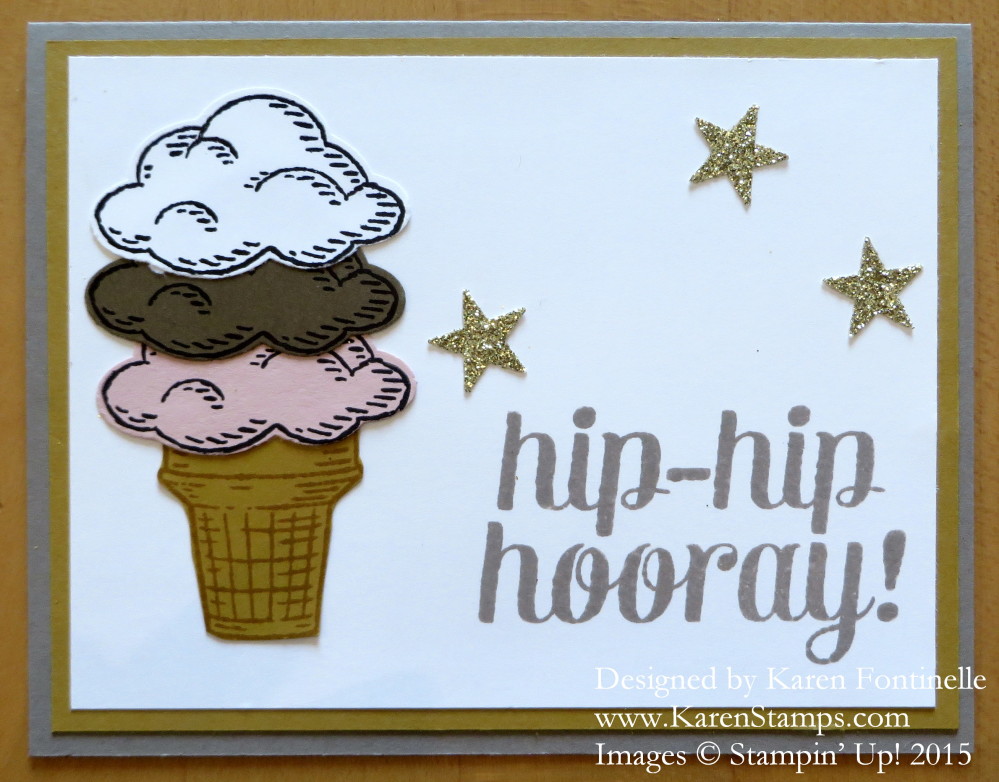
Sprinkles of Life Blue Bell Ice Cream Cone Card

Sprinkles of Life Blue Bell Ice Cream Cone Card

Today is a red-letter day in Houston and some other places in Texas! Blue Bell Ice Cream is coming back, hence my Sprinkles of Life Blue Bell Ice Cream Cone Card to celebrate! Blue Bell had to close up shop after a listeria outbreak, but they haven’t lost the support of their customers, certainly not this one! We tried various other brands of ice cream, even some very expensive ones, but nothing compared.

When we lived in Oklahoma, my favorite ice cream flavor was Braum’s Chocolate Almond, but when we moved to Houston years and years ago and heard about Blue Bell, there’s barely been a time when we haven’t had a couple of cartons of Blue Bell Ice Cream in our freezer. One time my husband opened the freezer and and said, “I can’t believe some alarm is not going off! We are out of Blue Bell!” I’m always stocked up if out-of-town company is coming because they MUST taste my favorite flavors of Blue Bell. Only limited flavors are coming back for now, as everything must be tested first before it goes out to stores, but one of my favorites is in there – Homemade Vanilla! My other favorite is Chocolate Chip, but guess I will have to wait for that.

The Sprinkles of Life Stamp Set by Stampin’ Up! is perfect for today because you can make an ice cream cone with however many scoops you want on it with the images. The ice cream scoops could also be clouds. There are lots of images in the stamp set and even a coordinating punch, the Tree Builder Punch, so there are TONS of creative things you can do with these stamps. And while you are having fun stamping and creating, you are helping out the Ronald McDonald House Charities because for every stamp set sold, Stampin’ Up! donates three dollars to the charity.

The greeting on my card is from the Bravo Stamp Set. I easily could have used one of the greetings in the Sprinkles of Life Stamp Set, but I decided on something more celebratory! And how can you have a celebration without some Gold Glimmer Paper stars punched with the star punch in the Itty Bitty Accents Punch Pack?! The card base is made with Tip Top Taupe, one of the new In Colors, and the layer is another In Color, Delightful Dijon.

Hard to believe today is the last day of August! And you know what that means! Tomorrow, September 1st is the beginning of the Stampin’ Up! Holiday Catalog! So if you live where they start selling Blue Bell Ice Cream, maybe you can eat a bowl of Blue Bell while you decide on your Holiday Catalog order! So many delicious flavors of Blue Bell to come, so many delicious Stampin’ Up! holiday products to choose from in the cataog! Choose from kits if you want it simple or don’t want to do the designing. There’s fall, Halloween, Thanksgiving, and the Christmas holidays! Get an early start on your holiday cards or Thanksgiving table decorations. Tomorrow I will show you my favorite kit in the catalog! And I couldn’t be more thrilled with how it turned out in just an hour or two.

If you don’t have a Stampin’ Up! Demonstrator helping you, I’d be happy to send you a Holiday Catalog of your own. Just email me your contact information.

And if you are feeling charitable and would like to make a donation to the Ronald McDonald House Charities while you are having a good time stamping, try the Sprinkles of Life stamp set. Then you, too, can make a Sprinkles of Life Blue Bell Ice Cream Cone Card with your favorite ice cream flavors or many other card designs.

Use Your Washi Tape for Gift Wrap!

Gift Wrap Using Washi Tape

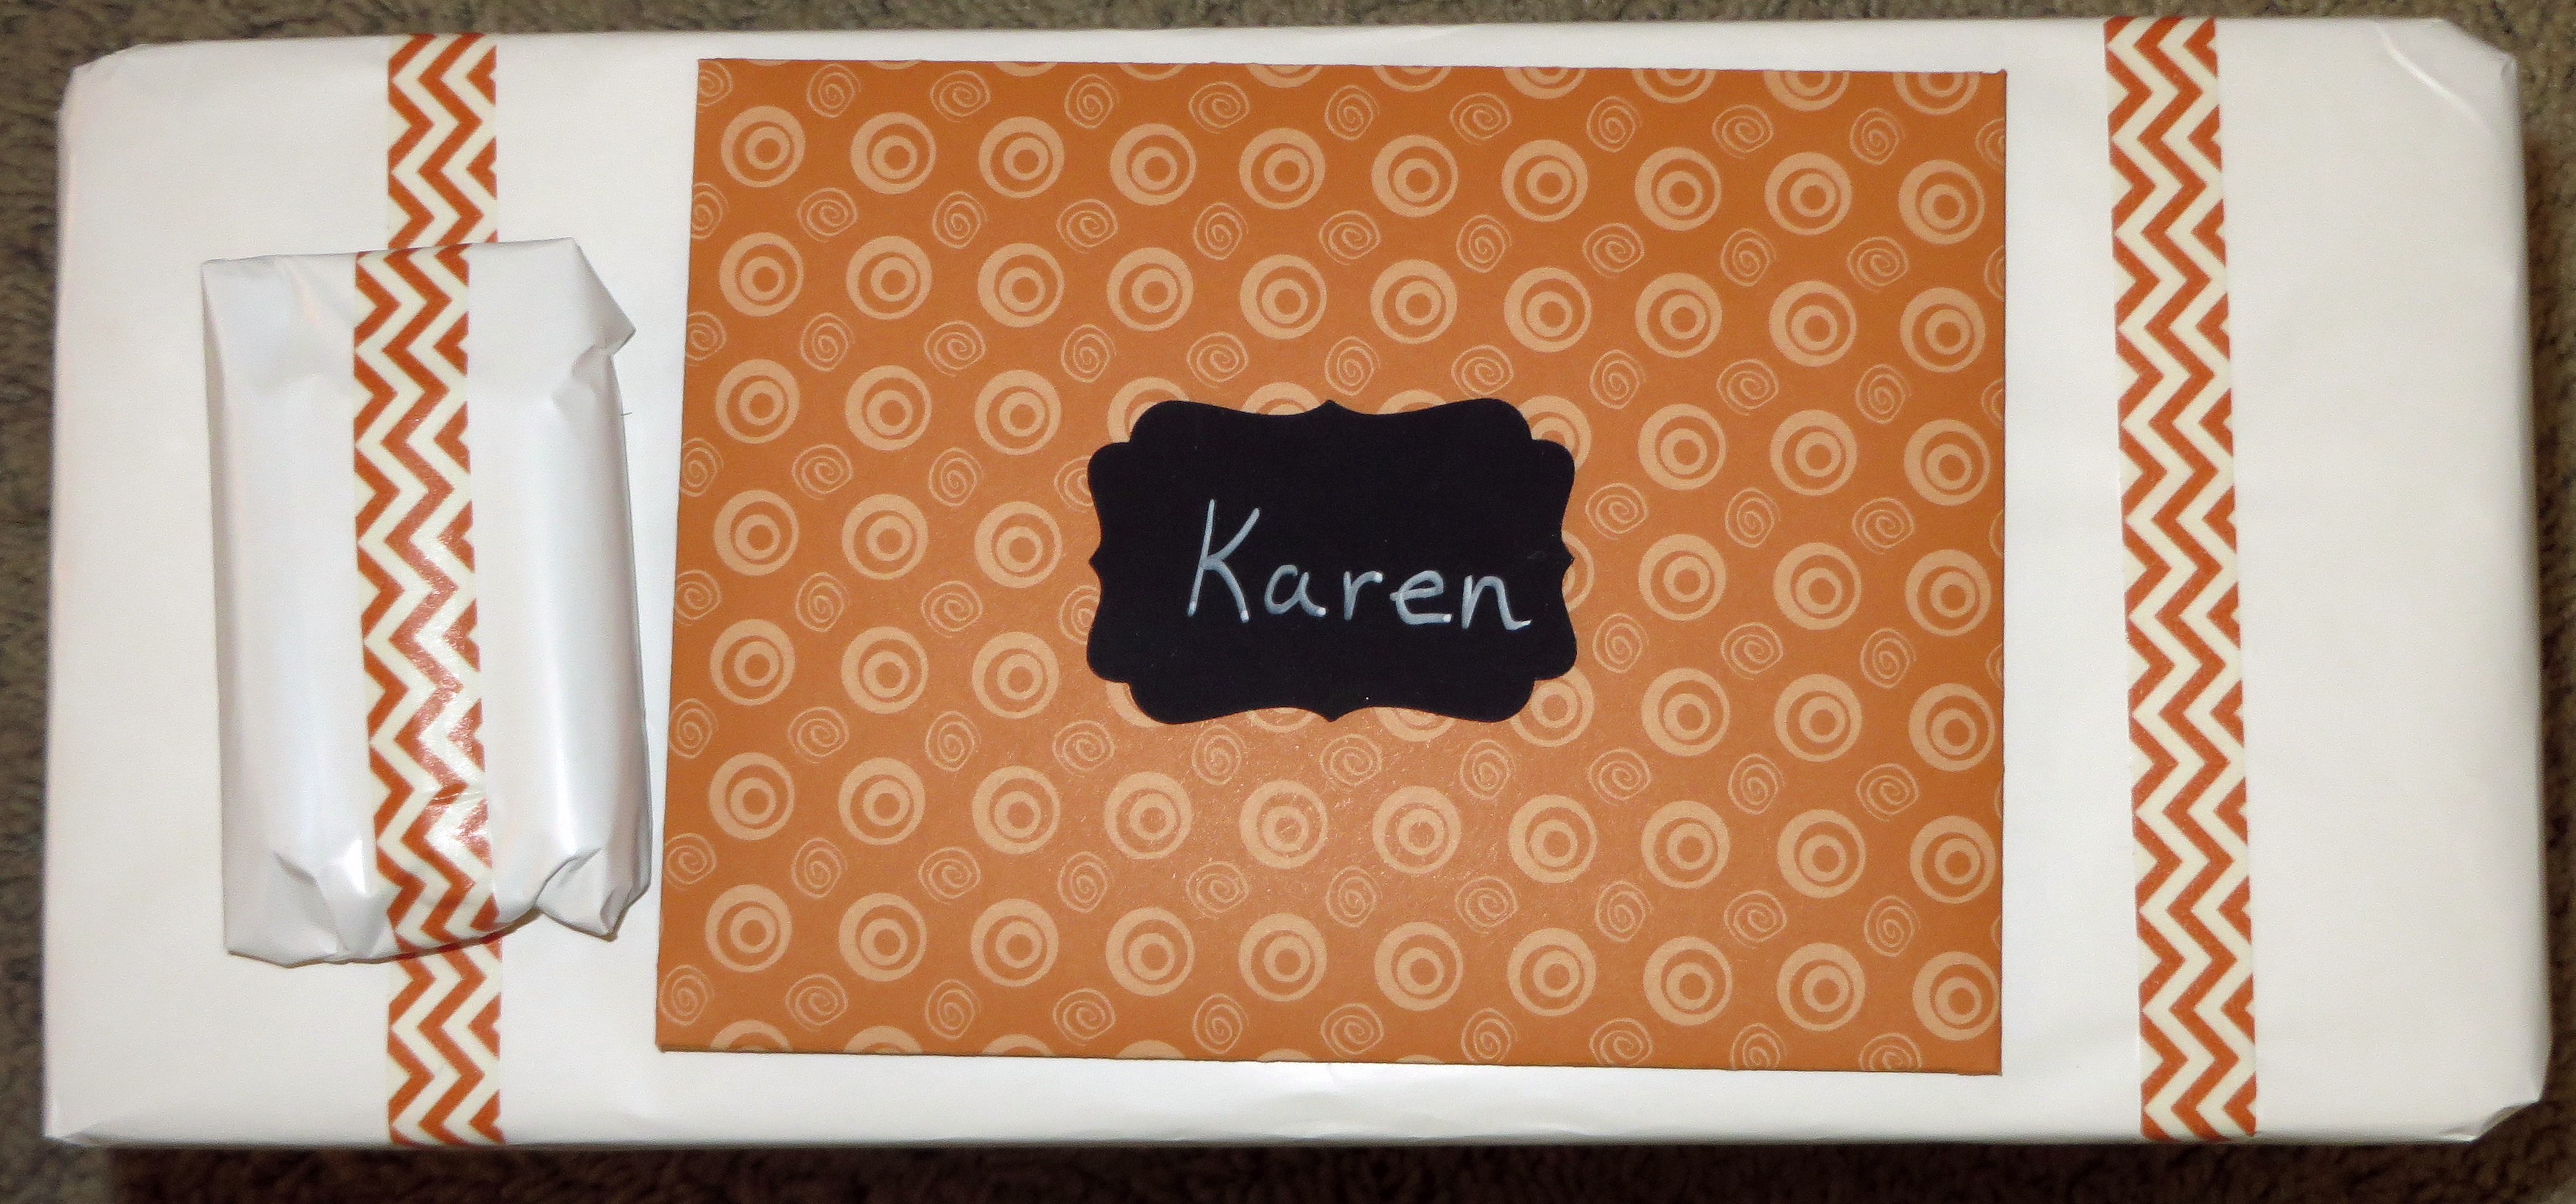
Here’s a great way to use up some of your washi tape! Use your washi tape for gift wrap! Use plain white wrapping paper, as my friend did for my birthday present, and then decorate with washi tape. You could get real creative and colorful using washi tape this way.

Some other suggestions might be:

  • Tape down a little bauble or favor on top of the package with washi tape.
  • Write out the person’s name or initials in washi tape on the package.
  • Use it instead of tape to hold the wrapping together or to adhere the gift card to the package.
  • Use washi tape to decorate a plain white or kraft gift bag.
  • Make a washi tape banner to string across the package.

Stampin’ Up! carries an assortment of washi tape to coordinate with your other Stampin’ Up! products to use for your cards and other creations and scrapbook pages. Shop HERE!

Stampin' Up! Washi Tape

And there will be more washi tape coming in the Stampin’ Up! Holiday Catalog, coming September 1, 2015!  That’s Tuesday!! Use your washi tape for gift wrap and have fun with it!

How to Label Stampin’ Up! Ink Pads

How to label Stampin' Up! Ink pads

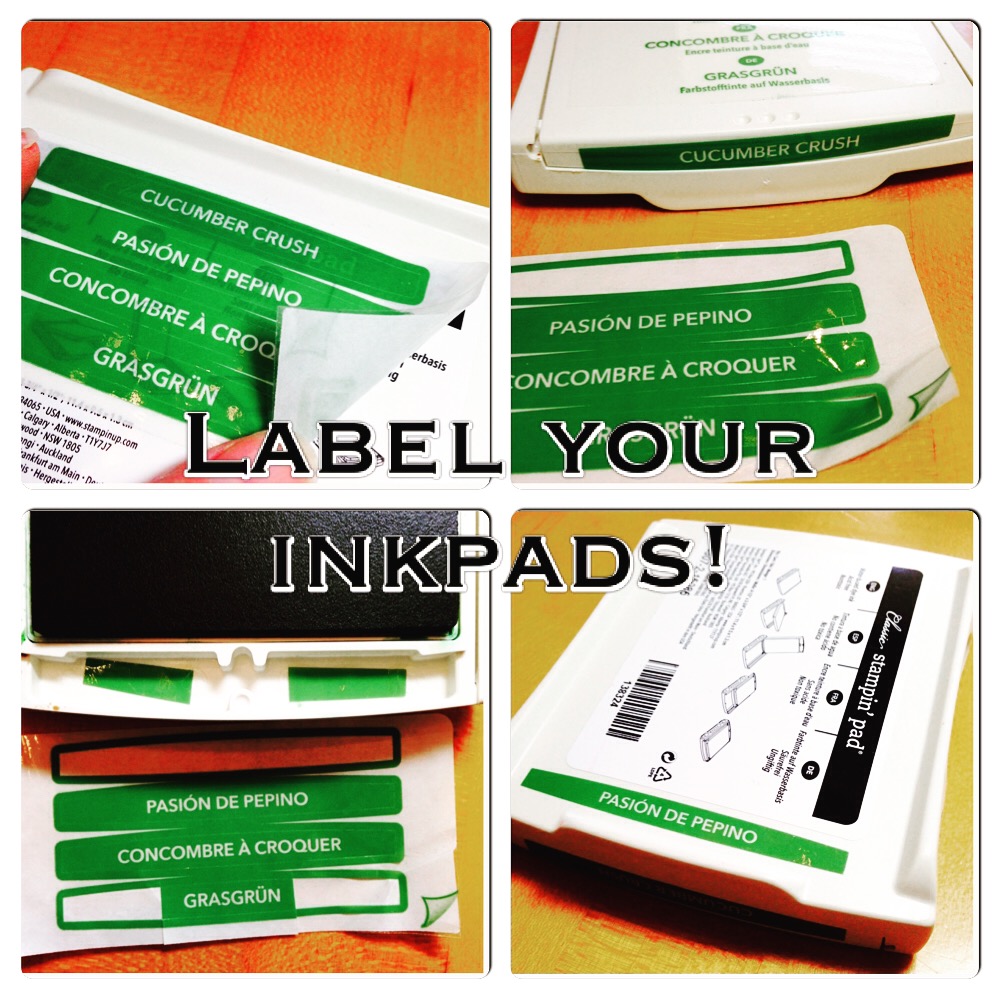
If you are new to stamping, this is how to label Stampin’ Up! ink pads! You might not have noticed (or forgot, like me!) that there are ink color labels on the bottom of each ink pad. They come in different languages, as do most things these days, but you can use more than your country’s name! It’s very handy and useful!

Peel off the whole color label piece.  Underneath you will find the directions for opening and closing your ink pad so you want that uncovered anyway, especially if you are new to stamping. Choose the label with the ink color in your language and stick that on the front of the ink pad as shown. It fits perfectly along that top edge. (One time I thought I had to fit the label on the shorter space underneath, I don’t know why!)

Then use the extra labels in the other languages to trim off the color ends and adhere those inside the ink pad in the little well in the front. Sometimes you can’t tell one ink pad color from another when you have several open, so this way, you can look inside and see the color from the labels. Very handy at times!

Then since you still have some labels left, use another one, to adhere to the bottom of the ink pad. Maybe not likely you will be looking under there, but just in case your ink pad gets turned over, you can see at a glance what color it is! And maybe you will also learn a foreign language while you are placing all the labels on your ink pads!

Here are the features of Stampin’ Up! ink pads!

Classic Stampin’ Pads come in exclusive Stampin’ Up! colors, grouped in collections to take the guesswork out of product coordination. The innovative ink pad design has a patented flip-top lid and a firm foam pad to give you a superior stamping experience.

* Fast drying, dye-based ink
* Always Artichoke
* Acid free
* Flip top for upside-down storage: pads stay inked during storage
* Firm foam pad lasts longer than felt pads and provides exceptional ink coverage, especially with solid-image stamps
* Can be re-inked with matching Classic Stampin’ Ink Refills
* Coordinates with Stampin’ Up! cardstock, markers, and embellishments
* 3-1/2″ x 4-1/2″

Be sure to order an ink refill when you purchase an ink pad so you have one on hand. You can also use the ink refills for various techniques so they’re not just for reinking!

Now that you know how to label Stampin’ Up!  ink pads, I hope you will take the time and put the extra labels to good use!

Shop Stampin’ Up! Online 24/7


Back to School Bravo Star Card

Back to School Bravo Star Card

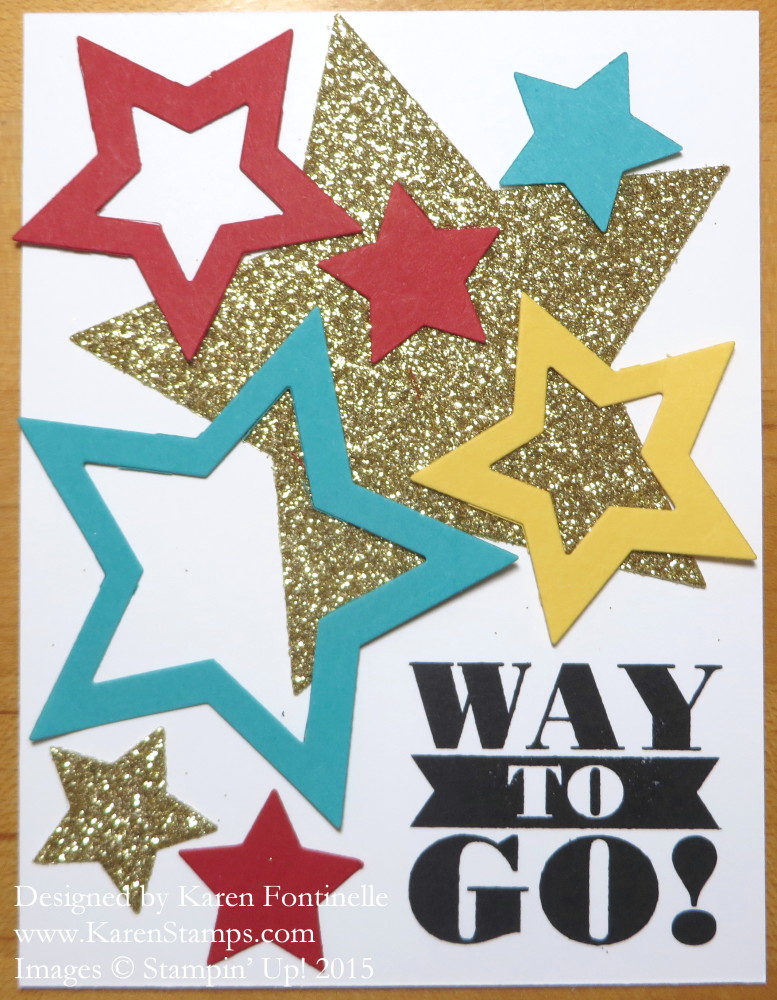
Here in Houston it is almost the end of the first week of school, so I thought maybe people would want to make a Back to School Bravo Star Card either for the student that has completely their first week of school or perhaps for the teacher who has completed a week (and probably more) of back to school! Use the Bravo Stamp Set and some stars cut with the Stars Framelits and Big Shot to choose an appropriate greeting. Change the greeting and make the card for someone getting ready to start school next week or after Labor Day!

For the card base I just used the new Whisper White Thick Cardstock. You will love the weight of this card stock if you would like to make a card with less layers. Then just die cut a bunch of assorted stars with the Stars Framelits and play around with the arrangement until you are happy with the placement of the stars and greeting.  Use a lot or use a few!  Place one framelit inside the other to make the stars with the center cut out.

I’ve always said everyone should have some star punches, star stamps, or in this case Star Framelits because stars can be used for just about anything. They are so good for congratulations, birthday, promotions, achievements, baby, thank you, anything special that you are making!

I loved making this simple Back to School Bravo Star Card using multiple stars and the Bravo Stamp Set! If you need any supplies, please visit my Stampin’ Up! Online Store!

New Stampin’ Up! Weekly Deal

Stampin' Up! Weekly Deal Aug 25 2015

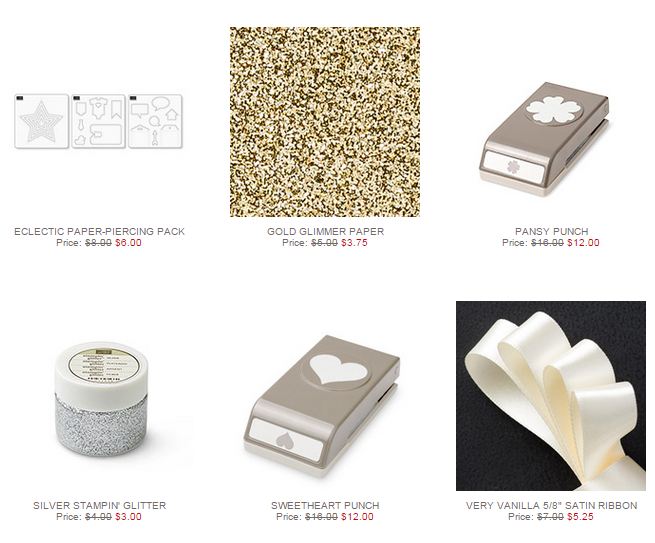
It’s Tuesday and that means new Stampin’ Up! Weekly Deals!  Check out two great punches, the Sweetheart Punch and the Pansy Punch, plus one of my favorite products, the Gold Glimmer Paper. Then for jazzing up your project, we have the Eclectic Paper-Piercing Pack, the Silver Stampin’ Glitter, and the pretty Very Vanilla Satin Ribbon.

These specials good through Monday, August 31 or while supplies last!

Be sure to check out the Clearance Rack as well when you order!  You might find some bargain you can use!

Shop Stampin’ Up! Here For the Weekly Deals and More!

Back to School Big News Awesomeness Gift

Back to School Big News Awesomeness Gift

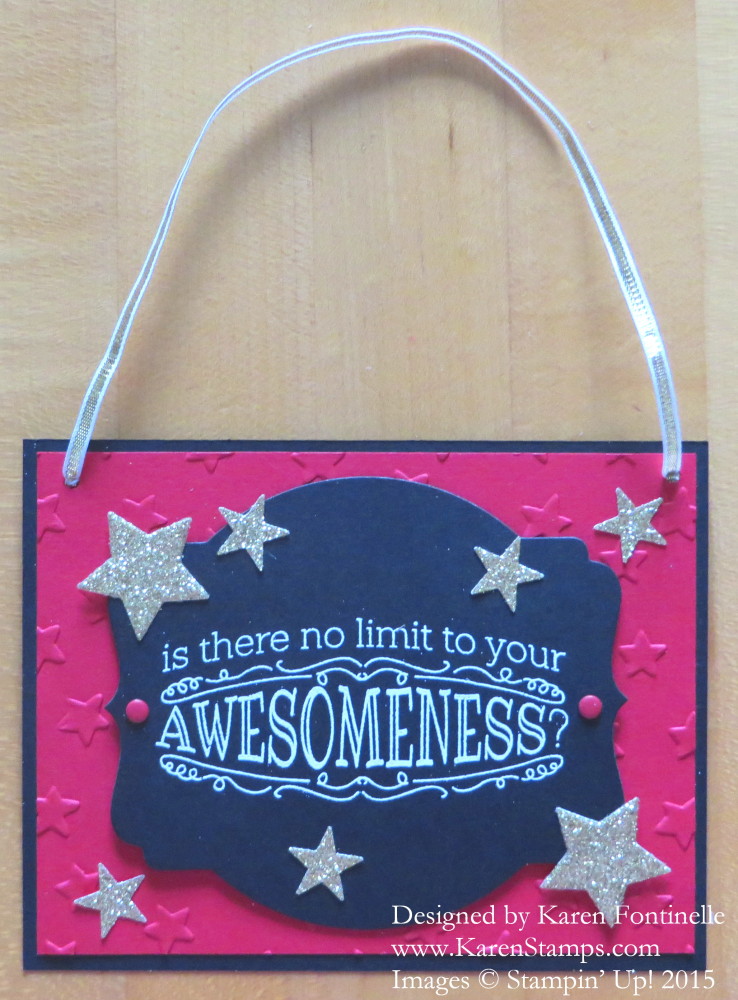
Tomorrow is Back to School time in Houston and probably lots of other places. If not tomorrow, probably very soon! Maybe you are looking for a little card or something for your child’s first day of school to encourage them, surprise them in their lunchbox or backpack. Rather than make this a card, I chose to tie some ribbon across the top to make it a hanger. Now the child can hang it up in their room or school locker and be inspired everyday and know you were thinking of them!

We have yet another power outage at our house as I am writing this so I’m not even sure how the colors are showing up. The base is Basic Black with a Real Red layer embossed with the Big Shot and Lucky Stars Embossing Folder.  The sentiment from Big News is stamped with Versamark Ink and heat embossed with White Stampin’ Emboss Powder and the Heat Tool. Be sure you have the Embossing Buddy to wipe across the card stock before stamping and applying the embossing powder because it helps eliminate the static that makes specks of embossing powder cling to the paper where you don’t want them! This embossed piece is cut out with the largest of the Deco Labels Framelits DiesYou could also just trim it whatever size you wanted to fit the card base. The smallest stars are punched out with the star in the Itty Bitty Punch Pack and the smallest star in the Stars Framelits DiesOf course the Gold Glimmer Paper is perfect for this as would be the Gold Foil Sheets. And I had to use a couple of Brights Candy Dots because they are so cute!

While you could easily copy this and make it a card in the usual fashion, I inserted some Gold 1/8″ Ribbon for a hanger. Any little thing you can make for your child for back to school I’m sure will be appreciated, even a note in their lunchbox!

Be sure to check the Stampin’ Up! Weekly Deals that end Monday night, August 24 as well as the Clearance Rack.

And if you are in the USA and do not have a Stampin’ Up! Demonstrator that you work with and don’t have access to the gorgeous new Holiday Catalog coming September 1st, please contact me at Karen@KarenStamps.com and  I will send a catalog out to you! I’m always happy to assist people in discovering and enjoying the fun and creativity of stamping and the products of Stampin’ Up!

Visit my Stampin’ Up! Online Store HERE!

Using Clear-Mount Stamps and Stickers

Clear-Mount Stamps and Stickers

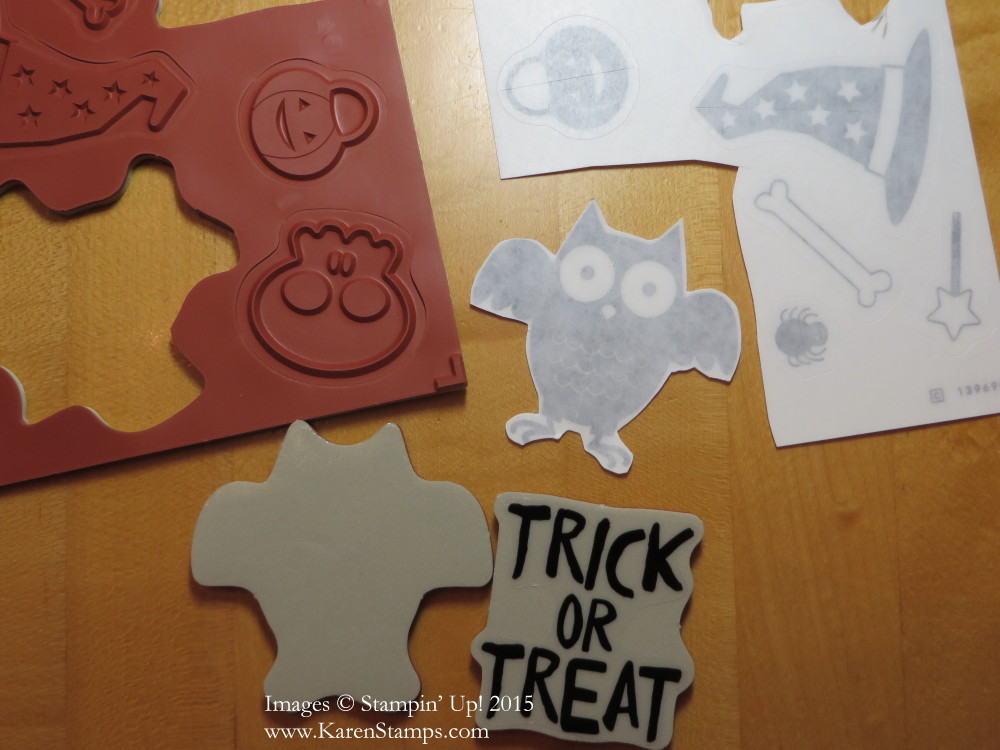
Sometimes we have trouble with the clear-mount stamps staying stuck on the acrylic block when we are stamping. The clear-mount stamps come with stickers to label them, but that covers up the foam meant to stick to the block. Some people remedy this by not applying the stickers at all to the stamp.  I have tried this but found I like having the sticker on there so I can remember what stamp I am using! It’s just what I am used to!

Here is one way to make your clear-mount stamps stick on the block better. If you want to use the stickers, kind of take a trip down memory lane years ago before the stamps were all die-cut and we had to cut out the rubber stamps ourselves with the appropriate scissors. Instead of cutting the rubber, trim the sticker down closer to the image so that when applied to the stamp, a little border of foam will not be covered and will stick to the block better.

Owl Stamp and Sticker

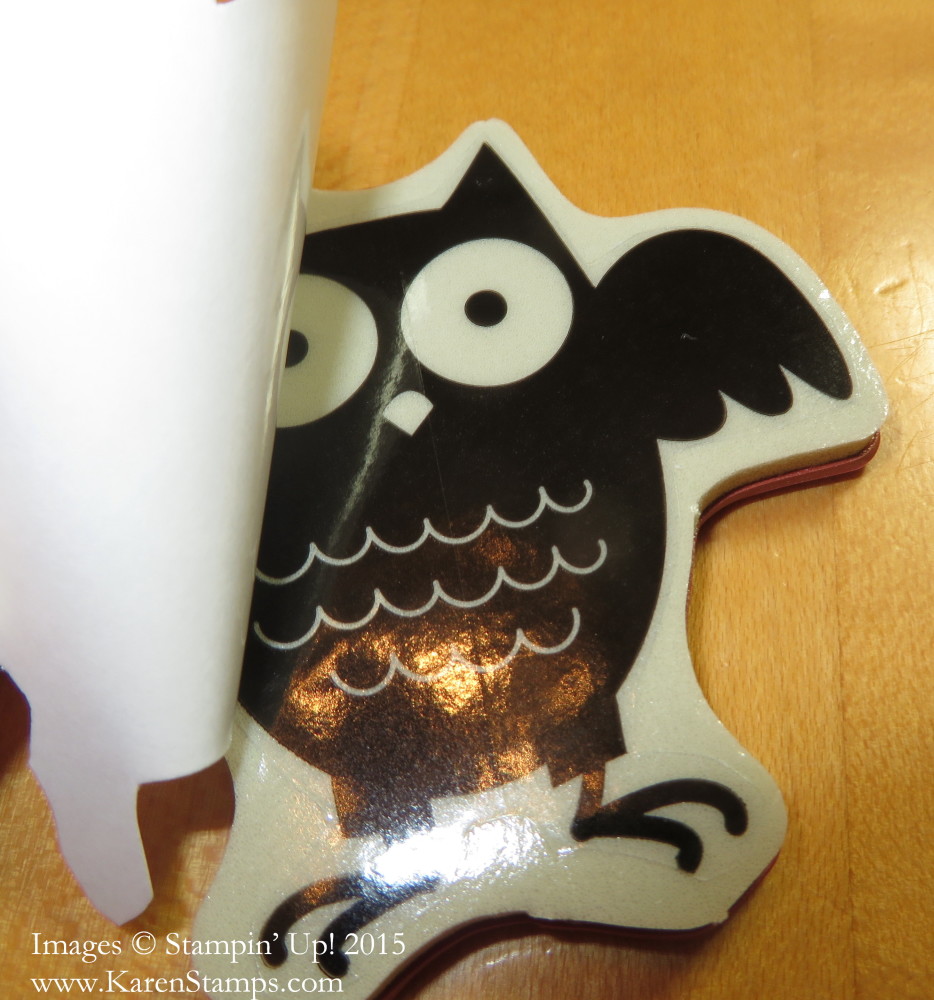
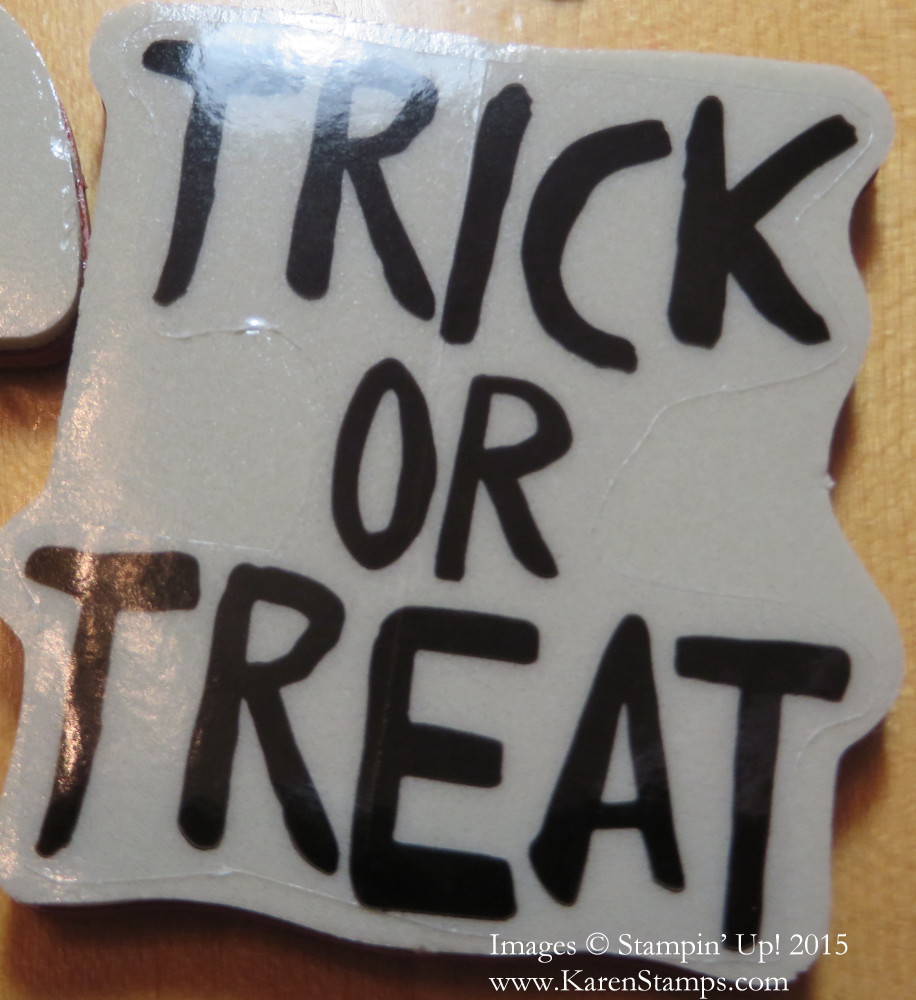
Is that extra work?? Yes!  Can we all use a little mindless trimming with our Paper Snips while watching TV or just relaxing?  Yes!  You don’t have to be exact so that makes it pretty easy.  Just go around the image in order to leave a little bit of a border.  Some stamps might have more than others.  Peel off the white paper covering the foam on the stamp. Then remove the split paper on the sticker itself and apply the sticker to the foam.  Then remove the backing from the sticker so that you can see it.

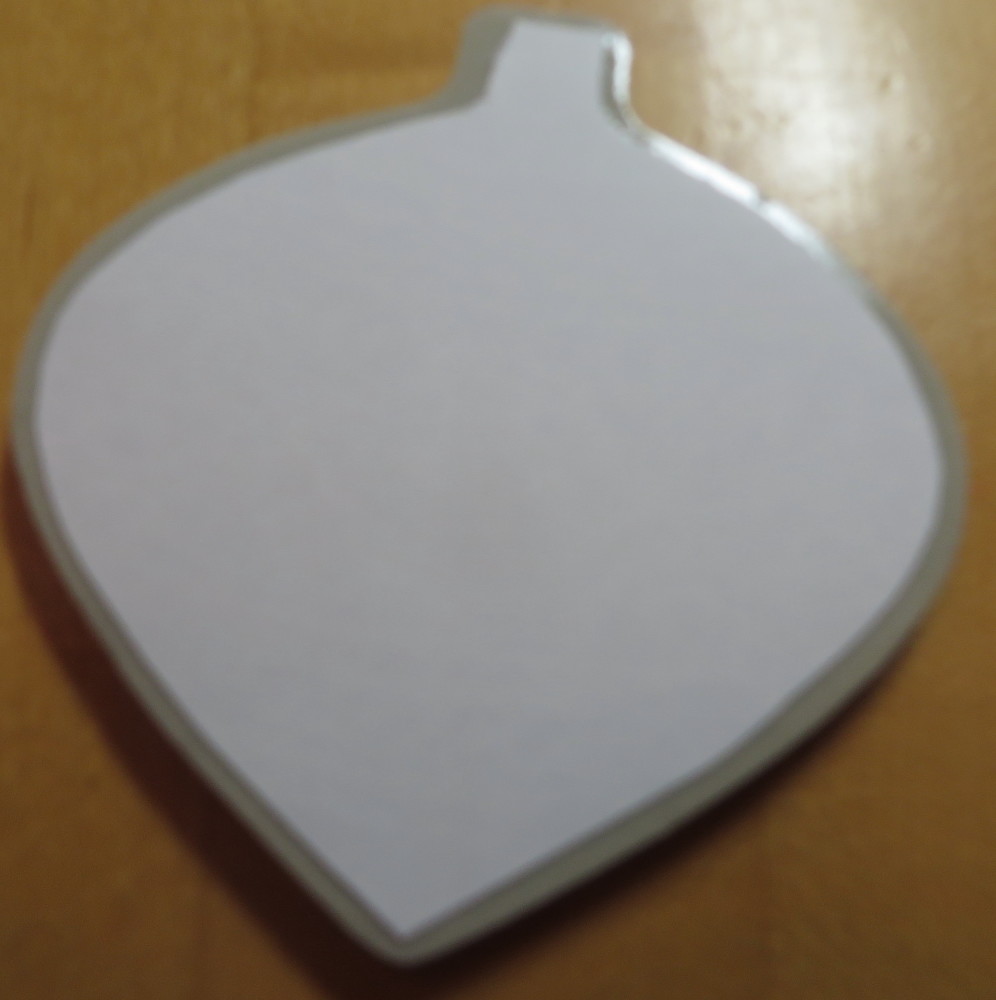
Here’s an ornament stamp with the sticker trimmed and applied, before the backing is removed. You can see the foam around the edge that will now be able to adhere to the block.

Ornament Sticker

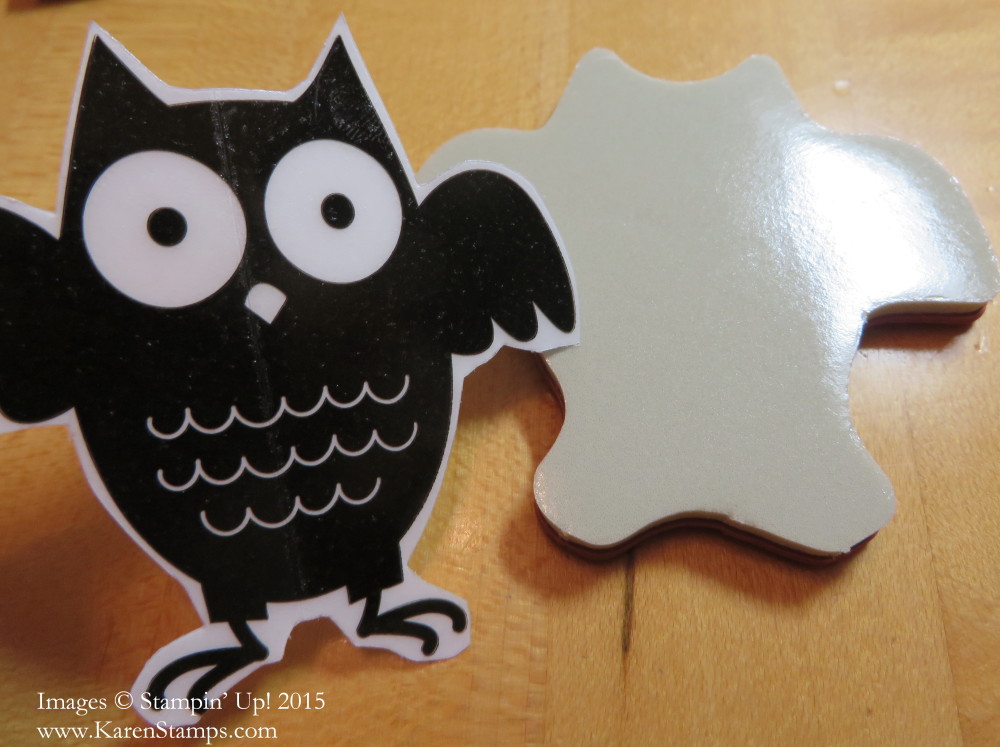
After the sticker is applied to the stamp, peel off that white covering.

Owl Clear-Mount Stamp and Sticker

Look closely and you can see the trimmed sticker on the stamp.

Sticker on Stamp

Of course if you still have trouble, or don’t want to trim your stickers, there are other solutions to clear-mount stamps that don’t stick.  Sometimes the acrylic blocks get dirty or greasy, so just cleaning off those oils will help stamps stick better.  Use the Clear Block Cleaning Cloth  or wash with some grease-cutting dishwashing soap.  The Multipurpose Liquid Glue can be applied lightly to the stamp and allowed to dry for a temporary adhesive. And if I am just in a hurry with a stubborn stamp, sometimes I just apply a little SNAIL! Also when you apply the sticker, make sure the stamp is flat and doesn’t get a bend in it from sticking the sticker on too tightly.

Clear-mount stamps are less expensive than wood-mount and take up less storage space, but the disadvantage is that they have to be placed on an acrylic block and taken off and sometimes they do not stick too well. If this is a real problem for you, I would recommend you purchase wood-mount stamps that are always ready to go, and that wood block just feels good in your hand!

The place to buy the best stamps is always Stampin’ Up!

Stampin’ Up! Weekly Deals August 18 2015

Stampin' Up! Weekly Deal Aug 18 2015

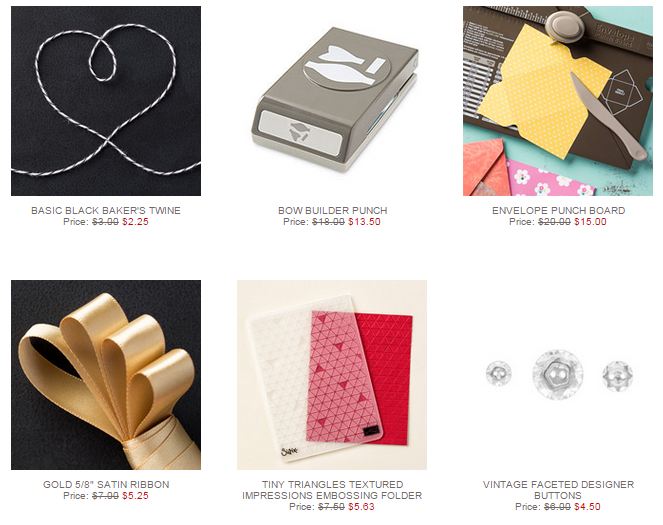
Here are the new Stampin’ Up! Weekly Deals for August 18 – 24, 2015.  Be sure to check them out in case you want to add some to your order. Offer available while supplies last at these prices. Make custom envelopes with the Envelope Punch Board! Make cute little paper bows with the Bow Builder Punch! Always good to have embellishments, like ribbons and buttons! And why not have another embossing folder?!

Shop for these Weekly Deals and more at my Stampin’ Up! Online Store HERE!

Save Your Sanity On a Plane

Relaxation Travel Kit

As the end of August approaches and people try to fit in a vacation or one more trip before school starts, I thought I would suggest a way to save your sanity on the plane ride! As we all know, flights these days are super-crowded and we’re packed into our seats like sardines.

I read yet another article this morning about coloring books for adults as a way to relax while traveling. The article says it can be like art therapy, a way to relax and to express feelings. You might choose bright or dark colors depending on your mood or maybe the more subtle pastel colors. Just doing the coloring can enhance our creativity. If nothing else, it’s something to do while you are crammed into your seat on a plane, nervous about flying, or trying to ignore the crying babies or the person edging in to your seat space. It can take your mind off whatever is troubling you or at least distract you a little bit! And that might be enough to get your through the plane ride!

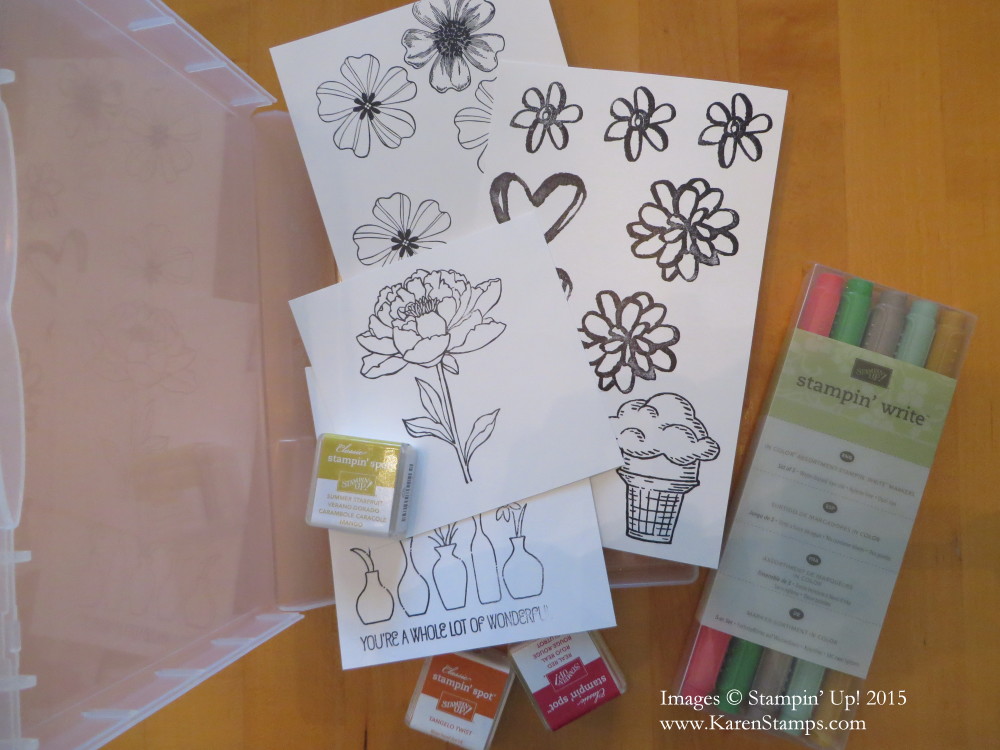
Instead of going out and buying adult coloring books, some of which are quite expensive, I’ve noticed, just use your stamps! Before the trip, stamp some images on Whisper White with Stazon Ink. Then take along your choice of coloring – Stampin’ Write Markers, a Blender Pen, Aqua Painter, ink spots (if you have some from way back or are getting them in Paper Pumpkin KIts) – whatever you like. The Stazon ink will not run (and stay tuned for the new Basic Black Archival Ink coming in the Holiday Catalog!!)

Use an empty stamp case to keep your supplies in.  You could even use the case for a tabletop if you needed to! You can purchase these cases in the Stampin’ Up! Online Store, 4 cases for only $4.00.  They are very handy for more than just storing stamps.

When you get home or to your destination, maybe you can cut out or punch those images you colored and use them on cards or projects.  But the real purpose is relaxing by coloring while you are traveling!

So before you pack your clothes in your suitcase, stamp some outline images first, gather your coloring supplies, and stick all those things in an empty stamp case.  Now you are ready to travel and save your sanity on the plane!