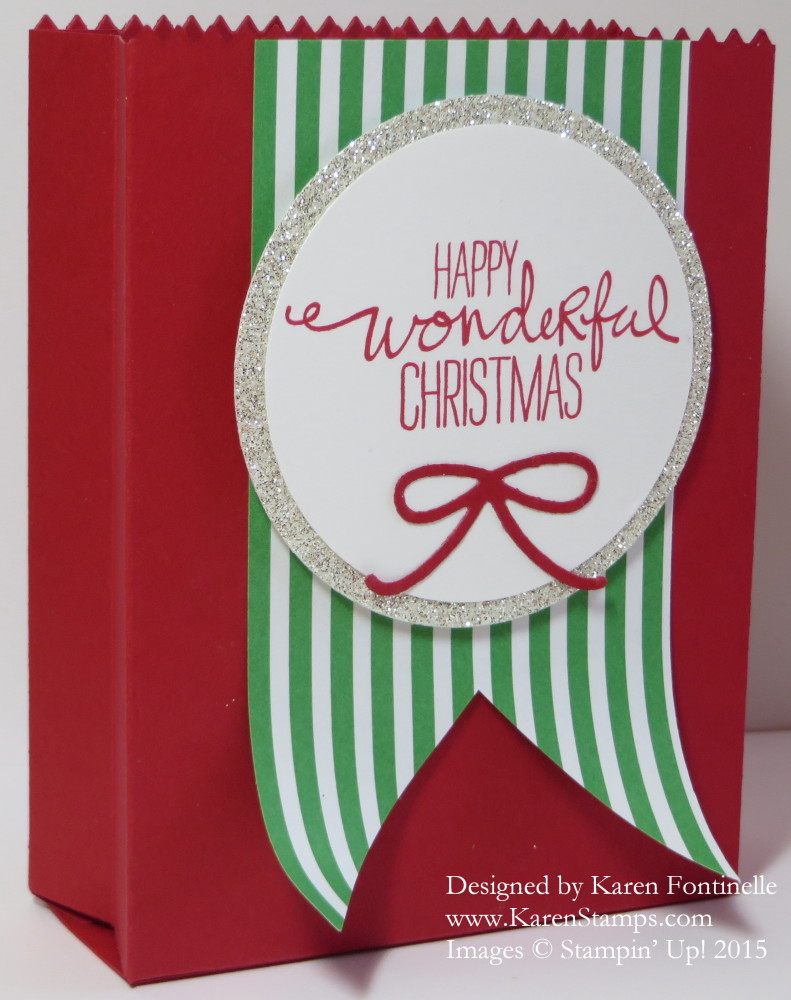
Do you realize that six months from today is Christmas Day?! That means there are less than six months to get ready for Christmas! Now that the Mini Treat Bag Thinlits Dies are on sale this week, $10 off, on the Stampin’ Up! Weekly Deals, I thought I would learn how to make an altered size bag, rather than just the flat kind of treat bag into which you would slip a card or gift card or something not very thick. Since it is only six months today until Christmas, I thought I would make a Mini Treat Bag Altered Christmas Gift Bag!
Here is a little tutorial for you:
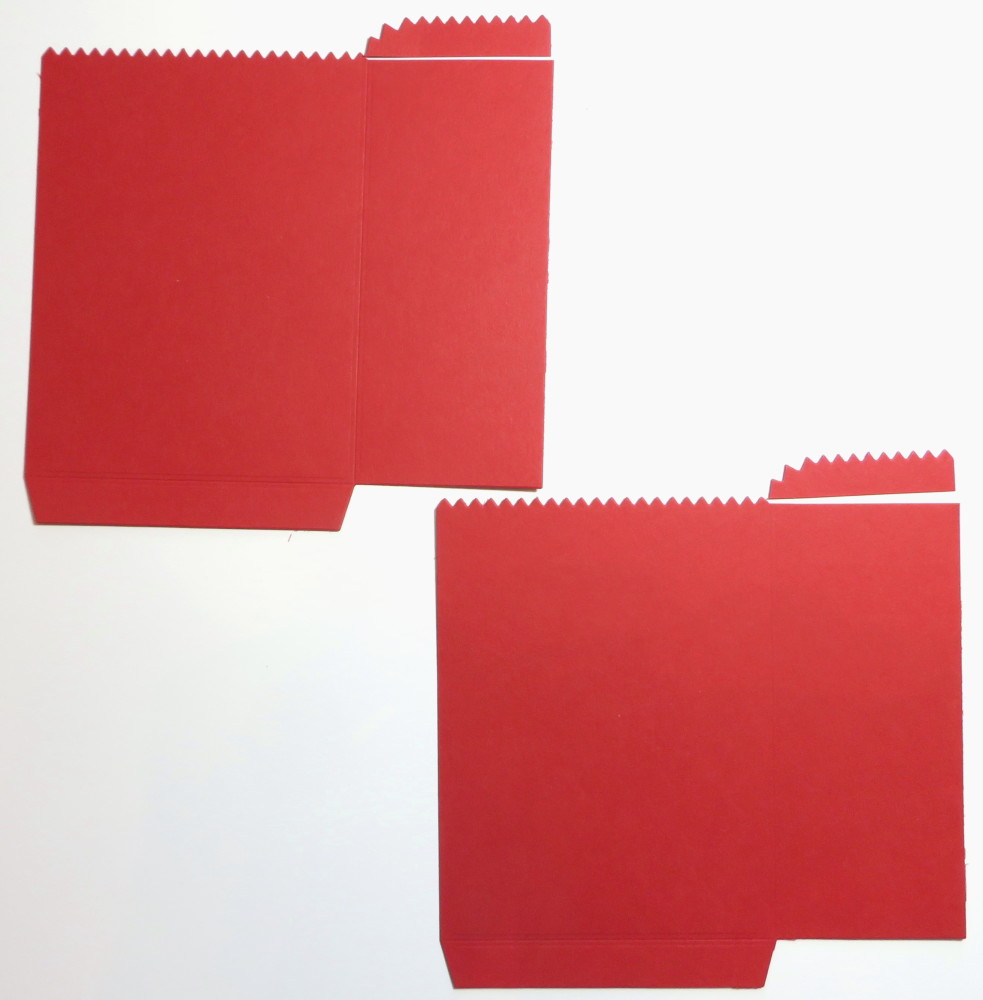
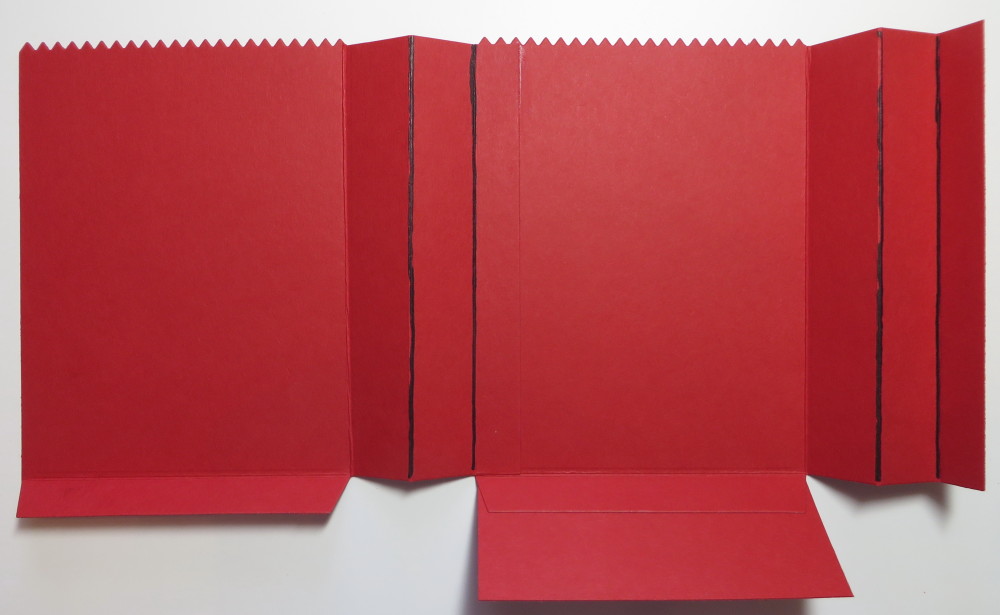
Instead of cutting the two different pieces to make the bag like you would normally, cut two pieces with the large bag die. This one piece would normally be the front of the regular Mini Treat Bag. Then just trim off that extra little piece as shown. Just snip it off with a scissors. That side of the bag will be the gusseted side of the bag when assembled.
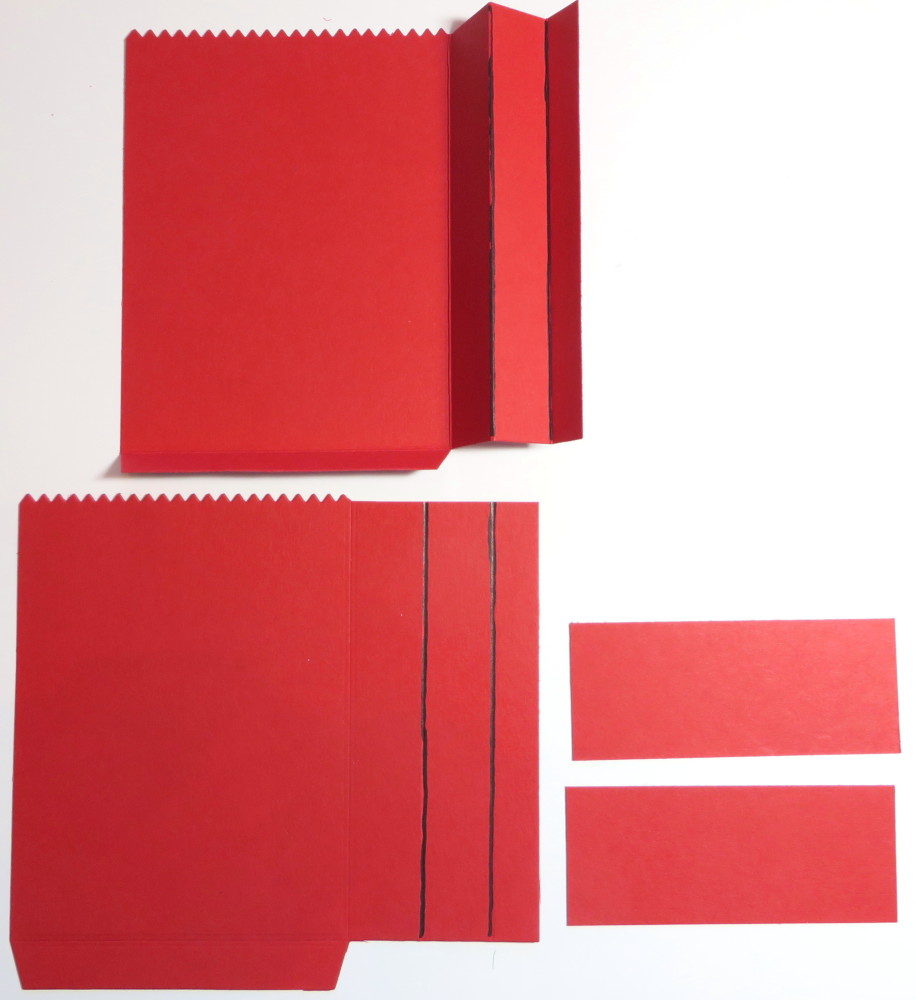
Now score just that right side of the large piece at 1/2″ and 1 1/4″ as shown. There will also be a score line made from the die. For the bottom of the bag, cut one or two pieces of paper 1 1/2″ x 3 5/8″. I say one or two because it depends on what kind of paper you are using and how strong and sturdy you want the bottom of the bag to be. With card stock probably just one piece is fine; with designer paper you probably want to glue two pieces together.
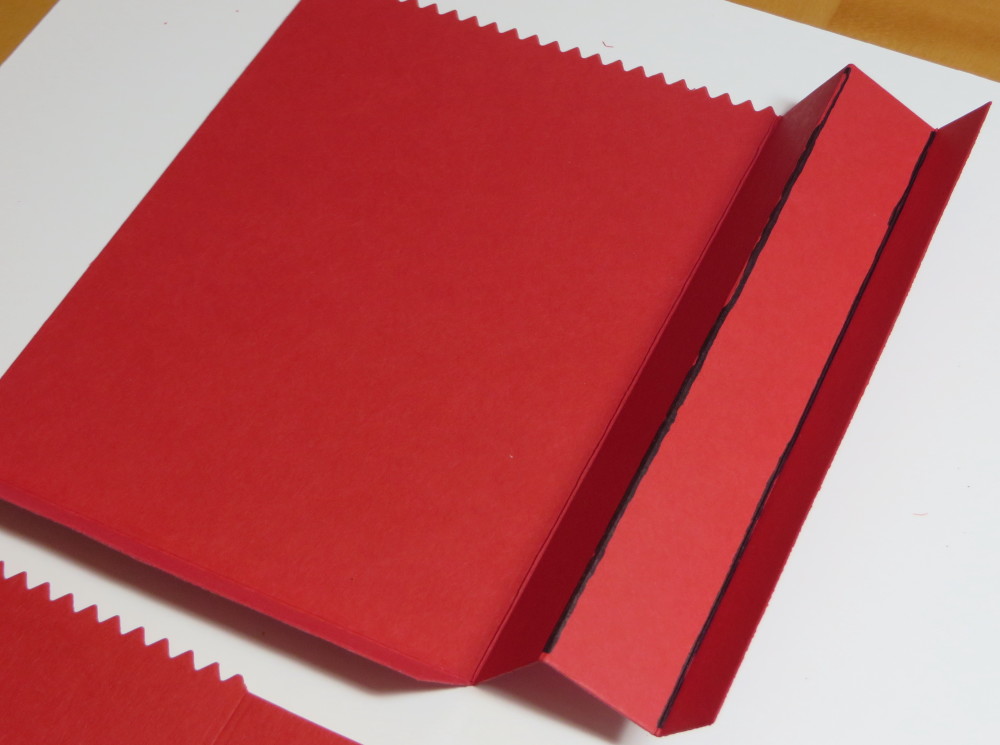
This is how you will fold on the score lines on both pieces to form the gusset for the side of the bag. If you just want the side flat, then just score at 1/2″ and use the score line made by the die. You won’t need the center one. Play with the two pieces and see how they will fit together so you have the folds going the correct way.
Adhere the bottom piece to the bottom tab and all the sides to form the bag. I like using the Multipurpose Liquid Glue because it gives you time and slip to be able to move the pieces to exactly the right positions. But Fast Fuse or Tear & Tape Adhesive.
Next comes the fun part of embellishing the Mini Treat Bag! I used a piece of the In Color Envelope Paper, the Cucumber Crush color, to make a banner. I stamped a Christmas greeting with a stamp in the Wondrous Wreath Photopolymer Stamp Set in Real Red ink, then punched it out with the 2 1/2″ Circle Punch. I die cut a piece of Silver Glimmer Paper with the Circles Collection Framelits Dies for a layer behind the greeting. The little bow is a die cut in the Mini Treat Bag Thinlits Dies package! So many cute and useful extra dies in that collection! I would also suggest putting a Rhinestone Jewel on the center of that bow. (I forgot!)
There you have it! Really the process is pretty easy to make a Mini Treat Bag Altered Christmas Gift Bag. Take advantage of the $10 savings on this die this week. Weekly Deals are good through Monday night, June 29 until 11:50 pm MT. Shop for these Mini Treat Bag Dies and any other stamping and art supplies you need at my Stampin’ Up! Online Store HERE. PS: That Silver Glimmer Paper is also on sale this week on the Weekly Deals!

