Category Archives: Wedding

An Anniversary Card On the Waterfront

An Anniversary Card On the Waterfront

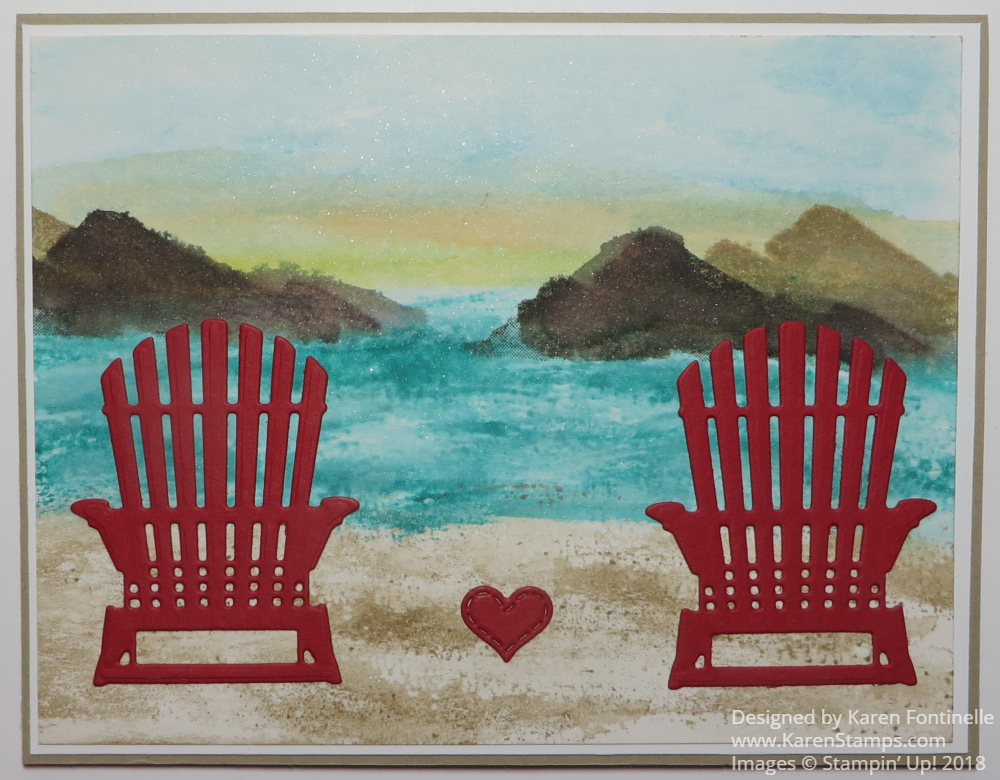
I love these red Adirondack chairs on this Anniversary Card On the Waterfront.  The card could be for anything, but adding a little red heart to match the chairs makes it into a card for someone special.

I think I decided to use the red chairs, die cut with the Seasonal Layers Thinlits Dies before I decided on the rest of the card!  I love red and I love those chairs!  I was envisioning the chairs on the shore of our favorite little lake in Michigan, where it is a lot cooler than here in Houston. I could have sponged in some sand and water, but I got out the Waterfront Stamp Set and used that. I think instead of a lake in Michigan I created a beach in the South Pacific or somewhere!!

This stamp set, Waterfront, is a real sleeper if you ask me.  I didn’t even pay much attention to it in the past Occasions Catalog when it came out until I saw what people were stamping with it. It is a tremendous stamp set to use to make yourself look like a true artist!!

The card base is Crumb Cake Cardstock layered with Shimmery White, probably my favorite kind of paper.  It is good to use with anything close to watercoloring if you don’t have official Watercolor Paper.  You might be able to see the tiny bit of shimmer in my photograph from the paper. Even in person, it is very subtle but when you see it, it is beautiful!

I started by stamping the sand with Crumb Cake ink, stamping off sometimes, other times full strength.  The water is Coastal Cabana Ink and the mountains, I think, are Crumb Cake and a bit of Early Espresso.  For the sky, I just used my Aqua Painter to paint in some Balmy Blue ink and then added a little yellow and orange to look like a sunset.  I also used the Aqua Painter just a little bit on the water and mountains to smooth them out a bit and make it look more watercolored.  I really was thrilled with how it all turned out!  You can do it, too!!

The little heart is die cut from Stitched Labels Framelits Dies.  You could also just cut out a little heart by hand or draw one in the sand!  I thought about doing that, too.  I didn’t put a greeting on the front, but you could, for whatever occasion.

If you are looking for an interesting stamp set, I would try the Waterfront Photopolymer Stamp Set and just play with it! In fact, you can purchase a set of all the products to make some notecards! It’s called the Waterfront Cards (149037).  You get the stamp set, a Clear Block, small note cards, two ink pads, and Nature’s Twine.  This Waterfront Stamp Set was designed by a Demonstrator who reached $1 Million in sales!

Try out this stamp set so you can make artistic cards like my Anniversary Card On the Waterfront or these cards that I made previously.

SHOP STAMPIN’ UP! ONLINE!

All About the Petal Promenade Designer Series Paper From Stampin’ Up!

Petal Promenade Suite

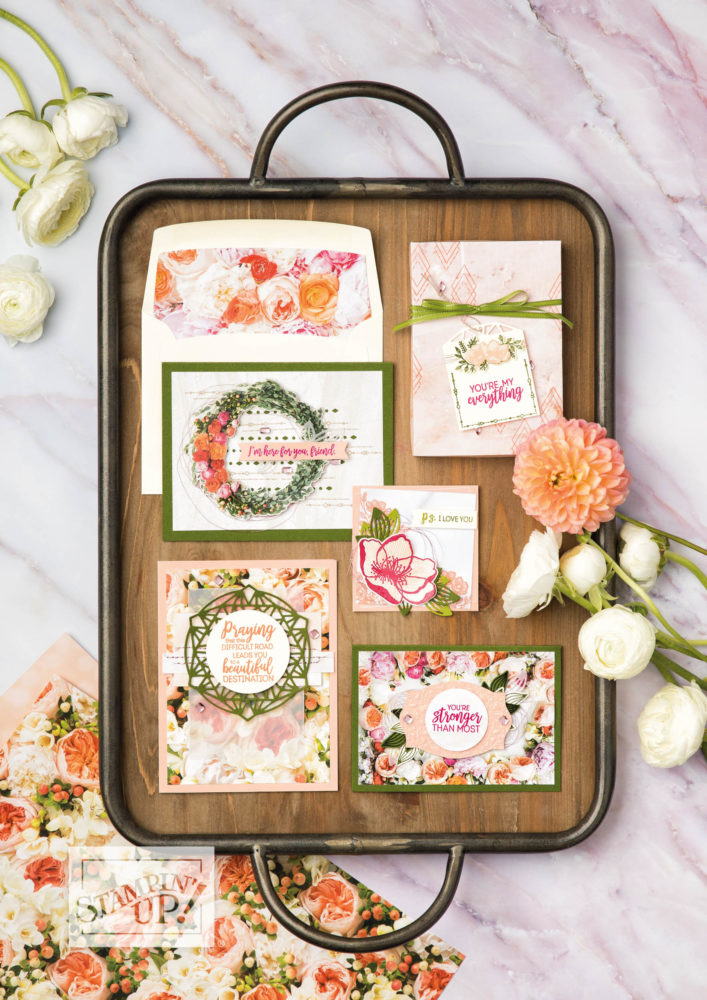
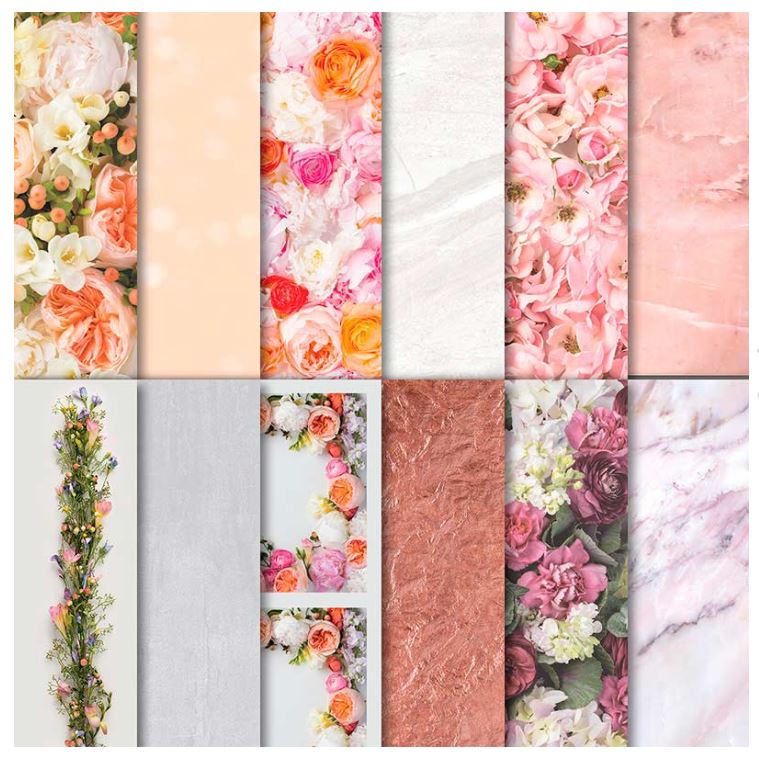
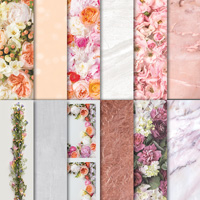
The Petal Promenade Suite is one of the most beautiful in the new Stampin’ Up! Catalog.  The designer paper, the Petal Promenade Designer Series Paper, is the real star of the suite!  Like some designer paper in the previous catalog, this paper is designed by photographing real flowers and making it into a paper pattern.

Watch this video below from Stampin’ Up! that describes how they designed the paper.  I love learning the “behind-the-scenes” secrets!

Even seeing this photo from the Online Store, you KNOW and I KNOW from experience that any designer paper made by Stampin’ Up! is ten times more beautiful in person that even the best photograph.

Petal Promenade DSP Sheets

I think this paper is going on my next order! There are some sheets that have elements that you cut apart.  All this paper is 12″ x 12″, so you will have plenty of paper to work with!

The video is very short, but if you don’t have time to watch it, just know that they photographed real flowers that they purchased and then designed the paper from those photographs.  I think there was some mention of photoshopping out a small spider!!  A ladybug on the flowers might have been cute!

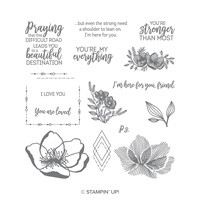
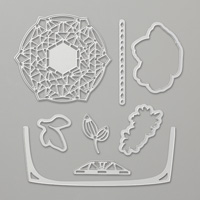
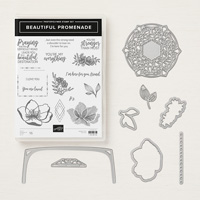
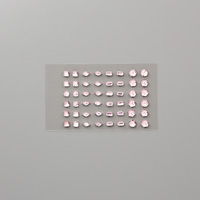
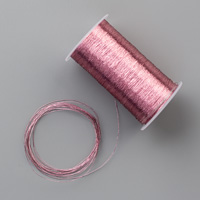
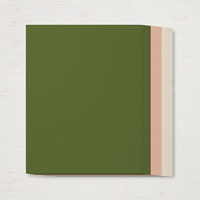
To go along with this designer paper, there is the Beautiful Promenade Photopolymer Bundle containing the stamp set and the Beautiful Layers Thinlits Dies.  There are also some embellishments.  Check out all the products in this suite below:

If you like flowers, I think you will get a lot of use out of these photographic floral images on this beautiful Petal Promenade Designer Series Paper. And now that you know how it was created, you will appreciate it even more!  I know I will!

SHOP STAMPIN’ UP! ONLINE TODAY!

A Handcrafted Wedding Card For the Royal Wedding Couple

Royal Wedding Card

If I were attending the wedding of Prince Harry and Meghan Markle, I might make A Handcrafted Wedding Card For the Royal Wedding Couple like this one!  I think I would make it look very elegant and rich but not overdone. Sometimes you have to know when to stop!

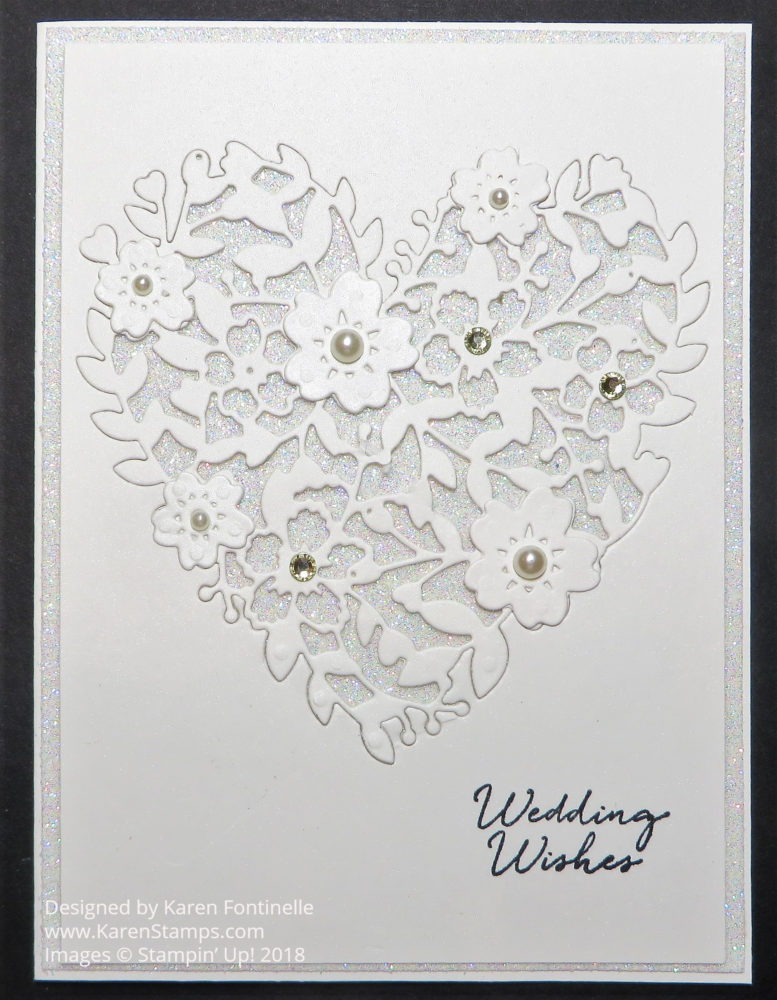
I think one of the best things Stampin’ Up! offered for wedding cards and other occasions is the Bloomin’ Heart Thinlits Dies. This heart die with the additional little flowers can make the most elegant and beautiful card for a wedding or other very special occasion or even Valentine’s Day!  I especially like to use special paper like Shimmery White and some Dazzling Diamonds Glimmer Paper for a border and underneath the heart. The Shimmery White Cardstock has just a hint of shimmer if the light is right so it is very elegant and pretty.

I stamped the wedding greeting straight on to the front of the card since space was limited. I tried a die-cut oval and glimmer paper layer underneath but it was all too big for the space. Sometimes simple is better. I used my Stamparatus to make sure I stamped it well!

For a little bling, I had to use some Pearl and Rhinestones on the flower centers! You can’t give a wedding card to the Royal Couple without some bling!

If you like this Bloomin’ Heart Thinlits Dies, be sure to pick up the set at the Stampin’ Up! Online Store under Last-Chance Products.  The Dazzling Diamonds Glimmer Paper is also on the retiring list and is discounted a little bit.  The Bloomin’ Heart dies are also discounted! For sure you should get it then!

I wonder if Prince Harry and Meghan Markle will get any Stampin’ Up! handmade cards like this one!  Probably not, but if I were sending one I would make an elegant yet simple card like this one!  Enjoy the wedding!

Royal Wedding Afternoon Tea Party Handmade Card

Royal Wedding Afternoon Tea Party Handmade Card

The Royal Wedding between Prince Harry and Meghan Markal is tomorrow, and I suspect there have been many afternoon teas around the occasion, so to commemorate that I have this Royal Wedding Afternoon Tea Party Handmade Card! Sometimes it is fun to think about current events and how we can incorporate our papercrafting and stamping into those.

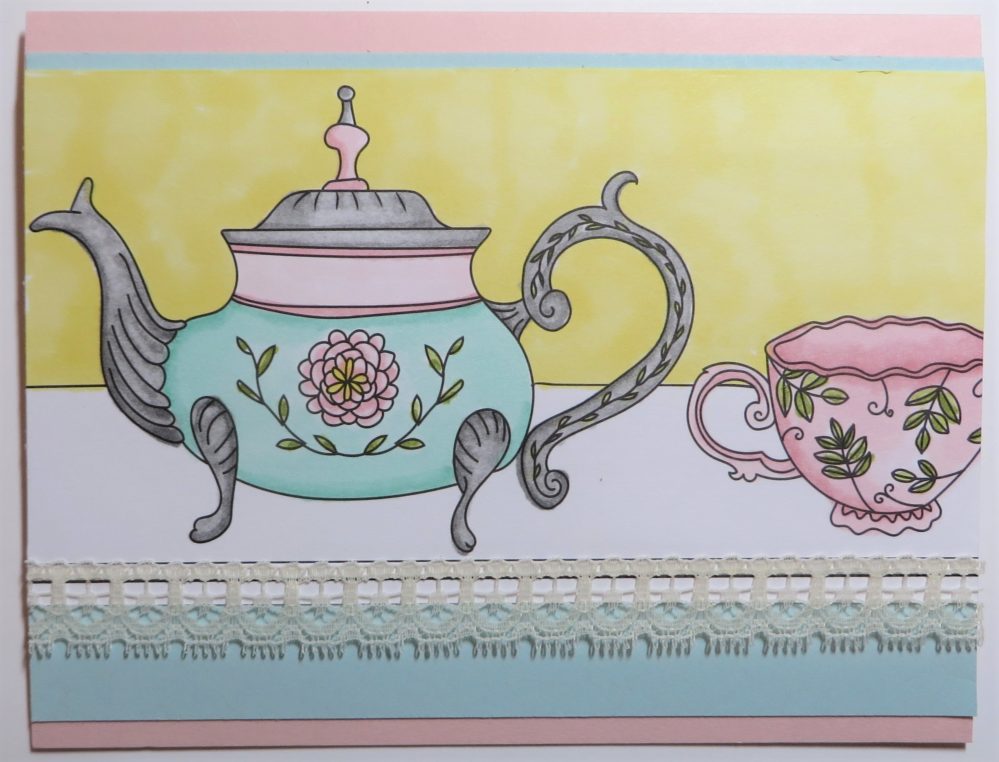
The Just Add Color Specialty Designer Series Paper has some teapots and teacups as images that are ready to be colored in and made into a project! This paper is on the Last-Chance List and even discounted, so it is a great deal! If you don’t already have the Stampin’ Blends Markers you can use other coloring techniques or you can save the paper and order the markers as soon as they are available so you will have them for some therapeutic, fun, relaxing coloring! I think coloring always takes us back to our childhood so maybe that is why they say it is so de-stressing and therapeutic for adults these days!

I picked the fanciest teapot and teacup to color on this patterned paper. My teapot is a mixture of sterling silver and porcelain!  Even the background is colored in with the Light Daffodil Delight marker for the wall color.  The base is left white for the crisp linen tablecloth.  Then I added some Very Vanilla Lace Trim (even though it isn’t white) because I just think there has to be some lace at a tea party!  I was able to cut this portion of the designer paper out just right to fit on the card.  To make it pop a little bit I edged it with strips of Soft Sky cardstock to match the little bit of Soft Sky marker I used on the coloring.  The card base is Powder Pink.  I can add a greeting later if I want to or just leave it off.  It can be a lovely notecard without a greeting.

Here’s another teapot card I made with the Just Add Color Specialty Designer Paper. On this card, I cut out the teapot and cup and adhered it to the card. Another way to do it!

Perhaps you will have a cup of tea if you will be watching the Royal Wedding very early tomorrow morning! Be sure to shop the Last-Chance List and get a package of this Just Add Color paper, great for a little adult, stress-free coloring as I did on this card for Royal Wedding afternoon tea parties!

Frame a Wedding Invitation For a Gift!

Framed Wedding Invitation

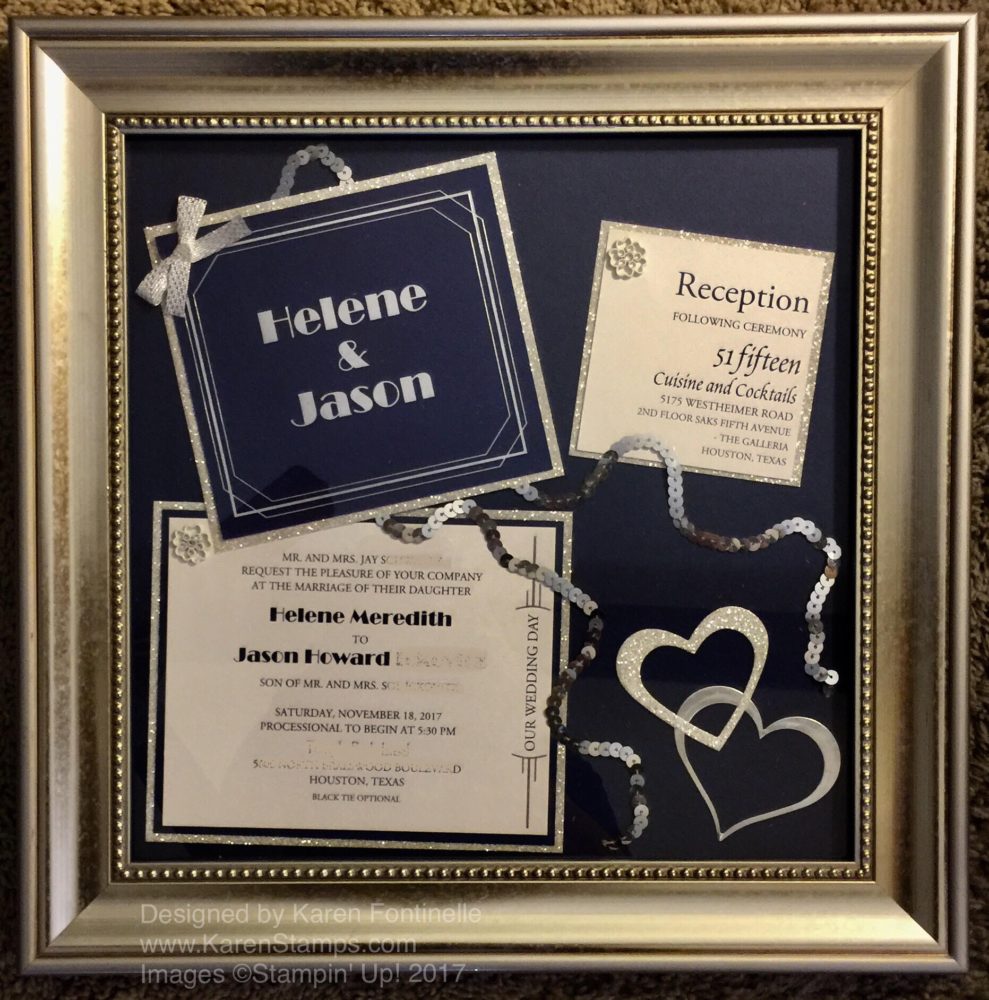
When you are invited to a wedding, you might be able to frame the wedding invitation for a gift to the bride and groom to make a beautiful keepsake! My daughter’s childhood friend got married in November, and the bride’s mother had asked if I could do something “artistic” with her wedding invitation since she likes my cards.

The invitation was three pages with a rivet in the top corner holding all of them together.  At first I was a little stumped with how to decoratively fit these three pages into a frame. Finally I started placing them “catty-wampus” on a 12″ x 12″ page. I started off thinking of a silver background, but once I tried the Night of Navy paper, I really liked that. It was just by accident that I used the Silver Glimmer Paper as kind of a placeholder for my Silver Foil Paper on order!  Once I saw that glimmer paper with the invitation, I loved it and had to use it.

Next I started pulling out any embellishments, ribbons, whatever that I thought I might use on the framed invitation.  You just have to play around with these things and see what you think looks best. It isn’t always in your mind to begin with, at least it’s not in mine! For example, I thought the Sequin Trim would look good somewhere, somehow but I wasn’t getting it quite right until my daughter got home and suggested the layout of the trim that you see. I used some retired silver ribbon to cover up the hole from the rivet and also some retired embellishments to cover the holes on the other pages.  At the very end, some die cut hearts in Silver Glimmer Paper and Silver Foil seemed to fill up that corner just perfectly.

The last step, perhaps it should have been the first, was to find a frame!  Since the embellishments were actually pretty flat, I didn’t need a real shadowbox. The man in the store found this frame for me,  12″ x 12″ and it turned out to be perfect!

I got lovely notes from the bride’s mother and the bride, saying she had opened my present last and that she loved it and said it was the best present to open last! So I think it as a success!

Sometimes your ideas don’t come right away. I began by looking for framed wedding invitation ideas, but I did better when I looked for wedding scrapbook pages! Then you have to play and play with the elements – sometimes it all comes together right away and sometimes you have to give it time to develop! Especially using someone’s wedding invitation, I wanted it to be extra perfect and something she would like really like. This framed wedding invitation really was fun to make and I was pleased with how it turned out! But I could have easily given up and said I had no ideas on something that would look good. Just keep playing, maybe walk away for awhile and come back to it. Give yourself time to come up with what works. Then finally you will see that you have a design you are satisfied with!

You can use your stamping and papercrafting skills in so many different ways, like this framed wedding invitation. And a handmade gift is often one of the best kinds!

Wedding Anniversary Card with Rose Wonder

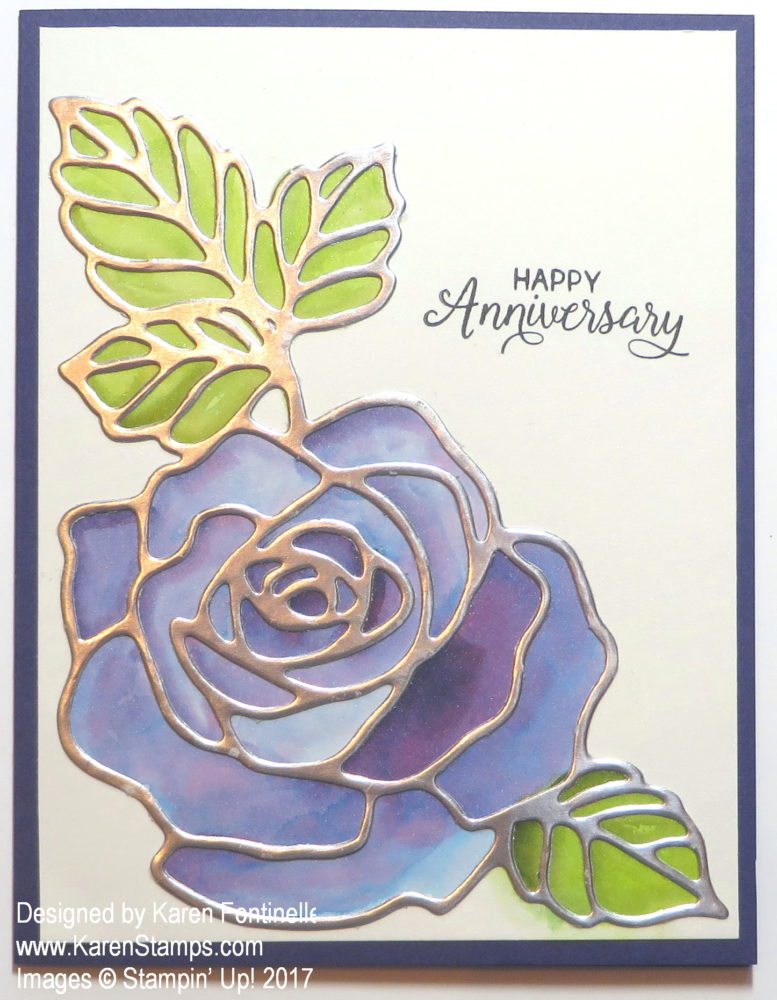
Wedding Anniversary Card with Rose WonderI’ve been getting kudos on Facebook after my daughter posted a picture of this Wedding Anniversary Card with Rose Wonder I sent her and her husband.  I almost didn’t remember this stamp set and die were current!  Sometimes we forget what is in the Stampin’ Up! Annual Catalog when we get so caught up in the Holiday Catalog!
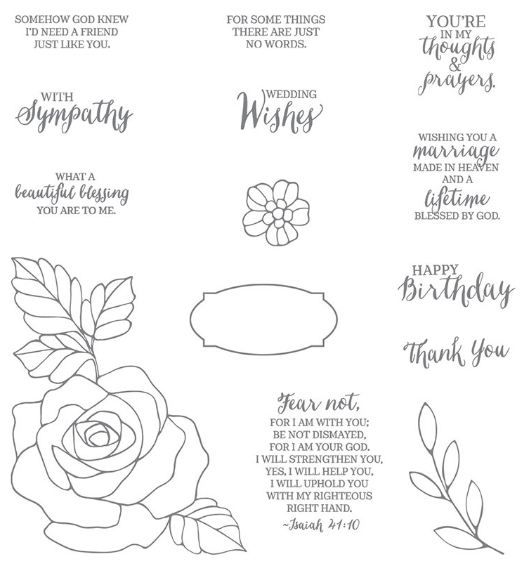
There are many ways to use this stamp set and thinlits dies!  The stamp set, Rose Wonder, comes with a great selection of greetings and sentiments, which may be one of the reasons I bought this stamp set!

Rose Wonder Photopolymer Stamp set

I used Shimmery White Cardstock, a must-have in your inventory, for this card for the stamped layer. The card base is Concord Crush (retired), but you can substitute something else.  The reason I used a retired color is because Concord Crush is the cardstock I used when they got married to make their wedding invitations! I stamped the flower in black ink (probably my old Stazon) and then colored in with the Concord Crush ink refill and my Aqua Painter. It’s always best to watercolor on Watercolor Paper, but Shimmery White works pretty well and has that oh so subtle shimmer to it.

The funny thing is, I think I just used lighter and darker shades of the ink (using less and more water) and the flower came out kind of multicolored.  I think some of those colors were hiding in the purple ink!  The greeting came from the Beautiful Bouquet Photopolymer Stamp Set.

Now the card was pretty at this point, but to add some extra pizzazz, I used the Rose Garden Thinlits Dies to die cut the flower and leaves out of Gold Foil.  The photo might look like Silver with the lighting, but it was the Gold Foil Sheets. It would be good to use the Multipurpose Adhesive Sheets. Since I didn’t have any, I used tiny dots of the Multipurpose Liquid Glue.

Even though this stamp set isn’t “brand new”, it’s a good one to own for the beautiful flower and leaves plus all the wonderful greetings. I was able to make this Wedding Anniversary Card with Rose Wonder pretty easily even though it looks very elegant!

Wedding Card with Bloomin’ Heart Inlaid Design

Wedding Card with Bloomin' Heart Inlaid Design

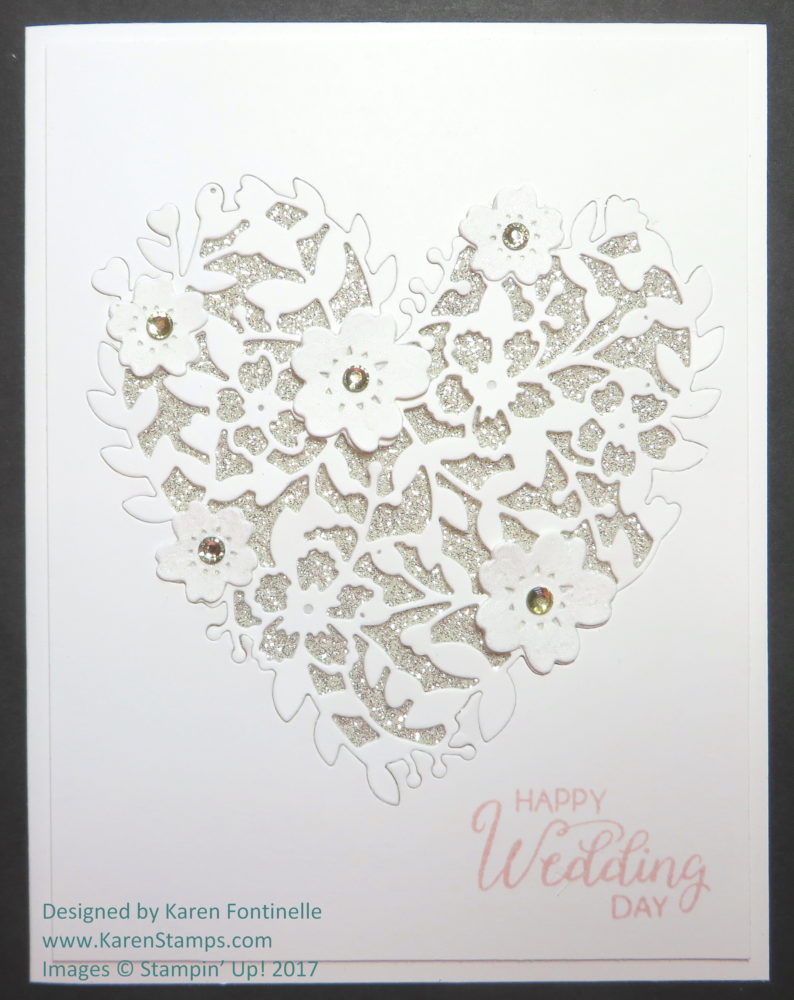
You can make a beautiful, elegant wedding card with sparkle and glimmer just like this Wedding Card with Bloomin’ Heart Inlaid Design using the Big Shot and the Bloomin’ Heart Thinlits Dies.

This card came about because a customer asked me how a similar card she’d seen online was made. At first I thought there was some complicated technique to prevent the heart from being completely cut out of the paper. Then it dawned on me that it really was very simple! The heart was die cut out of the top card layer but NOT removed from the paper, as we typically do. Every card I have made with this die, I have separated the heart from the paper and adhered just the heart to another piece of paper. Here is an example of a card with just the die cut heart itself adhered to the front of the card.

To make this type of Bloomin’ Heart card, cut the piece of paper that you want to be on the card front, whether it’s a top layer or the card base itself.  This paper that I cut as  a normal layer is  4″ x 5 1/4″. Then using the Big Shot and the Bloomin’ Heart Thinlit Die, die cut the heart. When you pull off the die from the paper, use the Paper Piercing Tool or other sharp item or the Die Brush to just loosen a bit of the heart from the die without lifting the whole thing out of the paper. Get just enough of an edge so you can use your fingers or a the Piercing Tool or sharp scissors so you can pull the heart out of the die carefully while leaving the heart IN the paper.  In other words, pull the die off the heart, leaving the heart in place. Either use the Die Brush to carefully and lightly loosen the die cut bits in the heart to remove those or use your sharp tool to poke them out.

Next, there needs to be a layer behind the heart. On this wedding card, I adhered a layer of Silver Glimmer Paper to the Whisper White card base.  I cut this glimmer paper just slightly smaller than the die cut layer so nothing would show. Then I adhered the die cut layer over the glimmer paper making sure no edges were sticking out, making sure it was layered on straight on all sides. I only put Multipurpose Liquid Glue around the borders of the die cut heart layer although perhaps I should have put glue on at least a few of the inside die cut pieces, but then this allows the die cut areas to look a little more 3D not being glued down to the glimmer paper underneath.  You can decide how to do yours.

I had also die cut the little flowers to glue onto the heart. I added a little Clear Wink of Stella to them for a little shimmer on the flowers. Then I added Rhinestone Basic Jewels to the centers of the flowers.

Finally it was time for the greeting.  I might have used silver embossing for the greeting, but didn’t want to risk messing up the card at this point so I chose to just stamp with Powder Pink ink!  The greeting is from the Beautiful Bouquet Stamp Set. Lots of great greetings to use in that set!

As you can see by this Wedding Card with Bloomin’ Heart Inlaid Design, you can use the Bloomin’ Heart Thinlit Die to create a different look than perhaps you can done before!  Try it!

Order the Bloomin’ Heart Thinlit Dies at Stampin’ Up! Online HERE!

Shimmery Heart Die Cut Engagement Card

Shimmery Heart Die Cut Engagement Card

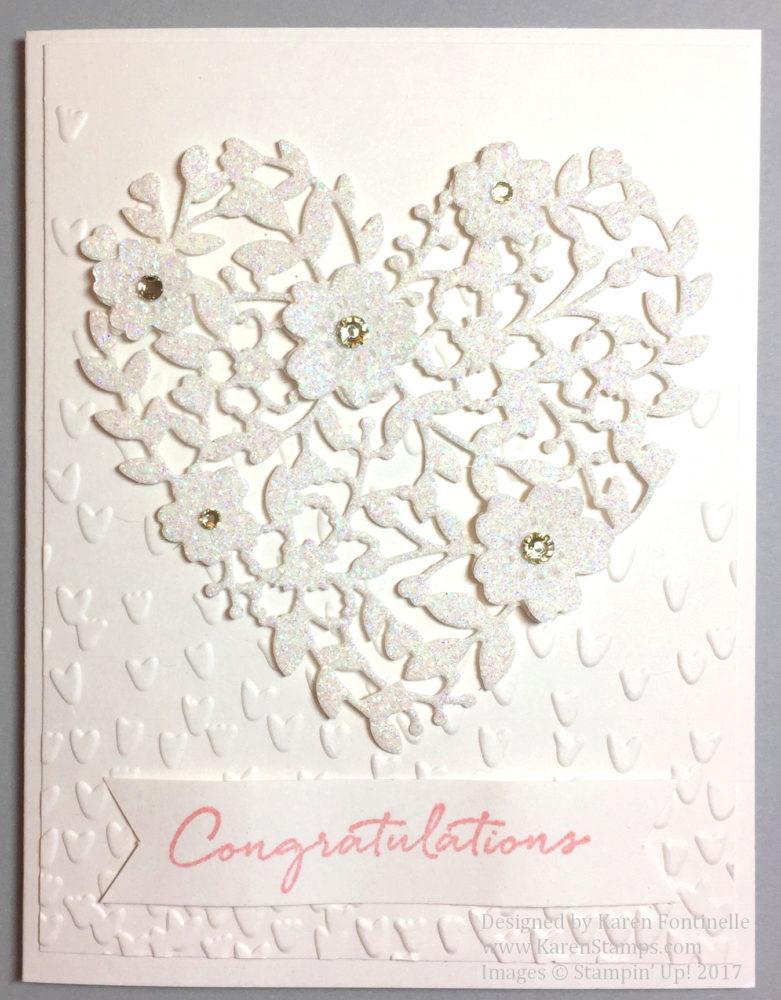
If you need an engagement card for an engagement party, use the Shimmery White Cardstock, which is beautiful in itself, and the gorgeous Bloomin’ Heart Thinlit Dies to make a Shimmery Heart Die Cut Engagement Card. 

Here is how I made the card.  The card base is Shimmery White Cardstock. The next layer is embossed with the Falling Petals Textured Impressions Embossing Folder. To me, this looks like little hearts, but I guess they are meant to be flower petals! It makes it hard to remember the name because I think the folder should be named “heart-something”! But it is a beautiful embossing folder and will be great to use on many, many cards.  The heart and little flowers are die cut with the Bloomin’ Heart Thinlits. It’s best to use the Precision Base Plate with the Big Shot since this is a more intricate die, and be sure to run it through twice, depending on your machine.  And I also highly recommend that you have the Big Shot Die Brush to use to get the little pieces out of the die and the die cut. Then adhere the little flowers on to the heart. I used the Dazzling Diamonds Glimmer Paper for the heart and flowers. And for a little bling, Rhinestone Basic Jewels are always good! The “Congratulations” greeting is from the Floral Phrases Stamp Set.

This card doesn’t photograph well because of the subtle shimmer of the Shimmery White Cardstock and the dazzle from the Dazzling Diamonds Glimmer Paper! In person, it looks very pretty and elegant.  You wouldn’t even have to have the Falling Petals embossed background, the die cut heart is pretty enough by itself on a card. You could even color the glimmer paper with a little reinker and Aqua Painter or brush to add some lightly colored flowers on the heart.  You can see this coloring technique that I did on some punched hearts on this card here on my blog.

They say June is the month for weddings, so maybe you need to start an engagement and wedding stack of cards!  It’s always nice to have some extra cards on hand.  When you make one card and like it, make a couple more of the same while you have the supplies out. You could also make this same card for other occasions, just by changing the greeting or leaving any greeting off. This Shimmery Heart Die Cut Engagement Card is well suited for an engagement card, wedding, birthdays, congratulations and many occasions.

Shop Stampin’ Up! During Sale-A-Bration!

Make a Valentine Card with a Die-cut Glimmer Paper Heart

Make a Valentine Card with a Die-cut Glimmer Paper Heart

Want to make a Valentine card with a die-cut glimmer paper heart? This card is a beautiful example of how to make a glittery valentine card pretty easily. And not only are hearts for Valentine’s Day, but this same card could be for a wedding or engagement or simply a nice card to send to someone special.

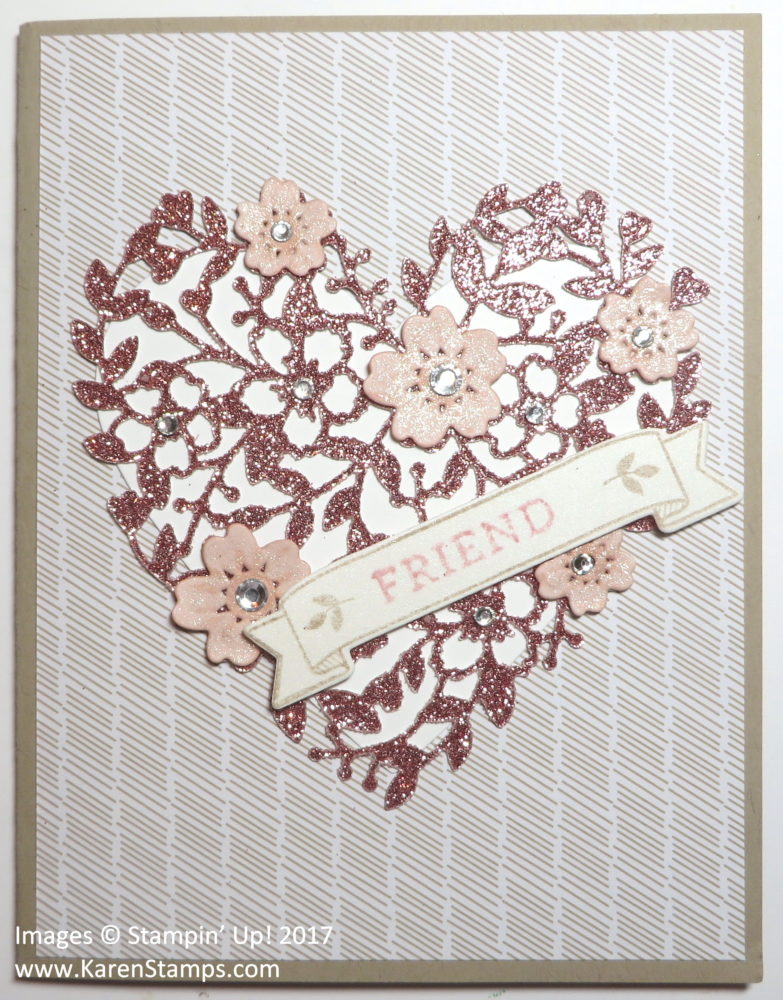
I was that someone special who received this card for Valentine’s Day from my dear friend – my friend I met on the first day of junior high in Mrs. Gordon’s math class in 7th grade/my college roommate/my Stampin’ Up! upline. It’s special to have a friend who has been with you through so many facets of your life.  From the minute she introduced me to Stampin’ Up! I became fascinated with stamping and making cards and especially all the creativity.

The photo doesn’t do this card justice, if you could see the sparkle in person you would really be impressed! It’s difficult to photograph glitter and glimmer!  The card base is Crumb Cake with a piece of designer paper for a layer behind the heart.  The heart is die-cut with the Big Shot and the Bloomin’ Heart Thinlit Die out of the Blushing Bride Glimmer Paper. So that the designer paper in the background doesn’t show through, she put a Whisper White die cut heart, made with the Sweet & Sassy Framelits Dies behind the glimmer heart.  The little pink die cut flowers are touched up with the Clear Wink of Stella Glitter Brush to give them some shine as well. And to top them off, my friend added a Rhinestone Jewel on each flower. For a final touch she stamped and cut a banner for a greeting out of Shimmery White card stock.

I hope you can see how this same design can be used as other types of cards, specifically a wedding or an engagement card, besides the beautiful Valentine card it is! Even using the Bloomin’ Heart Thinlit Die to make a heart out of any pretty paper will produce a beautiful card, but making a Valentine card with a heart die-cut from pretty glimmer paper really steps it up.

You can get any of these supplies at my Stampin’ Up! Online store.

Shop Stampin’ Up! Online 24/7!


One More Day Until the Occasions Catalog and Sale-A-Bration!

Today is the last day for some things at Stampin’ Up! and tomorrow, January 4, 2017, is the first day for some things, namely the new Stampin’ Up! Occasions Catalog and the first day of the annual promotion called Sale-A-Bration!

In case you need help with choosing new products from the Occasions Catalog, you might enjoy watching some of these Stampin’ Up! videos! I know I want everything when I see the videos of the new products!

See the fun ways to use the Balloon Adventure Stamp Set, Balloon Bouquet Punch, and Balloon Pop-Up Thinlits.

And wait until you see this beautiful So in Love Stamp Set and So Detailed Thinlits Dies! Perfect for making wedding cards or any elegant card or project!

Here’s a new look from the new Happy Celebrations Stamp Set and Celebrations Duo Textured Impressions Embossing Folder.

And something I think everyone should put on their first order, the new Watercolor Pencils in Stampin’ Up! colors!
s

Check out the Year-End Closeouts Sale today before it comes to an end. Otherwise, wait until tomorrow, January 4, 2017 to order and take advantage of the Sale-A-Bration promotion where for every $50 you spend on Stampin’ Up! products, you get to choose one free item from the Sale-A-Bration brochure.

The new Occasions Catalog and Sale-A-Bration Brochure will both be online tomorrow when they go live, if you did not receive a catalog in the mail.  If you are interested in Stampin’ Up! products and don’t already have a Demonstrator you are working with and would like beautiful hard copies of the new catalogs, please email me with your contact information and I will mail them out to you.

Shop Stampin’ Up!

Falling in Love Designer Paper Lacy Wedding Card

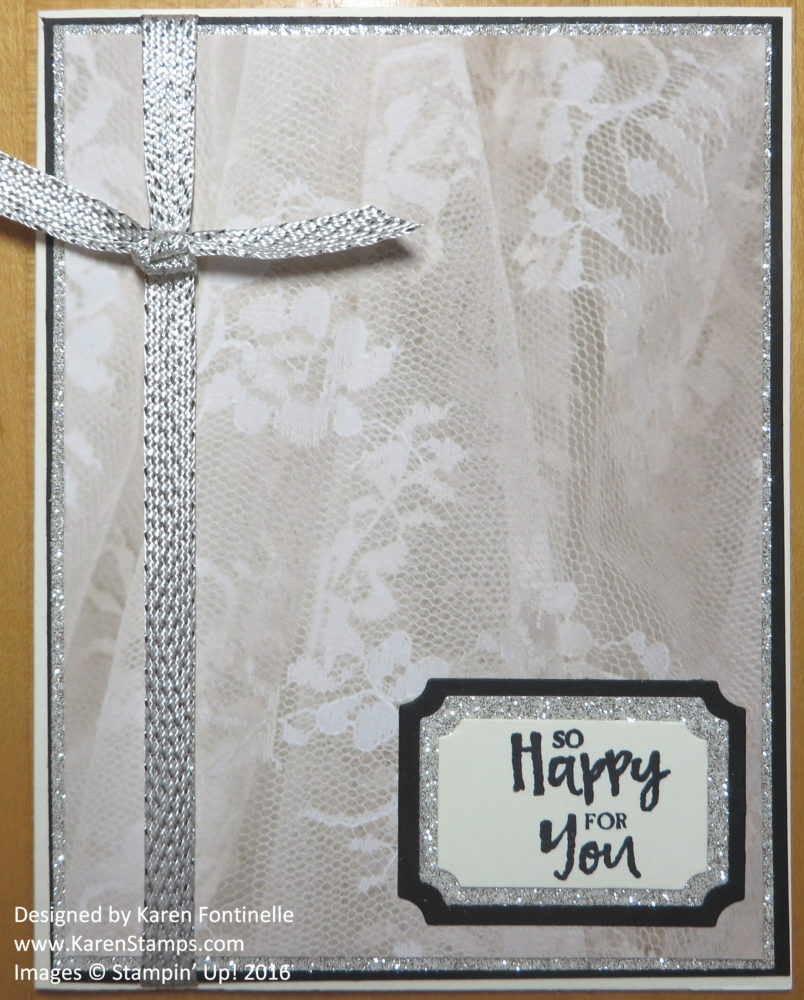
Falling in Love Designer Paper Lacy Wedding CardI’m calling this a lacy wedding card made with the Falling in Love Designer Series Paper because of the lacy patterned paper, but really this card could be for lots of occasions. The Falling in Love Designer Series Paper has lots of beautiful patterns in the pack, but the one that really catches my eye is this lace pattern. It’s one of those papers that you hate to cut into! The lace made me think of a wedding dress so this is theoretically a wedding card, but it could be birthday or any of a number of occasions.

This designer paper coordinates with Very Vanilla so I used that for the card base with a layer of Basic Black. Behind the paper I have Silver Glimmer Paper.  The greeting is from the upcoming stamp set, sure to be a hit, Beautiful You. If Stampin’ Up! Demonstrator reaction is any indication, I would say this stamp set will be very popular.  The beautiful silver metallic ribbon is a Sale-A-Bration item, called the 3/8″ Metallic Ribbon Combo Pack. You get both white ribbon woven with shiny silver and vanilla ribbon woven with shiny  gold accents.

Remember, the new Stampin’ Up! Occasions Catalog begins January 4th as well as the annual favorite Stampin’ Up! promotion called Sale-A-Bration.  During Sale-A-Bration, for every $50 Stampin’ Up! purchase you make, you get to choose a FREE Sale-A-Bration item in the special brochure!  These catalogs will be available online January 4th. If you are interested in Stampin’ Up! products and would like complimentary copies of the catalogs, send me your contact information via email at Karen@KarenStamps.com.

In the meantime, be sure to check out the Stampin’ Up! Year-End Closeouts Sale going on now through January 3rd and make sure you get everything from the Holiday Catalog that you want!

Shop Stampin’ Up! Online HERE!

Floral Thinlits Dies 40th Anniversary Card

Floral Thinlits Dies 40th Anniversary Card

When you’re kids and growing up, you probably can’t imagine that someday it will be years, and years, and years since you used to play together and be part of each other’s everyday lives. I recently made this Floral Thinlits 40th Anniversary card for the “boy” who lived next door to us and was best friends with my brother. When he met his future wife, she would sit in a lawn chair on the carport while my brother and his friend would fix a car or a lawn mower or go cut a neighbor’s grass or whatever they were up to. They eventually got married, 40 years ago, and my husband and I got engaged the following weekend if I remember correctly. How can we “kids” be celebrating forty years of marriage??!

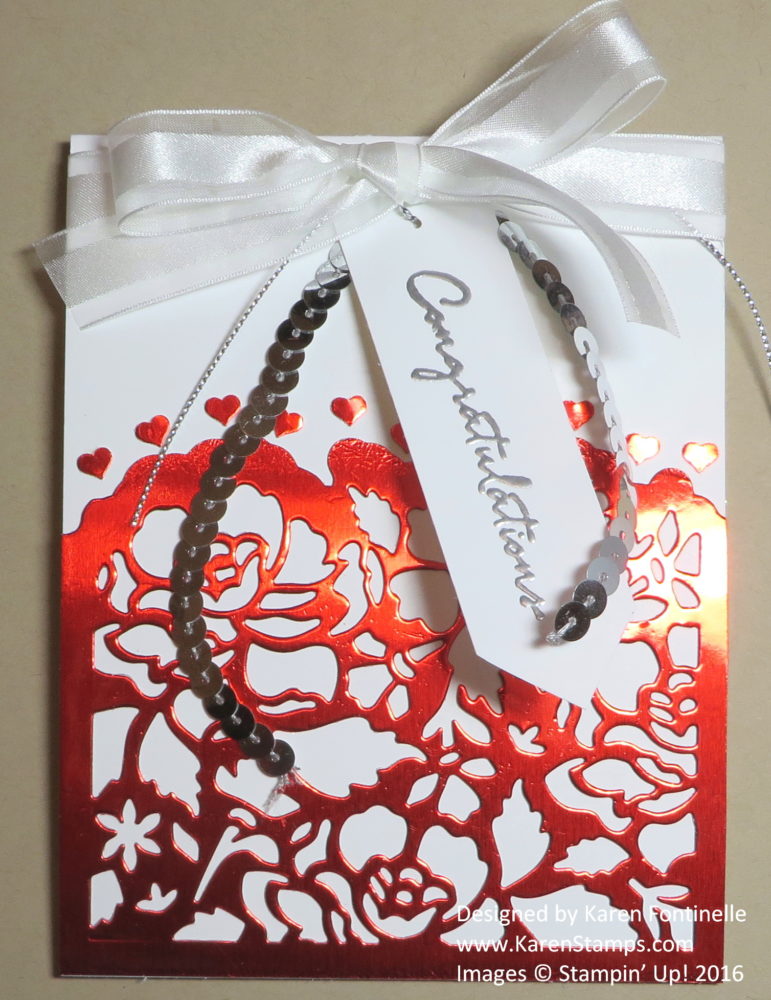
Apparently 40 years is “Ruby”, if anyone still goes by things like that for anniversary gifts and cards. I decided to make the card pretty fancy since it was for such a special occasion. I found a sample online that I liked and fashioned my card mostly after that one. The Floral Thinlits Dies are perfect for when you want to make a fancy card!  I used a Whisper White card base and die cut the Red Foil (retired). I only used the bottom piece, not the top piece. The card opens at the top so I could wrap the Whisper White 5/8″ Organza Ribbon around the card. To jazz up the ribbon, I also used a piece of Silver Sequin Trim and a piece of Silver trim that I just tied into the white ribbon.  The greeting is from the Floral Phrases Stamp Set and is embossed with Silver Emboss Powder  and the Heat Tool.  The little hearts are punched or die cut (I forget how I got those!) and just glued individually above the Floral die cut piece.

There are other ways you could make this same card.  You could use Gold or Silver Glimmer Paper for the die cut piece or a piece of cardstock and put some glimmer paper behind it.  You could stamp the greeting above the die cut piece rather than tie on the greeting on a tag. You could turn the card sideways, putting the die cut piece on the other side. For sure, the Floral Thinlits Dies can make any project look spectacular!

Notice the Floral Thinlits Dies are on SALE in the Stampin’ Up! Year-End Closeouts, so don’t miss it!

Shop Stampin’ Up! Online HERE!

Anniversary Card with a Silver Glimmer Flourish

Anniversary Card with a Silver Glimmer Flourish

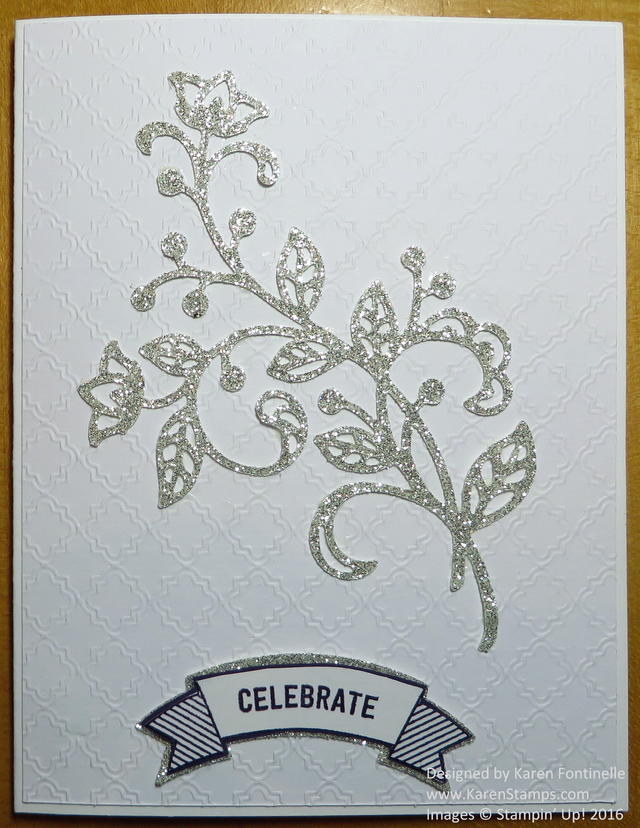
Recently I made this anniversary card with a silver glimmer flourish. I wanted to use the new Fancy Frost Specialty Designer Series Paper because it is so beautiful, and I knew it would make a lovely wedding or anniversary card. In spite of the name and the fact that it appeared in the Holiday Catalog, doesn’t mean it is only for Christmas! There are a few patterns that do suggest the holidays a bit, but the rest are definitely “plain” and can be used for anything. This paper is a little difficult to photograph but I think you can see the pattern I used.

I thought some Silver Glimmer Paper would look pretty with the white patterned paper, so I die cut a flourish with the Flourish Thinlits Dies.  Apparently I am short on “Happy Anniversary” greetings, but I thought “Celebrate” would also work! I found the word and the banner in the Thoughtful Banners Photopolymer Stamp Set. After punching out the banner stamped on white with Elegant Eggplant ink I trimmed it down a little and layered it on Elegant Eggplant cardstock and then on Silver Glimmer Paper.

You can purchase the Thoughtful Banners Photopolymer Bundle which includes the stamp set and Duet Banner Punch so you will be all set and save 10% in the process!

Try the Fancy Frost Specialty Designer Series Paper!  It’s different than anything else we have had since it is a dry embossed textured pattern. You can leave it white or you can color it a bit with Sponge Daubers, Brayer or Sponges.

Shop Stampin’ Up! Online for all your papercrafting supplies!

Wildflower Meadow Butterfly All Occasions Card

Wildflower Meadow Butterfly All Occasions Card

One of the retiring stamps is Wildflower Meadow with a matching embossing folder, Wildflower Meadow Textured Impressions Embossing FolderThey are discounted now on the Stampin’ Up! Retiring List so check them out! Wildflower Meadow is very pretty although I know I didn’t use it as often as I could have. It’s a large background stamp so I actually prefer the wood-mount verson which is a little easier to use I think.

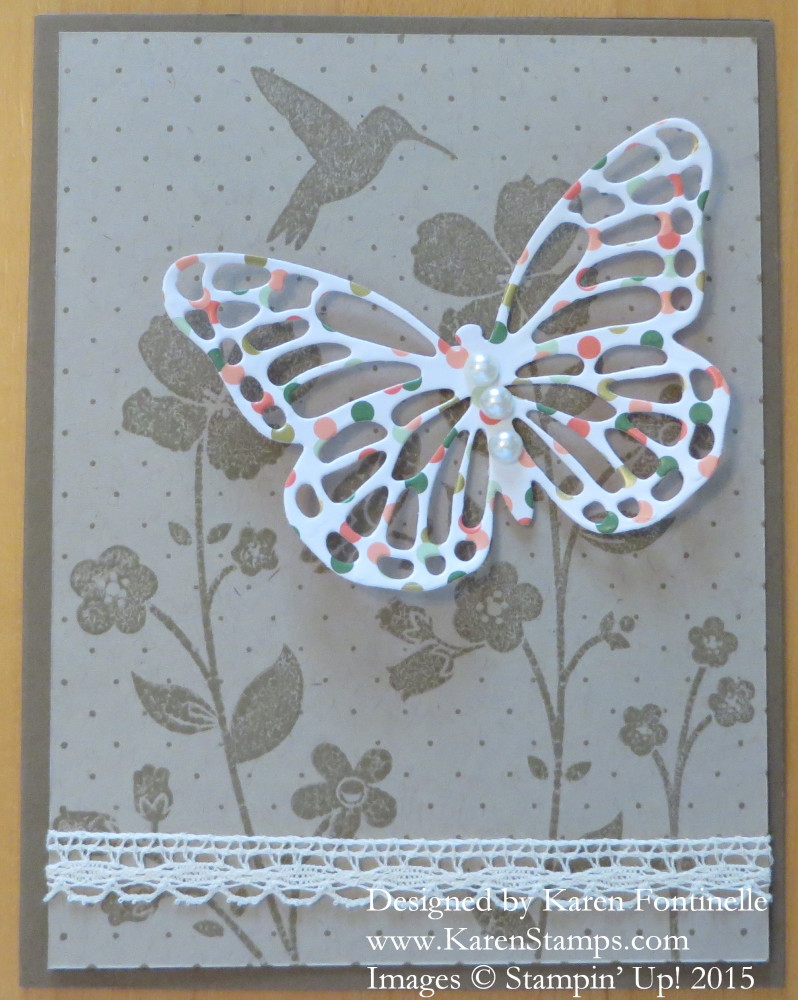
I decided to use the Wildflower Meadow stamp in kind of a monochromatic look on this card, stamping the Crumb Cake card stock with Crumb Cake ink.  You could also use Versamark Ink for the same look. The card base is Soft Suede. I wanted to see a pretty background but I wanted a butterfly to be the focal point.

The butterfly is a piece of paper from the Gold Soiree Specialty Designer Series Paper which is so pretty with its Metallic Gold and is discounted 50% on the Stampin’ Up! Retired List also! The butterfly is die-cut with the Butterflies Thinlits Dies. I added a few Pearl Basic Jewels Embellishments for the butterfly’s body and just adhered it with a Stampin’ Dimensional (a thin scrap from the edge of the Dimensional page to fit) so the butterfly would look 3D. Then for just a little more embellishment I added a strip of Venetian Crochet Trim across the bottom.

This card could be used for almost any occasion so I decided to leave off a greeting until I need to send the card and see what I want to put on it. It certainly could be used for Mother’s Day which is coming up next Sunday, May 10, 2015. It could also be birthday, thinking of you, get well, graduation, sympathy, even a wedding card.

Go to my Stampin’ Up! Online Store now and see all the great products and certainly many discounted prices available!

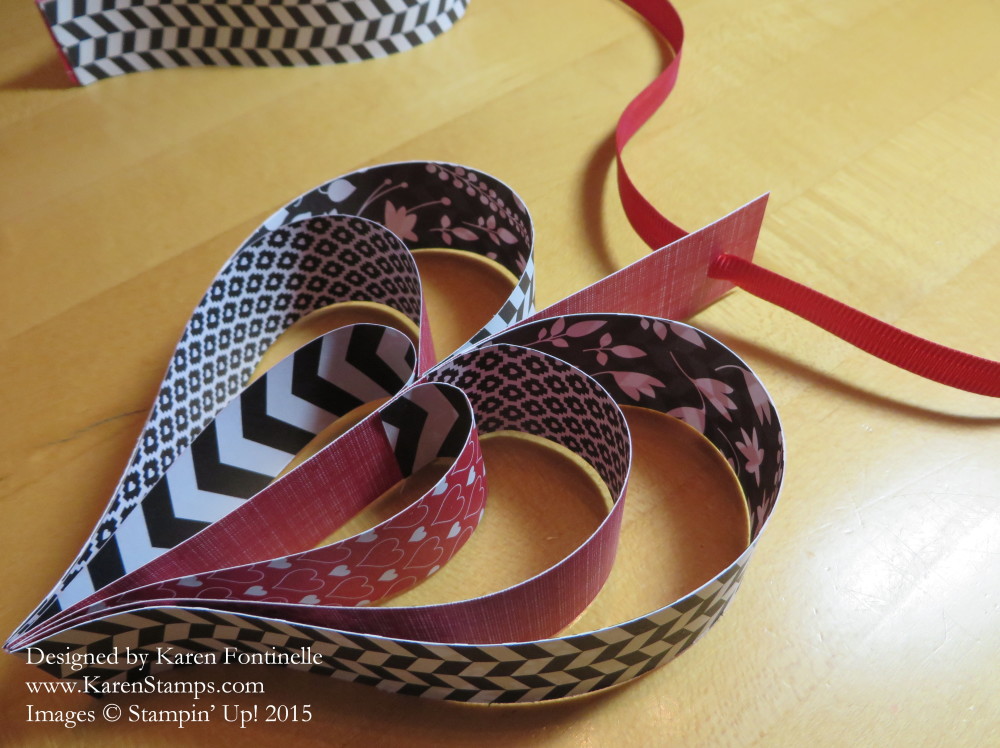
Make a Heart Garland for Valentine’s Day

Heart Garland Hanging

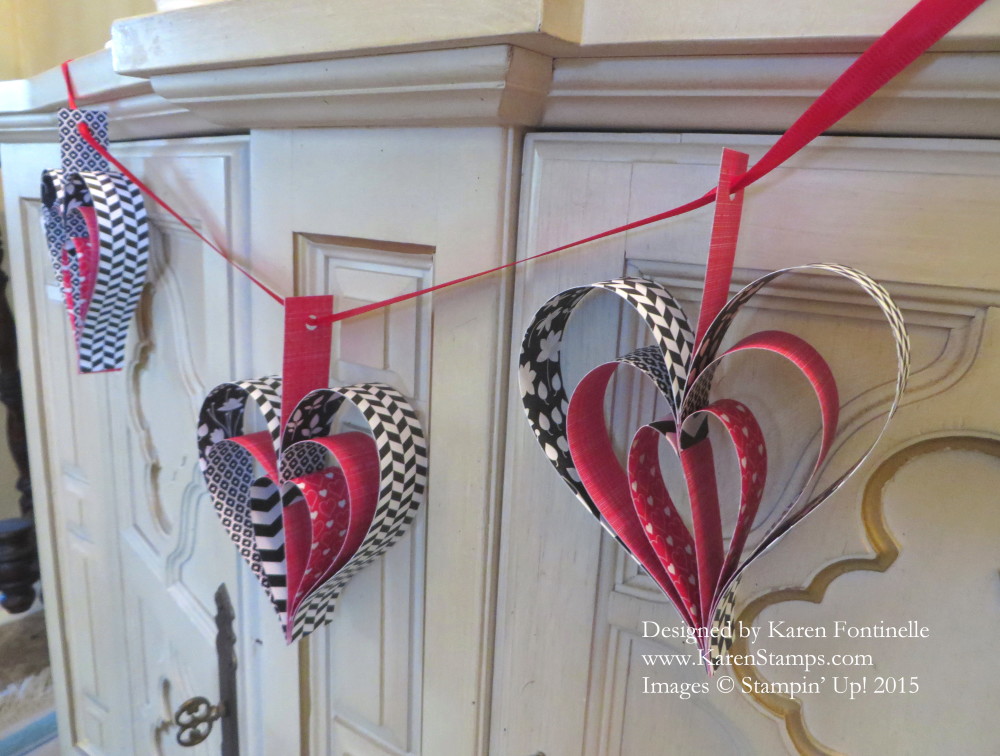
These heart garlands made with strips of paper are quite popular on the internet. Once I found one of these hearts, I found them everywhere! I wanted to use the Stacked with Love Designer Series Paper Stack but I also needed 8″ long strips. Luckily Stampin’ Up! has the Back To Black Designer Series Paper that I could use with the Stacked with Love papers.

There are some other methods of assembling them, but they are all easy to do. While we think of hearts for Valentine’s Day, this garland could be made for weddings or party decorations. Change the paper color and design for other occasions. Think how cute this would be for a baby shower or bridal shower!

Heart Garland One Heart

These are the instructions I followed to make these paper hearts. You can also find slightly different

directions using staples instead of glue and assembling the strips in a different way.

Cut 1″ wide strips of paper in these sizes:

2 – 8″ strips

3 – 6″ strips

2 – 4″ strips

Lay these strips out on the table in this order:

8″, 6″, 4″, 6″, 4″, 6″, 8″

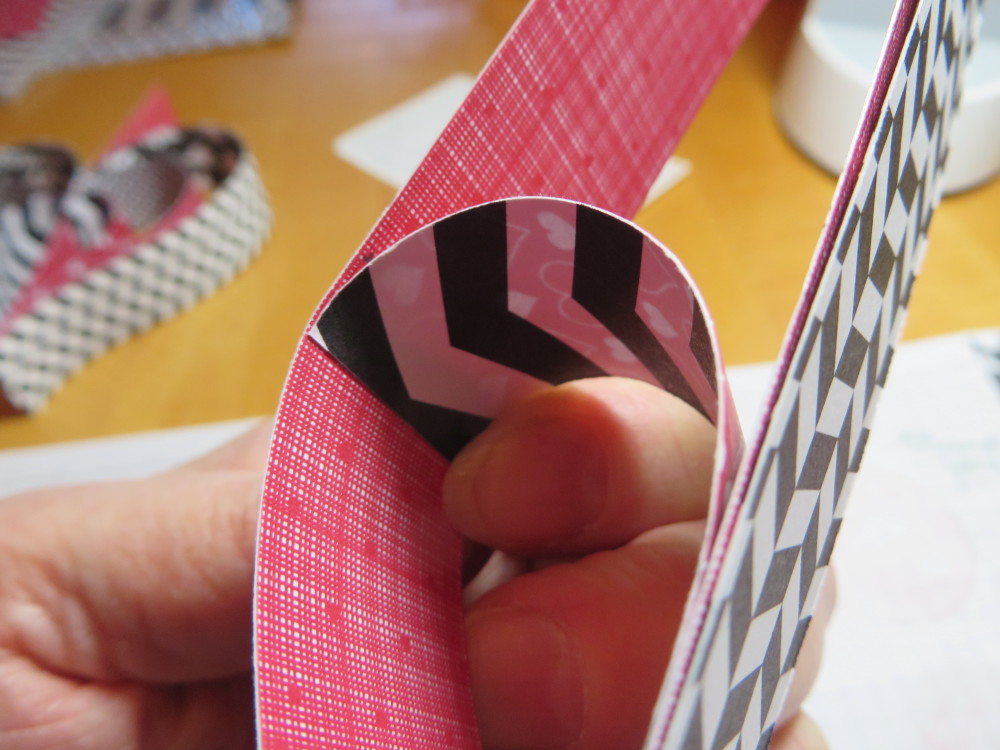
The 6″ strip in the center is the center strip that will remain straight and become the hanger. Checking the way you want your paper patterns to go, adhere the bottom edges of the three strips on one side of the center 6″ strip. One time I used Glue Dots and the other hearts I used Liquid Multipurpose Glue (the green glue!). You just have to hold for a few seconds when you use the glue until it sticks. Glue this stack of strips to the center 6″ strip also at the bottom.

Then take the 4″ strip in the glued together stack, bend the top, put some glue on the end that will attach to the middle area of the center 6″ strip.

Heart Garland Strips Glueing

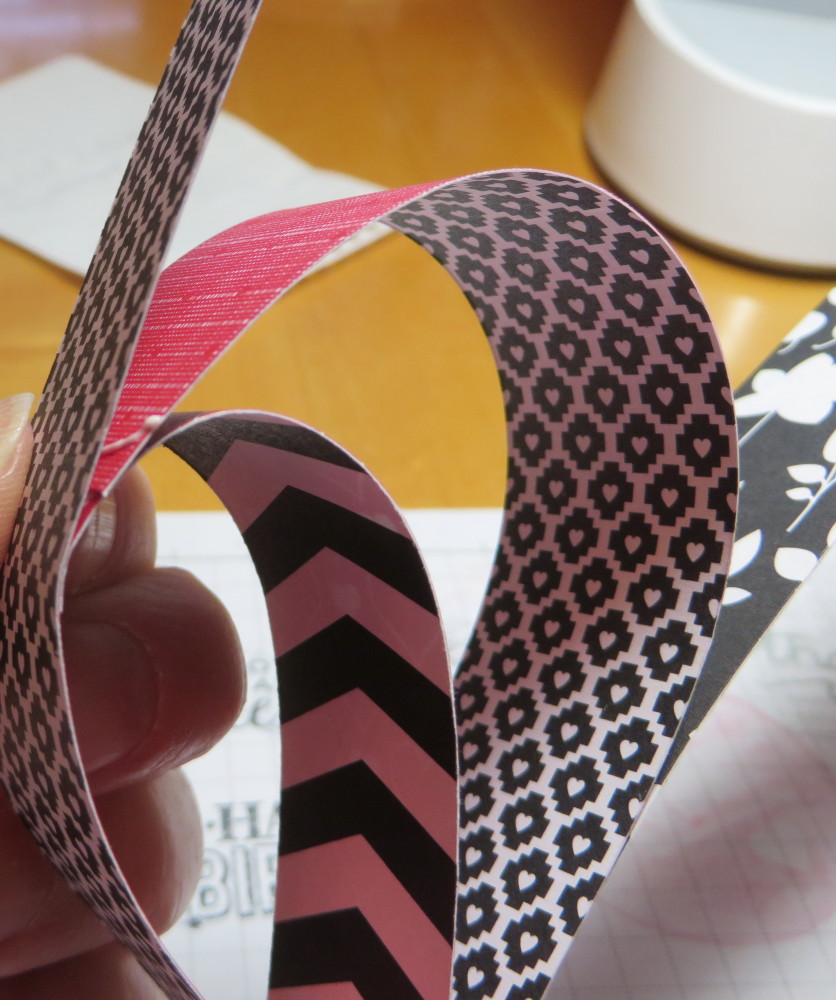
Next do the same with the 6″ strip.

Heart Garland Strips Glueing2

And finally the last 8″ strip.  Then you have half of your heart.  Do the same with the strips for the other side.

Punch a hole in the top of that center 6″ strip for each heart to thread ribbon through to hand. I used the Real Red 3/8″ Satin Woven Ribbon that was in the Holiday Catalog. I wish they had carried that over because it is SO pretty! But you can also use the Real Red 1/4″ Cotton Ribbon or any ribbon of your choice. You might even want to tie extra ribbons on between the hearts or add other decorations of some kind.

This is an easy papercraft to make and certainly is versatile for many occasions! All you need are paper strips and adhesive!

For any papercrafting supplies or stamping supplies you need, please visit my Stampin’ Up! Online Store. I can always put your order in for you if you like. During Sale-A-Bration, choose a FREE product from the Sale-A-Bration Brochure with every $50 purchase (before shipping and tax).