Category Archives: Wedding

New Stamp Set, New Weekly Deals from Stampin’ Up!

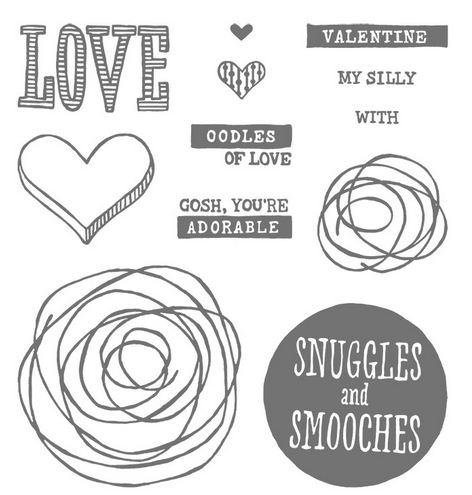
Snuggles and Smooches Stamp Set

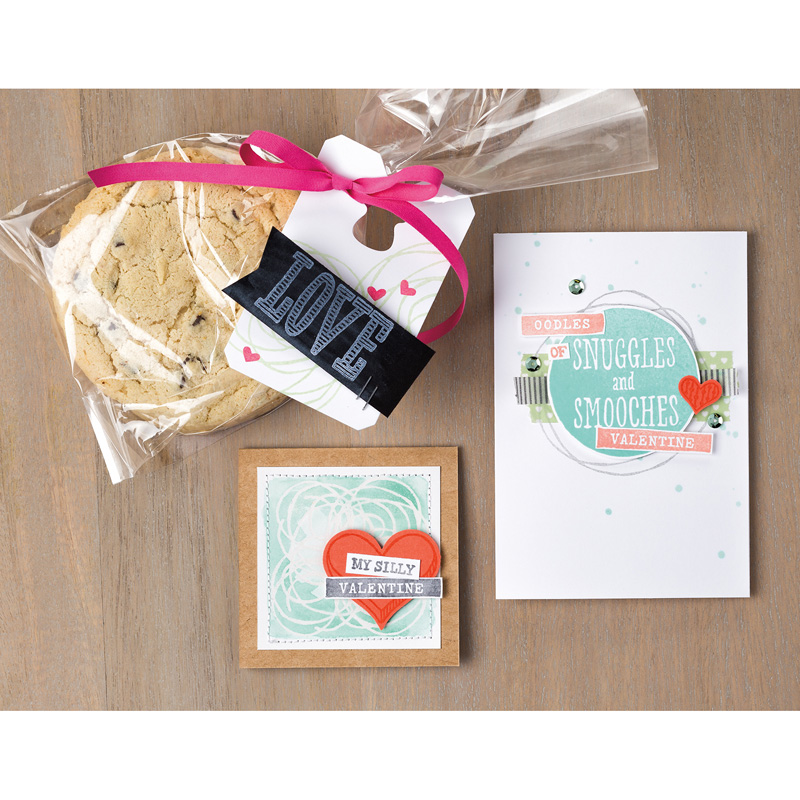
What a nice surprise this morning to check the latest Stampin Up! updates and find out they have a new stamp set for us! This one is called Snuggles and Smooches! It’s a photopolymer stamp set that CAN be used for Valentine’s Day but really can be used any time. The swirls match the trend of winding up some linen thread or twine as a design element on a card that you have probably seen. You can read more about the creation and use of this stamp set by the concept artist on the Stampin’ Up! Blog here. If you would like to order it, you can find it HERE in my Stampin’ Up! Online Store!

Snuggles and Smooches Stamped Projects

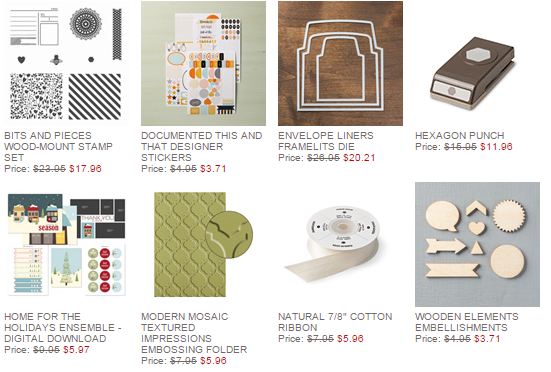
And the new Stampin’ Up! Weekly Deals are here! Click this link or the photo below!


Stampin' Up! Weekly Deal Dec 9 2014


Stampin' Up! Clearance Rack Year End CloseoutsDon’t forget to take advantage of the Stampin’ Up! Year-End Closeouts! You can add any and all of these items in this post to your order. Ask a friend if they would like to order anything, such as ribbon or scissors, and maybe you can reach the level for Hostess Benefits!

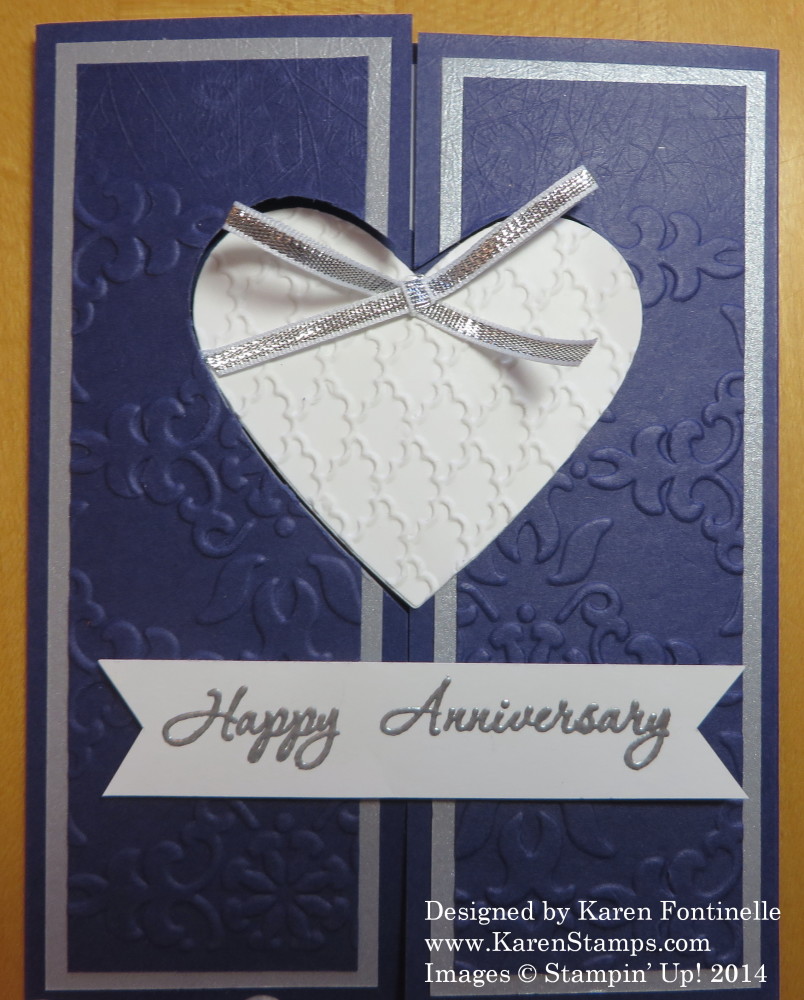
Wedding Anniversary Card with Heart Framelits

Wedding Anniversary Card with Heart Framelits

This is the wedding anniversary card I made for my daughter and son-in-law using the Heart Framelits and a technique I saw online by Deb Valder. To make the card special for them, I used the same color card stock (Concord Crush), and embossing folder (Vintage Wallpaper) I used to make their wedding invitations four years ago. (The Concord Crush color is retired now as is the beautiful Vintage Wallpaper folder.) I also used Brushed Silver Card Stock as I did on their wedding invitations, plus, of course, Whisper White.

Here is the inside of the card.
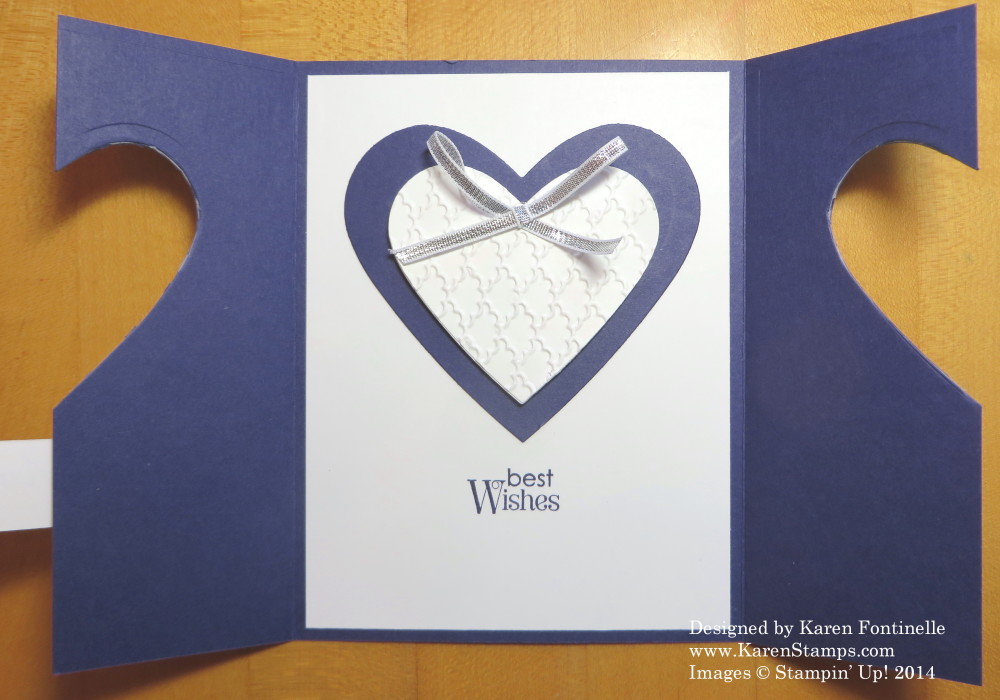
Wedding Anniversary Card withHeart Framelits Inside

The idea is that the front of the card is cut out in the shape of the framelit so that the die cut on the inside of the card decorates the front of the card!  And it is not that hard to make!

Take your usual half sheet of card stock, but to make the flaps, score 2 1/8″ from each end and fold.  Make sure the center meets. Layer a piece of card stock or designer paper inside the card, 4″ x 5 1/4″. On the two outer “flaps”, decorate however you like, perhaps with designer series paper, remembering that you are going to cut through those layers with a framelit so you don’t want it too thick. I made this card over a month ago so I don’t remember exactly, but I made have had to do some extra trimming to cut through entirely that the framelit couldn’t do. But you need to have the front done before you cut with the framelit. Lay the framelit cutting edge UP inside the card, centered and exactly where you want it, knowing that it is going to cut the front flaps of the card. Close the flaps over the framelit and cut out with the Big Shot. Now you want to cut the same framelit shape to go on the inside of the card, keeping in mind it needs to fit exactly in the shape you just cut out on the front of the card.  This didn’t matter with the heart, but if you did another shape you need to make sure it is going in the same direction and perhaps cut with the framelit cutting edge “up” again. When you have your shape, pop it up on Stampin’ Dimensionals and adhere inside the card so that it fits perfectly with the front cut-out. Hopefully you can kind of tuck the front flaps underneath that die-cut a bit to hold them closed.

This is a neat idea to experiment with and make an elegant card.  You just have to think about what you are doing and which way things are going to make it all work! But we paper engineers are pretty good at doing that!

If you don’t already own a Big Shot Die-Cutting Machine, I heartily recommend one.  I use mine almost everyday.
Owl Punch Anniversary Card

Owl Punch Anniversary Card

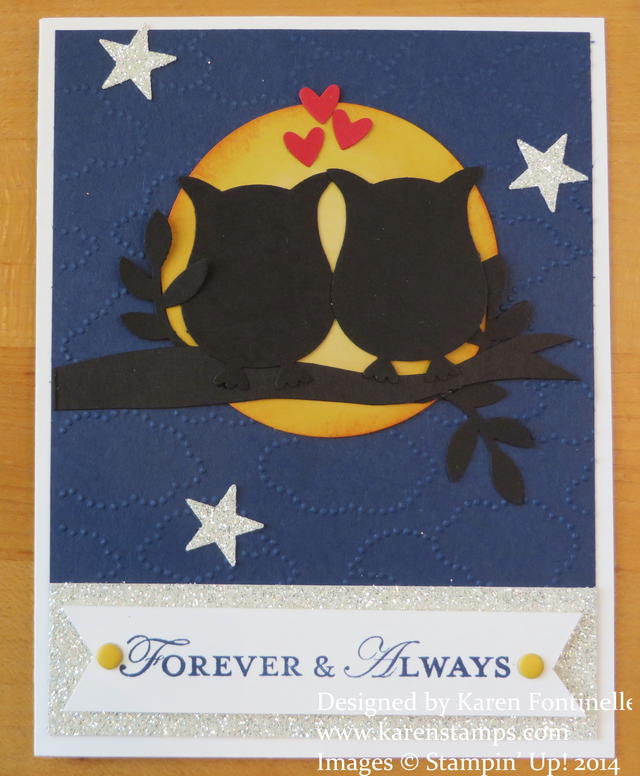
Yesterday was our wedding anniversary and this is the card I made for my husband using the Builder Owl PunchThe Owl Punch is so incredibly versatile you can’t believe it – unless you look online and see all the ideas people have come up with for dressing up the owl shape or cutting it differently to make something else. I found this basic idea online for my card, of the owls and the moon, and changed mine up a little bit. I figured the owl silhouette shapes were fine for my husband’s card because while he might appreciate it, he wasn’t going to ooh and aah over the card if I dressed up the owls!

Since we just had a “supermoon” here in Houston, I thought the owls and the moon were appropriate.  I punched a 2 1/2″ circle out of Hello Honey, our new In Color card stock, and then shaded it a bit by sponging on some Tangerine Tango ink and White Craft ink. It’s barely noticeable but sometimes it is the tiny little things you do that add a lot.

The little branches are punched with the Builder Bird Punch but I hand cut the tree branch out of Basic Black scrap. For the Night of Navy background, I embossed it with the Cloud embossing folder (retired). Since it didn’t emboss all the way to the bottom of the layer, I used a wider strip of the Silver Glimmer Paper to cover and put my greeting from Loving Thoughts (retired) on top of that with a couple Candy Dots. Couldn’t resist playing with the Glimmer Paper some more so I punched out a few stars with the star punch in the Itty Bitty Accents Punch Pack for the nighttime sky! The little Real Red hearts are punched with the Owl Punch.

Today the Stampin’ Up! Convention gets underway! Actually, this year they are officially calling it “Inspire. Create. Share. 2014” They are livestreaming a little bit of Convention each day for those of us sad demos at home!  I can’t wait and have an alarm set so I don’t forget! I’ll keep you posted on whatever news I hear out of Convention. Check back here, or better yet, follow me on my Facebook page at www.facebook.com/stampingwithkaren by clicking the “Like” button. You can also follow me on Twitter  (which I use now and then!) at www.twitter.com/karenstamps

You can bet that Salt Palace lobby is filled with demos already in line for General Session to get a front row seat and tons of swapping of card fronts going on! They swap while waiting in line, while walking by, while sitting down, everywhere, any time!  It’s so much fun and makes for such a friendly experience!

For great papercrafting supplies, please visit my Stampin’ Up! Online Store. Check the Weekly Deals and the Buy 3 DSP Get 1 Free Special Offer.

A Kim and Kanye Wedding Card With Bling

Kim and Kanye Wedding Card

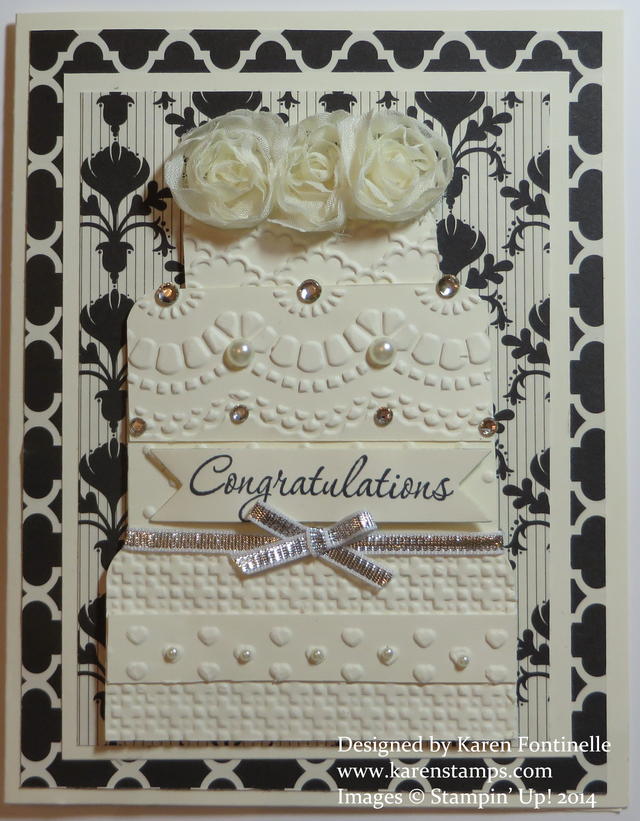
Now that Kim and Kanye have gotten married, I thought I should make them a wedding card with bling! This card probably doesn’t have enough bling for Kim Kardashian, but it will do for a start! She can always add more diamonds and jewels to it later! Can you even imagine the opulence of their wedding?

Most of us will never attend a wedding like Kim and Kanye’s, but when your friends or family members get married, I’m sure you want to give them a special handmade wedding card to send your good wishes. This one is made with a card base of Very Vanilla and the Modern Medley Designer Series Paper (it’s discounted on the Retired List right now!) The wedding cake was made with pieces of Very Vanilla card stock embossed with a variety of Stampin’ Up! Embossing Folders, some of which are retiring.  I then added some Rhinestone Jewels and Pearls, some Flower Trim (retired) and a greeting from the stamp set Love and Laughter as well as some Silver 1/8″ Ribbon.  I love how these little accessories can add so much to a card!

Whether or not you are sending Kim Kardashian and Kanye West a wedding card or gift, we all know someone getting married from time to time. If you need stamping supplies to make wedding cards, or perhaps cards for other special occasions, please visit my Stampin’ Up! Online Store. You’ll find everything you need!  Be sure to check the Weekly Deals and the Retired List, plus the Clearance Rack and see if you can find any good deals!

Gift Wrap Idea: Gold Kraft Gift Box with Gold Frizzle

Gold Gift Box with Gold Frizzle

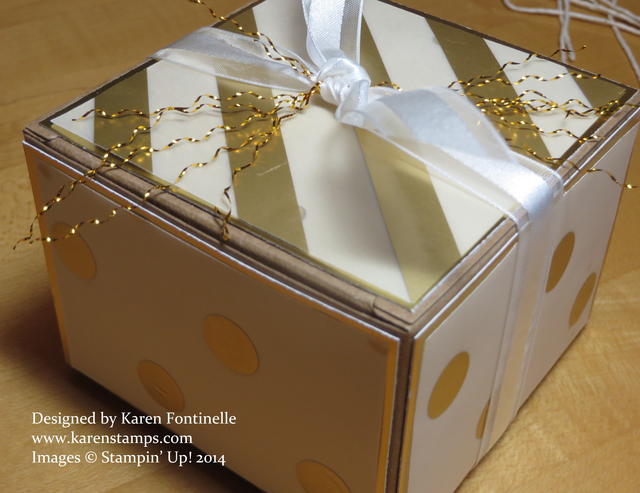
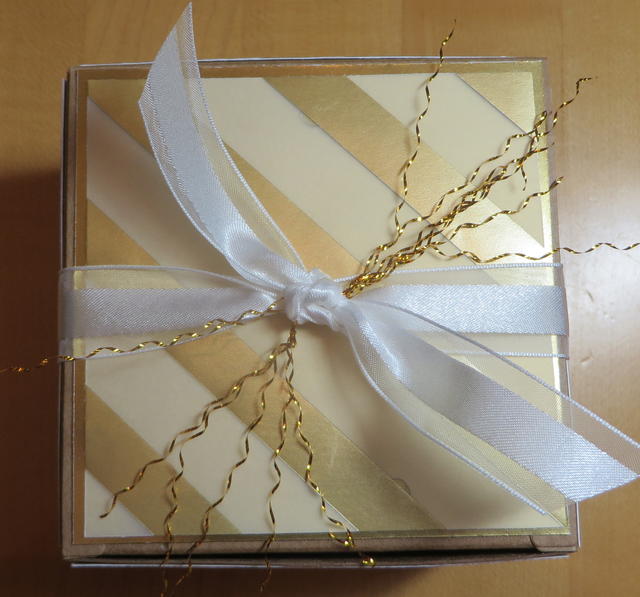
Do you need a fancy gift wrap idea?  Use the Stampin’ Up! Kraft Gift Box and gold, gold, gold! Gold is IN these days so you might as well use it! I love these little Kraft Gift Boxes. They are 3 1/2″ wide on each side so perfect for a small gift or treat. I decorated this one first with a layer of Gold Foil on each side, cut just 1/8″ smaller on each side than the box. Then I layered a piece of Gold Fancy Foil Designer Vellum on each side (choose whichever pattern you like the best). I put a different pattern on the top.

Then to really jazz it up a bit, I put a little “frizzle” on the top! I didn’t know where I came up with that term or description, but it turns out “frizzle” does mean curl or kink or ringlets so I guess I was correct! Do you know where I got it?  From the Gold Baker’s Twine! The Gold Baker’s Twine is really just White Baker’s Twine with the metallic gold thread twisted around in it. Some people have even complained that when using the Gold Baker’s Twine, it came untwisted and frayed at the ends. But you can embrace that idea and untwist the gold thread from the white twine! Cut the Baker’s Twine into pieces several inches long each to make it easier.  Then gather your pile of gold threads and tie onto a bow or knot. Very easy! I could have also added a piece of Gold Sequin Trim for some extra bling!

If you are looking for more gift-wrap ideas and haven’t signed up for my Mailing List yet, do it today and get your FREE GIFT, “A Dozen Creative Gift Wrap Ideas”. You’ll see the sign up box in the upper right corner of my blog!

Gold Gift Box Top with Gold Frizzle

A Husband Valentine

Husband Valentine

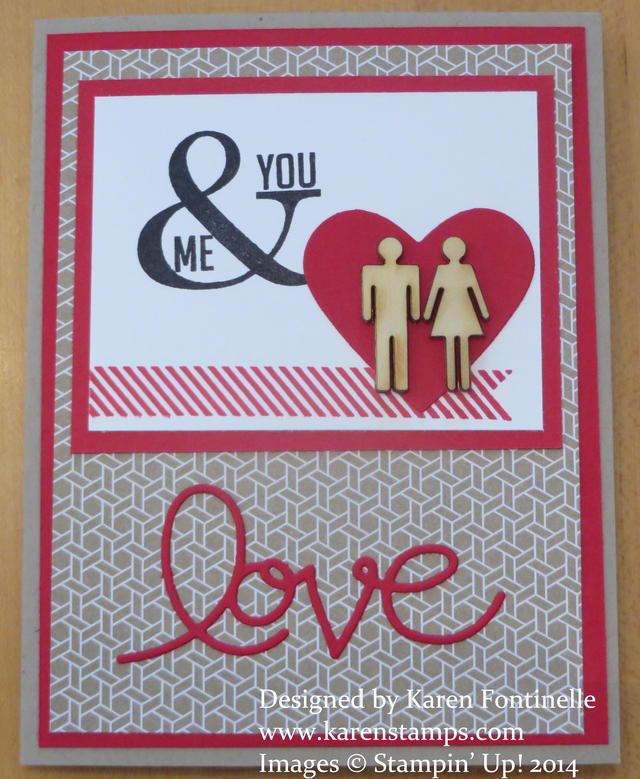
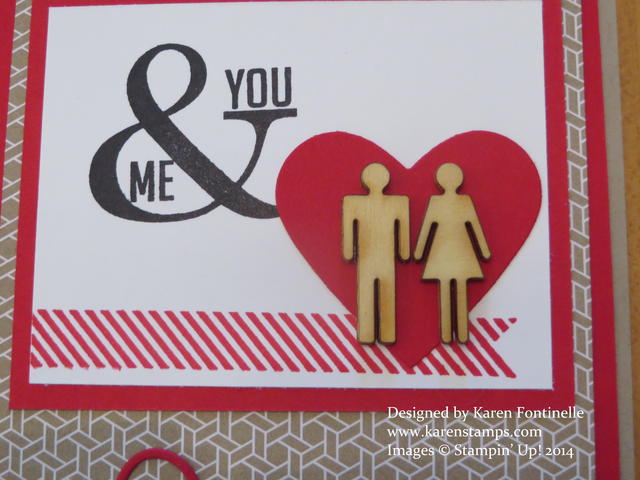
Here’s the valentine I just made for my husband!  I guess you can say I work best under pressure! At the last minute! I got the idea to use the little wooden people that came in a Paper Pumpkin Kit.  What a cute little 3D embellishment especially for a man’s card!  The ampersand and sideways banner is from Perfect Pennants. The Real Red heart is die-cut with one of the Hearts Framelits. That background paper is from the Fresh Prints Designer Series Paper Stack.  The “love” die-cut is from the Expressions Thinlits that were in the Holiday Catalog and sadly NOT carried over!  What WERE they thinking??!  I’ll keep my fingers crossed that they reappear in the next Annual Catalog!

I hope you are having a great Valentine’s Day!  The bouquet of flowers has arrived, right? And your husband will be bringing home the box of chocolates and diamond necklace later, right? Well, if not, then you get a free evening of stamping!  Treat yourself!! One year I bought myself that purple bottle of Elizabeth Taylor perfume, whatever it was called, and had it gift-wrapped at the cosmetic counter…for myself for Valentine’s Day! Why not?!

Hope this card will inspire you if you need an idea for a husband Valentine!

Husband Valentine Close-up

Spiral Flower Originals Die…Lovely to Own!

Spiral Flower Originals Die

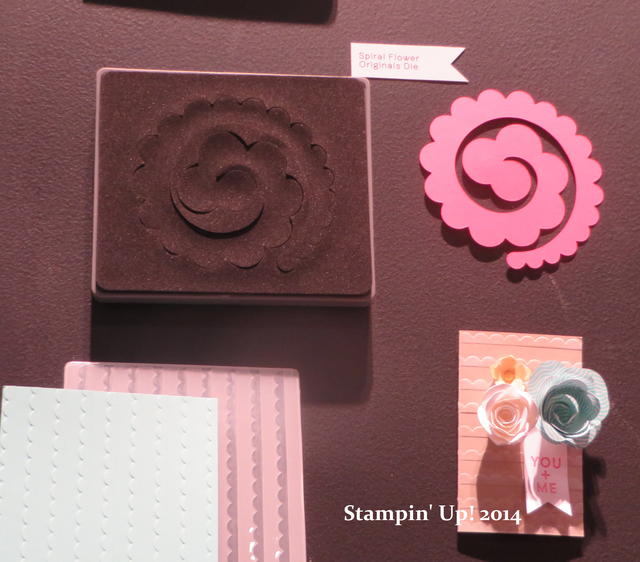
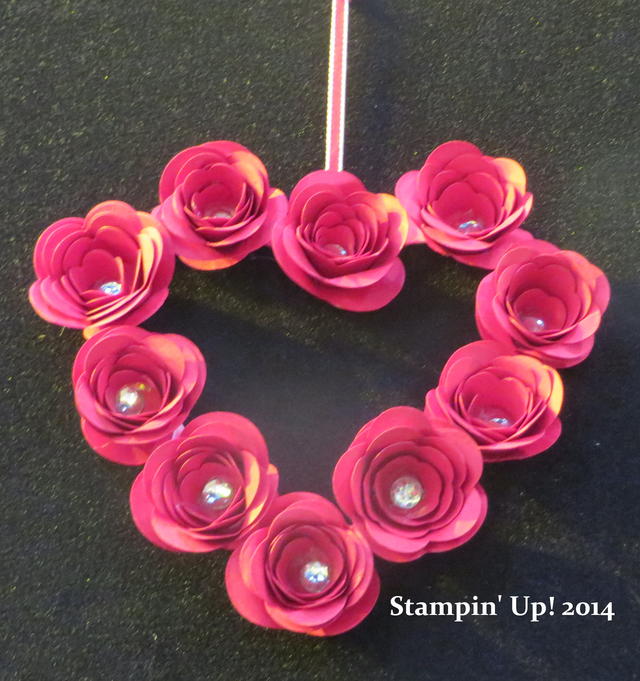
At Stampin’ Up! Leadership 2014 last week, I was able to see the Spiral Flower Originals Die in person and see the flowers made with it. Now I want to order it! They were showing the die and a ton of flowers made with it for demonstrators to see up close and personal. The Stampin’ Up! employee I was talking with said each flower will turn out different according to who made it and how tightly or loosely you roll it up. It is suggested you use your Bone Folder after cutting out the flower to loosen up the paper fibers to make it roll easier.  The die, like other dies of this kind, are not just for paper either!  You can use other materials, such as fabric, so think of the possibilities! Just roll it with your fingers or around a pencil or skewer, however you want to do it.  You can leave the center as it comes out or push it down and put a button inside or rhinestone or something.

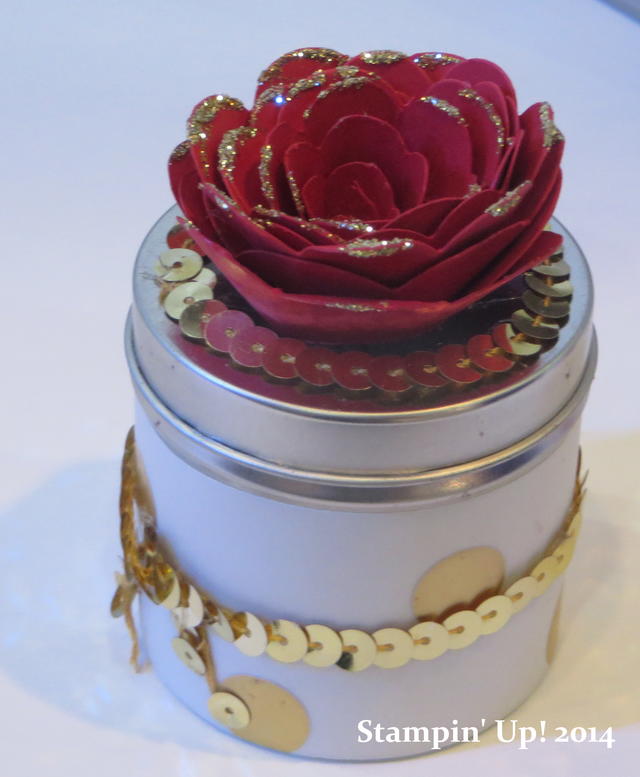
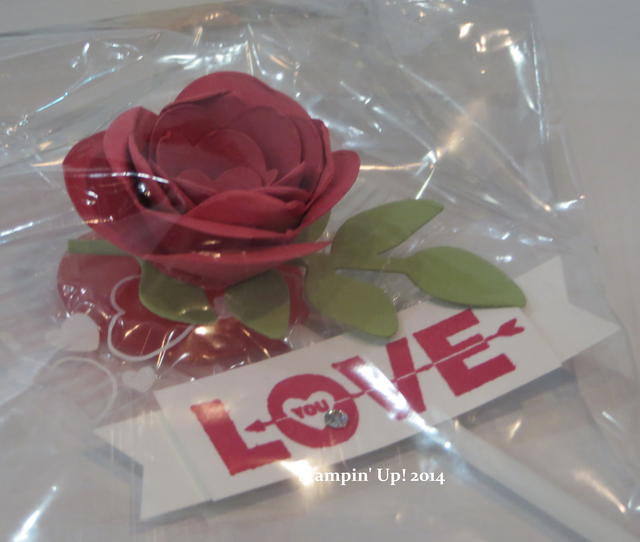
After Leadership there was a public event and some Stampin’ Up! Demonstrators were ‘demonstrating’ at booths. One was doing these paper flowers so here are some photos and ideas:

Spiral Flower Die Rose Tin

Spiral Flower Die Rose Lollipop

Spiral Flower Rose Heart Wreath

To add the Spiral Flower Die #129379 to your next order, just go to my Stampin’ Up! Online Store!  You could have a table full of flowers in no time for spring!

Make a Gift Bag for Mother’s Day!

Mother's Day Twitterpated Paper Gift Bag

Do you need a pretty gift bag for your Mother's Day gift…or really any occasion? You can use this design and just change out the paper for whatever person or occasion you want a gift bag for. If it's for a man, maybe leave off the paper flower but add a stamped image or greeting instead. You'll think of something!

I just found one of those small brown handled bags that you get now and then at the store.  If you save them, you'll always have a stash to go to when you need a nice gift bag.  Just choose 3 patterns from a pack of Stampin' Up! designer paper and cut one larger piece for the bottom section, one smaller piece for the top and  a piece to go across and cover up that line where the two papers meet and make a cute border. You could leave it as is or you could cut or punch a scalloped edge or whatever to jazz it up.

For my bag, I used three patterns out of the Twitterpated Designer Series Paper. For a pretty accent I added three buttons from the  Designer Buttons Subtles CollectionEach is tied with a small piece of White Baker's Twine. For something at the bottom corner of the bag, I chose to make a flower with the Flower Folds Die and the Big Shot using a pattern from the Twitterpated DSP.

Some of these items are on the Stampin' Up! Retired List so better do your shopping soon!  Anything on the list can sell out at any time so you don't want to be disappointed. Just click that link to go to my store with the retiring products and shop to your heart's content!

Brides & Babies–Best of 25 Years!

Best of 25 Years_May Brides and Babies

Click to Enlarge

In continuing to celebrate their 25th anniversary, Stampin' Up! has released this new collection of stamps for May 2013! One stamp in the set is a new image and the rest are favorites from the last 25 years! Although a new set is being released each month, they will all be available until March 31, 2014.

This is the season for brides and babies, so if you need to be making cards for new babies or weddings, you might want to invest in this set!

Just shop at my Online Store and check out this stamp set!

Best of Brides & Babies   #133482   Clear-mount


You Are Loved Valentine for Valentine’s Day

You Are Loved Valentine for Valentine's Day

Valentine's Day is only one day away!  Did you make a Valentine for someone special? This one came to mind when I saw something similar online with non-Stampin' Up! materials. I decided to add texture to the Cherry Cobbler base of the card with the very popular Honeycomb Textured Impression Embossing Folder #1293778. (I never remember it is called "Honeycomb"….I think most of us think of it as the 'hexagon' embossing folder!) I used the Labels Collections Framelits Dies #125598 to die-cut the First Edition Specialty Paper #121878. I stamped on it with Cherry Cobbler ink and sponged the edges a bit with Soft Suede to give it  a little aged look. Couldn't you also see this as a wedding card?

Originally I stamped the "Love" image directly on the First Edition paper as I did the flower from the stamp set You Are Loved, but the design just didn't do enough for me. So I relented and stamped it on Very Vanilla and cut out with the Decorative Label Punch #120907. I stamped it again and punched out the word "Love" with the Large Oval Punch #119855.

Since I already had the Champagne Glimmer Paper #127885 out on the table, I couldn't resist using it! Once you see that glimmer paper in person, you just can't resist it! The Champagne paper is still available to order even though it is not in the Spring Catalog. I originally tried it as a large Label die-cut behind the First Edition paper but changed my mind.  But once I was using the Decorative Label Punch, it was easy to layer it behind that! There is a trick to doing that….just punch out two and cut each in half, one vertically and one horizontally, then layer behind the punch on all four sides.  You'll see how they fit. And for a final touch, I wrapped some Cherry Cobbler Baker's Twine around the front of the valentine.

We often don't get a peek at the inside of the card, but since this You Are Loved stamp set had a nice saying in the set, I used that as well as stamped the flower on the inside layer.

You Are Loved Valentine inside

Now that's another Valentine card ready to go on February 14th! If you make a Stampin' Up! valentine, send me a picture and I'll put it on my blog!

Best of Love Gentler Times Heart Anniversary Card

Best of Love Gentler Times Heart Anniversary Card

Stampin’ Up! has lots of plans for their 25th anniversary year, and one of them is to offer the “Best of…” stamp sets through the year.  February’s stamp set is “Best of Love” and includes stamps that have been favorites through the years plus one  new image! One of the stamps in this set is this beautiful heart, which I mentioned in yesterday’s post, was originally from a stamp set “Gentler Times”.

The heart is stamped on this card in Regal Rose ink (although it comes out darker than you would think the ink would be!), cut out, then embossed with Iridescent Ice Stampin’ Emboss Powder to make it sparkly (which is why I had to take a picture sideways so you could see the design in the heart without the glare). The card base and layer is Pink Pirouette and there’s even a layer of the Silver Glimmer Paper. I also added some Whisper White 5/8″ Organza Ribbon to cover the edge of the half piece of the Paper Doily. And finally I needed a rather narrow sentiment for the bottom of the card and something that would go with the elegant heart, so I chose the words from Memorable Moments.

A bonus for you if you purchase some of these “Best of..” stamp sets is that you will receive a proof-of-purchase sticker with each set.  When you have collected six stickers, you can send in your Collector’s Card and choose a free stamp set valued at $14.95! A collector’s card is included with each stamp set.

Best of 25 Years February Best of Love

Click on the flyer above to enlarge.

Although this stamp set was introduced in February, you do have over a year to order….although, why wait?! Put it on your next order at my Online Store and start enjoying it and using it! Take advantage of Sale-A-Bration with a $50 order or several $50 increments…for FREE Sale-A-Bration products!

Another “You Are Loved” All-Occasion Card

You Are Loved All Occasions Card

This was just too easy, so I had to make another card with the You Are Loved stamp set! I chose Perfect Plum card stock and ink to give it the monochromatic look, stamped on Shimmery White card stock.  If you enlarge the photo, you might even be able to see the “shimmer” of the paper. Very subtle, very elegant, very pretty! I just used the greeting that was in the stamp set, or you could any other one, and tied a little Whisper White Taffeta Ribbon around the middle.  Beautiful card and couldn’t be simpler to make!

You could make a little package with this stamp set, colored card stock, Whisper White card stock and ribbon to spend $50 and then be eligible to choose a FREE product from the Sale-A-Bration Brochure!

  • You Are Loved Stamp Set (clear) #123779   $23.95
  • Assorted card stock #120954 or a single color  $6.95
  • Whisper White Card Stock  #100730   $6.95
  • Classic Stampin’ Pad (choose a color)  $5.95
  • 3/8″ Whisper White Taffeta Ribbon  #109070   $6.95

Total:  $50.75

Now if you wanted to add on some more items, like adhesive, envelopes, some bling (rhinestones, pearls, glitter, 2-Way Glue Pen), another greeting set, other ink colors, etc. you could spend another $50 and choose a second Sale-A-Bration FREE product!

Shop HERE at my Stampin’ Up! Online Store or contact me if you have any questions!

A Love Card…For Any Occasion

Love Card

I’m calling this a “Love Card” because it has the beautiful heart from the stamp set “You Are Loved” and it has a greeting from the stamp set “Loving Thoughts”. I had no idea I was going to make this card until I stamped the heart on Shimmery White paper and embossed it with Pewter Embossing Powder. I could have added any number of sentiments  depending on the occasion I wanted to use this card for, and it would be perfect! Just for extra pizzazz, I added a layer of Silver Glimmer Paper (although it was fine without it) and layered all that on Pool Party card stock. With two stamps and some card stock I had a lovely card!  It was so easy!  And I hadn’t even planned it!

Get out some of your Stampin’ Up! stamps, ink and paper today and see what comes to your creative mind! If you make something, take a picture and email it to me!

Find all your stamping supplies at my Online Store here. Don’t forget….it’s Sale-A-Bration!  Get a FREE product with every $50 you spend on merchandise!

Make an Anniversary or Wedding Card

Very Vanilla Vintage Anniversary Embossed Card

For today, let's look at an idea for a wedding anniversary card (or this could be a wedding card) and take a break from Halloween and Christmas.  I got this idea from a card I saw on our Stampin' Up! site for demonstrators and changed a few things a little bit.  This is a square card made with Very Vanilla card stock on all the layers. I mailed the card so I'm going to have to guess how I really made it!

The layer on top of the card base is embossed with the beautiful Fancy Fan Folder.  I cut a wide strip which I punched along the bottom with the Scallop Trim Border Punch and stamped "Happy Anniversary" from Teeny Tiny Wishes. I cut another narrower strip and embossed it with the Lacy Brocade Folder and adhered that near the top of the wide strip. Then you need a punched or die cut or hand-cut out heart and a few paper flowers. Add some ribbon, or I used some Victoria Crochet Trim kind of gathered up and adhered with Sticky Strip.  And for some bling, I added lots of Pearl Basic Jewels, including one or two Large Pearl Basic Jewels.

Just to add a little more to this card and differentiate all the Very Vanilla layers, I sponged a little Crumb Cake ink here and there, along edges and lightly over the embossed pieces.  Just adds a little something, especially if you want a little vintage look, which is often good for wedding or anniversary.

If you would like to place an order for any stamping supplies, you can order online any time, at your convenience, at my Stampin' Up! Online Store.  Be sure to check the Clearance Rack, too!

A Text a Stamping Mother Would Love!

My son was coming home today with his girlfriend to attend a friend's wedding this evening.

This was the text I received from him this morning:

"Could I possibly commission you for one of your world famous handmade cards? 🙂 "

Wouldn't any stamping mother just love that??!

So if we ever think that what we do isn't valued or appreciated by our family, this is one of those moments that we have to savor!

I was glad that I had several wedding cards already in my stash so he and his girlfriend were able to go through my pile and pick one out.  She happened to love the one with the little wedding birds from Easy Events. Naturally I don't have a picture of it, but the stamped birds are centered on the card with the (retired) Lace Ribbon Punch behind it across the card and a couple of rhinestones.  I think the background was embossed with the Perfect Polka Dots Embossing Folder.  So you get the idea!

Easy Events Stamp Set

This is a great stamp set as I've said many times.  It covers most occasions and you can even leave off the words and just use the image! You can order the stamps in either wood- or clear-mount.  You can even cut the words apart from the image and use them separately.

If you need a good versatile stamp set, this would be one I would recommend.  Just visit my Online Store!

Don't forget the free ribbon promotion with every $40 you spend!